Don’t Have an HDMI Display For Your Raspberry Pi? Wio Terminal LCD Got You Covered With a USB HMI!
Introduction
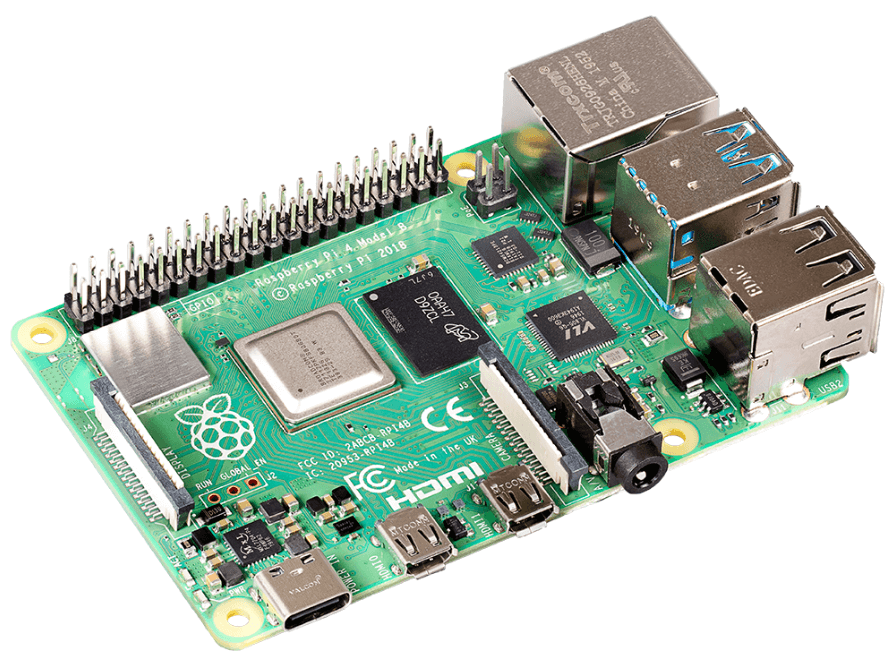
When you get your hands on a Raspberry Pi for the very first time, you might want to know how to actually log in to the Raspberry Pi so that you can start interacting with it. In my previous blog, I have already talked about a couple of methods of logging into a Raspberry Pi such as using a CP2102 USB to Serial Converter and using a Seeeduino XIAO.
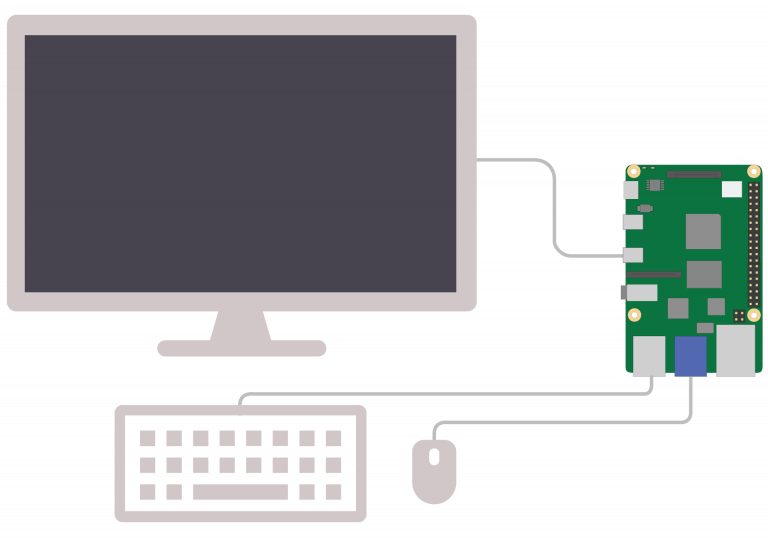
However, in both the methods, we logged into the Raspberry Pi via a command-line interface. We could interact with the Raspberry Pi through Linux commands, but there was no actual GUI (Graphical User Interface). The only way to interact with a Raspberry Pi via a GUI is by connecting it to an external display via the HDMI connection.
Wio Terminal LCD as Raspberry Pi GUI!
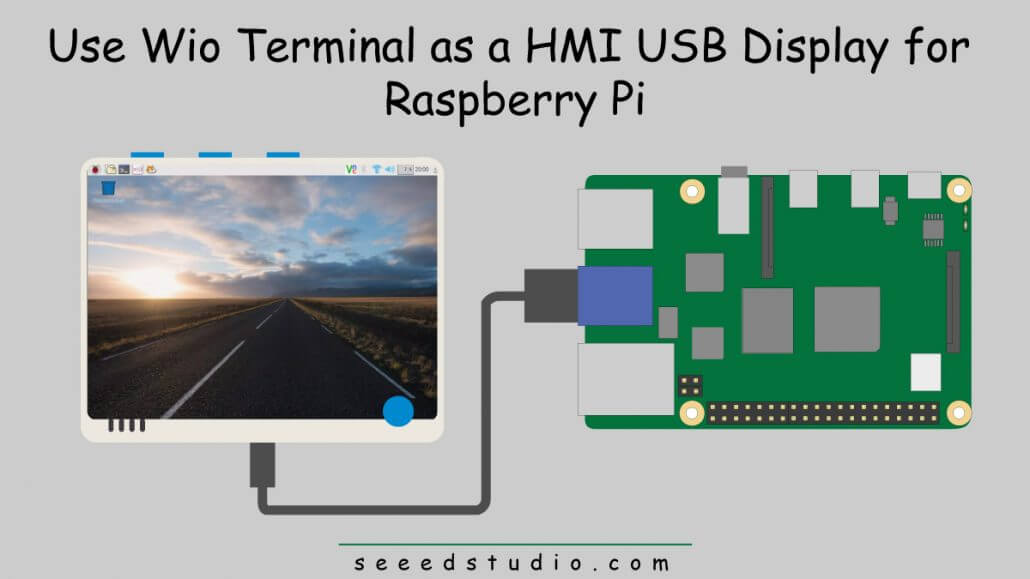
Now I would like to explain a whole new approach to accessing the GUI on the Raspberry Pi without connecting to an external display, and that is by using a Wio Terminal.
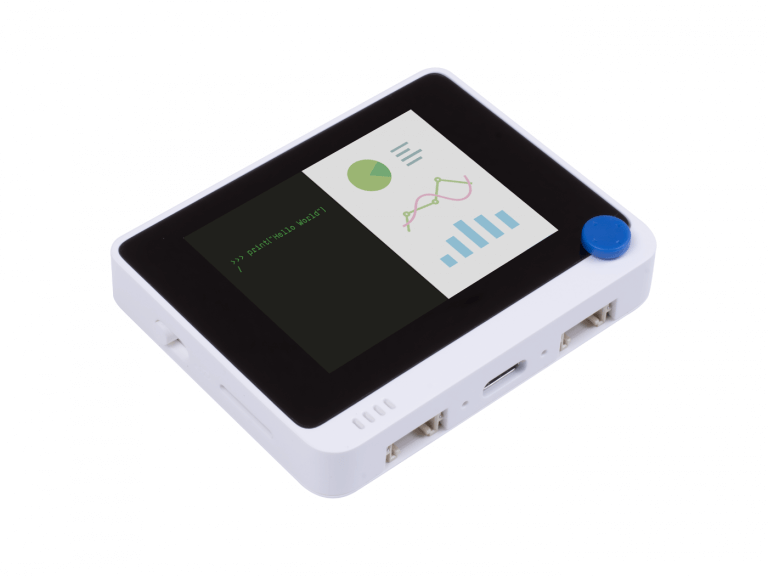
Wio Terminal is an ATSAMD51-based microcontroller with wireless connectivity supported by Realtek RTL8720DN and is equipped with a 2.4” LCD Screen, onboard accelerometer (LIS3DHTR), Microphone, Buzzer, micro-SD card slot, Light sensor, and Infrared Emitter(IR 940nm). It is also compatible with both Arduino and MicroPython.
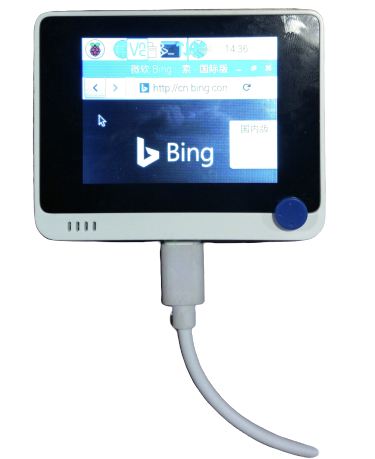
We could use the LCD on the Wio Terminal to display the Raspberry GUI just by connecting it to one of the USB ports on the Raspberry Pi. This becomes the Wio Terminal LCD, an HMI (Human Machine Interface) USB display for the Raspberry Pi. Furthermore, if you have more than one Wio Terminal, you could connect up to 4 Wio Terminals in total at the same time to the 4 USB ports available on the Raspberry Pi and set them to work in different modes such as Extend mode/ Mirror Mode. I will discuss this later in this blog. I also want to mention that this method not only works for Raspberry Pi, but also works for Nvidia Jetson Nano, BeagleBone, and Odyssey X86J4105 as well!
Wio Terminal Setup
Now, let’s dive into actually making the HMI display on the Wio Terminal to work! I will guide you through how to set up the Wio Terminal for the process.
If this is the first time you are using the Wio Terminal, it is better if you visit this page and do the initial setup for the Wio Terminal. After doing so, you can continue to the steps below.
You need to upload an Arduino program to your Wio Terminal and there are 2 methods of doing this.
Method 1 – Arduino IDE upload method
Step 1:
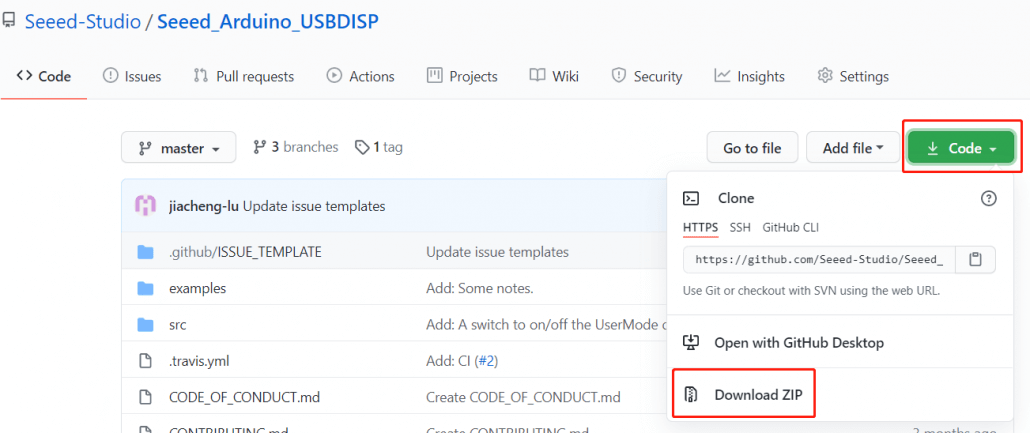
Visit the Seeed_Arduino_USBDISP library repo here.
Step 2:
Go to “code” and select “Download ZIP”
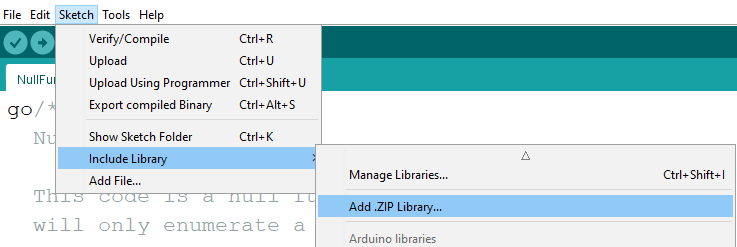
Step 3:
Open Arduino IDE, go to “Sketch > Include Library > Add .ZIP Library” and select the .zip file you just downloaded
Step 4:
Go to “File > Examples > Seeed_Arduino_USBDISP” and select the example you prefer out of the two.
- If you want a higher screen refresh rate on Wio Terminal, upload NullFunctional example to Wio Terminal.
- If you want Wio Terminal to also act as a USB Mouse, upload USBDisplayAndMouseControl example to Wio Terminal. Here you can use the 5-way switch and the 3 buttons on the WIo Terminal to act as a mouse.
Method 2 – flash uf2 method
There is a more convenient method and that is flashing the uf2 firmware files including the examples to the Wio Terminal.
Step 1:
Download the uf2 files of:
- NullFunctional example
- USBDisplayAndMouseControl example
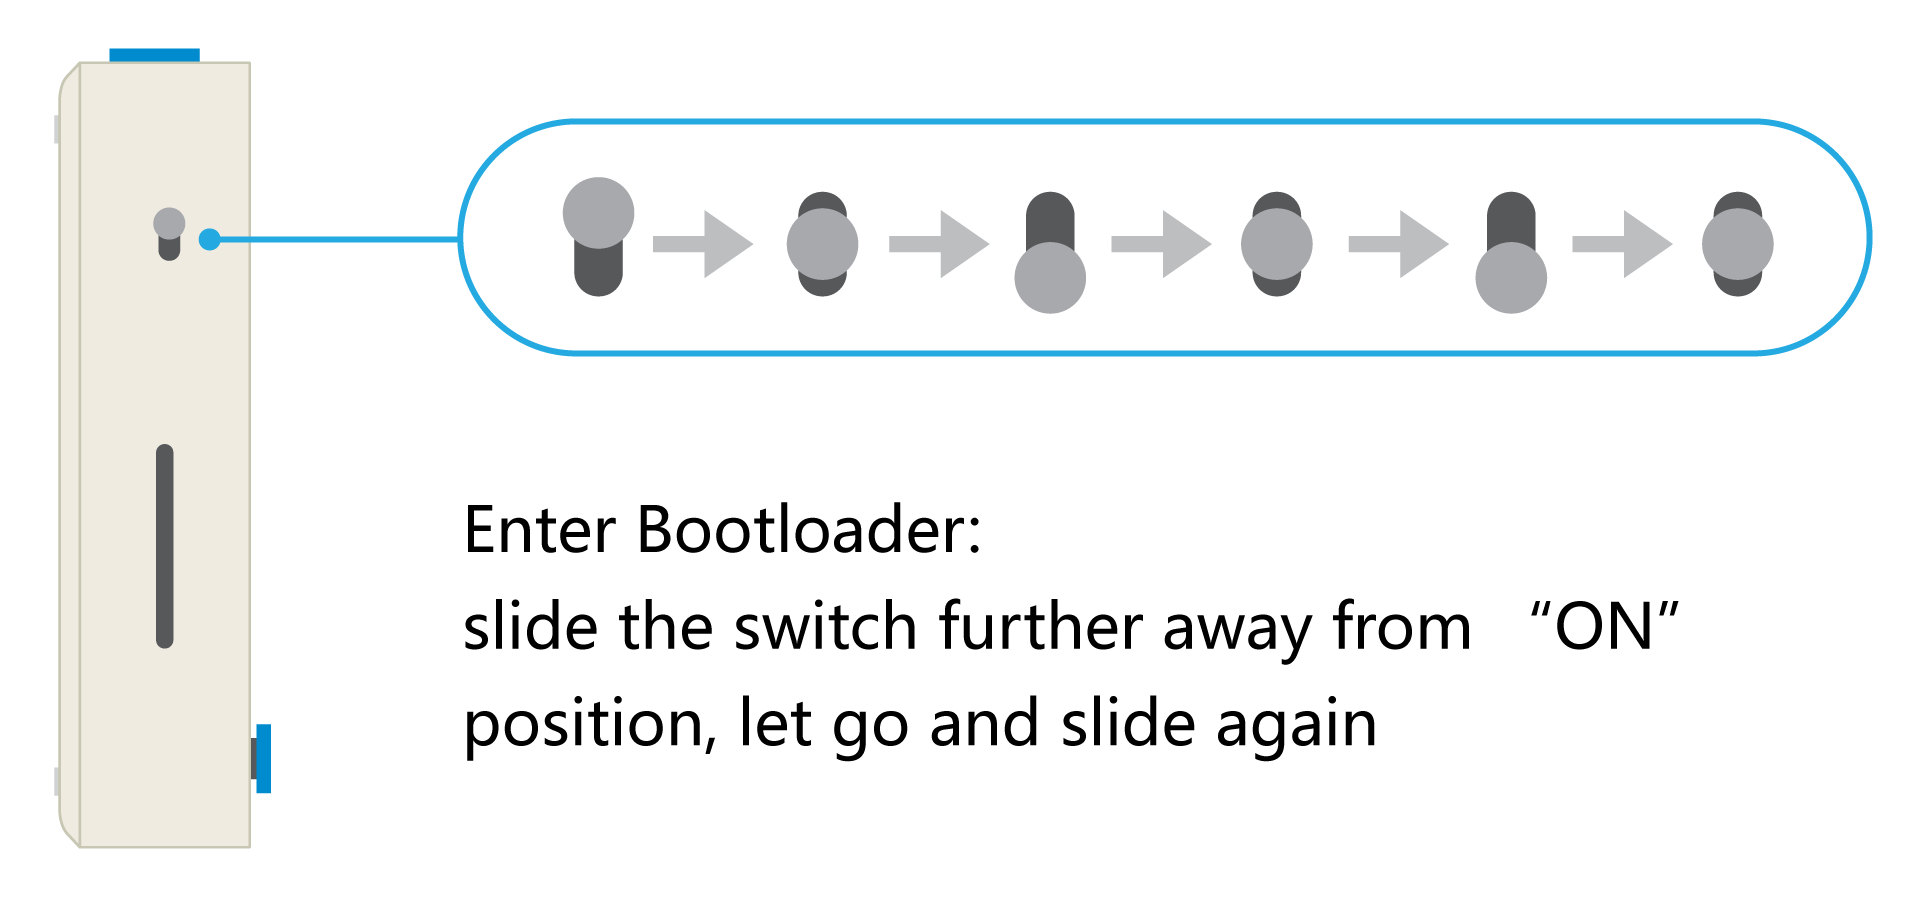
Step 2:
Enter bootloader mode on the Wio Terminal by sliding the power switch twice quickly.
Step 3:
An external drive named Arduino should appear on your PC. Drag the downloaded uf2 files to the Arduino drive.
Now the Wio Terminal is all set up. It’s time to set up the Raspberry Pi as well.
Raspberry Pi Setup
If this is the first time you are using the Raspberry Pi, it is better if you visit this page and do the initial setup for the Raspberry Pi. After doing so, you can continue to the steps below.
Step 1:
After you have configured Putty or any other SSH client to log in to the Raspberry Pi, open the command line interface inside the Raspberry Pi.
Step 2:
Download package information from all configured sources, by running the following command
sudo apt-get updateStep 3:
Install the necessary packages such as kernel headers, kernels, build-essential, dkms by running the following command in terminal:
sudo apt-get install raspberrypi-kernel-headers raspberrypi-kernel build-essential dkmsStep 4:
Download the display driver on Raspberry Pi
cd ~
git clone https://github.com/Seeed-Studio/seeed-linux-usbdisp
Step 5:
Make and build the driver
cd ~/seeed-linux-usbdisp/drivers/linux-driver
make & sudo make install
sudo reboot
Step 6:
Move the config files to the system location
sudo cp ~/seeed-linux-usbdisp/drivers/linux-driver/xserver_conf/10-disp.conf /usr/share/X11/xorg.conf.d/Note:
There are different screen configurations that you can choose from, the default is one Wio Terminal as one screen.
Step 7:
Restart the service
sudo service lightdm restartStep 8:
Connect the Wio Terminal to Raspberry Pi’s USB port and the Raspberry Pi Desktop GUI will magically appear on the Wio Terminal LCD!
Note: If nothing shows on the display, please follow the steps below
Run the following command in terminal:
sudo raspi-configOnce the Raspberry Pi Software Configuration Tool opens, navigate to the following location
Display Options > ResolutionSelect a different resolution except “default”
Note:
This version of the USB display driver does not support hot swapping
How about Jetson Nano, Beaglebone, and Odyssey X86?
I will also walk you through how to setup NVIDIA Jetson Nano, Beaglebone and Odyssey X86 so that the Wio Terminal can act as a display for them!
Step 1:
For Nvidia Jetson Nano and Odyssey X86J4105 (Ubuntu), install the Linux driver as followed, run the following in the terminal:
sudo apt install --reinstall linux-headers-$(uname -r)Note:
For Odyssey X86J4105, we have only tested for ubuntu and debian OS. Other Linux OS may not work.
Step 2:
Download the display driver
cd ~
git clone https://github.com/Seeed-Studio/seeed-linux-usbdisp
Step 3:
Make and build the driver
cd ~/seeed-linux-usbdisp/drivers/linux-driver
make & sudo make install
sudo reboot
Step 4:
Move the config files to the system location
sudo cp ~/seeed-linux-usbdisp/drivers/linux-driver/xserver_conf/10-disp.conf /usr/share/X11/xorg.conf.d/Step 5:
Restart the service
sudo service lightdm restartStep 6:
Connect the Wio Terminal to Jetson Nano, Beaglebone, or Odyssey X86 and you will see the respective GUI displayed on the Wio Terminal LCD!
Got more Wio Terminals? Let’s utilize them all for displays!
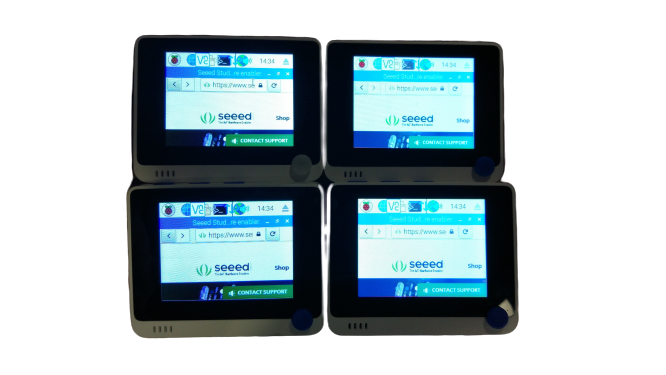
If you have multiple Wio Terminals, you could use them to display content with different working modes. For example, when a Raspberry pi is used and if you have 4 Wio Terminals, you could connect all 4 Wio Terminals to the 4 USB ports on the Raspberry Pi and configure the Wio Terminals to display the content in 4 different configurations.
You can do simply do this by editing the 10-disp.conf file.
Setup 1
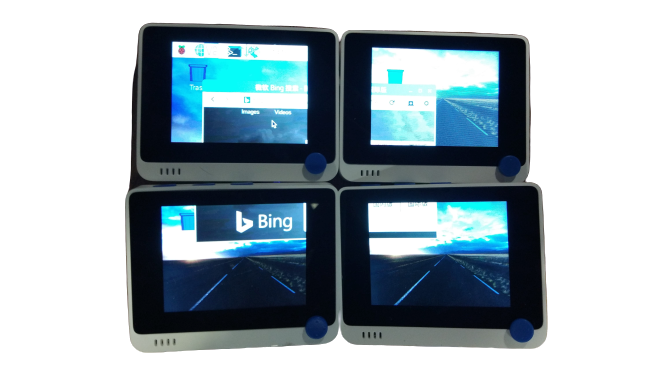
# Four-screen expansion
# pattern: 1  2
#        : 3  4
This is the 10-disp-1.conf under seeed-linux-usbdisp/drivers/linux-driver/xserver_conf/, simply copy this file to /usr/share/X11/xorg.conf.d/ and name it 10-disp.conf:
sudo cp ~/seeed-linux-usbdisp/drivers/linux-driver/xserver_conf/10-disp-1.conf /usr/share/X11/xorg.conf.d/10-disp.confSetup 2
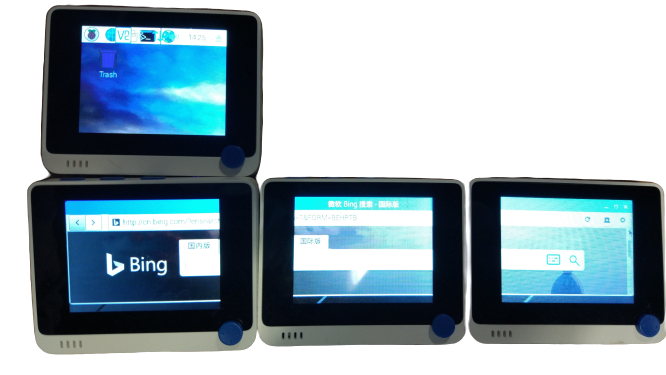
# Four-screen expansion
# pattern: 1
#        : 2  3  4
This is the 10-disp-2.conf under seeed-linux-usbdisp/drivers/linux-driver/xserver_conf/. simply copy this file to /usr/share/X11/xorg.conf.d/ and name it 10-disp.conf:
sudo cp ~/seeed-linux-usbdisp/drivers/linux-driver/xserver_conf/10-disp-2.conf /usr/share/X11/xorg.conf.d/10-disp.confSetup 3
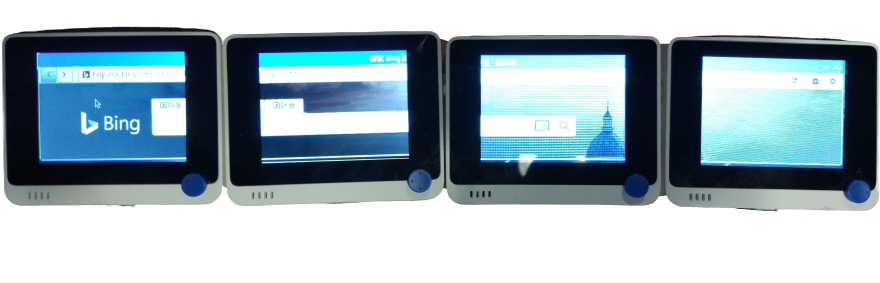
# Four-screen expansion
# pattern: 1  2  3  4
This is the 10-disp-3.conf under seeed-linux-usbdisp/drivers/linux-driver/xserver_conf/. simply copy this file to /usr/share/X11/xorg.conf.d/ and name it 10-disp.conf:
sudo cp ~/seeed-linux-usbdisp/drivers/linux-driver/xserver_conf/10-disp-3.conf /usr/share/X11/xorg.conf.d/10-disp.confSetup 4
# Four-screen clone displayThis is the 10-disp-4.conf under seeed-linux-usbdisp/drivers/linux-driver/xserver_conf/. simply copy this file to /usr/share/X11/xorg.conf.d/ and name it 10-disp.conf:
sudo cp ~/seeed-linux-usbdisp/drivers/linux-driver/xserver_conf/10-disp-4.confRun Python scripts on Raspberry Pi to display GUI on Wio Terminal LCD
You can not only display the Raspberry Pi Desktop GUI on the Wio Terminal LCD, but also can run Python scripts on Raspberry Pi command line which is accessed from PC and display graphics on the Wio Terminal LCD by using a graphics library.
PyQt5
One of the common graphics libraries is PyQt. You can use this library, program a Python code and run on the Raspberry Pi to display interactive graphics on the Wio Terminal LCD. Here we will be using the latest version of PyQt which is PyQt5.
You can install PyQt on the Raspberry Pi by following the steps below
Step 1:
Install dependencies for pyqt5
sudo apt update
sudo apt install python3 python3-distutils python3-pyqt5
Step 2:
Export macros for the screen
export QT_QPA_PLATFORM=linuxfb:fb=/dev/fb1Note:
Where fb1 is the first screen, fb2 is second, fb3 is third and so on. You may use echo $QT_QPA_PLATFORM to check the macros.
Basic Example
Here I will show you the basic usage of the PyQt5 library by displaying 3 buttons on the Wio Terminal LCD.
Step 1:
Copy the following codes and make a Python file called buttons.py. Then move this file to the Raspberry Pi
import sys

from PyQt5.QtWidgets import QApplication
from PyQt5.QtWidgets import QHBoxLayout
from PyQt5.QtWidgets import QPushButton
from PyQt5.QtWidgets import QWidget

app = QApplication(sys.argv)
window = QWidget()
window.setWindowTitle('QHBoxLayout')
layout = QHBoxLayout()
layout.addWidget(QPushButton('Left'))
layout.addWidget(QPushButton('Center'))
layout.addWidget(QPushButton('Right'))
window.setLayout(layout)
window.show()
sys.exit(app.exec_())
Step 2:
After that, run this file
python3 buttons.py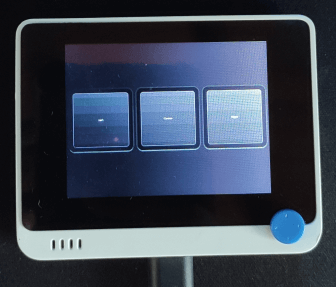
You will see 3 buttons displayed on the Wio Terminal LCD
Tetris on PyQt5
You can run the Tetris game on the Raspberry Pi, display on the Wio Terminal and control the blocks using a connected keyboard. This example is made by Jan Bodnar and all credits go to him.
Step 1:
To use this demo, copy the following code to a Python file, name it as tetris.py.
#!/usr/bin/python3

"""
ZetCode PyQt5 tutorial

This is a Tetris game clone.

Author: Jan Bodnar
Website: zetcode.com
"""

import random
import sys

from PyQt5.QtCore import Qt, QBasicTimer, pyqtSignal
from PyQt5.QtGui import QPainter, QColor
from PyQt5.QtWidgets import QMainWindow, QFrame, QDesktopWidget, QApplication


class Tetris(QMainWindow):

    def __init__(self):
        super().__init__()

        self.initUI()

    def initUI(self):
        """initiates application UI"""

        self.tboard = Board(self)
        self.setCentralWidget(self.tboard)

        self.statusbar = self.statusBar()
        self.tboard.msg2Statusbar[str].connect(self.statusbar.showMessage)

        self.tboard.start()

        self.resize(180, 380)
        self.center()
        self.setWindowTitle('Tetris')
        self.show()

    def center(self):
        """centers the window on the screen"""

        screen = QDesktopWidget().screenGeometry()
        size = self.geometry()
        self.move(int((screen.width() - size.width()) / 2),
                  int((screen.height() - size.height()) / 2))


class Board(QFrame):
    msg2Statusbar = pyqtSignal(str)

    BoardWidth = 10
    BoardHeight = 22
    Speed = 300

    def __init__(self, parent):
        super().__init__(parent)

        self.initBoard()

    def initBoard(self):
        """initiates board"""

        self.timer = QBasicTimer()
        self.isWaitingAfterLine = False

        self.curX = 0
        self.curY = 0
        self.numLinesRemoved = 0
        self.board = []

        self.setFocusPolicy(Qt.StrongFocus)
        self.isStarted = False
        self.isPaused = False
        self.clearBoard()

    def shapeAt(self, x, y):
        """determines shape at the board position"""

        return self.board[(y * Board.BoardWidth) + x]

    def setShapeAt(self, x, y, shape):
        """sets a shape at the board"""

        self.board[(y * Board.BoardWidth) + x] = shape

    def squareWidth(self):
        """returns the width of one square"""

        return self.contentsRect().width() // Board.BoardWidth

    def squareHeight(self):
        """returns the height of one square"""

        return self.contentsRect().height() // Board.BoardHeight

    def start(self):
        """starts game"""

        if self.isPaused:
            return

        self.isStarted = True
        self.isWaitingAfterLine = False
        self.numLinesRemoved = 0
        self.clearBoard()

        self.msg2Statusbar.emit(str(self.numLinesRemoved))

        self.newPiece()
        self.timer.start(Board.Speed, self)

    def pause(self):
        """pauses game"""

        if not self.isStarted:
            return

        self.isPaused = not self.isPaused

        if self.isPaused:
            self.timer.stop()
            self.msg2Statusbar.emit("paused")

        else:
            self.timer.start(Board.Speed, self)
            self.msg2Statusbar.emit(str(self.numLinesRemoved))

        self.update()

    def paintEvent(self, event):
        """paints all shapes of the game"""

        painter = QPainter(self)
        rect = self.contentsRect()

        boardTop = rect.bottom() - Board.BoardHeight * self.squareHeight()

        for i in range(Board.BoardHeight):
            for j in range(Board.BoardWidth):
                shape = self.shapeAt(j, Board.BoardHeight - i - 1)

                if shape != Tetrominoe.NoShape:
                    self.drawSquare(painter,
                                    rect.left() + j * self.squareWidth(),
                                    boardTop + i * self.squareHeight(), shape)

        if self.curPiece.shape() != Tetrominoe.NoShape:

            for i in range(4):
                x = self.curX + self.curPiece.x(i)
                y = self.curY - self.curPiece.y(i)
                self.drawSquare(painter, rect.left() + x * self.squareWidth(),
                                boardTop + (Board.BoardHeight - y - 1) * self.squareHeight(),
                                self.curPiece.shape())

    def keyPressEvent(self, event):
        """processes key press events"""

        if not self.isStarted or self.curPiece.shape() == Tetrominoe.NoShape:
            super(Board, self).keyPressEvent(event)
            return

        key = event.key()

        if key == Qt.Key_P:
            self.pause()
            return

        if self.isPaused:
            return

        elif key == Qt.Key_Left:
            self.tryMove(self.curPiece, self.curX - 1, self.curY)

        elif key == Qt.Key_Right:
            self.tryMove(self.curPiece, self.curX + 1, self.curY)

        elif key == Qt.Key_Down:
            self.tryMove(self.curPiece.rotateRight(), self.curX, self.curY)

        elif key == Qt.Key_Up:
            self.tryMove(self.curPiece.rotateLeft(), self.curX, self.curY)

        elif key == Qt.Key_Space:
            self.dropDown()

        elif key == Qt.Key_D:
            self.oneLineDown()

        else:
            super(Board, self).keyPressEvent(event)

    def timerEvent(self, event):
        """handles timer event"""

        if event.timerId() == self.timer.timerId():

            if self.isWaitingAfterLine:
                self.isWaitingAfterLine = False
                self.newPiece()
            else:
                self.oneLineDown()

        else:
            super(Board, self).timerEvent(event)

    def clearBoard(self):
        """clears shapes from the board"""

        for i in range(Board.BoardHeight * Board.BoardWidth):
            self.board.append(Tetrominoe.NoShape)

    def dropDown(self):
        """drops down a shape"""

        newY = self.curY

        while newY > 0:

            if not self.tryMove(self.curPiece, self.curX, newY - 1):
                break

            newY -= 1

        self.pieceDropped()

    def oneLineDown(self):
        """goes one line down with a shape"""

        if not self.tryMove(self.curPiece, self.curX, self.curY - 1):
            self.pieceDropped()

    def pieceDropped(self):
        """after dropping shape, remove full lines and create new shape"""

        for i in range(4):
            x = self.curX + self.curPiece.x(i)
            y = self.curY - self.curPiece.y(i)
            self.setShapeAt(x, y, self.curPiece.shape())

        self.removeFullLines()

        if not self.isWaitingAfterLine:
            self.newPiece()

    def removeFullLines(self):
        """removes all full lines from the board"""

        numFullLines = 0
        rowsToRemove = []

        for i in range(Board.BoardHeight):

            n = 0
            for j in range(Board.BoardWidth):
                if not self.shapeAt(j, i) == Tetrominoe.NoShape:
                    n = n + 1

            if n == 10:
                rowsToRemove.append(i)

        rowsToRemove.reverse()

        for m in rowsToRemove:

            for k in range(m, Board.BoardHeight):
                for l in range(Board.BoardWidth):
                    self.setShapeAt(l, k, self.shapeAt(l, k + 1))

        numFullLines = numFullLines + len(rowsToRemove)

        if numFullLines > 0:
            self.numLinesRemoved = self.numLinesRemoved + numFullLines
            self.msg2Statusbar.emit(str(self.numLinesRemoved))

            self.isWaitingAfterLine = True
            self.curPiece.setShape(Tetrominoe.NoShape)
            self.update()

    def newPiece(self):
        """creates a new shape"""

        self.curPiece = Shape()
        self.curPiece.setRandomShape()
        self.curX = Board.BoardWidth // 2 + 1
        self.curY = Board.BoardHeight - 1 + self.curPiece.minY()

        if not self.tryMove(self.curPiece, self.curX, self.curY):
            self.curPiece.setShape(Tetrominoe.NoShape)
            self.timer.stop()
            self.isStarted = False
            self.msg2Statusbar.emit("Game over")

    def tryMove(self, newPiece, newX, newY):
        """tries to move a shape"""

        for i in range(4):

            x = newX + newPiece.x(i)
            y = newY - newPiece.y(i)

            if x < 0 or x >= Board.BoardWidth or y < 0 or y >= Board.BoardHeight:
                return False

            if self.shapeAt(x, y) != Tetrominoe.NoShape:
                return False

        self.curPiece = newPiece
        self.curX = newX
        self.curY = newY
        self.update()

        return True

    def drawSquare(self, painter, x, y, shape):
        """draws a square of a shape"""

        colorTable = [0x000000, 0xCC6666, 0x66CC66, 0x6666CC,
                      0xCCCC66, 0xCC66CC, 0x66CCCC, 0xDAAA00]

        color = QColor(colorTable[shape])
        painter.fillRect(x + 1, y + 1, self.squareWidth() - 2,
                         self.squareHeight() - 2, color)

        painter.setPen(color.lighter())
        painter.drawLine(x, y + self.squareHeight() - 1, x, y)
        painter.drawLine(x, y, x + self.squareWidth() - 1, y)

        painter.setPen(color.darker())
        painter.drawLine(x + 1, y + self.squareHeight() - 1,
                         x + self.squareWidth() - 1, y + self.squareHeight() - 1)
        painter.drawLine(x + self.squareWidth() - 1,
                         y + self.squareHeight() - 1, x + self.squareWidth() - 1, y + 1)


class Tetrominoe(object):
    NoShape = 0
    ZShape = 1
    SShape = 2
    LineShape = 3
    TShape = 4
    SquareShape = 5
    LShape = 6
    MirroredLShape = 7


class Shape(object):
    coordsTable = (
        ((0, 0), (0, 0), (0, 0), (0, 0)),
        ((0, -1), (0, 0), (-1, 0), (-1, 1)),
        ((0, -1), (0, 0), (1, 0), (1, 1)),
        ((0, -1), (0, 0), (0, 1), (0, 2)),
        ((-1, 0), (0, 0), (1, 0), (0, 1)),
        ((0, 0), (1, 0), (0, 1), (1, 1)),
        ((-1, -1), (0, -1), (0, 0), (0, 1)),
        ((1, -1), (0, -1), (0, 0), (0, 1))
    )

    def __init__(self):

        self.coords = [[0, 0] for i in range(4)]
        self.pieceShape = Tetrominoe.NoShape

        self.setShape(Tetrominoe.NoShape)

    def shape(self):
        """returns shape"""

        return self.pieceShape

    def setShape(self, shape):
        """sets a shape"""

        table = Shape.coordsTable[shape]

        for i in range(4):
            for j in range(2):
                self.coords[i][j] = table[i][j]

        self.pieceShape = shape

    def setRandomShape(self):
        """chooses a random shape"""

        self.setShape(random.randint(1, 7))

    def x(self, index):
        """returns x coordinate"""

        return self.coords[index][0]

    def y(self, index):
        """returns y coordinate"""

        return self.coords[index][1]

    def setX(self, index, x):
        """sets x coordinate"""

        self.coords[index][0] = x

    def setY(self, index, y):
        """sets y coordinate"""

        self.coords[index][1] = y

    def minX(self):
        """returns min x value"""

        m = self.coords[0][0]
        for i in range(4):
            m = min(m, self.coords[i][0])

        return m

    def maxX(self):
        """returns max x value"""

        m = self.coords[0][0]
        for i in range(4):
            m = max(m, self.coords[i][0])

        return m

    def minY(self):
        """returns min y value"""

        m = self.coords[0][1]
        for i in range(4):
            m = min(m, self.coords[i][1])

        return m

    def maxY(self):
        """returns max y value"""

        m = self.coords[0][1]
        for i in range(4):
            m = max(m, self.coords[i][1])

        return m

    def rotateLeft(self):
        """rotates shape to the left"""

        if self.pieceShape == Tetrominoe.SquareShape:
            return self

        result = Shape()
        result.pieceShape = self.pieceShape

        for i in range(4):
            result.setX(i, self.y(i))
            result.setY(i, -self.x(i))

        return result

    def rotateRight(self):
        """rotates shape to the right"""

        if self.pieceShape == Tetrominoe.SquareShape:
            return self

        result = Shape()
        result.pieceShape = self.pieceShape

        for i in range(4):
            result.setX(i, -self.y(i))
            result.setY(i, self.x(i))

        return result


def main():

    app = QApplication([])
    tetris = Tetris()
    sys.exit(app.exec_())


if __name__ == '__main__':
    main()
Step 2:
After that, run this file
python3 tetris.py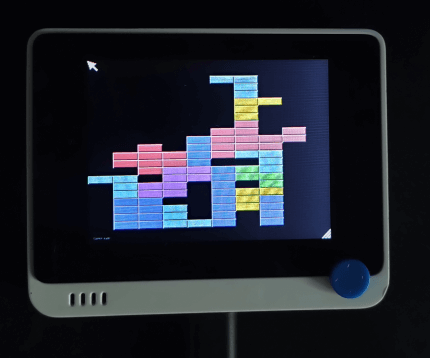
Now you can play Tetris, displayed on the Wio Terminal LCD by using the keyboard arrow keys and the spacebar.
Scientific Graphics using PtQtGraph
PyQtGraph is a pure-python graphics and GUI library built on PyQt4 / PySide and numpy. It is intended for use in mathematics / scientific / engineering applications.
Let’s look at an example of displaying a scientific graph.
Step 1:
Install dependencies for PyQtGraph
sudo apt update
sudo apt install python3 python3-distutils python3-pyqt5 python3-pip python3-numpy -y
sudo pip3 install pyqtgraph
Step 2:
Copy the following code to a Python file, name it as graph.py
# -*- coding: utf-8 -*-
"""
Demonstrates common image analysis tools.
Many of the features demonstrated here are already provided by the ImageView
widget, but here we present a lower-level approach that provides finer control
over the user interface.
"""
import pyqtgraph as pg
from pyqtgraph.Qt import QtCore, QtGui
import numpy as np


# Interpret image data as row-major instead of col-major
pg.setConfigOptions(imageAxisOrder='row-major')

pg.mkQApp()
win = pg.GraphicsLayoutWidget()
win.setWindowTitle('pyqtgraph example: Image Analysis')

# A plot area (ViewBox + axes) for displaying the image
p1 = win.addPlot(title="")

# Item for displaying image data
img = pg.ImageItem()
p1.addItem(img)

# Custom ROI for selecting an image region
roi = pg.ROI([-8, 14], [6, 5])
roi.addScaleHandle([0.5, 1], [0.5, 0.5])
roi.addScaleHandle([0, 0.5], [0.5, 0.5])
p1.addItem(roi)
roi.setZValue(10)  # make sure ROI is drawn above image

# Isocurve drawing
iso = pg.IsocurveItem(level=0.8, pen='g')
iso.setParentItem(img)
iso.setZValue(5)

# Contrast/color control
hist = pg.HistogramLUTItem()
hist.setImageItem(img)
win.addItem(hist)

# Draggable line for setting isocurve level
isoLine = pg.InfiniteLine(angle=0, movable=True, pen='g')
hist.vb.addItem(isoLine)
hist.vb.setMouseEnabled(y=False) # makes user interaction a little easier
isoLine.setValue(0.8)
isoLine.setZValue(1000) # bring iso line above contrast controls

# Another plot area for displaying ROI data
win.nextRow()
p2 = win.addPlot(colspan=2)
p2.setMaximumHeight(250)
win.resize(800, 800)
win.show()


# Generate image data
data = np.random.normal(size=(200, 100))
data[20:80, 20:80] += 2.
data = pg.gaussianFilter(data, (3, 3))
data += np.random.normal(size=(200, 100)) * 0.1
img.setImage(data)
hist.setLevels(data.min(), data.max())

# build isocurves from smoothed data
iso.setData(pg.gaussianFilter(data, (2, 2)))

# set position and scale of image
img.scale(0.2, 0.2)
img.translate(-50, 0)

# zoom to fit imageo
p1.autoRange()


# Callbacks for handling user interaction
def updatePlot():
    global img, roi, data, p2
    selected = roi.getArrayRegion(data, img)
    p2.plot(selected.mean(axis=0), clear=True)

roi.sigRegionChanged.connect(updatePlot)
updatePlot()

def updateIsocurve():
    global isoLine, iso
    iso.setLevel(isoLine.value())

isoLine.sigDragged.connect(updateIsocurve)

def imageHoverEvent(event):
    """Show the position, pixel, and value under the mouse cursor.
    """
    if event.isExit():
        p1.setTitle("")
        return
    pos = event.pos()
    i, j = pos.y(), pos.x()
    i = int(np.clip(i, 0, data.shape[0] - 1))
    j = int(np.clip(j, 0, data.shape[1] - 1))
    val = data[i, j]
    ppos = img.mapToParent(pos)
    x, y = ppos.x(), ppos.y()
    p1.setTitle("pos: (%0.1f, %0.1f)  pixel: (%d, %d)  value: %g" % (x, y, i, j, val))

# Monkey-patch the image to use our custom hover function.
# This is generally discouraged (you should subclass ImageItem instead),
# but it works for a very simple use like this.
img.hoverEvent = imageHoverEvent


## Start Qt event loop unless running in interactive mode or using pyside.
if __name__ == '__main__':
    import sys
    if (sys.flags.interactive != 1) or not hasattr(QtCore, 'PYQT_VERSION'):
        QtGui.QApplication.instance().exec_()
Step 3:
After that, run this file
python3 graph.py
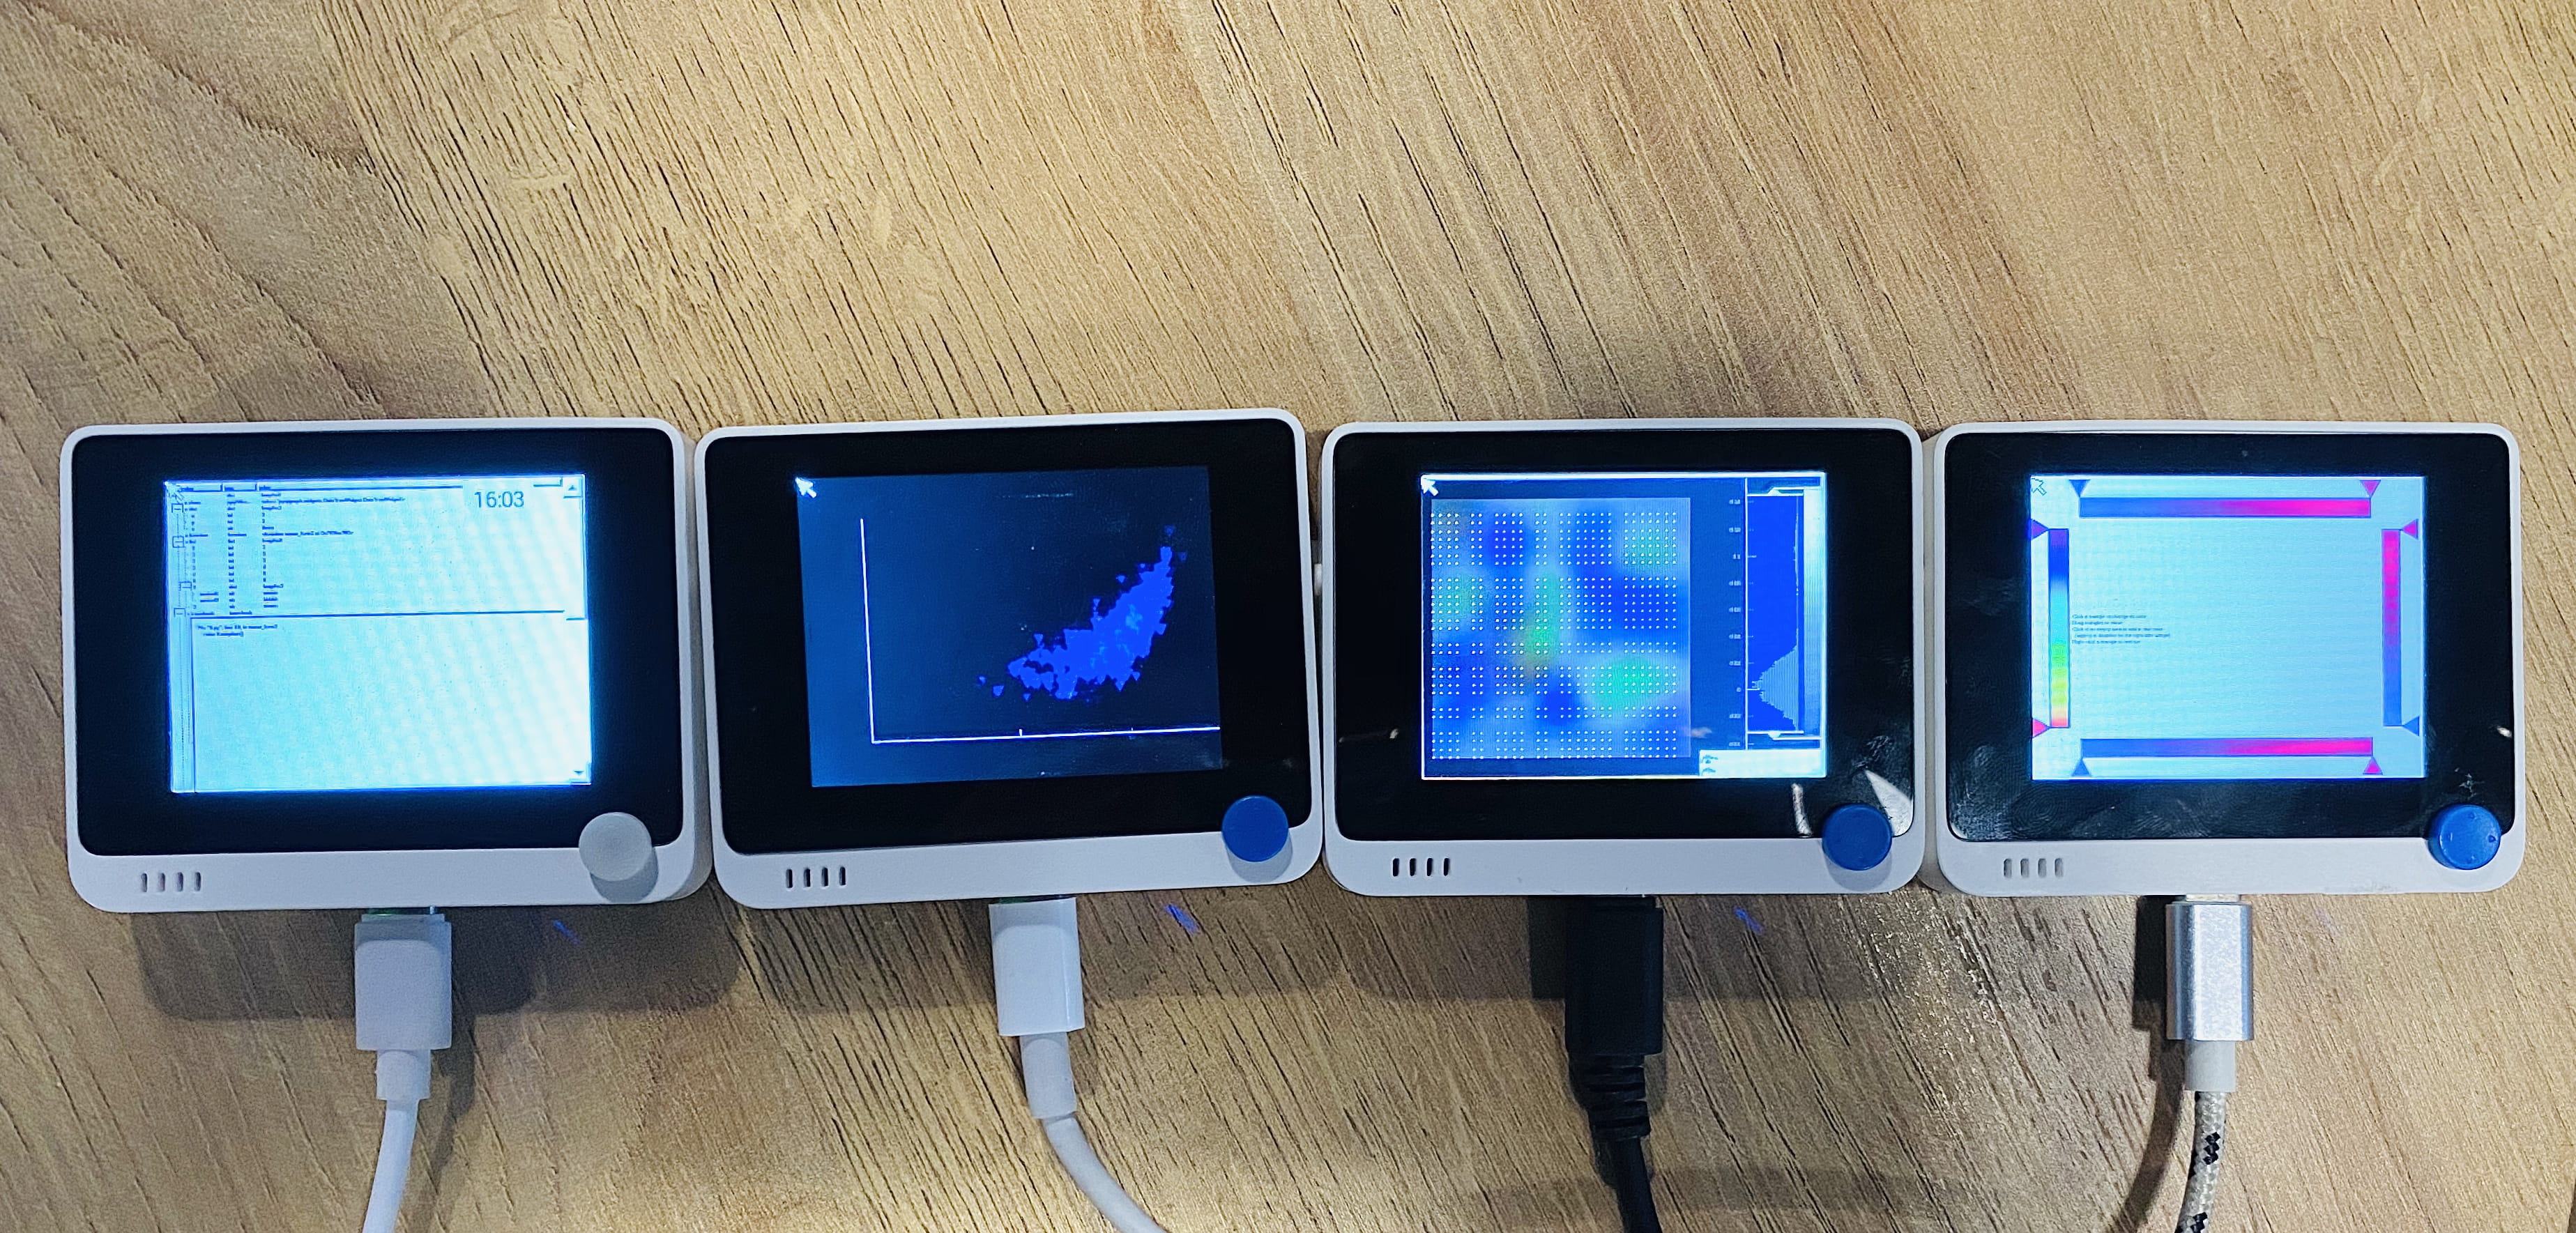
Now you will see different scientific graphs displayed on the Wio Terminal!
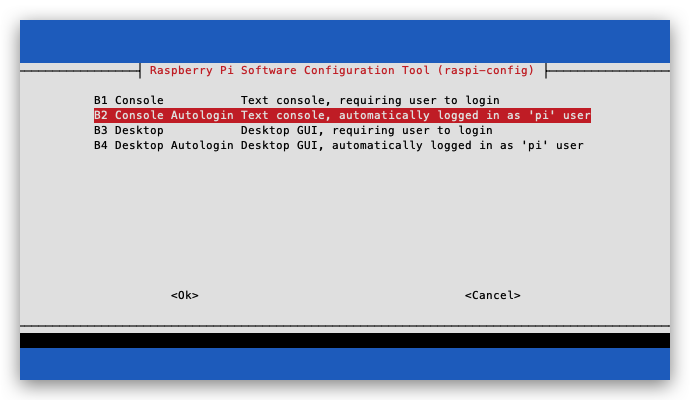
If you experienced that Mouse is crashing with PyQtGraph’s script, you can simply disable raspberry pi’s desktop using sudo raspi-config -> Boot options -> Desktop/CLI -> Console Autologin.
You can also run different PyQtGraph scripts on different screens as follows
Usermod SDK
Apart from displaying your Raspberry Pi Desktop GUI on the Wio Terminal LCD, you could display your PC on the Wio Terminal LCD as well. Click here to check the wiki for more information.
Conclusion
That’s all about it for this blog. I hope you clearly understood how to setup the Wio Terminal so that you could use it as a display with your Raspberry Pi, Jetson Nano, BeagleBone, and ODYSSEY-86! Now you can start implementing it in your next projects!