How to Use SLAMWARE ROS SDK for Robot Navigation Positioning Development
In the last article, we talked the release of the SLAMWARE ROS SDK allows users to implement the mapping, positioning and navigation functions provided by SLAMWARE in robot development while retaining the application logic originally developed based on ROS.
Today, we take everyone to experience how to use the SLAMWARE ROS SDK for development.
Let’s start with the movement of the robot.
1. Keyboard control (moving back and, left and right)
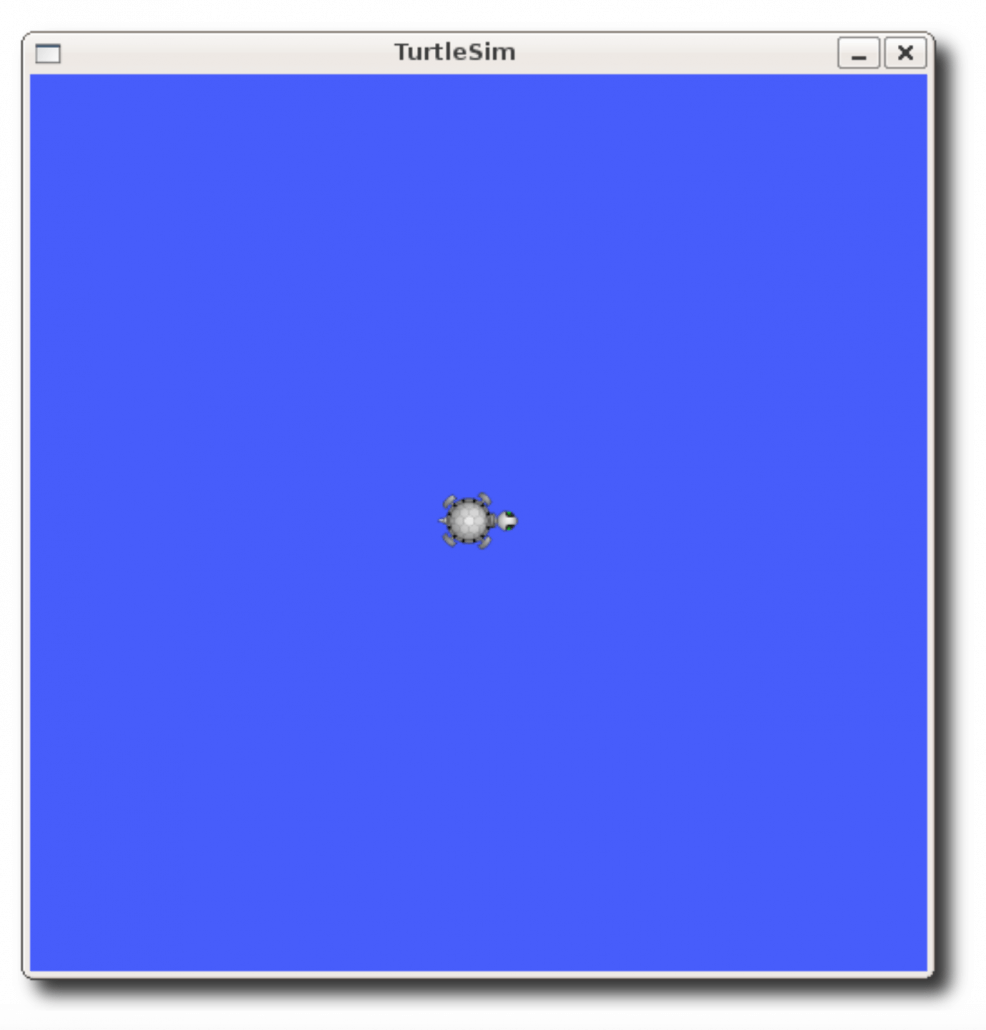
Remember the most classic turtlesim in ROS ?
In the case, the turtle movement can be controlled by the keyboard direction key by starting the turtle_teleop_key node.
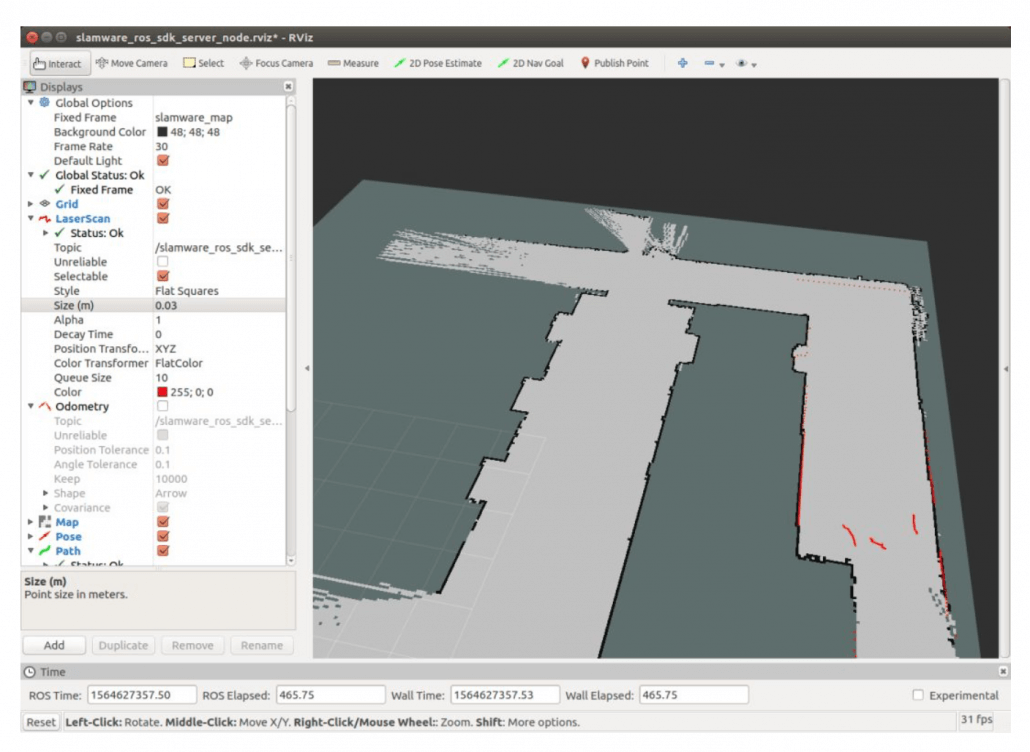
However, when users get our SLAMWARE-based robots or mapping radar products, the first thing that shows up in RViz is the map information. If you want to use the keyboard to control the robot’s moving direction, but it does not work.
At this time, please refer to the SLAMWARE ROS SDK development document to find out that slamware_ros_sdk_server_node subscribes to the standard type topic of [direction movement], that is, if you want to use the keyboard to control “robot”, we only need to compile a node to receive keyboard information. After receiving the keyboard information, the corresponding command message can be sent to the topic.
The corresponding message parameters will be like the following:
| Message Parameter | Description |
| liner.x > 0.005f | Forward |
| liner.x < -0.005f | Back |
| angular.z > 0.001f | Turn left |
| angular.z < -0.001f | Turn right |
When using SDK for keyboard control, there are several main development points:
1. Define keyboard buttons
moveBindings = {
    'w':(1.0, 0.0),
    's':(-1.0, 0.0),
    'a':(0.0, 1.0),
    'd':(0.0, -1.0)
}
2. Define pub, develop message topic and message type
pub = rospy.Publisher('/cmd_vel', Twist, queue_size = 1)3. Initialize node
rospy.init_node('teleop_twist_keyboard')After these operations are completed, when the pressed button is in the previously defined case keys, the corresponding value is assigned to linearX, angularZ.
 key = getKey()
 if key in moveBindings.keys():
     linearX = moveBindings[key][0]
     angularZ = moveBindings[key][1]
 else:
     linearX = 0.0
     angularZ = 0.0
     if (key == '\x03'):
         break
4. Assemble the release message according to the type required by the topic
twist = Twist()
twist.linear.x = linearX
twist.angular.z = angularZ
pub.publish(twist)
At this point, the deployment of the robot using the keyboard has been completed. Users who have completed this step can start the slamware_ros_sdk_server_node and teleop_twist_keyboard nodes respectively to try [left and right] to move.
Let’s take a closer look at the issue of navigation targeting. Everyone knows that SLAMTEC has an extensible robot management and development software, RoboStudio, which integrates robot motion and control development functions to send commands to mobile robots for visual monitoring of robots.
So, how to make ROS realize the same function of Robostudio?
2. Navigation and positioning
1. Navigation and Positioning
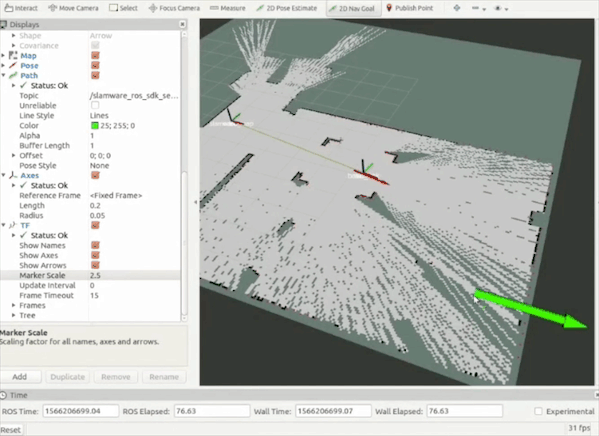
The release of the SLAMWARE ROS SDK enables the positioning and map information of all SLAMWARE-based robots to be displayed in RViz. Once we have the map, we can click anywhere and the robot will automatically plan an optimal route to move to the destination. The specific demonstration will show as follows:
2. Virtual wall/virtual track
For SLAMTEC, in addition to autonomous positioning navigation technology, there is also a feature that is based on pure software set virtual wall/virtual track, without any physical laying, flexible control of robot range of motion. This has great significance in practical application scenarios.
Below, let’s start experimenting
First, find the topic of [virtual_walls] in the document. The published message type is a custom type. Click to view the type of structure information.
slamware_ros_sdk/Line2DFlt32Array
File
slamware_ros_sdk/msg/Line2DFlt32Array.msg
Definition
| Element | Type | Description |
|---|---|---|
| lines | slamware_ros_sdk/Line2DFlt32[] | multiple lines |
(1) Initialize the node, define the publisher and subscriber objects
 ros::init(argc, argv, "display_virtual_lines");
 ros::NodeHandle n;
 ros::Publisher pub = n.advertise<visualization_msgs::Marker>("visualization_marker", 10);
 ros::Subscriber sub = n.subscribe<slamware_ros_sdk::Line2DFlt32Array>("/slamware_ros_sdk_server_node/virtual_walls", 30, virtualWallCallback);
(2) Globally defines a Marker type, lines are used to store and publish virtual walls.
visualization_msgs::Marker lines;(3) After receiving the virtual wall message sent by the slamware_ros_sdk_server_node node, save it to lines
void virtualWallCallback(const slamware_ros_sdk::Line2DFlt32Array::ConstPtr & msg)
{
    lines.points.clear();
    size_t cnt = msg->lines.size();
    for (size_t i = 0; i < msg->lines.size(); ++i)
    {
        geometry_msgs::Point p1;
        p1.x = msg->lines[i].start.x;
        p1.y = msg->lines[i].start.y;
        p1.z = 0.2;

        geometry_msgs::Point p2;
        p2.x = msg->lines[i].end.x;
        p2.y = msg->lines[i].end.y;
        p2.z = 0.2;

        lines.points.push_back(p1);
        lines.points.push_back(p2);
    }
}
(4) Configure lines, such as type, size, and color, etc.
 lines.id = 1;
 lines.header.frame_id = "slamware_map";
 lines.type = visualization_msgs::Marker::LINE_LIST;
 lines.ns = "lines";
 lines.action = visualization_msgs::Marker::ADD;
 lines.pose.orientation.w = 1.0;

 lines.scale.x = 0.1;
 lines.color.r = 1.0;
 lines.color.a = 1.0;
(5) Publish the lines
  ros::Rate r(30);
  while(running)
  {
      size_t cnt = lines.points.size();

      lines.header.stamp = ros::Time::now();
      pub.publish(lines);

      r.sleep();
  }
After deployment, we start the slamware_ros_sdk_server_node, view_slamware_ros_sdk_server_node and display_virtual_lines nodes respectively.
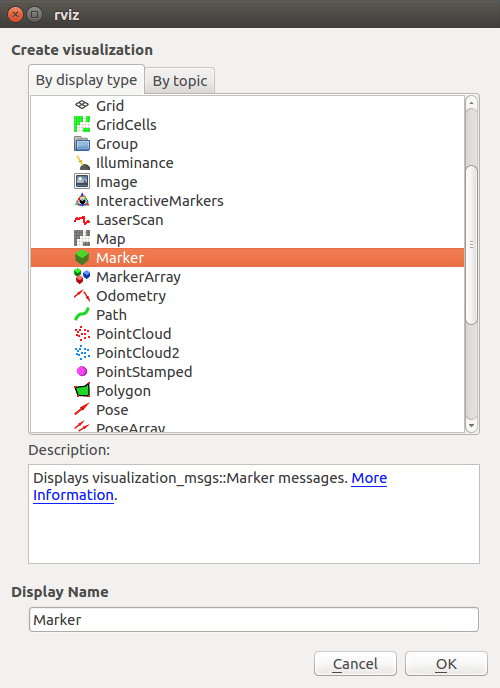
At this point, you need to configure the Add Marker information in RViz. First, find the [Add] button in the lower-left corner of RViz.
Select Add [Marker] to display the object.
After the addition is complete, we continue to find the [add_ lines] topic in the reference documentation, and then we can customize it. Click to see the composition and description of the custom type: line type, add location, and related definitions
Start the slamware_ros_sdk_server_node node, connect the robot, and type in the command line:
rostopic pub /slamware_ros_sdk_server_node/add_line slamware_ros_sdk/AddLineRequest -1 -- '[0]' '[1, [0.0, 0.0], [1.0, 1.0]]'
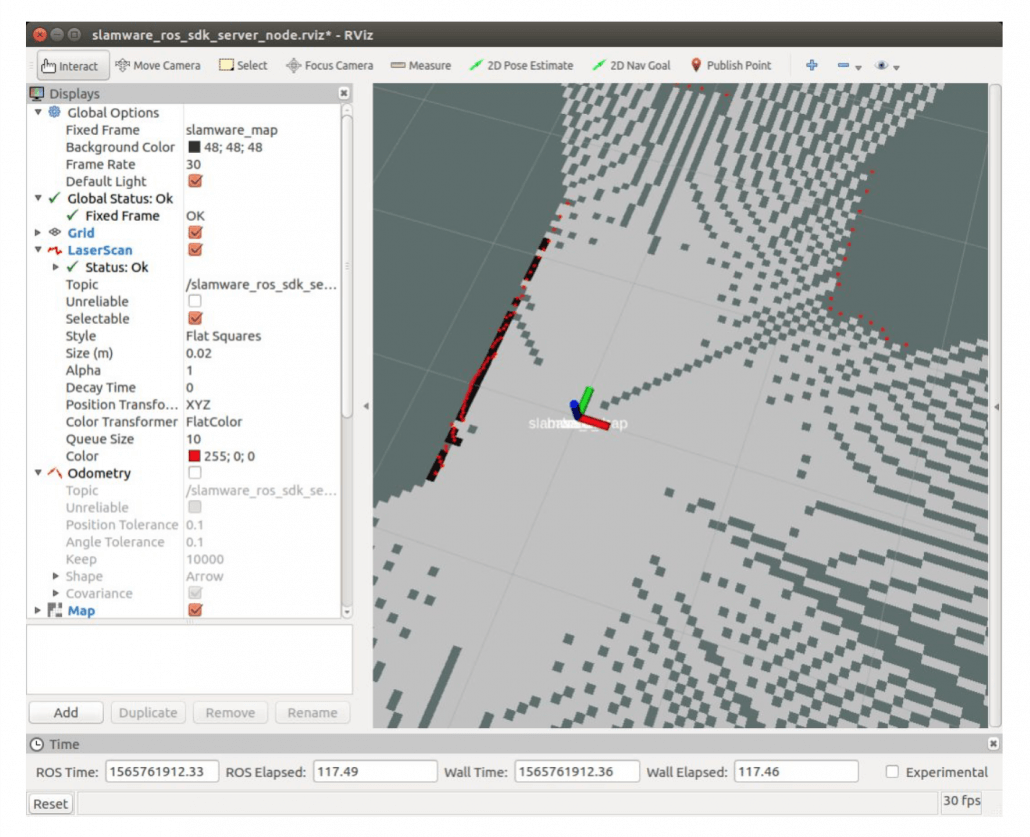
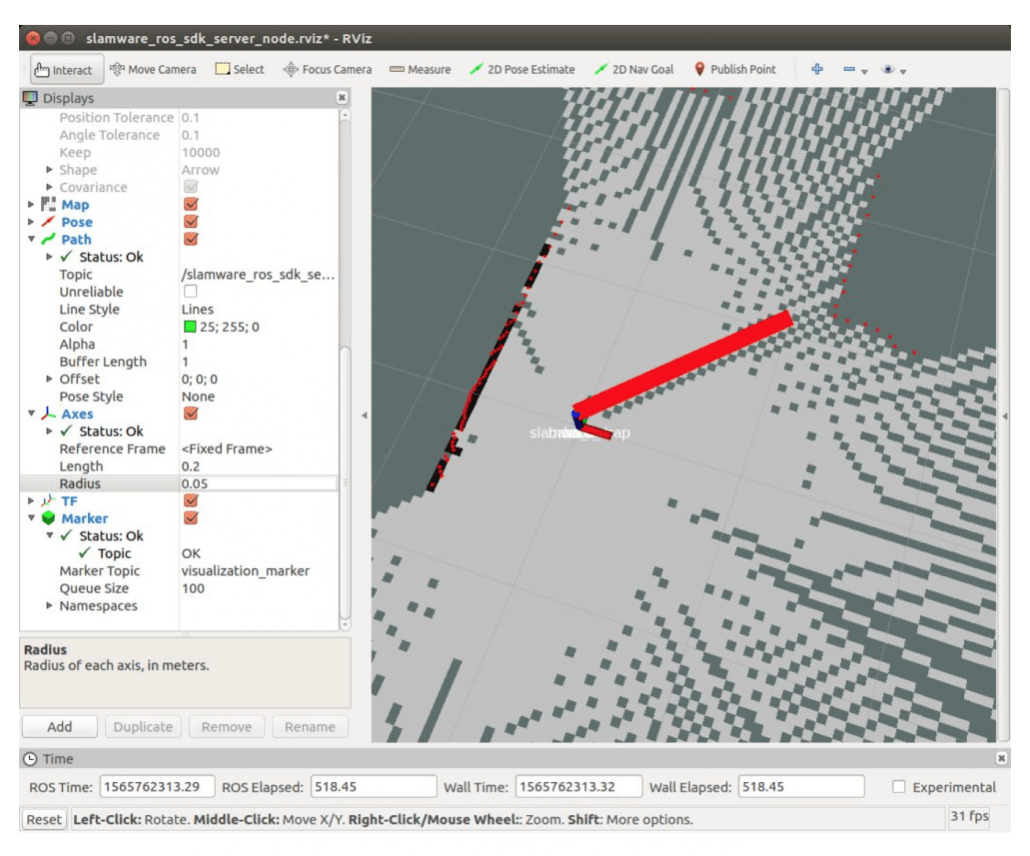
At this point, we can see the virtual wall in Rviz.
How do you delete it? Similarly, we find the clear_lines node information, enter the corresponding code on the command line:
rostopic pub /slamware_ros_sdk_server_node/clear_lines slamware_ros_sdk/ClearLinesRequest -1 '[0]'The development of virtual tracks will be the same as above.
This tutorial is just a demonstration of the two simple features of the SLAMWARE ROS SDK. The flexible use of topics such as controlling robot motion state, steering, rotation angle, map synchronization, and clearing the map will enable better monitoring and control of the robot.
So, are you ready to explore?
I love your articles! Do you know of a way to connect a Ps3 controller (or any thing other than a keyboard) to publish teleop to Rviz or Gazebo to run the simulations?
Looking forward to more SLAM reading