Bluetooth Shield
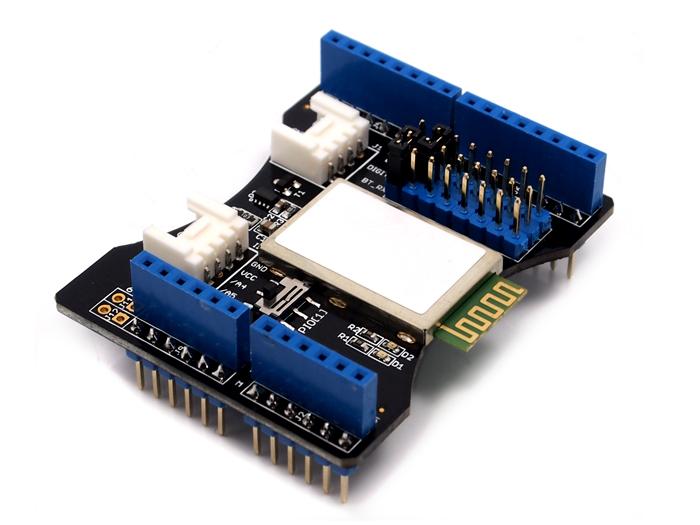
The Bluetooth Shield integrates a Serial Bluetooth module. It can be easily used with Arduino/Seeedstudio for transparent wireless serial communication. You can choose two pins from Arduino D0 to D7 as Software Serial Ports to communicate with Bluetooth Shield (D0 and D1 is Hardware Serial Port). The shield also has two Grove connectors (one is Digital, the other is Analog) for you to install Grove modules.
Model:SLD63030P
Features
Input Voltage: 3.3V
Baudrate: 9600, 19200, 38400, 57600, 115200, 230400, 460800
Seeeduino/Arduino compatible
Up to10m communication distance in house without obstacle
UART interface (TTL) with programmable baud rate (SPP firmware installed)
Default Baud rate: 38400, Data bits: 8, Stop bit: 1, Parity: No parity
Default PINCODE:”0000”
A full set of configuration commands
On board PCB Antenna
FCC Part 15 Certificated
Interface funcion

| Pad Type | Description |
|---|---|
| PIO1 | Status instruction port of Bluetooth module can be read by Arduino A1 port: low-disconnected, high-connected. |
| BT_RX | UART Data input of Bluetooth module. |
| BT_TX | UART Data output Bluetooth module. |
| Two Grove connectors | One is Digital (D8 and D9), the other is I2C/Analog (A4 and A5). |
Demonstration 1:Two Bluetooth Shield Connect
This demo will show you how to connect two Bluetooth shield.
You need two piece of Seeeduino V3.0, a Grove - Button, and a Grove - LED.
One Bluetooth Shield as Master while the other as Slave, and there's a Botton connect to the Master, a Led connect to Slave.
When the button press up, the led in Slave will change.
Hardware Installation
Firstly, we choose a Bluetooth Shield as Master, and plug Grove - Button to D8,D9 of this Bluetooth Shield.
For the Slave, we connetc Grove - Led to it's D8,D9 Grove. And D7 as TX, D6 as RX, as folowing:

Download Code and Upload
You can download the code in github, click here,then extract it to libraries folder of Arduino.
Open Arduino IDE, open File -> Examples -> Bluetooth_Shield_Demo_Code -> Master_Button, then you can open the code of Master
Open Arduino IDE, open File -> Examples -> Bluetooth_Shield_Demo_Code -> Slave_led, then you can open the code of Slave
Click Upload to Upload the code, if you have any problem about how to start Arduino, please click here for some help.

Check The Result
After finish Uploading the code to both Master and Slave, reset the two devices meanwhile
You can see the red and green led blink, indicate that devices was initializing and connecting.
After about servel seconds, only green led blink, indicate that Master and Slave had connected.
Now you can press up the button, then the led will change its state.
Note: If the phenomenon is not observed above, try unplugging the power and re-plug in again.
Demonstration 2:Connect to Smart Phone
This demo will show you how to connect Bluetooth Shield to a Smart Phone.
We need a Seeeduino V3.0, a Grove - Temperature Sensor, and what's more, a Smart Phone that with Bluetooth function.
Via a Bluetooth SPP App, we send a 't' to Bluetooth Shield, then it'll return the temperature.
Hardware Installation
Plug Grove - Temperature Sensor to A4,A5 Grove of Bluetooth Shield.
TX connect to D7 while RX connect to D6. as folowing:

Download Code and Upload
You can download the code in github, click here,then extract it to libraries folder of Arduino.
Open Arduino IDE, File -> Examples -> Bluetooth_Shield_Demo_Code -> Slave_Temperature, then you can open the code
Click Upload to Upload the code, if you have any problem about how to start Arduino, please click here for some help.

Download a SSP App
Here we us an Ardriod Phone, Mine is a Xiaomi 2A, open Google Play, search bluetooth spp, you can find many results.

Most of this app are useful, just choose one and have try.
Get Temperature
After installing an SPP app, try connecting it to SeeedBTSlave, pin code is: "0000"

When connect is ok, send 't' to SeeedBTSlave, and you can get the temperature now:

Related Projects
It's a pity that we don't have any demo about Bluetooth Shield in the Recipe yet.
Post your awesome project about CAN BUS Shield to win $100 Coupon! Please feel free to contact us: [email protected]
Here we introduce some projects about Serial port bluetooth module.
What is Serial Port Bluetooth Module

Serial port bluetooth, Drop-in replacement for wired serial connections, transparent usage. You can use it simply for a serial port replacement to establish connection between MCU and GPS, PC to your embedded project and etc.
Serial Port Bluetooth Module Demo

This is a complete tutorial about how to control multiple servo motors from android app through Serial Port Bluetooth Module.
Share Your Awesome Projects with Us
Born with the spirit of making and sharing, that is what we believe makes a maker.
And only because of this, the open source community can be as prosperous as it is today.
It does not matter what you are and what you have made, hacker, maker, artist or engineers.
As long as you start sharing your works with others, you are being part of the open source community and you are making your contributions.
Now share your awesome projects with us on Recipe, and win a chance to become the Core User of Seeed.
Core Users, are those who show high interests in Seeed products and make significant contributions on Recipe.
We cooperate with our Core Users in the development of our new product, this, in another word, the Core Users will have the chance to experience any new products of Seeed before its official launch, and in return we expect valuable feedback from them to help us improve the product performance and user experience. And in most cases when our Core Users have some good ideas of making things, we'll offer hardware pieces, PCBA services as well as technical support. Besides, further commercial cooperation with the Core Users is highly possible.
Schematic Online Viewer
Resources
- [EAGLE]Schematic and Layout in Eagle format
- [PDF]BlueTooth Shield SCH
- [PDF]BlueTooth Shield PCB
- [Library]Bluetooth Shield Library for Arduino 1.0
- [Instruction]Bluetooth Software instruction
- [Datasheet]Bluetooth - module Datasheet
- [Connections] Set up connections between two BluetoothBee step by step
Tech Support & Product Discussion
Thank you for choosing our products! We are here to provide you with different support to ensure that your experience with our products is as smooth as possible. We offer several communication channels to cater to different preferences and needs.