Micro Switch: What It Is, How It Works, and How to Use It
When people search for “micro switch“, they mostly want something very practical. For instance, they want to know what this small-sized switch does, where it is used, and how to wire it into a project or product. In this guide, we will walk through all of that step by step.
We will keep things simple and conversational, but still technical enough for engineers and makers. You will see how the internal snap action works, how to pick the right micro switch button, and how to connect a micro switch Arduino circuit without speculation.
What Exactly Is a Micro Switch?
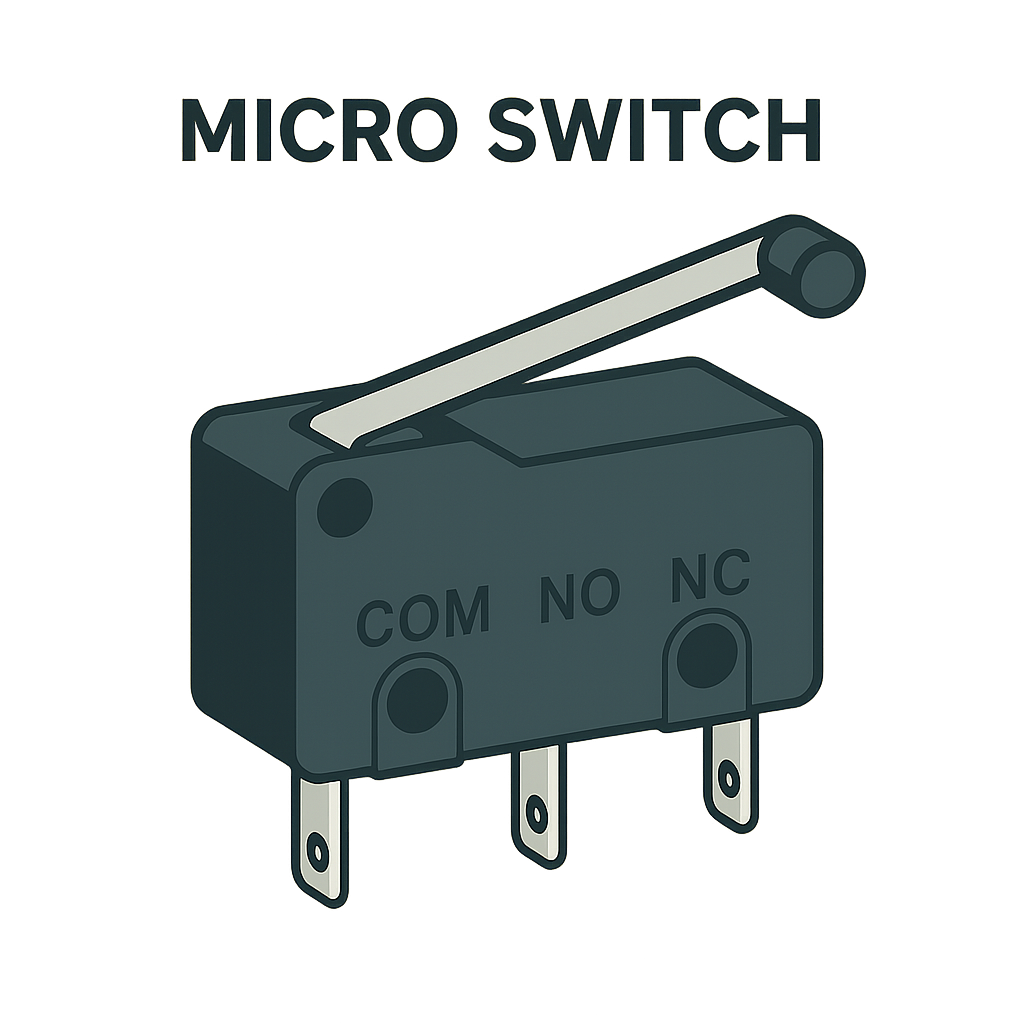
A micro switch is a very small electromechanical switch that uses a snap-action mechanism to change state with very little travel and force. Inside the case, a spring and lever system moves the contacts from one position to another when the actuator reaches a critical point.
Because the motion is sudden and repeatable, the switch gives an extremely clean electrical transition. That makes it appropriate as a position or limit sensor in control systems, safety interlocks, and user interfaces. Note that you might also see micro switches described as “miniature snap-action switches” or “micro limit switches” in datasheets and catalogs.
How Does a Micro Switch Work?
The heart of a micro switch is the over-center spring. As you press the actuator, the spring stores energy, and the contacts remain in their original position. Once you hit an operating force and travel, the spring flips to the other side and forces the contacts to change state quickly. Micro switches may have an operating force of 10-500 g, per actuator style and switch body size.
This is the snap action. It lowers arcing and bounce time, as well as gives a consistent actuation point over millions of cycles. The tiny contact gap and rigid enclosure help the switch manage moderate currents even though the movement at the micro switch button feels light and small.
Common Uses for Micro Switches
Micro switches are used when a system needs a precise mechanical position-based on/off signal.
Industrial Equipment
They act as limit switches on linear slides, conveyor mechanisms, and actuator end stops. When the cam or lever hits the actuator, the controller knows the motion has reached a safe limit.
Appliances and Consumer Devices
Micro switches sit inside door latches, float mechanisms, and control panels. They confirm that a door is closed, a level is reached, or a button is pressed before power is applied. Small “clicky” buttons in mice and handheld tools are also built on micro switch technology.
Embedded Designs
A micro switch Arduino combo is a way to detect collisions, home positions, or manual inputs. You only need one digital pin and a pull-up or pull-down resistor. This renders micro switches attractive for robotics, CNC machines, and 3D printers that need precise but low-cost end-stops.
Key Specs When You Choose a Micro Switch
When you select a micro switch, the datasheet matters more than the shape. You need to match the contact rating to your load voltage and current, including whether the load is AC or DC and whether it is resistive or inductive. Many miniature switches support a few amps at 125-250 VAC. On the other hand, low-level versions use gold contacts for logic signals.
Mechanical parameters are just as important. Operating force, pre-travel, over-travel, and differential travel determine how hard you must press the actuator and how far it moves before and after switching. These numbers control the “feel” of the micro switch button and how tolerant your mechanism can be to alignment errors. When used within load and environmental constraints, high-quality snap-action micro switches may last 500,000 to 10,000,000 operations.
To keep things clear, here are the main points to check in any micro switch datasheet:
- Electrical ratings and contact configuration (SPDT, SPST, NO, NC).
- Operating force and total travel range
- Mechanical and electrical life, temperature range, and any IP sealing rating.
Wiring a Micro Switch and a Micro Switch 3 Pin Layout
Most micro switches expose three terminals:
- COM (common).
- NO (normally open).
- NC (normally closed).
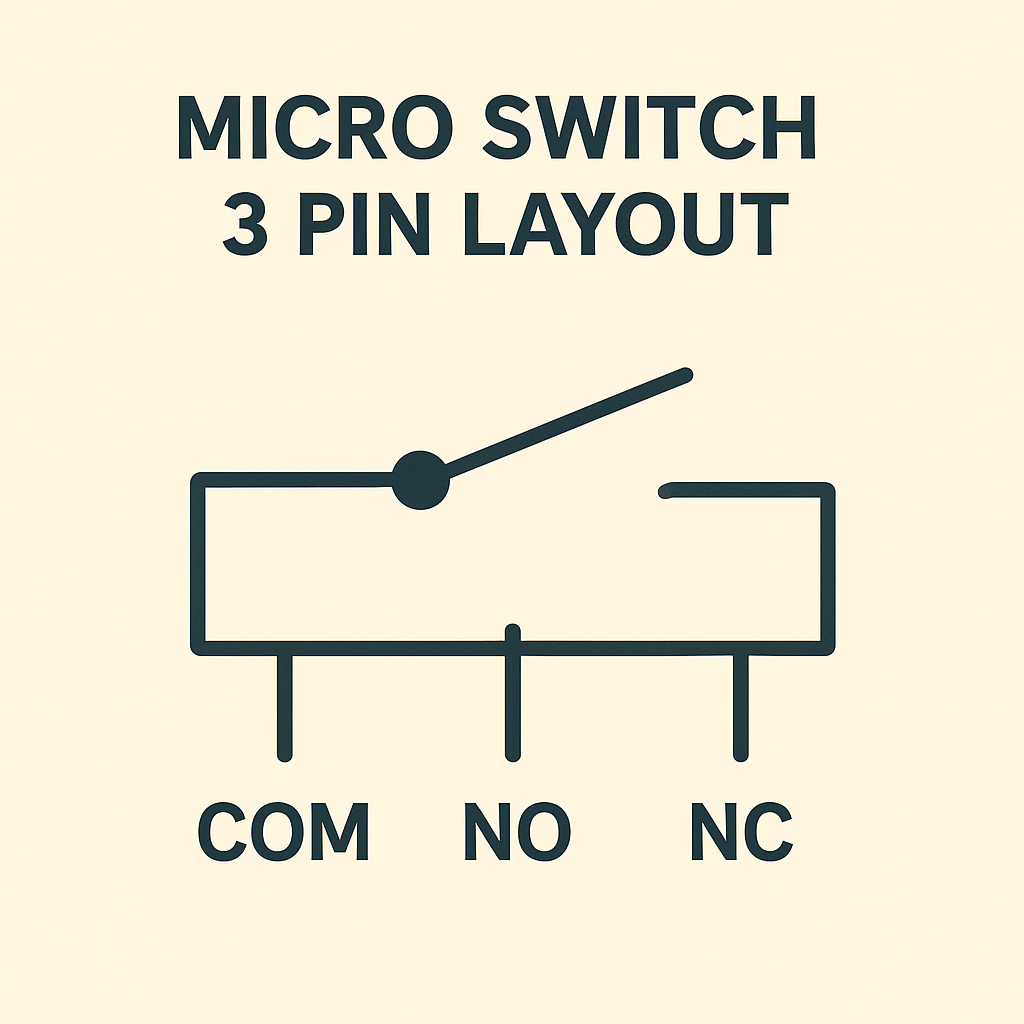
This is what people mean by a micro switch 3 pin device. COM is the moving contact. Meanwhile, NO and NC are the two fixed positions it can connect to.
Basic 3-Pin Wiring for Low-Voltage Micro Switch Circuits
For low-voltage electronics, one simple wiring pattern is to tie COM to ground and NO to a microcontroller input with an internal pull-up enabled. So, the pin reads HIGH when the switch is idle and LOW when you press the actuator. Swapping to the NC pin inverts the logic.
Debouncing and Safety Tips for Micro Switch Arduino Projects
You may add a little debounce delay in code to disregard contact bounce during the first few milliseconds following a state change if you use a micro switch Arduino configuration. Always make sure that the wire gauge, insulation, and protective components are up to your local norms and the sort of load for higher voltages or systems that are vital to safety.
Grove — Micro Switch: A Plug-and-Play Option
At Seeed Studio, we know that wiring tiny switches on a perfboard can be painful. That is why we created the Grove — Micro Switch as a ready-to-use module with a standard 4-pin Grove connector and mounting holes. You just plug it into a Grove Base Shield to read a digital signal.
The module integrates a sensitive snap-action micro switch that is actuated by very little force, but it responds and returns reliably. Moreover, it works at both 3.3 V and 5 V (lower amps than many), and you can connect it to Arduino, Raspberry Pi, and other development boards without level shifting.
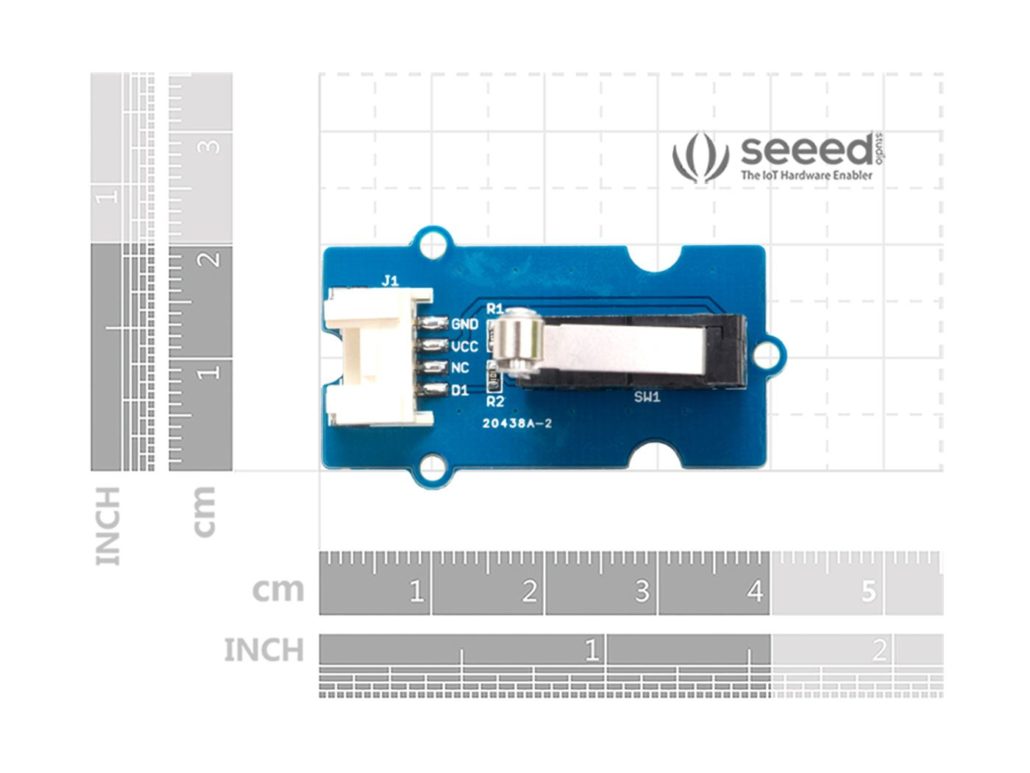
Instead of choosing between COM+NO or COM+NC like on a bare three-terminal switch, you plug the 4-pin Grove cable into a digital port and read the D1 pin as your on/off signal. In other words, D1 is the preconfigured digital output from the micro switch, which makes the module plug-and-play. Also, note that on this board, the pin marked “NC” means “Not Connected”, not “Normally Closed”. So, it is just an unused pin rather than a second contact option.
Because the wiring is standardized, you can swap the switch between prototypes without rewiring. For projects that need several limit or safety inputs, you just route more Grove cables instead of soldering new 3-pin headers for each switch. That makes debugging much easier.
FAQs
- What Is A Micro Switch Used For?
A micro switch is employed as a compact position or limit sensor in machines, appliances, and control panels. That’s where its snap-action mechanism converts a small movement at the actuator into a precise on/off electrical signal for controllers and safety circuits.
- Can I Repair A Micro Switch?
You can sometimes clean the actuator and terminals with an appropriate contact cleaner. But if the micro switch stops clicking, shows burnt marks, or gives intermittent readings even after cleaning, it is more reliable and cheaper to replace it with a new unit.
- How to Tell If a Micro Switch Is Bad?
A micro switch is likely bad if the actuator feels loose or silent, the housing is cracked or discolored, or a multimeter shows that COM-NO and COM-NC do not change cleanly between open and closed when you press and release the button in a simple continuity test.
- How to Wire Up a Micro Switch?
To wire a standard three-terminal micro switch, connect your common wire to COM. After that, choose NO if you want the circuit closed only when the button is pressed or NC if you want it closed at rest. Meanwhile, in the context of a micro switch Arduino circuit, COM goes to ground, and NO goes to a digital input with an internal pull-up resistor enabled.
Conclusion
Micro switches lurk behind panels and within housings, yet they conduct a crucial job. They interpret minuscule motions into electrical impulses that make equipment safe and responsive. With a view of how snap-action mechanisms function, how datasheet specs relate to real designs, and how to wire a micro switch 3 pin layout, you may incorporate them with confidence.
We welcome you to test our Grove module if you want to quickly get from a concept to a prototype. We made it so that you can connect snap-action sensors to Arduino, Raspberry Pi, and other boards. This way, you can concentrate on your code and mechanics instead of connectors.
>> Read More