IR Proximity Sensor for Arduino Distance Measuring
Proximity sensors are commonly used today alongside Arduino for many applications, ranging from distance measurement, object detection, to heat emission measurement. Hence, picking one that’s easily connectable, accurate, and reliable is very much important for fulfilling your intended usages.
Sounds like it’s too much to handle? Not to worry, this blog will introduce a SHARP proximity sensor and discuss how to easily connect it with your Arduino for a plethora of applications!
Alongside the introduction and Arduino guide, I’ll be showcasing some projects you can try as well!
And yes, for today’s guide, you will not need jumper wires nor breadboard because of the plug and play capability provided by Grove System 🙂
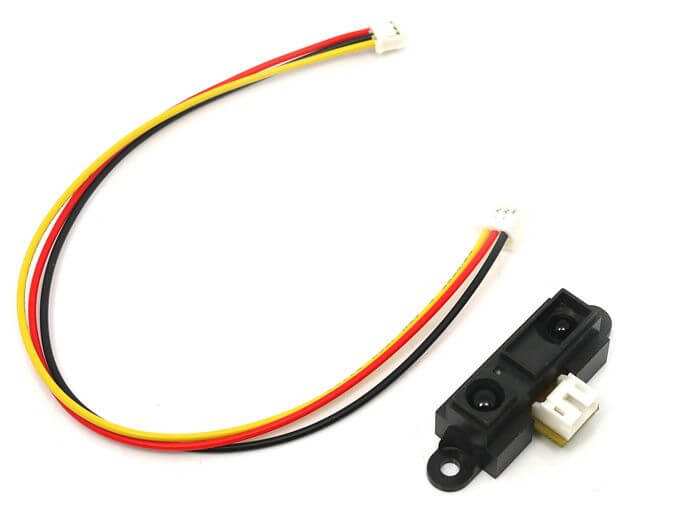
The Grove – 80cm Infrared Proximity Sensor

Based on the SHARP GP2Y0A21, this IR proximity sensor is a popular choice that I’m recommending for anyone that’s looking for accurate distance measuring beyond your alternatives.
Packed in a small package with low power consumption, this IR proximity sensor allows for continuous distance reading with a range of 10cm to 80cm!
This sensor is quite small and uses a tiny connector called the Japan Solderless Terminal (JST) connector. These connectors have three wires: Ground, VCC, and Output. Because the sensor fire continuously and don’t need any clock to initiate a reading, it is easy to interface with any microcontroller. for the Seeeduino 4.2, the wire converts the 3-wire to 4-wire so that it can be compatible with the twig interface of Grove.
Hardware Overview: Specifications
| Item | Minimum | Typical | Maximum |
|---|---|---|---|
| Working Voltage | 2.5V | 5V | 7V |
| Analog Output Voltage(80cm) | 0.25V | 0.4V | 0.5V |
| Average Current Consumption | – | 33mA | 50mA |
What makes this an attractive option?
Small form factor
Built small for seamless applications, you wouldn’t have to worry if it doesn’t fit into the smallest project space you’re working with!
Ease of Usage with Japanese Solderless Terminal (JST)
Since it uses a tiny connector called the JST, all you need to connect the proximity sensor with is a 3pin JST wire. This eliminates the need for many jumper wires and manually soldering it for pairing purposes!
Cost-performance ratio
Compared to LIDAR which tends to be on the pricier side, the Grove -80cm Infrared Proximity Sensor offers a good cost-to-performance ratio, achieving a distance measurement range of 10cm to 80cm for only $13.90!
Grove Interface
Grove? Grove system is Seeed very own initiative, mainly aimed at helping users like yourself to easily use different modules, sensors, and more through our plug and play system!
We currently already hold more than 200 Grove modules, including other proximity sensor types for you to choose from!
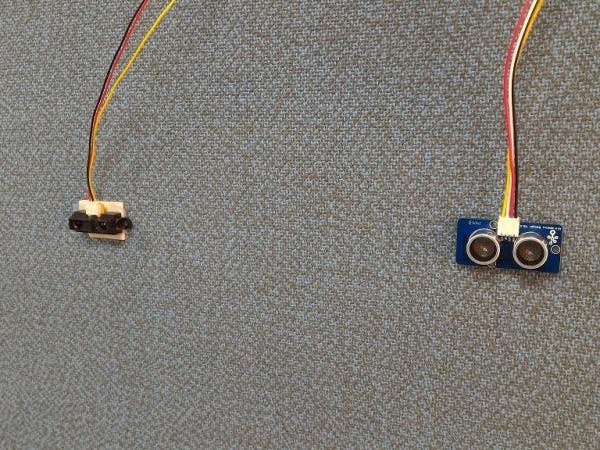
Don’t believe how easy pairing is made possible with Grove? Below shows a general proximity sensor vs the Grove – 80cm Infrared Sensor:
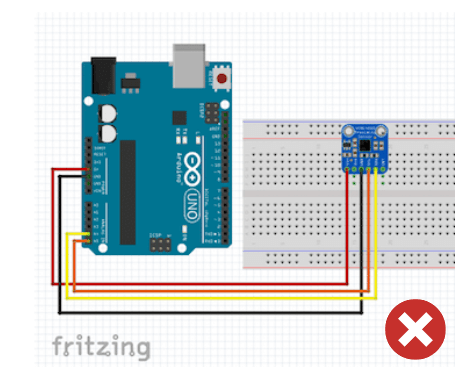
General proximity sensor setup with Arduino 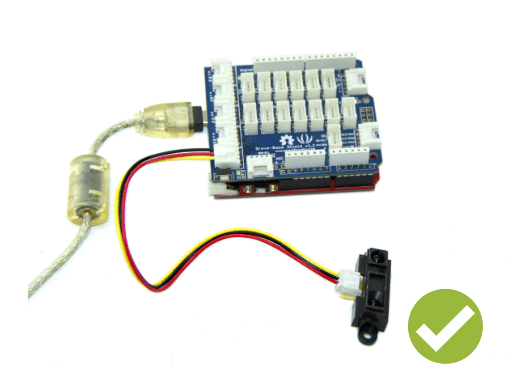
Grove – 80cm proximity sensor setup with Arduino
Like how simple and less messy it is?
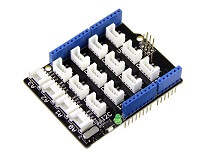
All you need is a Grove Base Shield alongside your Arduino and you’re good to go! Switch to using grove today!
Interested to know more about Grove? You can head over to our wiki page!
Proximity Sensor Arduino Guide
If you like what you’ve seen so far with the Grove – 80cm Infrared Proximity Sensor, the following Arduino Guide will help you get started in no time!
As mentioned, this proximity sensor is easy to use, all you need is the following:
Seeeduino is Seeed’s very own Arduino, built with relative advantages over the original version. The following boards are compatible as well:
- Arduino Uno
- Seeeduino V4.2
- Arduino Mega / Seeeduino Mega
- Seeduino LoraWan
- Arduino Leonardo / Seeeduino Lite
- Arduino 101
- Arduino Due
- Intel Edison
- Linkit One
Hardware Configurations
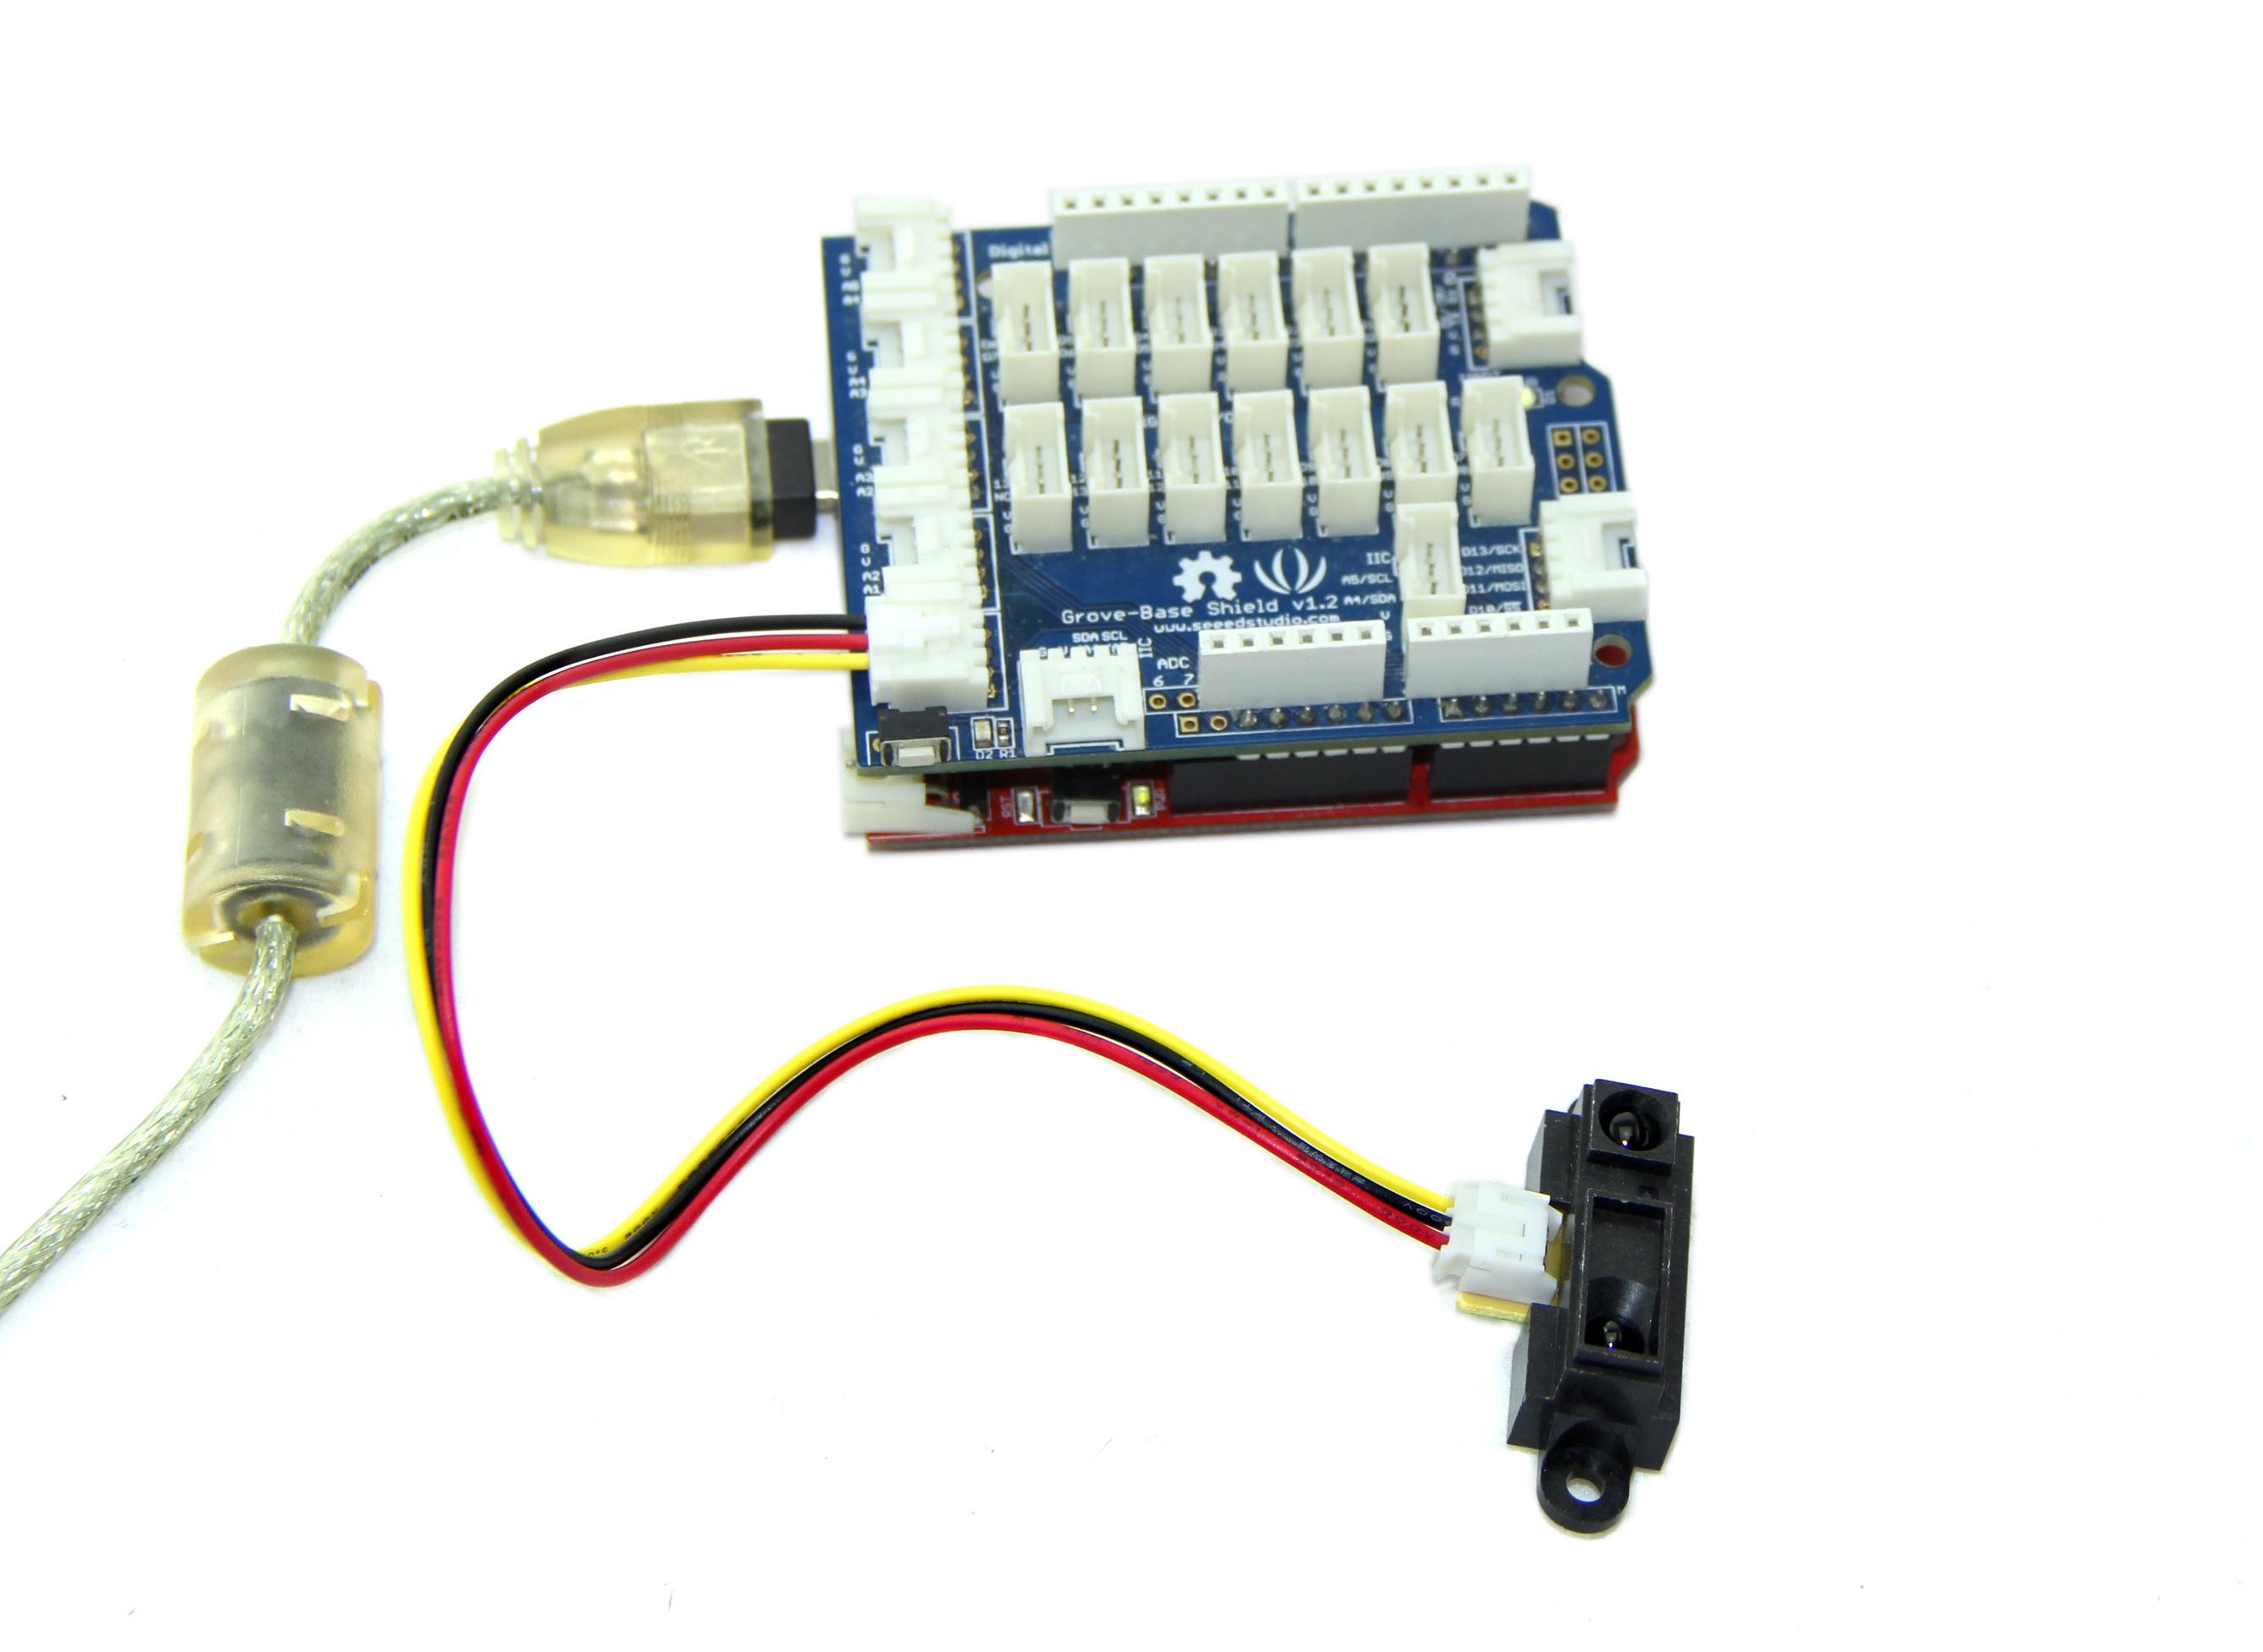
- Step 1: Connect the 3-pin connector to the sensor, and connect the 4-pin connector to Grove-Base shield’s A1 port
- Step 2: Connect Arduino/Seeeduino via a USB cable
It should look something like this after the above steps:
Software configurations
- Step 1: Copy and paste code below to a new Arduino sketch
#define IR_PROXIMITY_SENSOR A1 // Analog input pin that is attached to the sensor
#define ADC_REF 5//reference voltage of ADC is 5v.If the Vcc switch on the Seeeduino
//board switches to 3V3, the ADC_REF should be 3.3
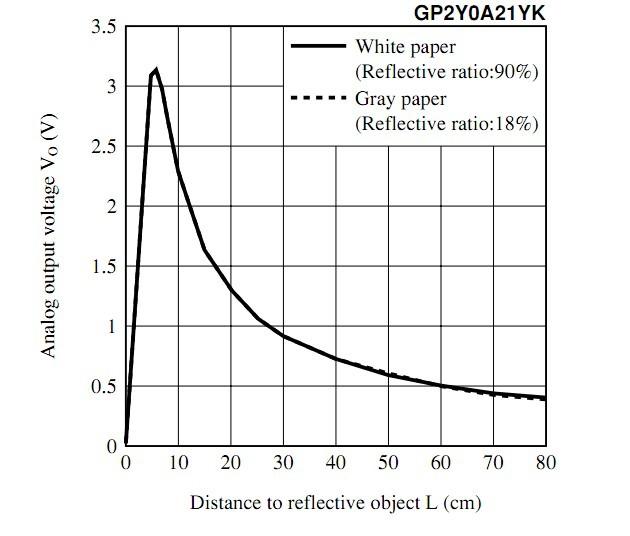
float voltage;//the sensor voltage, you can calculate or find the distance
// to the reflective object according to the figures
//on page 4 or page 5 of the datasheet of the GP2Y0A21YK.
void setup()
{
// initialise serial communications at 9600 bps:
Serial.begin(9600);
}
void loop()
{
voltage = getVoltage();
Serial.print("sensor voltage = " );
Serial.print(voltage);
// wait 500 milliseconds before the next loop
delay(500);
}
/****************************************************************************/
/*Function: Get voltage from the sensor pin that is connected with analog pin*/
/*Parameter:-void */
/*Return: -float,the voltage of the analog pin */
float getVoltage()
{
int sensor_value;
int sum;
// read the analog in value:
for (int i = 0;i < 20;i ++)//Continuous sampling 20 times
{
sensor_value = analogRead(IR_PROXIMITY_SENSOR);
sum += sensor_value;
}
sensor_value = sum / 20;
float voltage;
voltage = (float)sensor_value*ADC_REF/1024;
return voltage;
}- Step 2: Upload the code
- Step 3: Open the Serial Monitor, you can calculate or find the distance to the reflective object according to the below figures
Infrared Proximity Sensor Projects
Now that you’ve understood how to pair the Grove – 80cm Infrared Proximity Sensor, we’ll now take a look at some interesting projects you can consider!
Arduino101 BLE Autonomous Rover
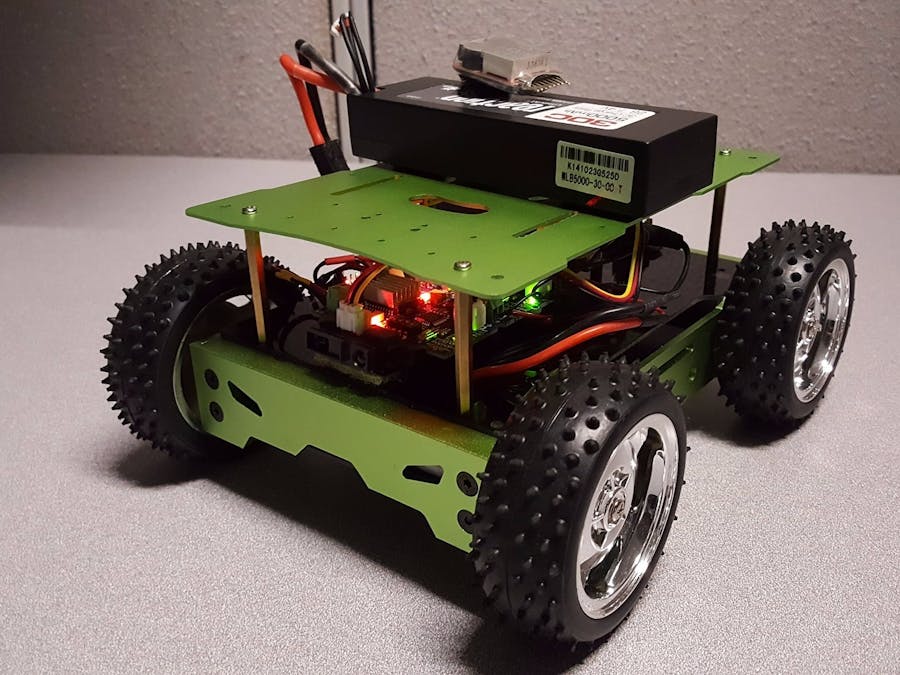
Kicking the list off is an Autonomous self-driving vehicle you can build by simply adding sensors to create a platform!
What do you need?
Hardware components:
- 1 Arduino 101 & Genuino 101
- 1 Seeed Grove – 80cm Infrared Proximity Sensor
- 1 Seeed Skeleton Bot – 4WD Mobile Robotic Platform
- 1 Seeed Grove Starter kit for Arduino 101
- 2 Seeed Grove – I2C Motor Driver Board
Software apps and online services
Hand tools and fabrication machines
- Velcro Tape
- Small screwdrivers
Interested? You can find the full tutorial by Oliver Chen, shadeydave, Prashant Lalwani, Purval Sule on Seeed Project Hub!
Recreating Flappy Bird: Flappy Duino

Miss playing flappy bird on a small handheld device? This project recreates the game with simple hardware and involves a twist; the player has to “flap” his/her hand to fly the bird!
Sounds interesting? Here’s what you need:
Hardware components
- Arduino Pro Mini 328
- Grove – 80cm Infrared Proximity Sensor
Interested? You can find the tutorial by Baoshi Zhu on Seeed Community website!
Counting People
Lastly, perhaps the most apparent project relating to proximity sensors being the detection of bi-directional in&out of humans. To do so, this project mainly uses the IR proximity sensor alongside ultrasonic!
What do you need?
Hardware components:
- Seeeduino Cloud
- 8mm RGB Led Lamp common anode (10 PCs)
- Seeed 4 Digit Display
- Seeed Grove Ultrasonic Ranger
- Seeed Grove Base Shield
- Grove – 80cm Infrared Proximity Sensor
Interested? You can find the full tutorial by JackRose on Seeed Project Hub!
Resources and Going Further
For more on what I’ve covered today:
Summary
Overall, the Grove – 80cm Infrared Proximity Sensor is one of many IR proximity sensors on the market. Boasting a good cost-to-performance ratio, and ease of pairing, it’s ideal for your next Arduino project that requires short-distance measurement!