How to use a button with Arduino in 6 steps! – Simple Arduino Tutorial
Own a switch or a push-button and wonder how you can easily connect it to an Arduino? In today’s simple tutorial, I’ll be teaching you the basics and how you can easily get started without any resistors!
List of Switch Buttons at Seeed
Before we get started with our switch button tutorial, if you’ve yet to own one, do consider the wide array of options available here at Seeed! All of it Grove Compatible!
Need a list rundown of the available switch options? We got you covered! ALL of our switch buttons here are Grove compatible! Not to mention they are very cost effective and much cheaper compared to other buttons.
Grove? What is Grove?
More about Grove

Grove system is Seeed very own initiative, mainly aimed at helping users like yourself to easily use different modules, sensors, and more through our plug and play system!
- No more breadboarding, soldering and complicated electrical circuits
- More than 200 Grove modules for you to choose from, including other sensor types for you to choose from!
Don’t believe how easy pairing is made possible with Grove? Below shows a general Arduino switch pairing vs one of our Grove – Switch:
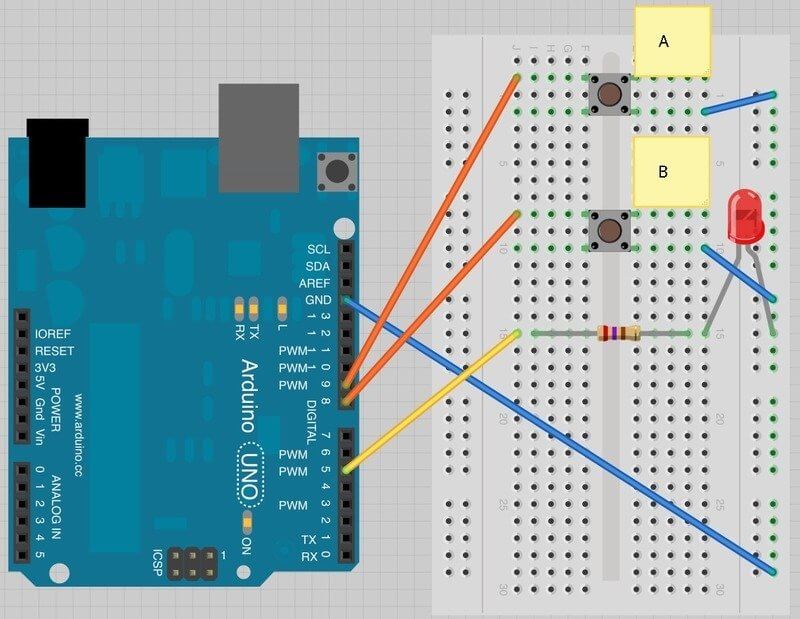
Arduino switch circuit with jumper wires and breadboard 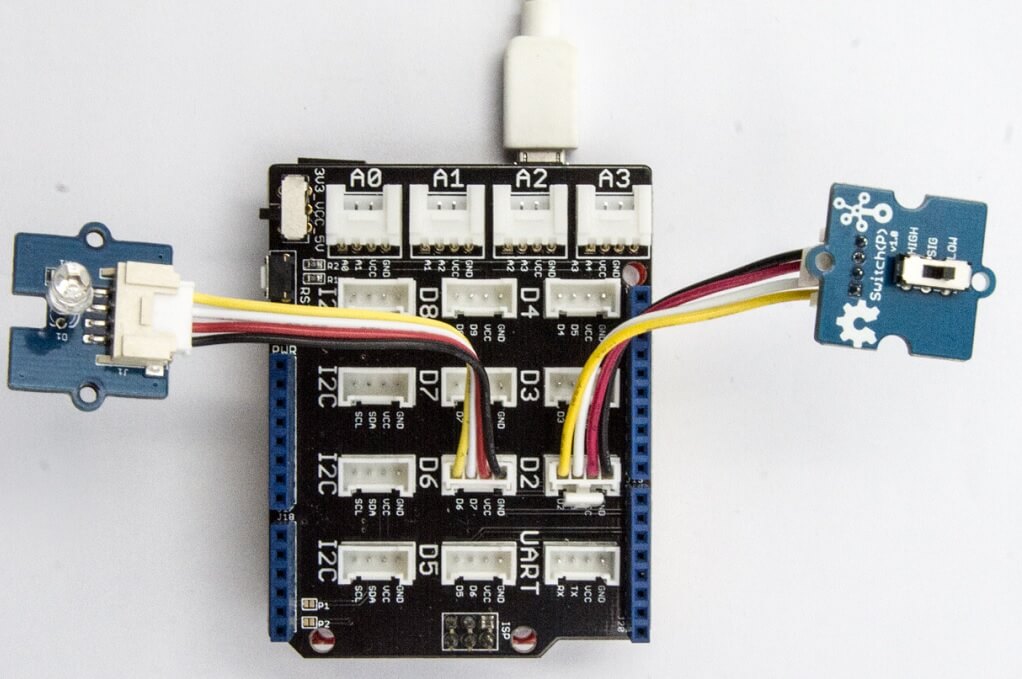
Arduino switch circuit with Grove
Like how simple and less messy it is?
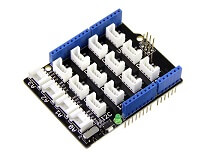
All you need is a Grove Base Shield alongside your Arduino and you’re good to go or get one of our Seeeduino’s which is attached with a Grove interface.
- We’ll talk more about the pairing later on during our tutorial
Now let’s move on to our list of switches!
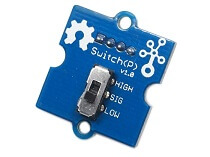
1) Grove – Switch (P) ($2.90)

Starting off the list is an entry-level low-cost switch for your every day ON/OFF applications. If you’re looking for a reliable switch to simply get started and experience our grove prototyping system, this option is for you!
If you’re wondering what the “P” means, it stands for “panel mount”
Its features and specifications include:
- Ease of usage with Grove interface
- Dimensions: 20mm x 20mm
- Operating voltage: 3.⅗V
- Electrical life: 10,000 cycles
- Operation Force: 200 ± 50gf
- Operation Temperature: -20℃ to +80℃
2) Grove – Tilt Switch ($2.90)

Instead of switching the button physically on and off, we have here the Grove – tilt switch, an equivalent of a button that does switching through tilting movement!
- It contains a pair of balls inside that form an electrical connection when the case is placed upright
- When the case is tilted over, the balls wouldn’t touch, hence no connection is made
Do note that this sensor is wired to the SIG line instead of using NC.
Its features and specifications include:
- Ease of usage with Grove interface
- Voltage levels:
- Minimum: 3V
- Typical: 5V
- Maximum: 5.25V
- Connecting angle: 10° ~170°
- Disconnect angle: 190° ~350°
- Electrical Life: 100,000 cycle
3) Grove – Micro Switch ($2.90)

If you’re looking for an electric switch that’s higher speed and applicable for industrial applications such as machinery, controls, appliances, etc., this switch option is the one for you!
- Being a micro switch that’s actuated by little physical force, a relatively small movement at the actuator button will produce a large movement at the electrical contacts
Similarly to the previous two options, it’s low-cost and easily pairable with your Arduino, Raspberry Pi, or other development platforms!
Its features and specifications include:
- Ease of usage with Grove interface
- Dimensions: 40mm x 20mm x 20mm
- Working voltage: 3.3V / 5V
- Operating Force: 80±20g
4) Grove – Magnetic Switch ($2.90)

Looking for another type of switch that utilizes a different way of turning a circuit on and off? The Grove – Magnetic Switch does so through proximity!
Based on the CT10 encapsulated dry reed switch which is a single-pole, single-throw (SPST type), this switch sensor is double-ended and can be actuated with an electromagnet, a permanent magnet of both!
Its features and specifications include:
- Ease of usage through Grove interface
- Small footprint: 2.0cm x 2.0cm twig module
- Minimum external parts
- 10W rating
- Rugged encapsulation
5) Grove – 5-Way Switch ($4.45)

No.5 on this list goes to our 5-way switch. If you need multifunction control on your electrical circuit, this is a good option to consider!
Not only can it be used to detect switch positions and events such as single click, double click or long-press, but directional detection (left, right, up, down, center) is also possible as well!
- With its directional detection, it’s applicable for game controls
Its features and specifications include:
- Ease of usage with Grove compatibility
- I2C interface
- Good heat resistance
- Long operating life
- Operating voltage: 3.3V / 5V
- Dimensions: 40mm x 20mm x 10mm
6) Grove – 6 Position DIP Switch ($3.90)

No.6 on this list and 6 positions? Yes! Jokes aside, If One switch isn’t enough and you’re looking for a module with multi-channel capabilities, this switch option is for you!
- Integrating 6 individual switch positions in one, this option is great for just that!
It uses I2C for data transmission through the grove port as well, maintaining its ease of usage!
Its features and specifications include:
- Inclusion of 6 individual switch
- Good heat resistance
- Long operating life
- I2C interface
- Grove compatible
- Dimensions: 40mm x 20mm x 10mm
- Operating voltage: 3.3V / 5V
7) Grove – Button ($1.90)

After seeing 6 different switches on this list, it’s time to showcase a switch button! If you wish to ON/OFF a circuit by pressing a button-down instead of flipping it, the Grove – Button is for you!
This button is identical to our sister version Grove – Button (P) apart from the placement of our Grove – connect port.
Its features and specifications include:
- Easy to use momentary ON/OFF button
- Grove interface
- Operating voltage: 3.⅗V
- Electrical life: 200,000 cycles
- Operating force: 100 ± 50gf
- Operating temperature: -25℃ to +70℃
- Dimensions: 20mmX20mm
Arduino Button tutorial
Picked out the switch button that you will be using for your Arduino project? Lets head into how to use them with the Arduino!
For this tutorial, we’ll be using our Grove – Switch (P) to show you how you can turn on an LED with Arduino.
- We’ve provided an Arduino code and tutorial for the other switches on the list as well. If you’re interested in any, you may refer to the “Resources and Going Further” Section of today’s blog
To complete this tutorial, you’ll need the following parts:
- Seeeduino is Seeed’s very own Arduino board, made with relative benefits over the original
- If you do not wish to purchase a Seeeduino, this tutorial is still applicable for the following Arduino boards: Arduino UNO, Arduino Mega, Arduino Leonardo, Arduino 101, Arduino Due
Hardware Assembly
- Step 1: Connect Grove-Switch (P) to D2 port of Grove -Base Shield
- Step 2: Connect Grove – Purple LED to D6 of Grove – Base Shield
- Step 3: Plug Grove – Base Shield into Seeeduino
- Step 4: Connect Seeeduino to PC via a USB cable
It should look something like this after completing the above steps:

Note: If you wish, you can directly connect Grove-Switch(P) and Grove – Purple LED (3mm) to Seeeduino v4.2 instead of using a Grove – Base Shield since it has sufficient grove ports.
| Seeeduino | Grove-Switch(P) | Seeeduino | Grove – Purple LED (3mm) |
|---|---|---|---|
| 5V | Red | 5V | Red |
| GND | Black | GND | Black |
| NC | White | NC | White |
| D2 | Yellow | D6 | Yellow |
Arduino Code and Software configurations
- Step 1: Copy the below code to Arduino IDE and upload it to Arduino
- If you’re unsure on how to upload the code, do check out our guide on uploading code here
const int switchPin = 2;     // the number of the pushbutton pin
const int ledPin =  6;      // the number of the LED pin

int switchState = 0;         // variable for reading the pushbutton status

void setup() {
    // initialize the LED pin as an output:
    pinMode(ledPin, OUTPUT);
    // initialize the switch pin as an input:
    pinMode(switchPin, INPUT);
    Serial.begin(9600);
}

void loop(){
    // read the state of the switch value:
    switchState = digitalRead(switchPin);

    if (switchState == HIGH) {
        //turn LED on:
        digitalWrite(ledPin, HIGH);
        Serial.println("switch high!");
    }
    else {
        //turn LED off:
        digitalWrite(ledPin, LOW);
        Serial.println("switch low");
    }
}- Step 2: The LED will now be on when we switch it to high! The serial output will be displayed as below:
switch high!
switch high!
switch high!
If you’re both an Audio and Visual learner, here’s a video tutorial on what I’ve gone through earlier!
Switch Button Projects
Since the only thing you could try with switch buttons is the above tutorial, I’ve provided some other projects for you to get started!
Arduino BoomBox

Want to build a custom boombox that’s cheaper than those pre-build ones on the market? This project uses the Grove Serial MP3 paired with Arduino UNO and others to help you achieve that!
What do you need?
Hardware components:
- Arduino UNO
- Grove – Button
- Grove – Switch (P)
- Grove – Base Shield
- Grove – Serial MP3 Player
- Grove – Slide Potentiometer
- Grove – Universal 4 Pin 20cm Unbuckled Cable (5 PCs Pack)
- 4xAA Battery Holder
Software apps and other services:
- Arduino IDE
Interested in finding out more? You can check out the full tutorial by ArduinoBasics on SeeedStudio Community!
DIY Wooden Laser Gun
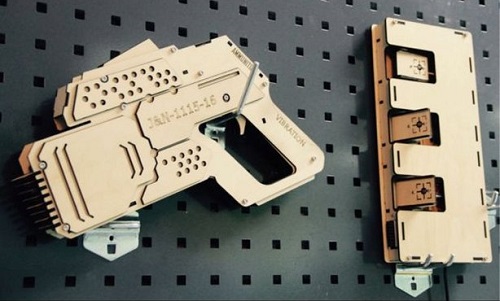
Into Guns and want to DIY one for yourself? This project is the one for you! Inspired by Overwatch, this gun is made from wood and works by emitting a laser pulse, activating the light sensors installed on gun targets.
What do you need?
Hardware components:
- Seeeduino Lotus
- 5mW Laser Module Emitter – Red Point
- Grove – LED Bar v2.0
- Grove – Vibration Motor
- Grove – Button (P)
- Servo
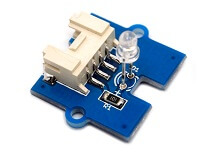
- Grove – Light Sensor v1.2 (P)
- Grove – 4 Digit Display
- Grove Buzzer
Structural components:
- Rubber band
- Support column M3*25
- Support column M3*30
- Support column M3*50
- Support column M3*20
- M3 screws and nuts
- M2 screws and nuts
- Screwdriver
- 3mm thick wood planks
- 5mm thick wood planks
Software apps and other services:
- Arduino IDE
Machinery:
- General Laser cutter
Interested in finding out more? You can check out the full tutorial by SeeedStudio on Instructables!
LED String Light
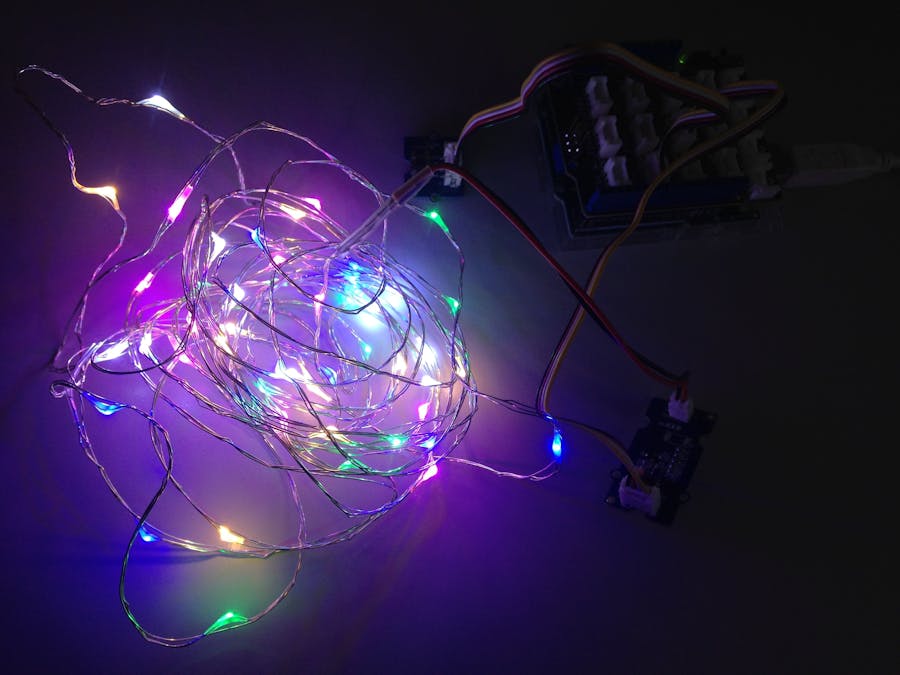
Want to build an LED display more impressive than the regular LED sensor? With this project, you can learn how to connect your Arduino board to LED string lights!
What do you need?
Hardware components:
- Arduino UNO & Genuino UNO
- Seeed Grove Base Shield
- Seeed Grove LED String Light
- Seeed Grove Universal Buckled Cable
- Seeed Grove Button
- Seeed Analog LED Strip
Software apps and other services:
Hand tools and fabrication machines:
- Soldering iron (only applicable if you change the LED Strip)
Interested in finding out more? You can check out the full tutorial by Ingo Lohs on Hackster.io!
Universal Remote Control

With switch buttons being applicable in very much all that involves a circuit, a single button press on the remote in this project will convert it to precise Sony IR signal combinations (E.g. Turn on the TV and then switch channels). Impressive? Here’s what you need!
Hardware components:
- Arduino Uno
- Grove – Base Shield
- Grove – Infrared Receiver
- Grove Button
- Grove 16×2 LCD (White on Blue)
- KEYES IR Remote control
- SONY IR Remote control
Software apps and other services:
- Arduino IDE
Interested in finding out more? You can check out the full tutorial by ScottC on Hackster.io!
Positive Habit Enforcement Device

Remember those new year resolutions you told yourself that you’re going to achieve? Well, chances are they’ll be broken before January ends. Hence, to avoid such behavior, you can build this device for behavior modification!
What do you need?
Hardware components:
- Particle Photon
- Driver DRV8825 for Stepper Motors for Theremino System
- Stepper Motor, Mini Step
- 2828 OLED
- Seeed Grove Micro Switch
- Pushbutton Switch, Momentary
Software apps and online services:
Hand tools and fabrication machines:
- 3D printer
Interested in finding out more? You can check out the full tutorial by Arduino “having11” Guy on Hackster.io!
Resources and Going Further
We’ve provided an Arduino code and tutorial for most of the other switches on the list as well. Here are its resources:
- Grove – Tilt Switch
- Grove – Micro Switch
- Grove – Magnetic Switch
- Grove – 5-way Switch
- Grove – 6 position DIP Switch
- Grove – Button
Summary
That’s all for today on switch and buttons. I hope with today’s blog, you get a deeper understanding of how you can easily control an LED with Arduino!