Everything You Need to Know about PCB Assembly Functional Testing
What device are you reading this article on? Is it a smart phone? Laptop? Tablet? Take a moment and think about how amazing it is that the device in front of you works the way it does with little to no faults. How does that happen? There are hundreds of steps to get a high quality, robust product in your hands starting all the way from concept and through production.
When designing a product, design is only half the battle. You can do all the due diligence you can before committing to making hundreds, thousands, or even millions of your product. But, if you do not have a way to make sure each of those units works the way you intend, might as well not make it at all.
The other half of the battle is testing, to make sure you ship a quality, functional product to your customers. That starts with designing for testability and performing a functional test on each and every part of your product.
Test Early, Test Often
Typically, an electronics design requires a PCB (Printed Circuit Board) which needs to be fabricated. If there are defects in the PCB, there is no hope for rest of the design. Many manufacturers have some built-in processes that make sure the design that is being manufactured is exactly what you provided.
Getting the PCB right is the first step in mitigated any issues along the way. Seeed Studio provides an inside look on how circuit board is created on their YouTube channel.
Seeed Studio recently started offering free functional testing when you use their PCB Assembly service. You provide them with a test plan and they will test one of your fully assembled PCBAs!
Automatic Optical Inspection (AOI) and Electrical Test are your best friends at the PCB fabrication level to catch any defects. AOI will visually check the design against the artwork that was provided and the Electrical Test will test for any erroneous open or short circuits by physically probing the PCB.
If your manufacturer assembled the PCB, they would usually have another inspection process to make sure everything is right. Automated Optical Inspection will be performed to check for any assembly issues. If there are some complex component packages, a x-ray image will check everything looks good under the part.
Even after these two big steps, there are things can go wrong and therefore it is extremely important to perform a functional test on every completed PCB assembly before it is installed in your product or released to the wild.
What is PCBA Functional Testing?
Now your design has made it through all the above steps, it is time to test. When your design is tested, it should exercise all the elements in your design that makes it operate correctly. This kind of testing is called Functional Testing. Below is everything that is typically tested in a functional test to confirm that the design works as intended.
Voltage & Power
Nothing is going to work if your design is not getting power correctly. You will need to confirm that your design is getting the correct voltages. If your voltages are wrong, there is no hope for the rest of the design and you’ll need to troubleshoot what is going before your move forward.
The electrical test that was performed during PCB fabrication should catch any open or short circuits on your PCB. Powering your board for the first time is nerve racking no matter how many times you do it.
Microcontrollers & Processors
You would be hard pressed if you did not find some kind of brain in a design in the world today.
Microcontrollers are found is many design because they are very powerful and cheap.
When using a microcontroller in your design, it will need to be programmed. This can happen by the chip manufacturer before the part is even soldered onto the board for a fee or additional lead time or both, but it is also important to have a way to program with an In-System Programmer (ISP).
For the initial units, it is best to program them yourself and have a way to debug any issues that might arise by using an ISP while you interact with the circuit.
Signals & Sensors
Most designs will include some kind of signal whether it is being generated as an output from your microcontroller or coming from some sensor.
Most likely, you will need to program a microcontroller before your design is working as intended. Let’s assume that your microcontroller is programmed and it is communicating to all the peripheral components.
When you microcontroller is programmed, you should be able to test the remaining aspects of your design.
User Interfaces
Most users will not care or even think twice about how your product works, they just want it to do all it promises it will do.
Testing user-facing components is critical to make sure your product will work for the end-user, as intended. This includes switches, buttons, LEDs, screens, capacitive touch, or whatever the user will be interacting with to make your product work for them as you promised.
How to Test
Before I get into how a functional test is performed, it is a good idea to witness how it has been performed in the past. The best way to see testing in action is to visit a manufacturing facility that produces a similar product as yours and see the entire production line up to the point that box and stack the product on a pallet.
Ask questions if they are willing to answer and be curious. You will learn something new that might save you headache later on.
Alternatively, there is an amazing video of a popular tech YouTuber walking through a manufacturing facility, detailing what it takes to produce a smartphone. A staggering 100+ people have their hands on every product before it leaves the facility.
Functional Test Plan
It is important to think about testing as early as possible so you can bake it into your design. While creating a block diagram of your design, think about how each element might be tested and what it would mean for it to function correctly.
Jot down notes about how each aspect might be tested. This will put you in a “design for testability” mindset throughout your entire design. It will force you to include testing aspects in your schematics, PCB layout, and even the code for your microcontroller.
Imagine your completed design. How will users interact with it? All of those user-facing features only function when the underlying design works.
For example, a user touches the capacitive touch, what do you expect that action to do? Maybe it wakes up a screen or turns on an LED, then tells the microcontroller to perform an action.
You will quickly see that this action will require that all your components are getting the proper voltages, the capacitive touch sensor is installed correctly as well as the LED, and the microcontroller is programmed and performing as expected.
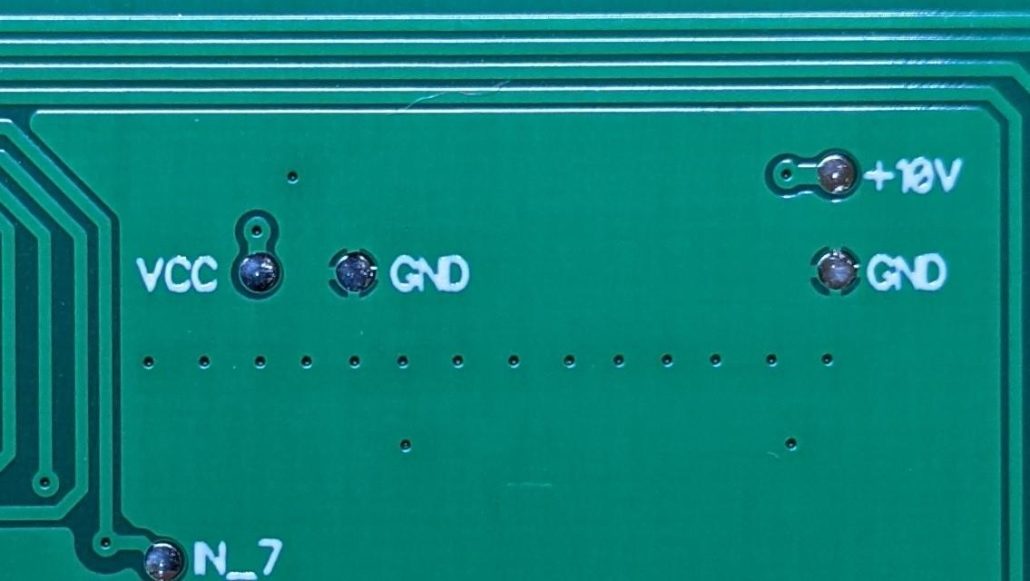
Test Points
Once you understand what needs to be tested, there needs to be a simple way to physically measure each aspect of the design.
Test points are just pads on your board that are specifically include to easily probe. You do not want to rely on probing the pin or pad of a component for various reasons.
There are no rules on the size of these pads but they should be large enough to easily make contact with a test probe.
In-System Programming
If you take a look at the guts of any sufficiently sophisticated product, you might find a programming header or a vacant spot on the PCB where a programming header might go.
This header is typically used to program a microcontroller when it is already installed on the PCB, hence the term “in-system.”
In a mass production scenario, it does not make sense to install this header. It is there for the designer for debug purposes and is not installed during production to eliminate the cost.
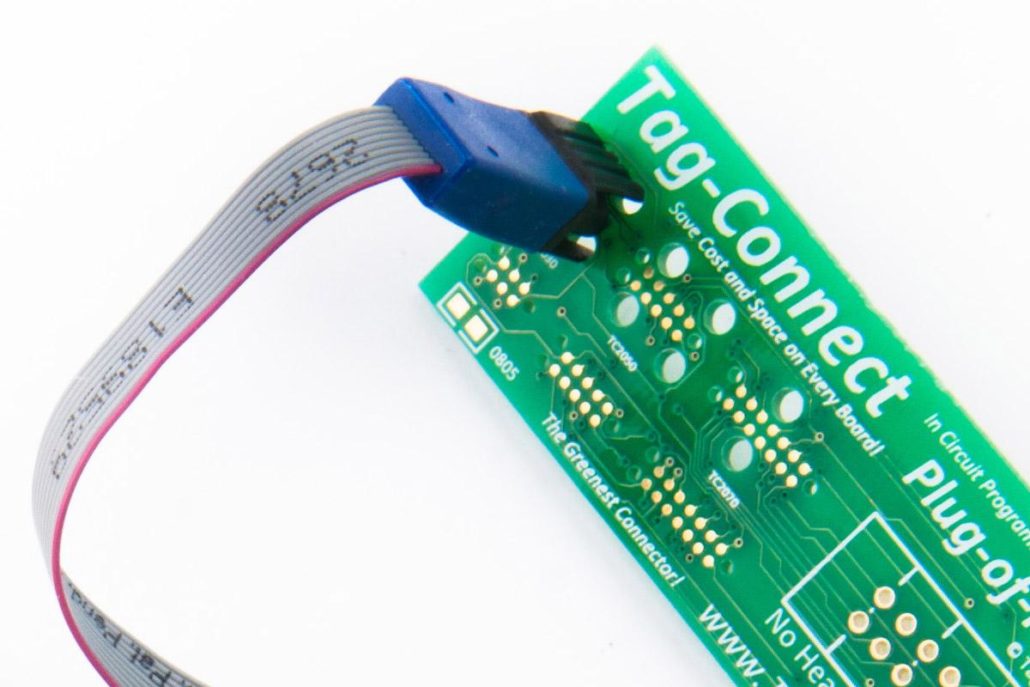
There are many ways to accomplish this in-system connection and one of my favorites is using the Tag-Connect system. This eliminates the need for extra components on the board. I have a few of these special cables laying around which I can use to connect to all my boards because I use the same Tag-Connect footprint on all my designs.
Test Fixtures
For early prototypes or lower quantities of your design, it makes sense to manually test each board by yourself. You will thank your future self for going through this exercise because it allows you to appreciate and understand what it takes to confirm your product is functioning properly.
Humans are typically bad at repeatability so having your test plan laid out, even with checkboxes, helps you not skip any steps.
This manual approach works well if you can justify the time it will take to test all your boards. When you start to scale, automation will be your best friend.
If you decided to tour a manufacturing facility, you no doubt saw some automated tests being performed by specialized fixtures. These fixtures become a product in and of itself. They usually involve a computer, a control board, an enclosure, and user-interface. It may not be as flashy as your product, but it is just as important and sometimes even more complex.
Construction
A text fixture that is intended to be used over and over again needs to be robust in both function and construction.
Some test fixtures can be a combination of metal enclosures, 3D printed parts, or even 2x4s but the end goal is the same, it needs to perform the same test repeatedly and provide results.
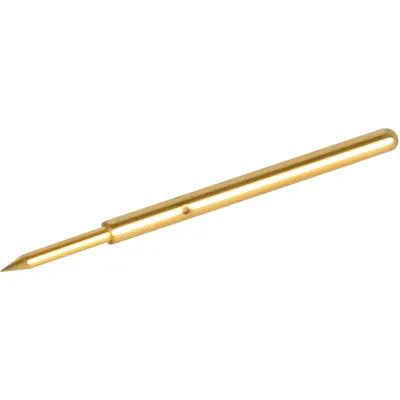
A popular way of testing a design is to clamp it down against some spring loaded, conductive pins that connect your boards test points to the text fixture control electronics. A fixture should mechanically align your board to these pins for max repeatability.
Automate as Much as Possible
The ideal text fixture would be one where you can quickly drop your board in, clamp it down and press a go button. The text fixture should perform everything necessary to qualify your board.
Taking the human out of loop as much as you can will increase your chances of success. When physically buttons need to be pressed on your board, use a solenoid to physically push the button that is controlled by the text fixture.
If your design has an LED that needs to be a certain color, include a color sensor in your fixture that is designed to detect the colors you expect.
All of this increases test fixture complexity but it completely worth the upfront effort. You will thank yourself.
Testing Interfaces
Another key aspect of test fixture design is making it self-reliant. You do not want to rely on your manufacturer to have a dedicated computer to run your test fixture. They may not have the correct software, it may be an old and slow computer, or it just might crash at any given moment.
Your test fixture needs a brain and computers are cheap, small, and are more than enough to operate your text fixture. Most all test fixtures will need to run from a computer which will execute your test program.
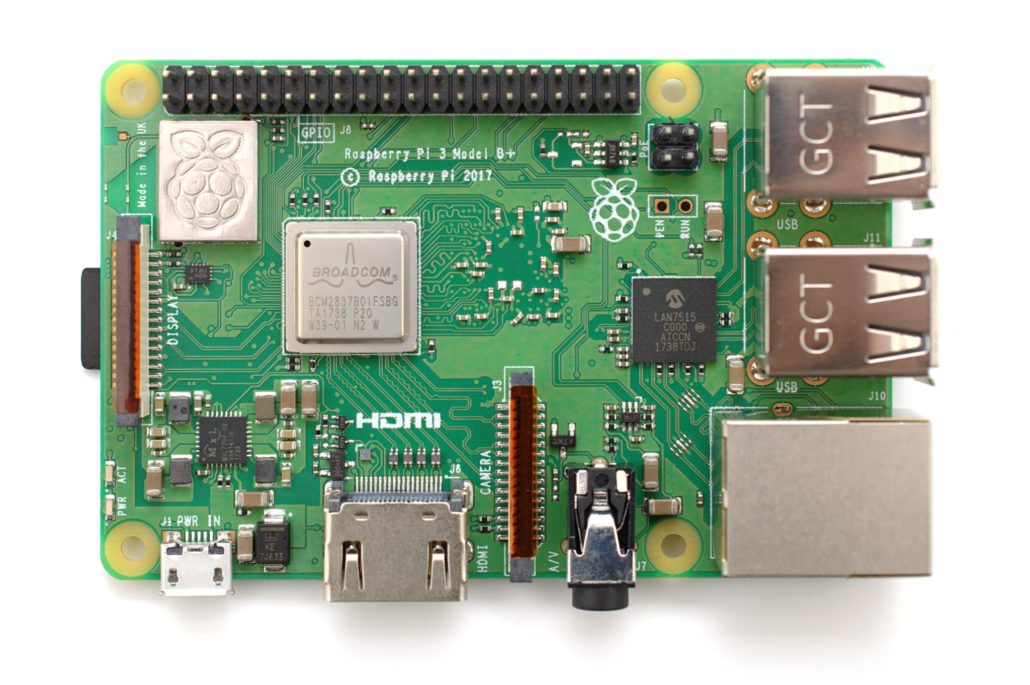
A Raspberry Pi is an excellent choice for your test fixture computer. It is a compact computer that has an easy way to interface with peripheral devices via the header with all the GPIO, power, and communication available.
The most popular operating system for the Raspberry Pi is Linux and if it’s good enough for Mars, it is more than enough for your test fixture.
The Raspberry Pi will pair nicely with an interface board that extends the capabilities of the Raspberry Pi to run specific test on your unit under test (UUT). Just like raspberry pie and whipped cream.
Supplying your own computer eliminates any compatibility issues that your manufacturer’s unknown computer might have. There is no guess work because you set up the computer exactly how you want, they just have to plug it in.
Redundancy
To cover yourself even further when it comes to being successful during production, consider building two or three identical text fixtures.
This kind of redundancy will save you if the worst happens, such as a test fixture breaking down. Imagine if you only had one text fixture lined up to test thousands of your boards. The test fixture is the gateway between production and revenue for your business.
If your test fixture breaks down, your board cannot be tested, and therefore cannot be installed into your product. Production comes to a screeching halt until the test fixture is fixed or you send another one.
Send at least two test fixtures to your manufacturer and keep one for yourself to debug problems that might arise in parallel.

Make it Easy, Make it Obvious
Unless the robots have completely taking over everything, often you will have humans pushing your product through production. Someone will physically load your board on to a test fixture and tell it to “go!”
Labor and time are costs that factor into how much your product will ultimately cost to make so you want to make everything as quick and seamless as possible.
Design your test fixture in a way to it is obvious to operate. Include a repeatable method to load the board into the test fixture, an obvious button to press to start the test, and an obvious way to know if the board passed or failed.
This might include an obnoxiously large start button and large green and red LEDs.

Identifying Issues
Testing everything above will quickly find any issues or manufacturing defects in your design. It is important to detail everything that needs to be tested in a test plan that can either be manually or automatically performed.
There are several issues that might arise due to manufacturing defects, wrong components, and even faulty components.
Common PCB Assembly Issues
While automated PCB tests can find initial issues, a functional test will make sure only good PCB assemblies make it into your product.
Some common issues during manufacturing may include the following:
- Soldering – Too much solder, too little solder, and cold solder joints can cause connectivity issues. Too much solder could cause a short, too little solder could cause an open circuit, and cold joints can give you intermittent connectivity.
- Components – Sometimes the components themselves can be a point of failure. Perhaps a component was installed backwards or the wrong component was installed. Each component manufacturer should have a quality assurance process but every once in a while, a bad seed will slip by or get damaged in the assembly process. Components can also unexpectantly shift during the reflow process.
- Environmental – Some components are sensitive to humidity and if they were not properly stored before PCB assembly, sending them through a reflow process can cause failures. A circuit may also be mishandled during manufacturing and get physically damaged. Most manufacturers are mindful of all the environmental issues that arise during the fabrication and assembly processes.
A lot of manufacturing issues can be mitigated with proper PCB design, but a functional test should catch everything else.
What Can’t Functional Testing Do?
The caveat with functional testing is that it assumes that you have done your due diligence and prototyping before production. You could potentially work these into a test plan but would certainly affect the complexity of your test and not to mention the time it would take.
Functional testing will not fix any issues that were overlooked in the design phase. Environment may be something that affects your design such as ultra-cold or hot temperatures or humidity levels. These types of tests can be run using a temperature chamber and “soak” your design at temperature extremes. Each component does have a temperature and humidity specification that should be followed during the design process.
Electromagnetic interference is another design aspect that should be tested before production. This can be tested using your own equipment or you can send your design to a testing lab. All electronic products sold in the United States need to go through FCC testing whether it is an intentional radiator (i.e. Wifi or Bluetooth) or non-intentional radiator. This test will find any noise that your design is emitting and determine whether it is something that needs attention.
Conclusion
Testability of your product can make or break your production efficiency. Think of your test fixture as the last line of defense for your product, and therefore your business, that ensures you get a quality product into the hands of your customers.
I cannot imagine shipping something that has not been tested. Your customer should not have to find the problems, your product should bring them joy and not headache, there are expectations.
The forethought you put into producing your product will ultimately affect your bottom-line and reputation of your business. The adage; garbage in, garbage out, still holds true and you are in control of what goes into production so what comes out is not a pile of stinky garbage that is riddled with problems.
Treat testing with as much thought and purpose as you do with your product and you will increase your chances of success tenfold!