Understanding Micro Servo: A Complete Beginner’s Guide
When you start making small electronic projects, you often need a way to make something move – maybe a tiny arm, a small door, or a sensor that turns. One of the easiest tools for this is the micro servo.
It’s small, low-cost, and works with almost any beginner board. Even if you have never used a motor before, a micro servo is a great place to start because it is simple to connect and reacts quickly to commands.
In this guide, you’ll learn what a micro servo is, how it works, and how you can use one in your own projects, even if you’re just getting started.
What Is a Micro Servo?
A micro servo is a small, smart motor designed for precision. Rather than spinning continuously like a fan, it rotates to a specific angle and holds that position – like turning a robot’s head or adjusting a camera sensor.
Compact, affordable, and easy to use, it’s the go-to component for adding controlled motion to electronics projects, from beginner-friendly creations to advanced robotics.
How Does a Micro Servo Work?
A micro servo motor works by constantly checking where it is and making small adjustments until it reaches the exact angle you’ve asked for. This is all thanks to a smart little feedback system inside.
At the heart of this system is a small sensor called a potentiometer, which measures the servo’s current position. When you send a command from a controller, the servo’s internal circuit compares your desired angle with the current one. If they don’t match, the servo gently turns the motor until the two positions align perfectly.
You send these commands using a signal called servo PWM – short for Pulse Width Modulation.
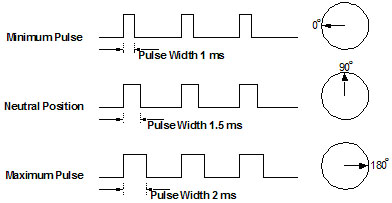
It’s basically a tiny pulse sent every 20 milliseconds. The length of that pulse tells the servo where to go:
- A short pulse moves the output shaft toward 0°
- A medium pulse centers it around 90°
- A long pulse moves it toward 180°
The beauty of servo PWM is its simplicity. You only need one signal wire to control the servo, making wiring clean and beginner-friendly. With just a few lines of code from a compatible board, you can make a micro servo motor move smoothly and hold its position with precision – no wonder it’s such a favorite in robotics, RC models, and all kinds of DIY electronics projects.
How to Choose the Right Micro Servo for Your Project
Now that you understand what a micro servo is and how it works, the next question is simple: which one should you choose? When you shop online, you’ll usually find two main options: the classic standalone component and the ready-to-use module. Your choice often comes down to preference: Do you want the hands-on experience of wiring, or do you want something you can plug in immediately?

Key Difference #1: Movement Style – 180° or 360°?
Before thinking about wiring, decide how you need it to move:
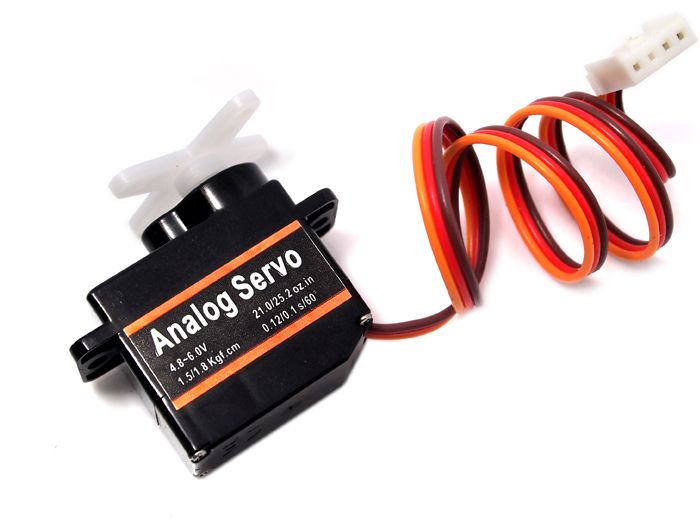
- 180° Servos (Positional): This is the most common micro servo motor. It swings back and forth and stops at precise angles – perfect for a robot arm, a panning sensor, or anything requiring exact servo control.
- 360° Servos (Continuous Rotation): These spin in full circles. You control their speed and direction, making them ideal for wheeled robots or small conveyors.
Key Difference #2: Connection – Your Two Beginner-Friendly Options
This is what makes the biggest practical difference in your project.
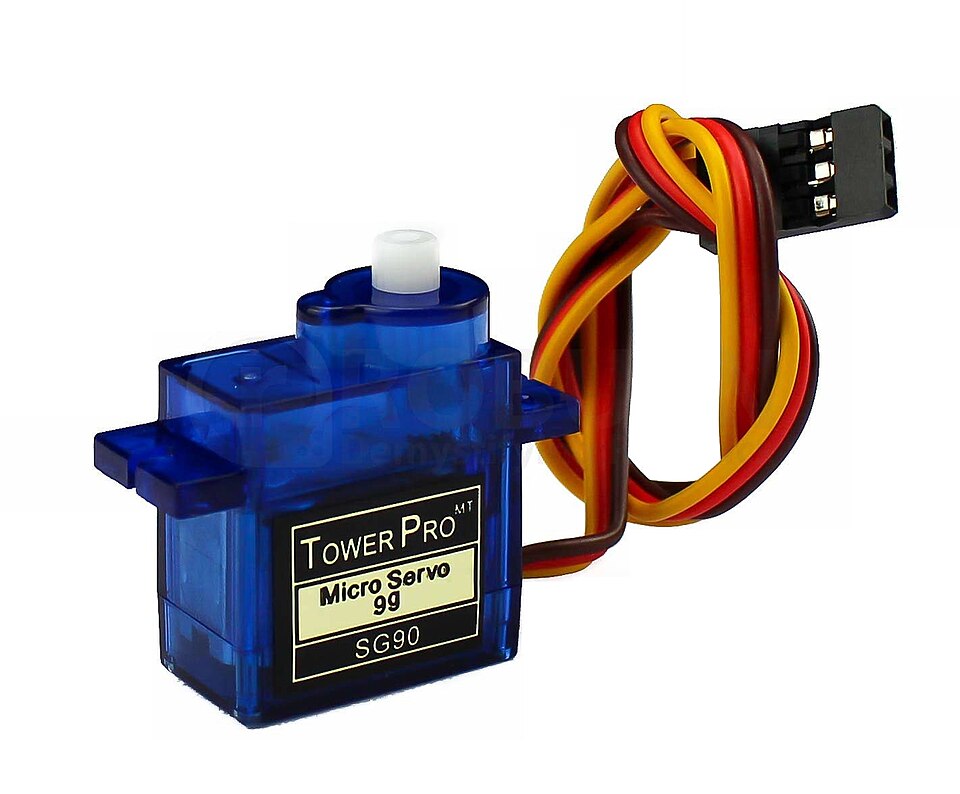
Option A: The Classic Component – The sg90 micro servo
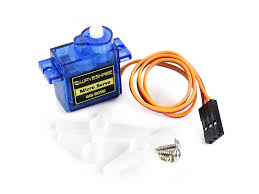
When people search for a micro servo arduino, the SG90 is often the first result. It’s affordable, reliable, and the universal standard. You get the motor with three loose wires (red, brown, orange) that you connect manually to your board. It’s the best way to learn the fundamentals of wiring and servo PWM signals.
Option B: The Plug-and-Play Module – The Grove Servo Module
For a faster, mistake-proof start, consider a module. The Grove – Servo from Seeed Studio integrates a compact micro servo on a small board with a secure 4-pin Grove connector. Instead of three loose wires, you use one sturdy Grove cable. It only fits one way, eliminating wiring errors and saving time – perfect for clean, rapid prototyping.
Quick Comparison :
| Feature | SG90 Micro Servo (Component) | Grove Servo Module |
| Format | Standalone motor with wires | Motor + board with Grove connector |
| Connection | Manual wiring (3 wires) | Plug-and-play (1 cable) |
| Best For | Learning wiring, flexible setups | Quick builds, clean wiring, avoiding errors |
| Main advantage | Lowest cost, universal compatibility | Zero wiring mistakes, faster setup |
| One thing to know | Requires careful pin connections | Needs a Grove-compatible board (e.g., Base Shield) |
Important:
No matter which one you pick, you control them the exact same way. You’ll use the same servo PWM signal and the same Arduino code. The only difference is how you plug it in.
Tutorial: Getting Your Micro Servo Moving with Arduino
Ready to bring your micro servo motor to life? A controller board, like the widely popular Arduino, is the perfect brain for your project.
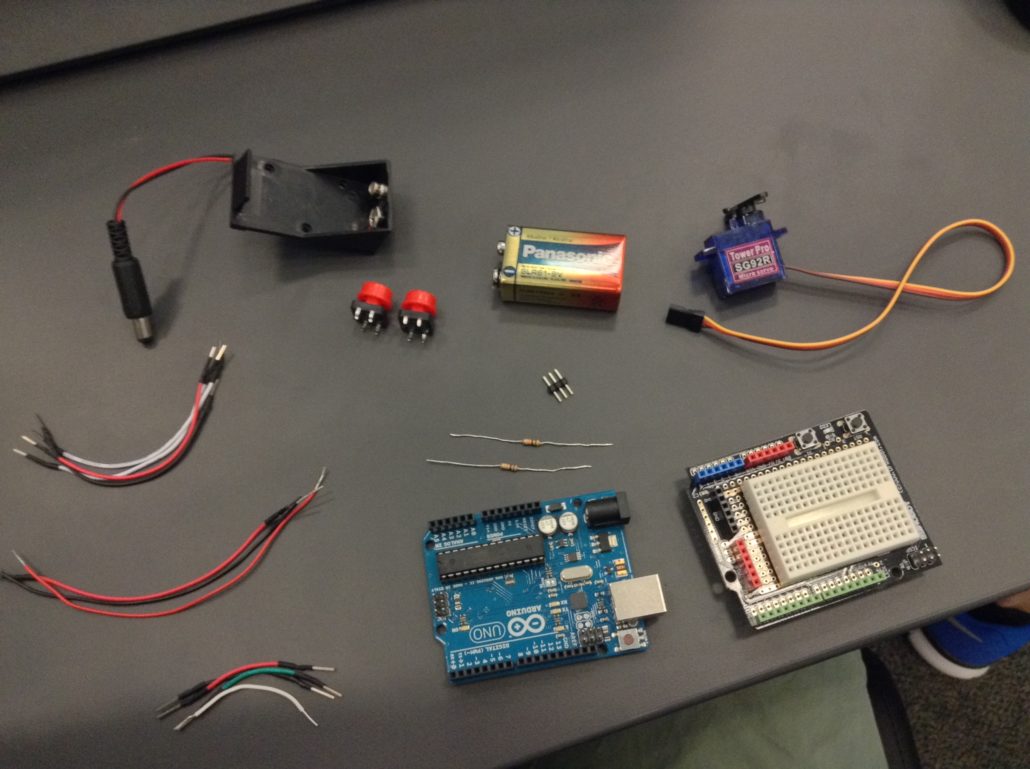
Here is what you will need :
- An Arduino board
- A micro servo motor (like the SG90)
- Jumper wires
- (Optional) A Grove Base Shield and a Grove Micro servo cable
Step 1: The Wiring (Physical Connection)
Connecting a standard micro servo is easy. It has three wires:
- Brown or black for ground
- Red for 5V power
- Orange or yellow for the signal
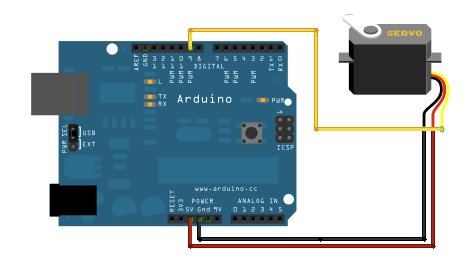
Tip: Always double-check your connections! Plugging the wires into the wrong pins can damage your servo or Arduino
If you have a Grove Micro servo, it’s even easier. Just plug the 4-pin Grove cable into the servo and connect the other end to a Grove port (like D9) on a Grove Base Shield attached to your Arduino. The cable handles power and signal safely – no wrong connections possible.
Step 2: Essential Code (Servo Control)
Once the wiring is complete, upload this simple program. It tells the micro servo Arduino setup to move between 0°, 90°, and 180°:
#include<Servo.h>
Servo servo;

void setup() {
  servo.attach(9);
}

void loop() {
  for(int i=0;i<180; i++){
    servo.write(i);
     delay(15);
  }
  for(int i=180; i>0; i--){
    servo.write(i);
     delay(7);
  }
}
After uploading, your micro servo arduino setup should sweep smoothly between positions. This basic servo control sketch is your foundation for more complex projects!
Fixing Common Micro Servo Problems
Micro servos can sometimes behave in unexpected ways, but most issues are easy to solve once you know what to check. One common problem is shaking or jittering. This usually comes from an unstable power supply. Make sure the servo receives a steady 5V, and always share the same ground between the servo and the control board. A loose wire can also cause small vibrations, so it’s worth checking the connections one by one.
Another frequent issue is a servo that doesn’t move. This often means the signal wire is connected to the wrong pin, or the code isn’t sending a clear angle. Testing simple angles like 0°, 90° and 180° can help you confirm everything is working.
You may also notice overheating if the servo is forced to hold a heavy load or pushed too far toward an extreme angle. Reducing the weight or adjusting the position usually fixes the problem.
A few quick checks can solve most servo issues without much trouble.
Simple Project Ideas to Get Started
Trying small projects is the best way to understand how a micro servo motor behaves in real situations. Here are a few beginner-friendly ideas that don’t require advanced skills.
Mini Robotic Arm

A simple robotic arm is a great project to start with. Each micro servo controls one joint, letting you move the arm up, down, or sideways. You can trigger the movements with buttons, sliders, or even basic sensors.
Pan-Tilt Camera Mount

Using two micro servos, you can build a camera mount that moves left and right (pan) and up and down (tilt). It’s perfect for filming small experiments or making a simple tracking system.
Light-Controlled Smart Blinds

Here, the servo adjusts the angle of blind slats depending on the brightness in the room. A basic light sensor and one servo are enough to make your first ”smart home” project.
Final thoughts
Micro servos are incredible little devices that bring motion and engagement to your electronics projects. By understanding servo PWM and choosing the right model, you have the foundation to start building.
The best way to learn is to practice. Grab a servo, connect it, and make something move! For a smoother, safer start, consider the Grove ecosystem and the Grove Servo, which make connections virtually foolproof.
>> Read more

Add your description here…