How to Add an E-ink Display to Arduino?
E-ink displays are the favorite choice for low-power electronics. Their ability to hold an image without consuming power and maintain high contrast images makes them perfect for data dashboards, smart labels, weather stations, and more. When paired with compact and capable boards like Seeed Studio’s XIAO ESP32 series, they become even more attractive for modern DIY and IoT projects.
Many makers find it challenging to add an e-ink display to Arduino for their DIY projects. If you are also one of them, this tutorial is for you.
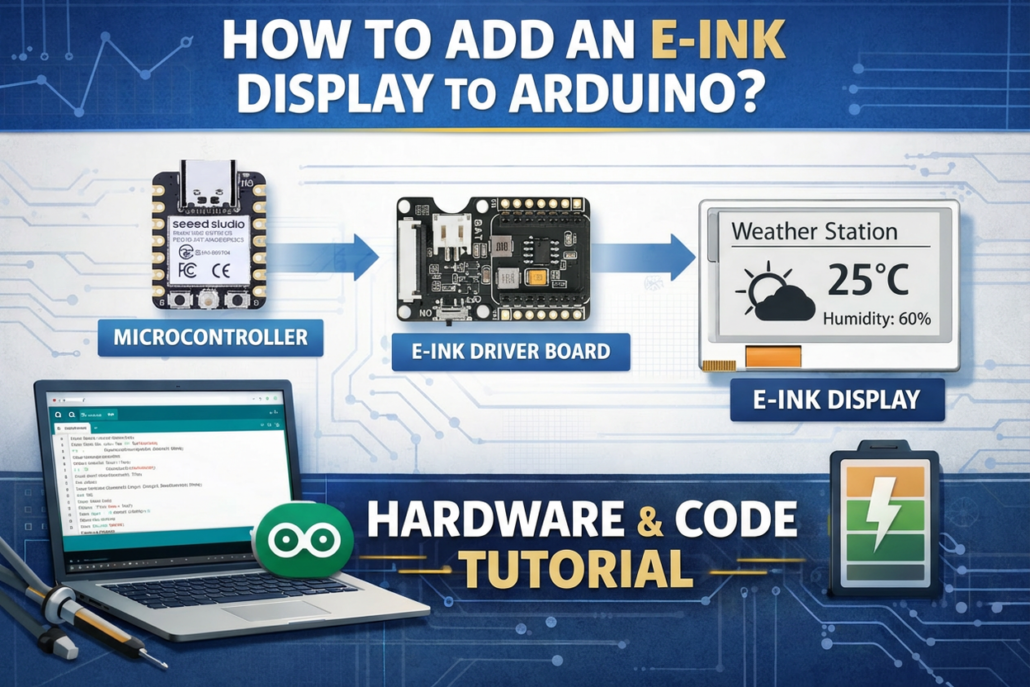
E-ink displays are compatible with widely used microcontrollers. All it requires is using a dedicated ePaper driver board to act as an intermediary and transform complex voltage and waveform generation into a simple plug-and-play solution.
In this tutorial, we will guide you step-by-step through the entire process using the XIAO ESP32 series and Seeed Studio’s accessible hardware ecosystem to eliminate that complexity. Read on till the end to learn how to create a functional Arduino ePaper in minutes, with sample code to display your first graphics and text. You will learn:
- Why e-ink? Why This Setup?
- Step-by-Step Guide to Add an e-ink Display to Arduino
- Conclusion
Why e-ink? Why This Setup?
E-ink display is bistable. It only requires high power consumption when the image changes, which OLED or LCD fails to offer. When the pigments are set, they require zero energy to hold that state indefinitely. This makes it best for battery or solar-powered projects that need to run for months.
The strength of e-ink display comes with a technical hurdle, i.e., it requires high-voltage and precise waveforms for the display that is complex to generate. That’s why in our e-ink display Arduino guide, we will use a specific three-part setup:
- A Generic Microcontroller: This is the project’s programmable brain. It is responsible for your application logic, sensor reading, and data processing. You code it using the familiar Arduino IDE.
- A Dedicated E-Ink Driver Board: This is the essential intermediary. Its sole purpose is to generate the necessary high-voltage signals and complex waveforms required to control the E-ink pigments.
- The E-Ink Display Module: This is the “digital paper” that displays your final text, graphics, or data.
This approach takes away the complexity and makes it quick to create projects.
Step-by-Step Guide to Add an e-ink Display to Arduino
First things first, the Arduino ePaper project is not rocket science. Seeed Studio’s integrated hardware ecosystem has done the heavy lifting. So, let’s get right to the four-step process to have an e-ink Arduino setup:
1.Hardware Preparation
Step 1. Material Selection
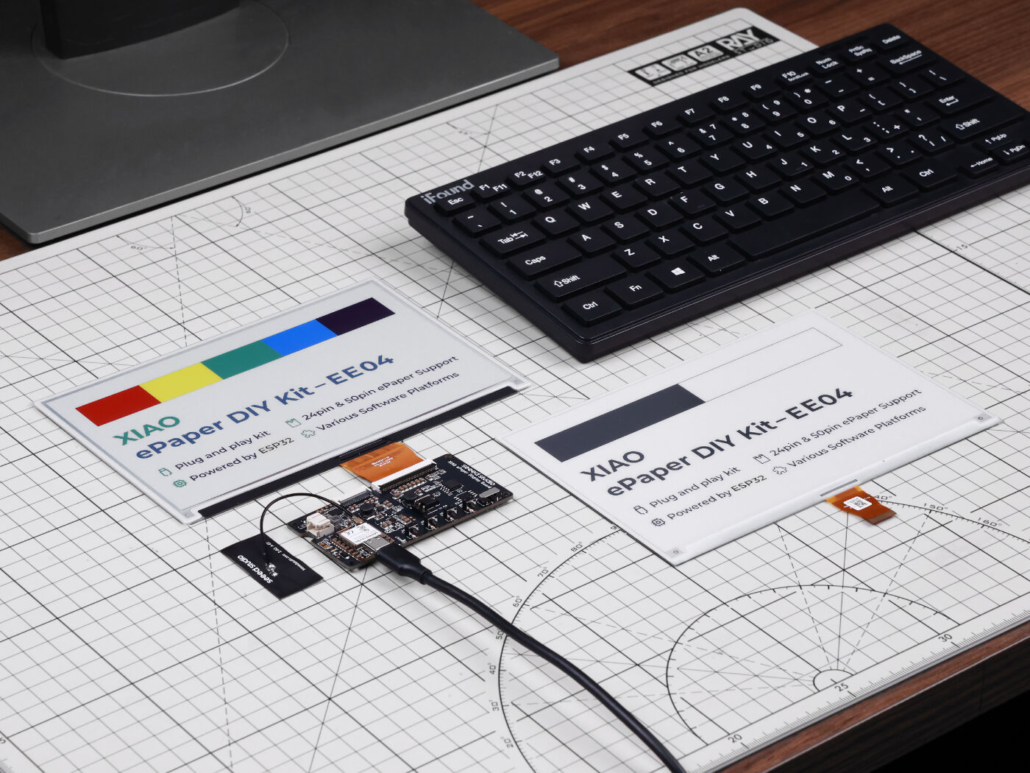
As mentioned earlier, there are three hardware components required to build an Arduino ePaper setup. We are using all these products from Seeed Studio, including:
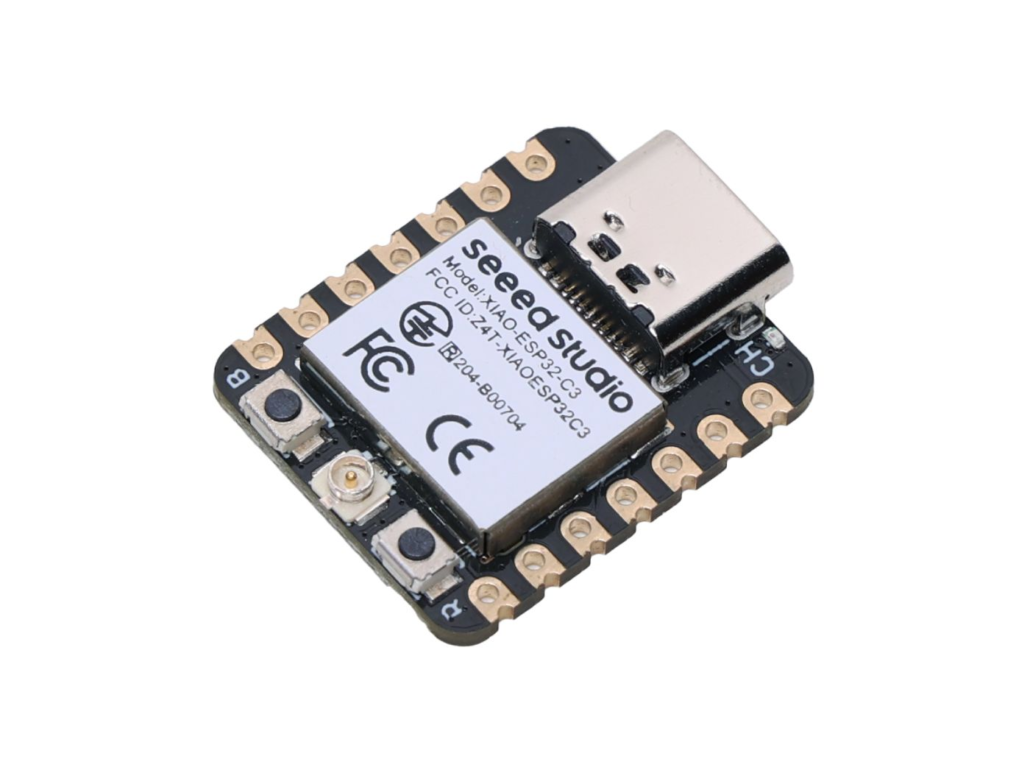
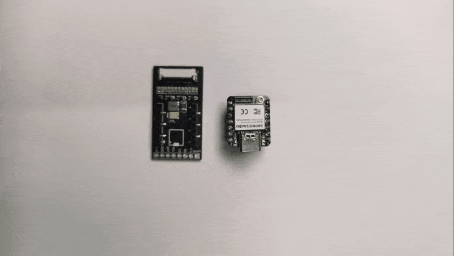
XIAO ESP32C3
Seeed Studio XIAO ESP32-C3 features a RISC-V architecture and supports Wi-Fi and BLE connectivity. It is useful for a wide range of IoT applications.
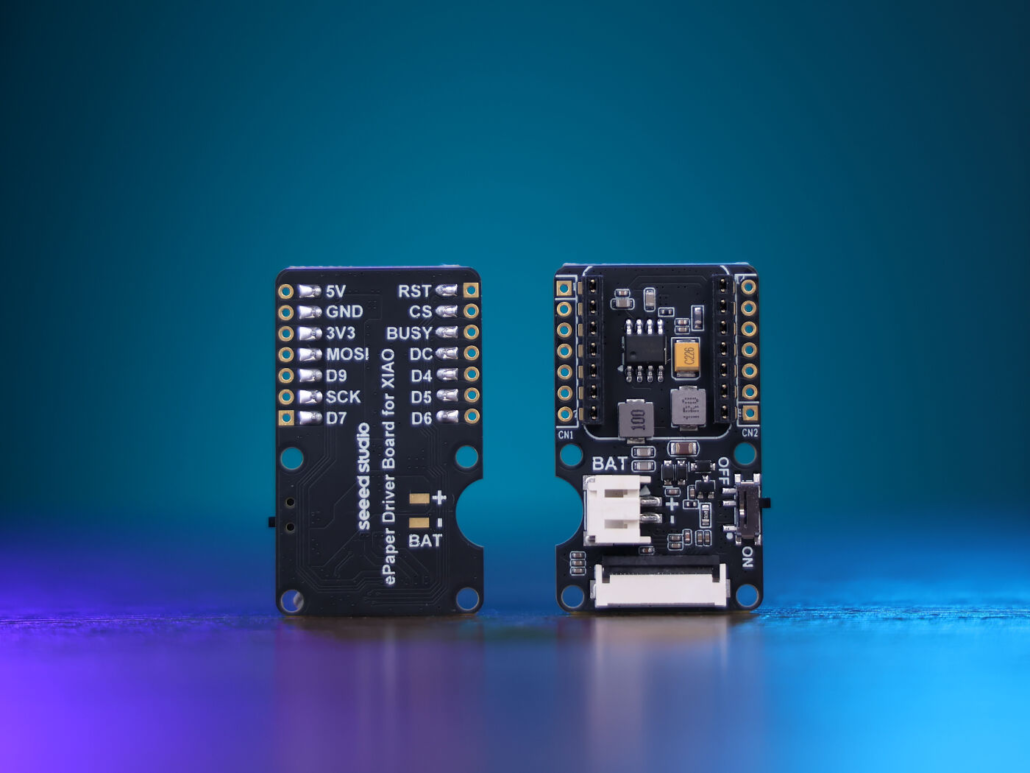
ePaper Driver Board
The ePaper driver board is a 24-pin FPC connector with a JST 2-pin BAT connector for easy battery connection and a built-in charging IC for safe battery charging. It is best for creating Wi-Fi-based digital photo frames.
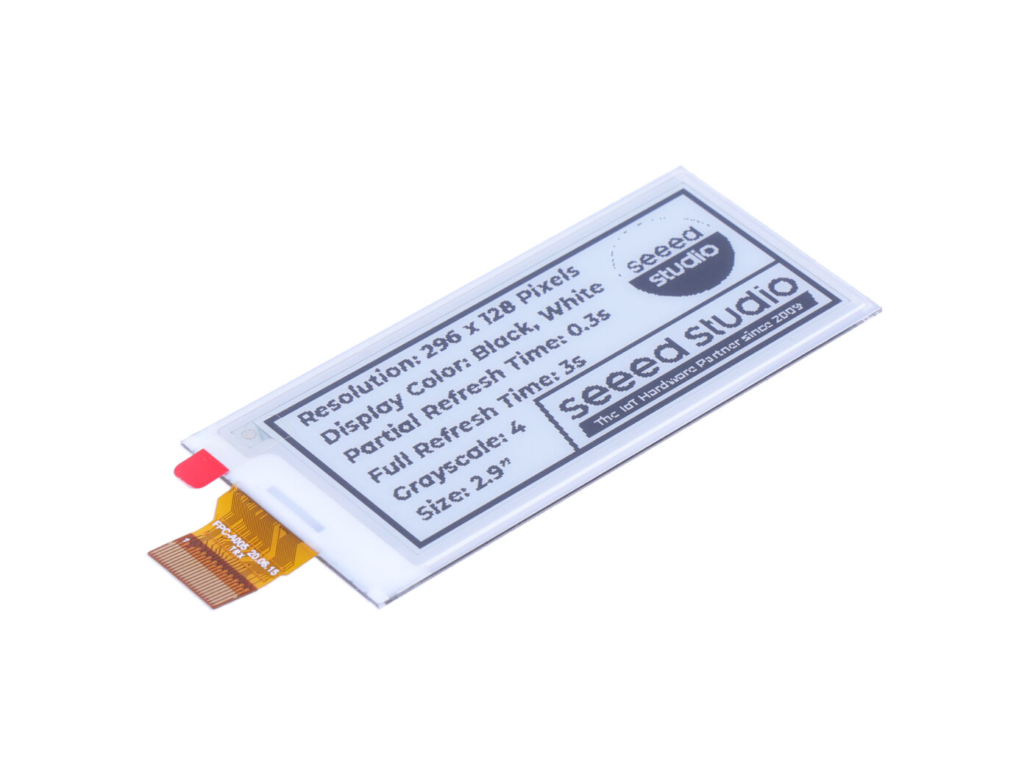
2.9″ Monochrome ePaper Display
The 2.9-inch monochrome ePaper display of Seeed Studio features 296×128 resolution and offers a black and white display with a 2.9-inch diagonal size. It also delivers excellent contrast and a fast refresh rate, which makes it useful for smart wearables, e-readers, and other portable devices.
Read more: Which is your best e-ink display for your home-assistant dashboard
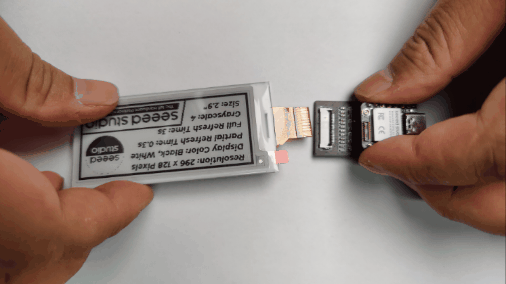
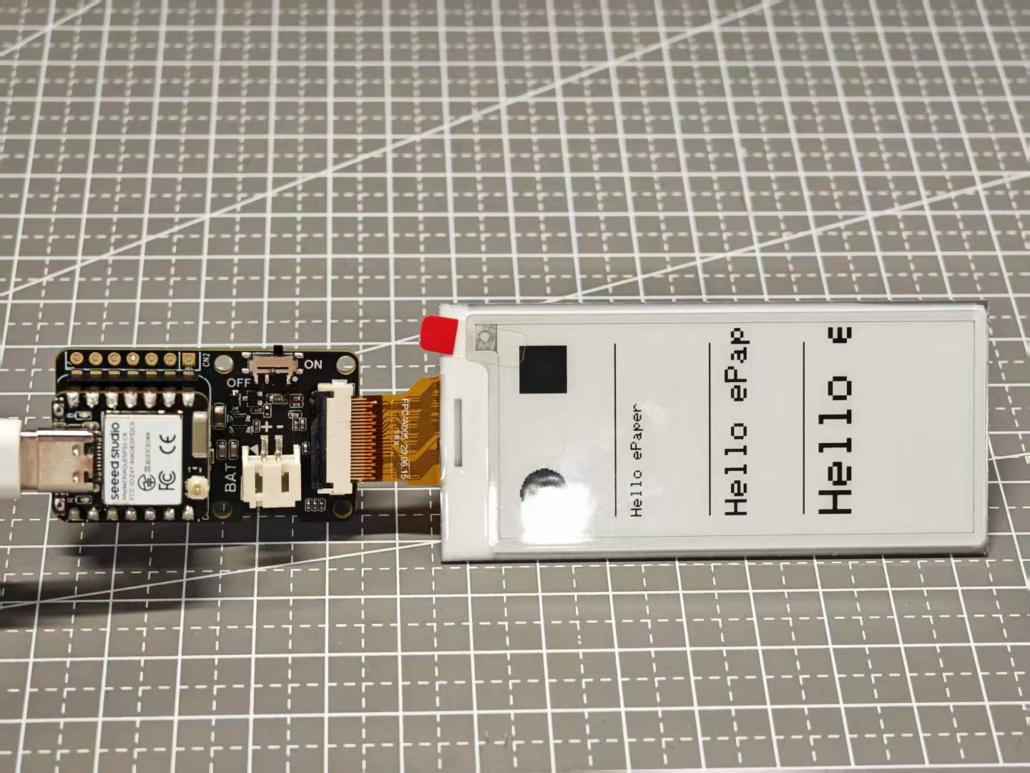
Step 2. Insert the XIAO into the ePaper Driver Board
Align the pins and insert the XIAO ESP32C3 into the XIAO socket of the ePaper driver board.
Step 3. Insert the ePaper Display into the FPC Connector
Insert your ePaper display into the board’s 24-pin FPC connector.
2.Software Preparation
We will use the Arduino IDE and configure the Arduino environment for the XIAO and add the on-board package.
Tip: If you are using Arduino for the first time, check out our guide on Getting Started with Arduino.
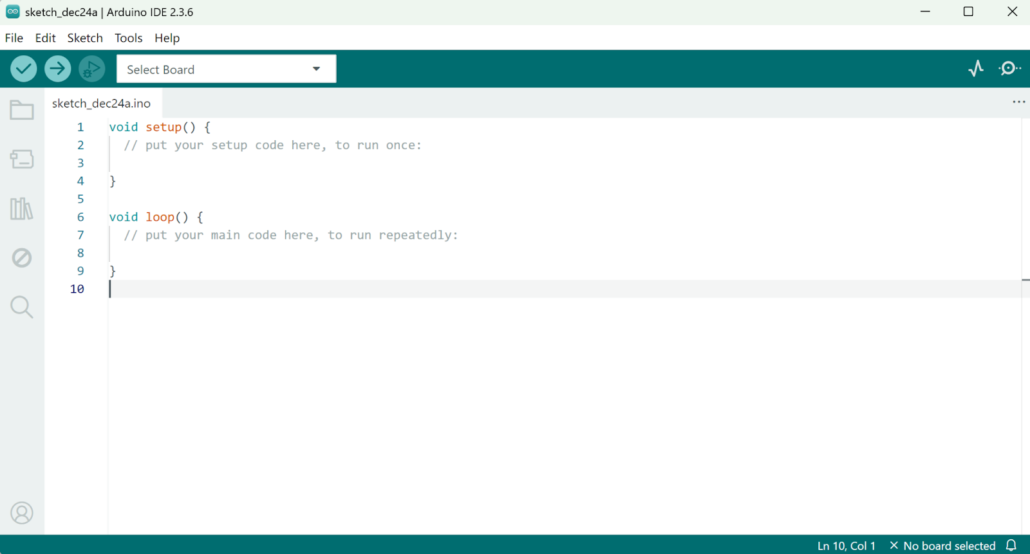
Step 1. Access the Arduino App
Download and launch the Arduino app.

Step 2. Add the ESP32 Board
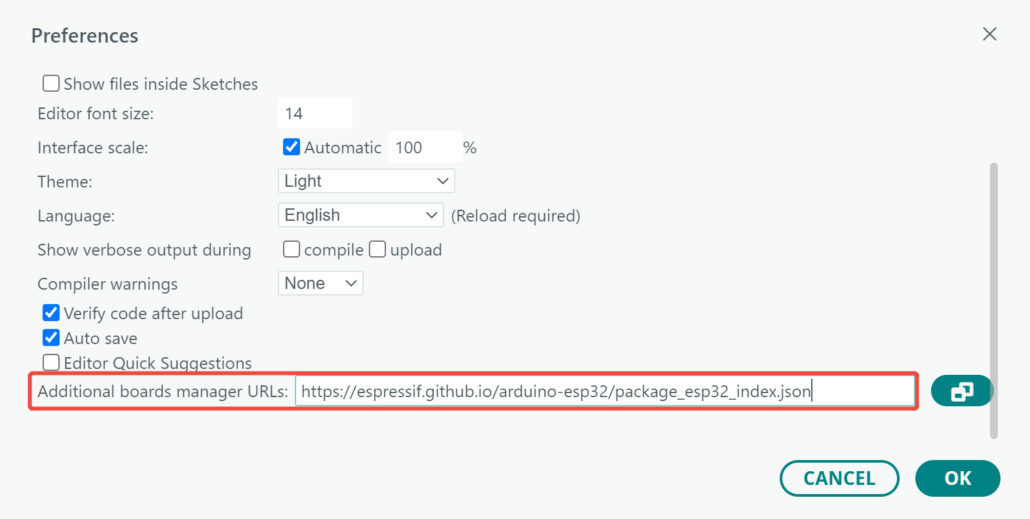
Add the ESP32 board package to your Arduino IDE. To do so, go to File > Preferences, and fill “Additional Boards Manager URLs” with the URL below: https://espressif.github.io/arduino-esp32/package_esp32_index.json
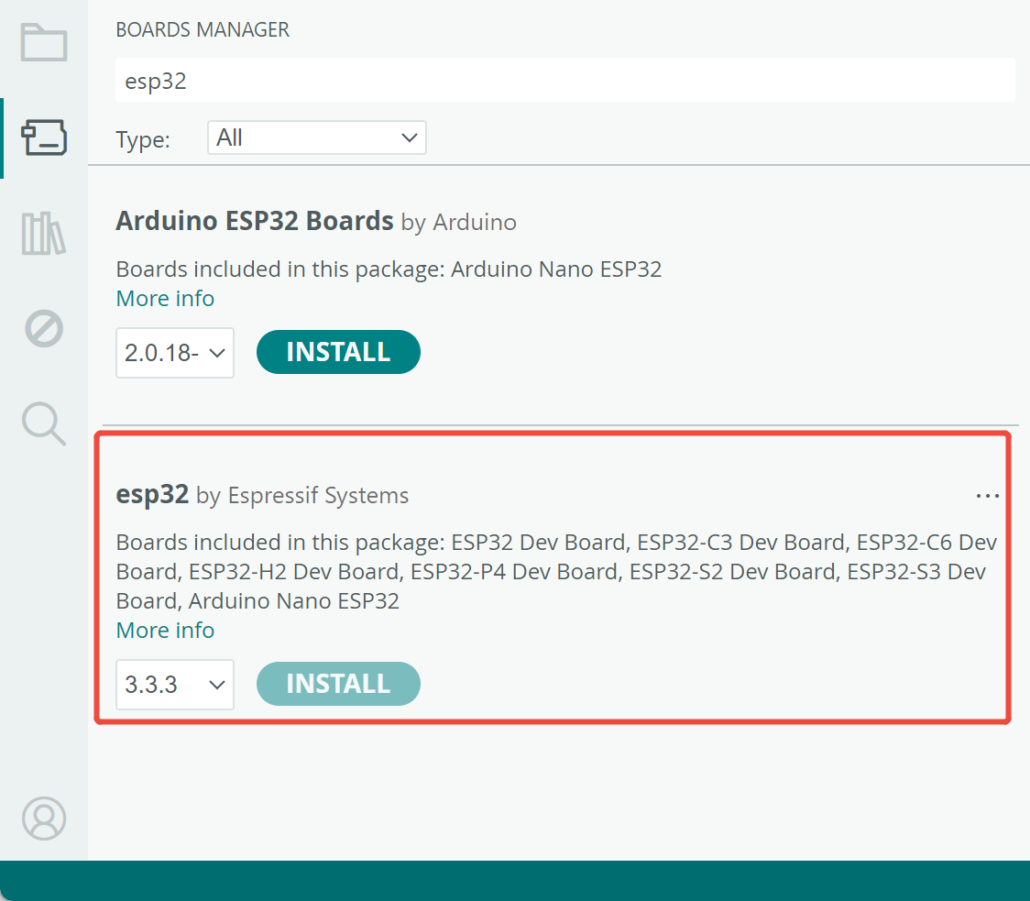
Next, go to Tools > Board > Boards Manager. Type the keyword “esp32” in the search box and install the latest version of esp32.
Step 3. Choose the Board and Port
Board
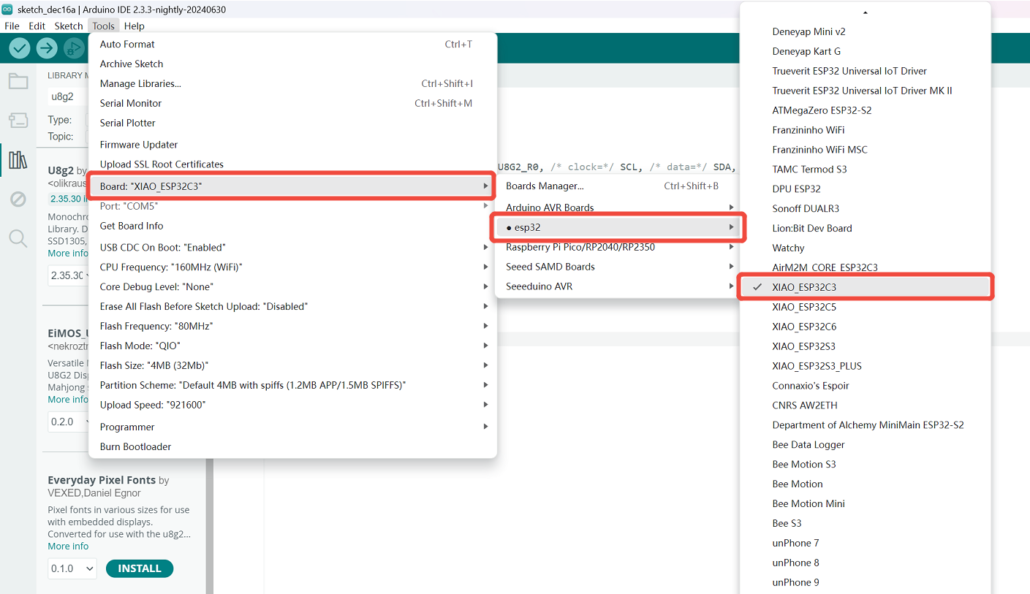
Go to Tools > Board > ESP32 Arduino and select “XIAO_ESP32C3”. You will find this board after some scrolling.
Port
Go to Tools > Port and pick the serial port name of the connected XIAO ESP32C3. This is usually the COM3 or higher (COM1 and COM2 are mostly reserved for hardware serial ports).
3.Install Seeed GFX Library
Step 1. Install Seeed GFX Library
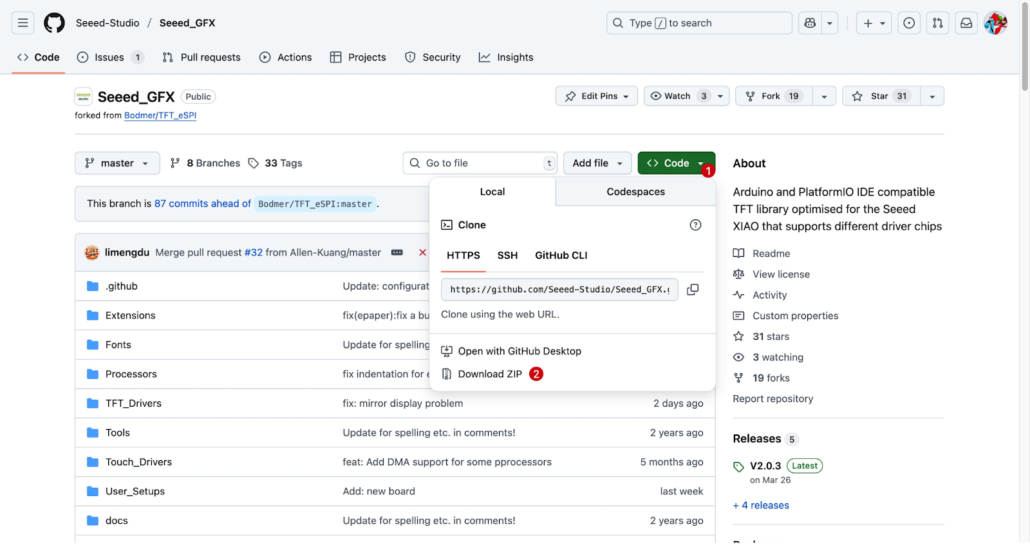
Use GitHub to download and install the Seeed GFX library.
Scroll down and open this link.

Pick your device type. Afterward, you will get some code. Copy them for later use.
Tip: If you choose the wrong device type, you won’t see any display on the screen. So, make sure you choose the right device type.
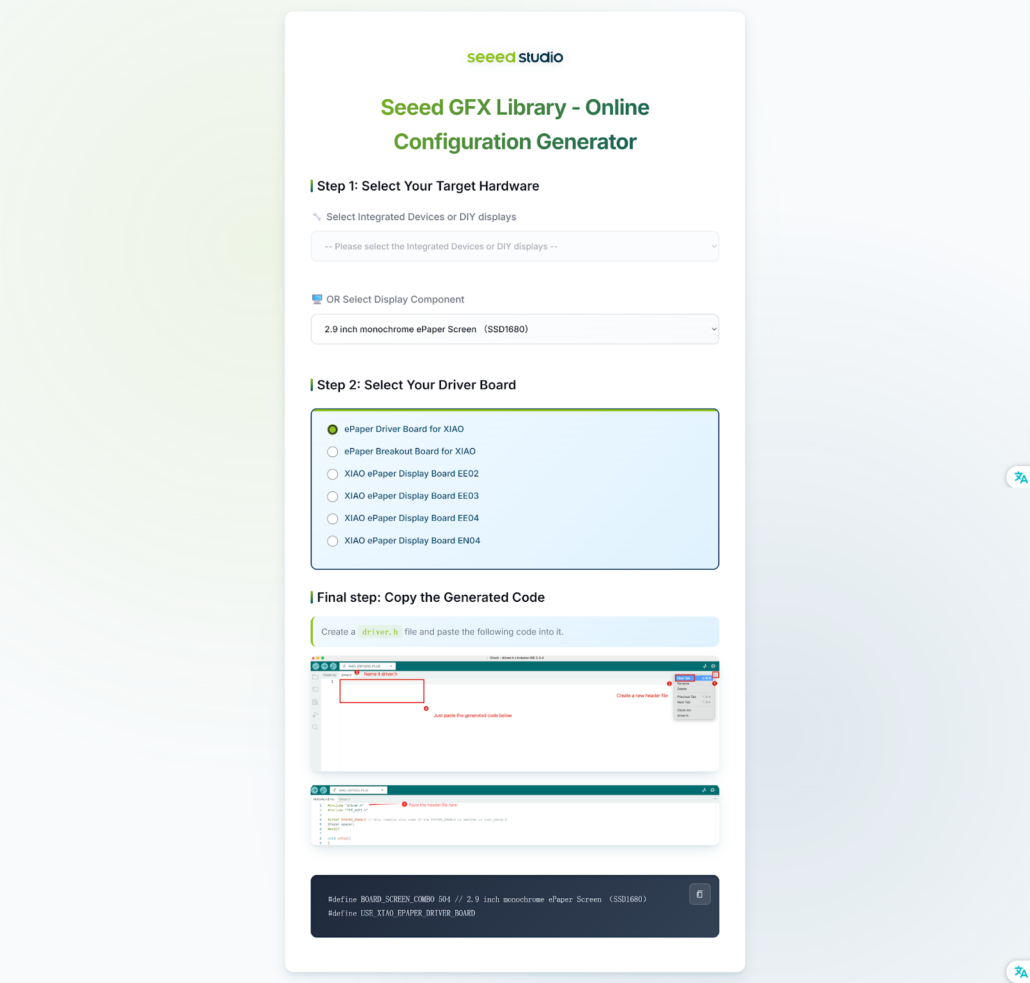
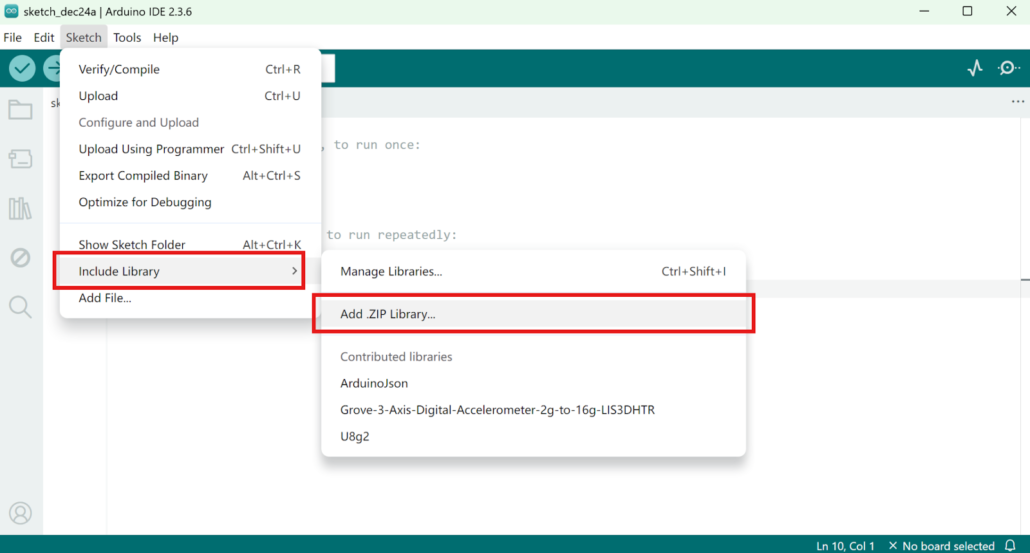
Once the library is downloaded, go to Sketch > Include Library > Add .ZIP Library and choose the downloaded library.
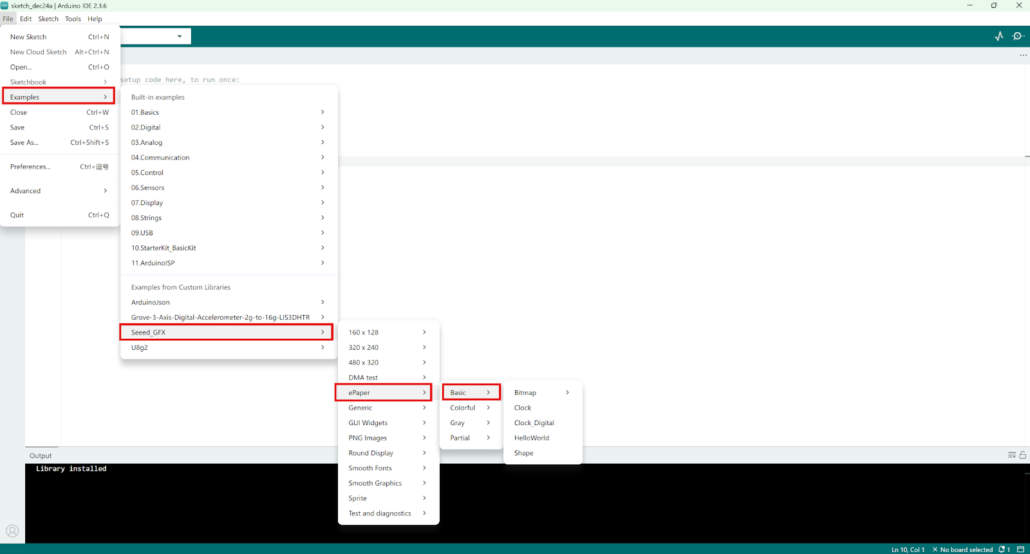
Next, you can open one of the four basic examples:
- Clock: Display a clock.
- Bitmap: Display a bitmap image.
- Clock_digital: Display a digital clock.
- Shape: Display random words and shapes in different sizes.
You can access these examples by clicking File > Examples > Seeed_GFX > ePaper > Basic.
- Upload the Code
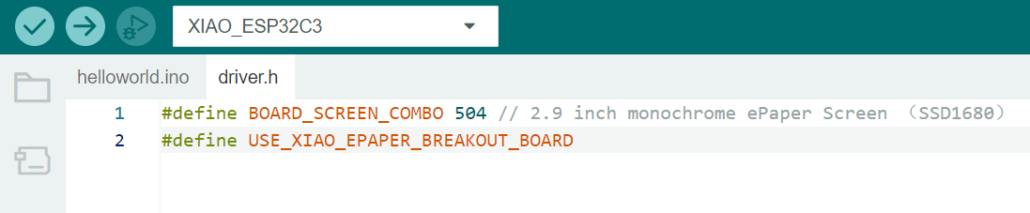
Create a “driver.h” file and paste the code in it. The code will appear as:
#define BOARD_SCREEN_COMBO 504 // 2.9 inch monochrome ePaper Screen (SSD1680)
#define USE_XIAO_EPAPER_BREAKOUT_BOARD
Now, go to Tools -> Board -> XIAO ESP32C3 and Tools -> Port -> Pick the right port your board is connected to. Click “Upload” to upload the code.
That’s it! You will see the display on your ePaper screen.
Conclusion
An e-ink display for Arduino offers a compact and cost-effective digital screen for DIY projects. It is easier to configure when using specific boards, such as those Seeed Studio offers.
When using e-ink with Arduino, avoid updating the screen too frequently (once every 3-4 minutes is usually safe). Plus, try to update the screen content daily to keep the contrast sharp. Also, handle the e-ink display with care due to its delicate structure. So, what are you waiting for? Get the components from Seeed Studio, follow the above steps, and begin your Arduino ePaper project.
>> Read more