What is EMG sensor, Myoware and How to use with Arduino?
When it comes to EMG sensor with Arduino, Myoware is the one you’ve probably only heard of. However, here at Seeed, we offer a cheaper alternative for your EMG applications!
Before we introduce our EMG muscle sensor, let’s understand more about what is an EMG sensor and how it works first!
This guide will cover the following:
- What is EMG sensor
- How does an EMG sensor work
- Introduction to Grove – EMG Detector, a cheaper alternative to Myoware muscle sensor
- EMG sensor Arduino Guide and Code
- Other biomedical sensor recommendations
What is an EMG Sensor?
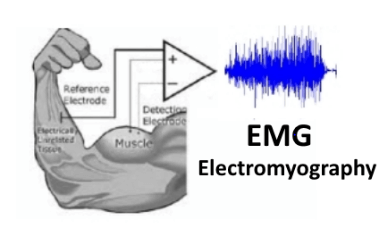
EMG Sensor, also known as electromyography sensor is one that measures small electrical signals generated by your muscles when you move them!
- This includes lifting your arm up, clenching your fist, or even the simplest of movements like moving a finger!
Technical details
If you would like to further understand the technical side of things, here’s how your muscles move and its relationship with ECG:
- The whole process starts off in your brain
- Neural activity in the motor cortex (part of your brain) signals to the spinal cord
- The signal is then conveyed to the muscle part via motor neurons
- Motor neurons innervate the muscle directly, causing the release of Calcium ions within the muscle and ultimately creating a mechanical change
- This mechanical change involves depolarization (change in electromechanical gradient), which is then detected by EMG for measurement
What are the types of EMG sensors?
Now that we’ve had a better understanding of the definition of EMG, we’ll now take a look at the two types of EMG sensors!
sEMG sensors (surface electrodes)
- The “S” refers to the surface, where this type of EMG sensor takes measurements by placing surface EMG electrodes on your skin
- Uses Non-invasive technology, making this EMG sensor type not painful
- Commonly applicable in clinics and sports health
- Limitations: Though is a simple and easy way of EMG measurement, it’s restricted to superficial muscles and dependent on other variables such as the weight of patients, etc.
Intramuscular EMG

- Intramuscular EMG takes measurement through an inserting a monopolar needle electrode through your skin and into the muscle tissue
- A common way of EMG sensing
- A perfectly safe option, though it may cause discomfort when the needle electrodes are inserted and muscle soreness afterward
- Limitations: Possible contamination of deeper muscle recording as the needle shaft is exposed
How does EMG sensor work?
Both types of EMG differs from the sensor placement, though its procedures share certain similarities. Here’s the illustration of how each EMG sensor works!
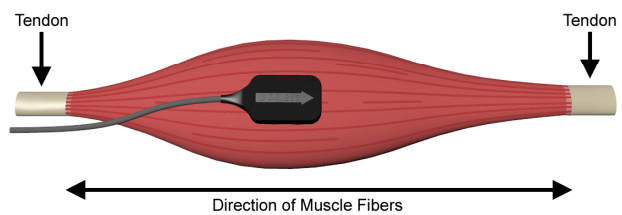
This is how a surface EMG sensor works:
- The process begins with EMG sensor placement; where it’s placed in the innervation zone of both tendons for better detection quality (Picture 1)
- Electrodes begin to detect electrical activity generated by muscle movement/contraction
- Electrical activity detected is then displayed via the form of waves on a monitor (also known as an oscilloscope)
How an intramuscular EMG work:
- The process begins by inserting a sterile needle (monopolar needle electrode) into the muscle itself
- Electrodes begin to detect electrical activity generated by muscle movement/contraction
- An audio amplifier may be attached for evaluation of appearance and sound
- The electrical activity from your working muscle is measured and displayed on the monitor
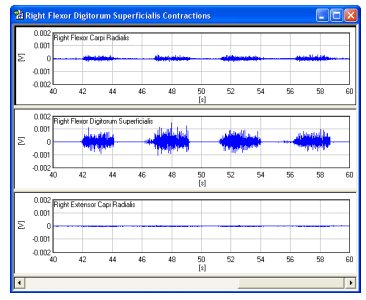
Note: Both EMG sensing sensor procedures should end up with either normal or abnormal results:
- Normal results:
- Muscle tissue at rest should be electrically inactive with no waveforms
- There should be varying rates and amplitudes spotted on the data when the muscle is fully contracted
- Abnormal results:
- Unusual data collected
- May result from disorders of muscle, nerves, etc.
Overall, the stronger the muscle contraction = the higher the number of activated muscles. Hence, a higher recorded voltage amplitude.
What is EMG Sensor used for?
EMG sensors are mostly used for biomedical applications that range from:
- Helping doctors diagnose muscle and nerve disorders of patients for early prevention/treatment
- Research tool for kinesiology
- A control signal for prosthetic devices; hands, arms, and lower limbs
Myoware Muscle Sensor Alternative: Grove – EMGDetector
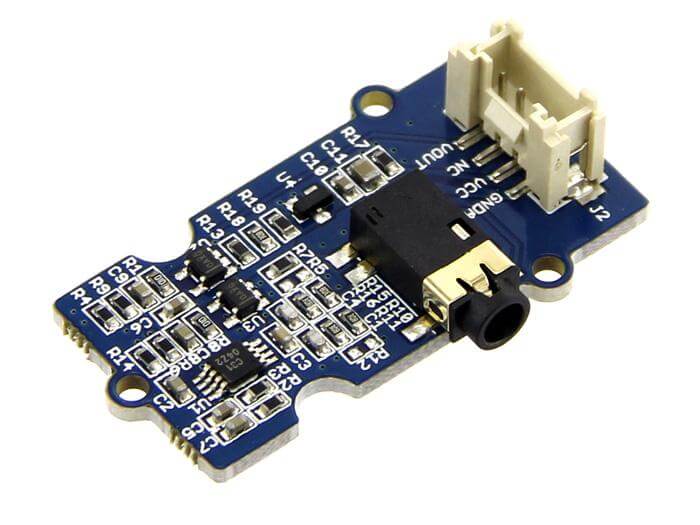
Grove – EMG Detector 
Surface Electrodes that come with it
Now for the moment you’re waiting for, this is the Grove – EMG Detector, a cheaper alternative to Myoware muscle sensor for your EMG sensing needs!
Similarly to the Myoware muscle sensor, our Grove – EMG Detector does not need an additional power supply and supports 3.3V – 5V for easy microcontroller integration!
Why you should buy this EMG Sensor
Our very own EMG sensor is capable of gathering small muscle signals and processing it with 2th amplify and filter, with the output signal easily recognizable by Arduino!
Seeed’s very own Grove system
Grove system is Seeed very own initiative, allowing for you to pair the Grove – EMG Sensor with other sensors, shields, modules through plug-and-play!
- You still need to solder the Myoware Muscle Sensor if you want to use it with Arduino
However, with this, it means no more using messy and complicated jumper wires, soldering, or debugging electronic circuits!
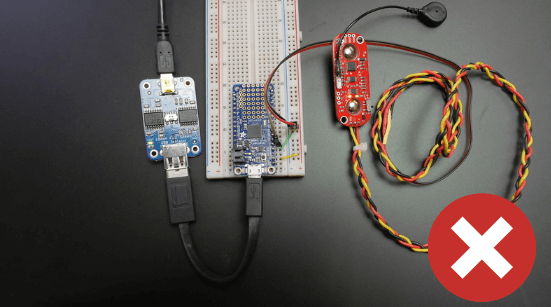
Typical Myoware Arduino Circuit 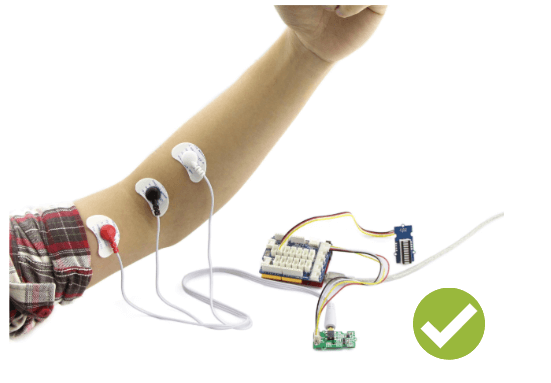
With Grove
Apart from the above reasons, the Grove – EMG Detector has the following features as well:
- 3.5mm Connector
- 6 Disposable Surface Electrodes included
- 1000mm Cable Leads
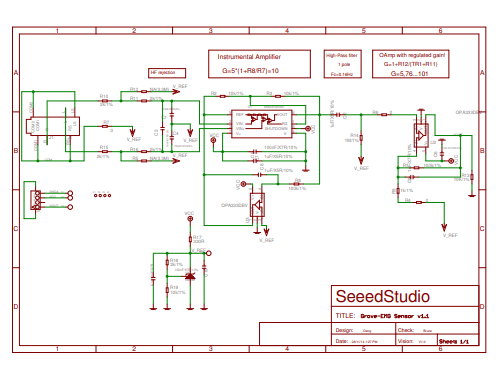
EMG Sensor Schematic:
To take a deeper look at the Grove – EMG detector, here’s its circuit diagram for your reference!
EMG Sensor Arduino Tutorial
Need an EMG sensor Arduino code for the pairing? We got you covered with this EMG sensor Arduino tutorial!
This tutorial will show you how to connect our Grove – EMG Sensor to a Seeeduino!
- Seeduino is Seeed’s very own Arduino, built with benefits over the original version
What do you need?
Note: This tutorial can work without the Base Shield as well since the Seeeduino Lotus V1.1 contains grove ports.
EMG sensor raspberry pi is made possible as well since it supports other microcontroller platforms. However, users have to write their own software library as it’s not possible to provide demo code for all supported platforms
Hardware Configuration:
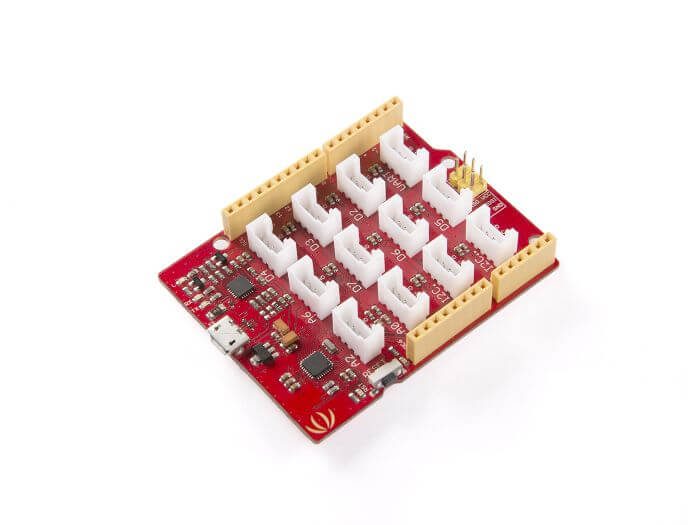
- Step 1: Plug Grove-Base Shield to Seeeduino
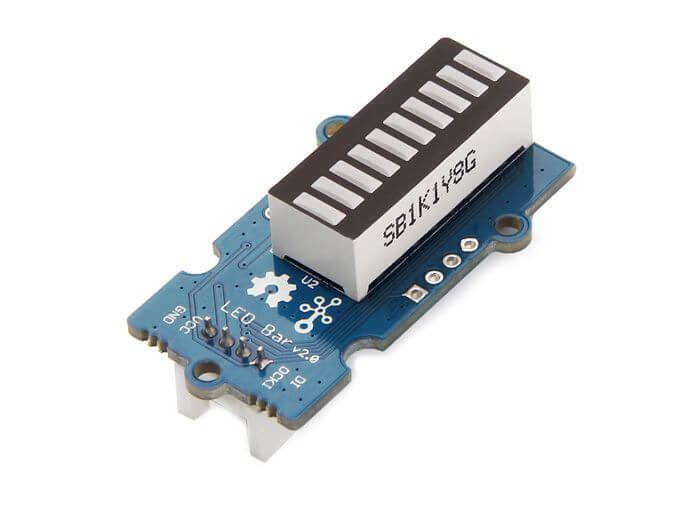
- Step 2: Plug Grove – LED Bar to D8 port
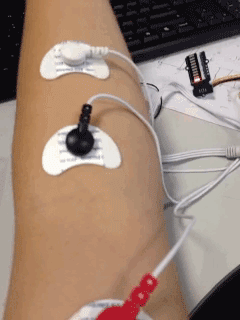
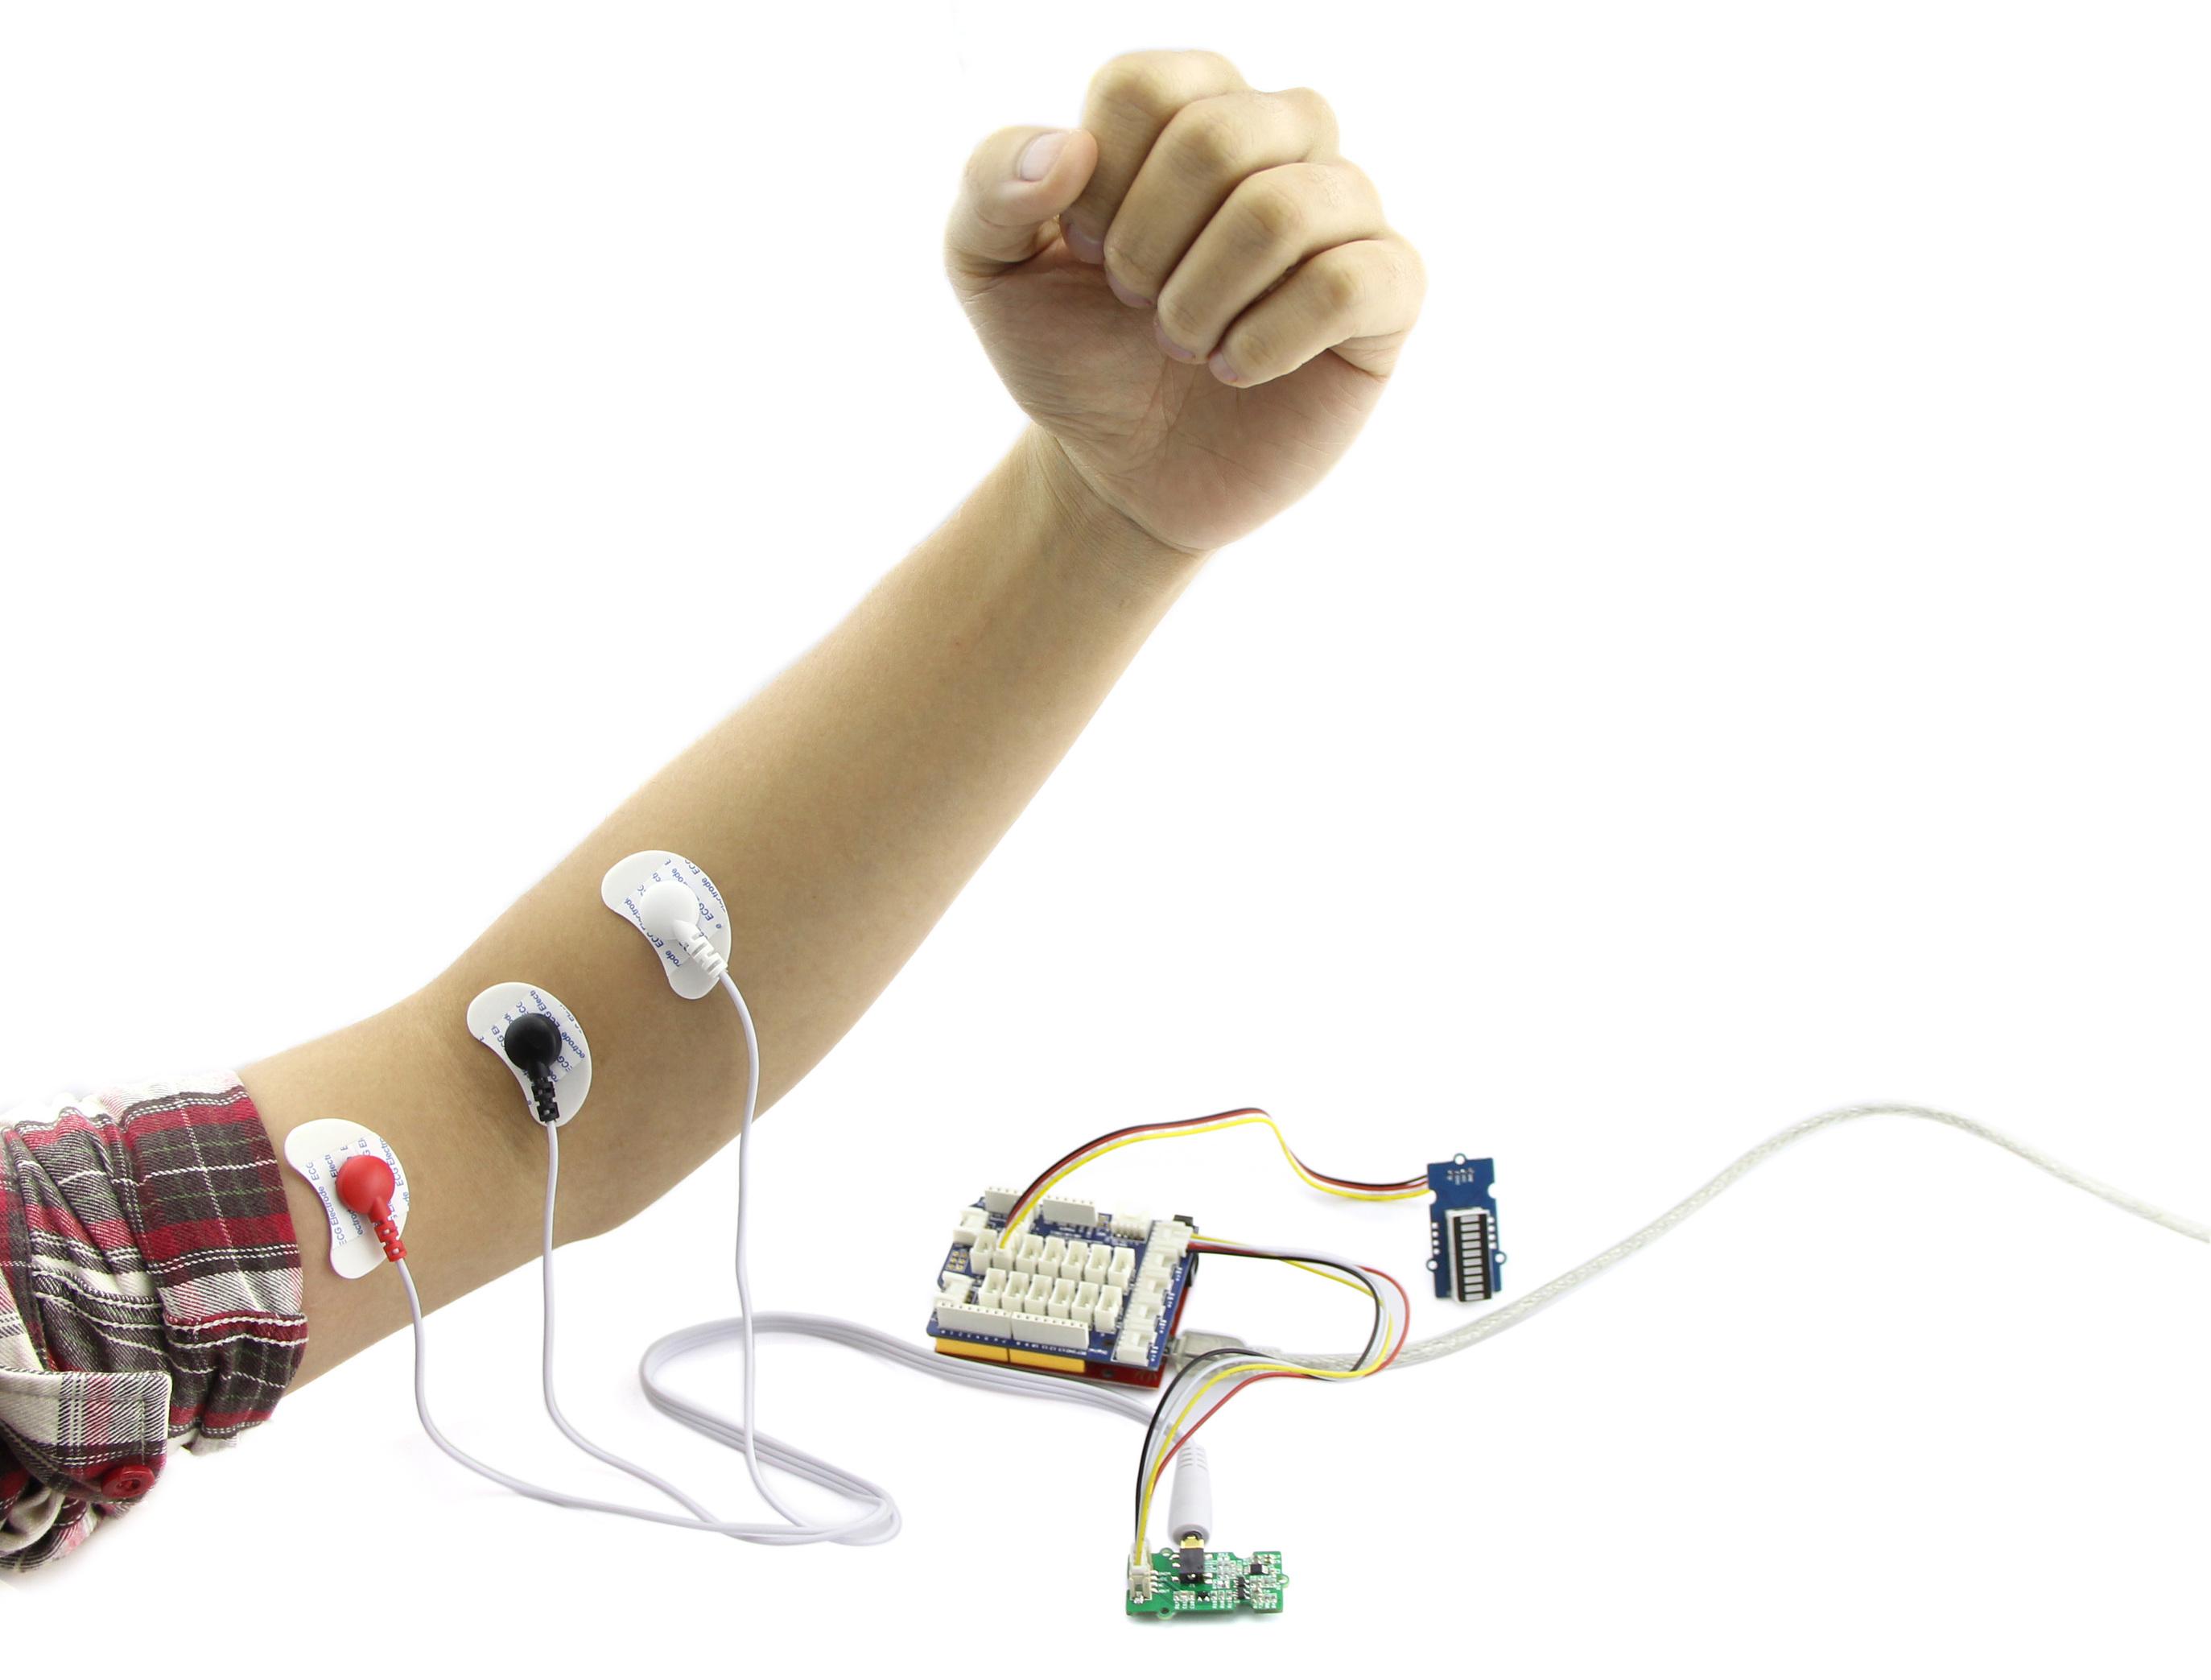
- Step 3: Connect Grove – EMG Sensor to A0 port
- Step 4: Plug in the electrodes to Grove – EMG Sensor and place it on your muscle. Remember to keep a distance between each.
It should look something like this once done:
Software configurations:
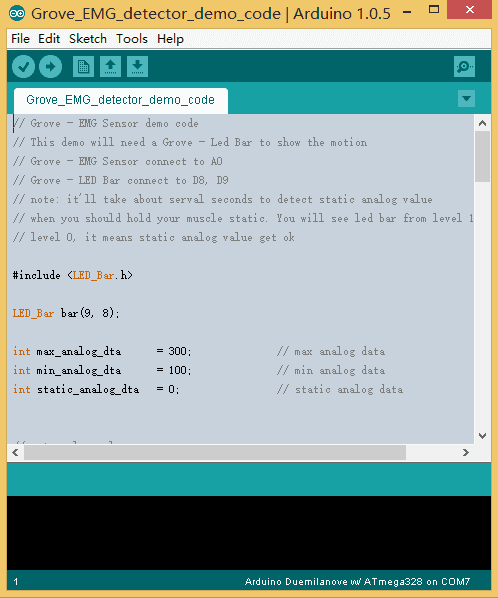
- Step 1: Copy and paste the EMG sensor Arduino code below and upload
- You may download the code in GitHub here as well
// Grove - EMG Sensor demo code
// This demo will need a Grove - Led Bar to show the motion
// Grove - EMG Sensor connect to A0
// Grove - LED Bar connect to D8, D9
// note: it'll take about serval seconds to detect static analog value
// when you should hold your muscle static. You will see led bar from level 10 turn to
// level 0, it means static analog value get ok

#include <LED_Bar.h>

LED_Bar bar(9, 8);

int max_analog_dta      = 300;              // max analog data
int min_analog_dta      = 100;              // min analog data
int static_analog_dta   = 0;                // static analog data


// get analog value
int getAnalog(int pin)
{
    long sum = 0;

    for(int i=0; i<32; i++)
    {
        sum += analogRead(pin);
    }

    int dta = sum>>5;

    max_analog_dta = dta>max_analog_dta ? dta : max_analog_dta;         // if max data
    min_analog_dta = min_analog_dta>dta ? dta : min_analog_dta;         // if min data

    return sum>>5;
}

void setup()
{
    Serial.begin(115200);

    long sum = 0;

    for(int i=0; i<=10; i++)
    {
        for(int j=0; j<100; j++)
        {
            sum += getAnalog(A0);
            delay(1);
        }

        bar.setLevel(10-i);
    }

    sum /= 1100;

    static_analog_dta = sum;

    Serial.print("static_analog_dta = ");
    Serial.println(static_analog_dta);
}

int level       = 5;
int level_buf   = 5;

void loop()
{

    int val = getAnalog(A0);                    // get Analog value

    int level2;

    if(val>static_analog_dta)                   // larger than static_analog_dta
    {
        level2 = 5 + map(val, static_analog_dta, max_analog_dta, 0, 5);
    }
    else
    {
        level2 = 5 - map(val, min_analog_dta, static_analog_dta, 0, 5);
    }

    // to smooth the change of led bar
    if(level2 > level)
    {
        level++;
    }
    else if(level2 < level)
    {
        level--;
    }

    if(level != level_buf)
    {
        level_buf = level;
        bar.setLevel(level);
    }

    delay(10);
}- Step 2: Upload the code to Seeeduino
- If you have any problems about code uploading, do refer to Getting Started With Seeeduino
Testing phase; Before you start moving!
- When you’ve finished uploading the demo code, it’ll take about 5s to initialize, and you should keep static when it’s initializing
- You’ll then see the LED Bar go from level 10 to level 0
- When the LED Bar is all off, you can start moving!
Resources and Going Further
Grove – EMG Sensor related Files
- Grove-EMG Sensor v1.0 Eagle File
- Grove-EMG Sensor v1.1 Eagle File
- Grove-EMG Sensor v1.1 schematic PDF
- Download Arduino Demo Code
More on Biomedical Sensors:
Summary
That’s all for today on EMG Sensors. I hope with today’s blog, you get a deeper understanding of what it is, how it works, and what it takes to build one with an Arduino!
For easy EMG sensor pairing with Arduino, do consider the Grove – EMG Detector. Start building your EMG related project today!