How to play with Wio Terminal & Grove – TF Mini LiDAR – The game of “Statues”
We are all familiar with the game of “Statues”. This video is showing how we use our hot product Wio Terminal and Grove – TF Mini LiDAR to play the game.
With Grove – TF mini Lidar’s high degree of accuracy and precision, no single movement could escape from its detection, which making the game more challenging!

If you find the game interesting, come and build the project and play with your families and friends, and let’s see who could be the “Statue”!
Hardware Components
· Wio Terminal

Compatible with Arduino and MicroPython, Wio Terminal is an ATSAMD51-based microcontroller with wireless connectivity supported by Realtek RTL8720DN. Its CPU speed runs at 120MHz (Boost up to 200MHz). Realtek RTL8720DN chip supports both Bluetooth and Wi-Fi providing the backbone for IoT projects. The Wio Terminal itself is equipped with a 2.4” LCD Screen, onboard IMU(LIS3DHTR), Microphone, Buzzer, microSD card slot, Light sensor, and Infrared Emitter(IR 940nm).
· Grove – TF Mini LiDAR ToF Distance Sensor

Grove – TF Mini LiDAR is based on ToF (Time of Flight) principle and integrated with unique optical and electrical designs, so as to achieve stable, precise, high sensitivity and high-speed distance detection.
ToF is the abbreviation of Time of Flight technology, and its operating principle is as follows: a modulated near-infrared light is sent from the sensor and reflected by an object; the distance to the object to be shot can be converted with the sensor by calculating the time difference or phase difference between the light sending and the light reflection, so as to produce the depth information.
Hardware Connection


Pinout

Note: Please refer to the pinout instruction above before you starting to connect Wio Terminal with Jumpers.
Step 1 Plug Grove-TF-Mini-LiDAR to Wio Terminal via Jumpers and also connect Wio Terminal to PC through a USB cable.
Step 2 Download the Demo code and copy the whole Seeed_Arduino_Linechart file and paste it into your Arduino IDE library file.
Step 3 Copy the demo code into your Arduino IDE.
#include"seeed_line_chart.h" //include the library
#include "TFLidar.h"
#define LINE_DIS 0X00
#define STRING_DIS 0X01
TFMini SeeedTFMini;
TFLidar SeeedTFLidar(&SeeedTFMini);
#define uart Serial1
TFT_eSPI tft;
#define max_size 10 //maximum size of data
doubles data; //Initilising a doubles type to store data
TFT_eSprite spr = TFT_eSprite(&tft); // Sprite
void setup() {
Serial.begin(115200);
pinMode(WIO_KEY_C, INPUT_PULLUP);
tft.begin();
tft.setRotation(3);
spr.createSprite(TFT_HEIGHT,TFT_WIDTH);
SeeedTFLidar.begin(&uart,115200);
}
uint8_t mode = LINE_DIS;
void loop() {
if (digitalRead(WIO_KEY_C) == LOW) {
mode ++;
if(mode > STRING_DIS ) mode = LINE_DIS;
while(!digitalRead(WIO_KEY_C));
}
display(get_Lidar_data(),mode);
delay(50);
}
uint16_t get_Lidar_data()
{
while(!SeeedTFLidar.get_frame_data()){
delay(1);
}
return SeeedTFLidar.get_distance();
}
void display(uint16_t lidar_data,uint8_t mode){
spr.fillSprite(TFT_WHITE);
//Settings for the line graph title
auto header = text(0, 0)
.value("Lidar Terminal")
.align(center)
.valign(vcenter)
.width(tft.width())
.color(green)
.thickness(3);
header.height(header.font_height() * 2);
header.draw(); //Header height is the twice the height of the font
if (LINE_DIS == mode){
if (data.size() == max_size) {
data.pop();//this is used to remove the first read variable
}
data.push(lidar_data); //read variables and store in data
//Settings for the line graph
auto content = line_chart(10, header.height()); //(x,y) where the line graph begins
content
.height(tft.height() - header.height() * 1.5) //actual height of the line chart
.width(tft.width() - content.x() * 2) //actual width of the line chart
.based_on(0.0) //Starting point of y-axis, must be a float
.show_circle(false) //drawing a cirle at each point, default is on.
.value(data) //passing through the data to line graph
.color(TFT_RED) //Setting the color for the line
.draw();
}
else if (STRING_DIS == mode){
for(int8_t line_index = 0;line_index < 5 ; line_index++)
{
spr.drawLine(0, 50 + line_index, tft.width(), 50 + line_index, TFT_GREEN);
}
auto header = text(0, 0)
.thickness(1);
spr.setFreeFont(&FreeSansBoldOblique24pt7b);
spr.setTextColor(TFT_BLUE);
spr.drawFloat(lidar_data / 100.00,2,80,110);
spr.drawString(" M",80 + 90,110,1);
}
spr.pushSprite(0, 0);
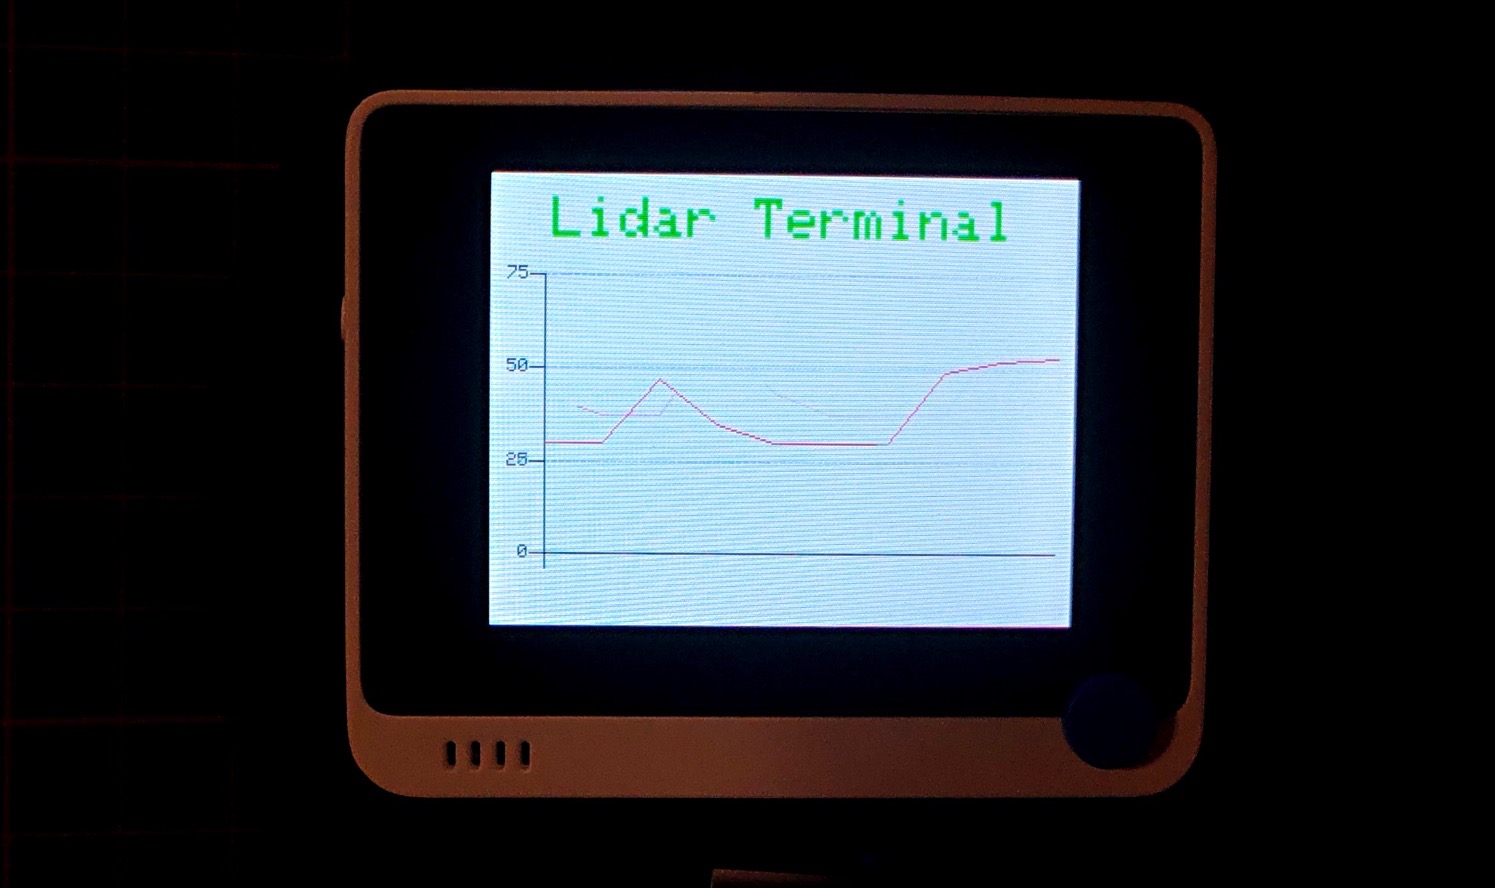
}An image will display on the screen of Wio terminal as below if everything goes well.
Let’s go and play the game now!

More Resources
- [Datasheet] Grove-TF-Mini-LiDAR
- [ZIP] Seeed_Arduino_TFlidar
- [ZIP] Seeed_Arduino_Linechart
Getting Started with Wiki
More information and resources about the product are in the Wiki, please refer to links below:
http://wiki.seeedstudio.com/Wio-Terminal-Getting-Started/
http://wiki.seeedstudio.com/Grove-TF_Mini_LiDAR/
If you need technical supports, please visit our forum.