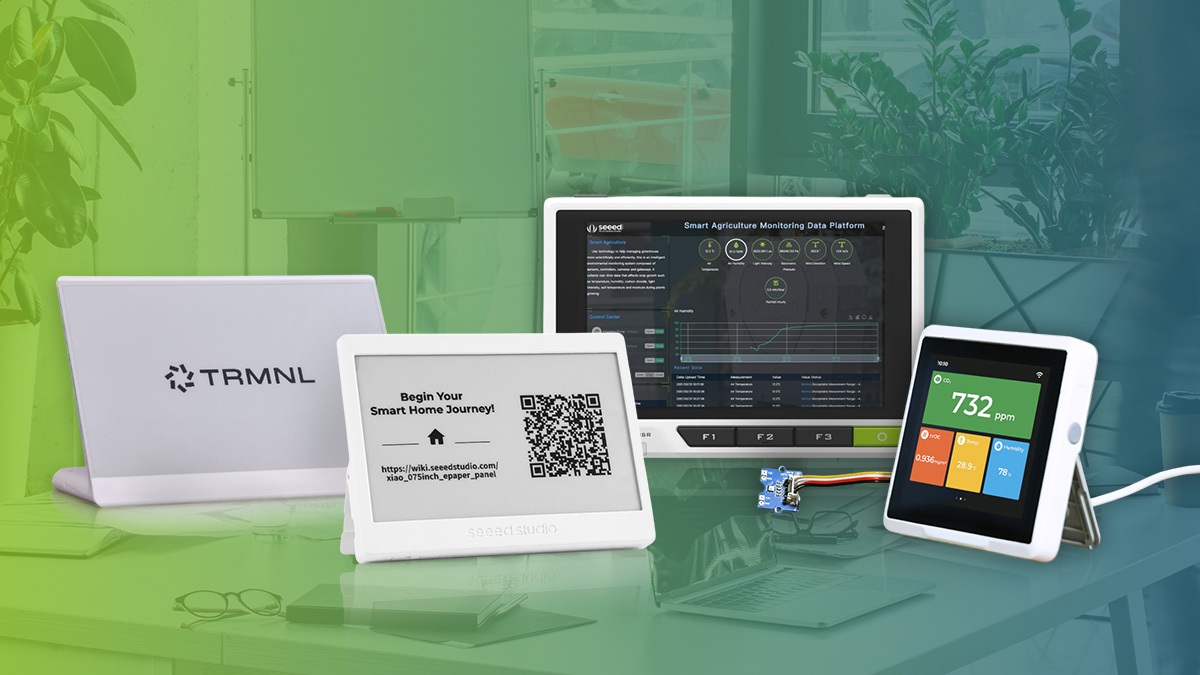
The Ultimate Guide to Home Assistant Displays: Transform Your Smart Home

Explore how to pick the right Home Assistant Display among esphome epaper display, and home assistant touch screen. You can also expect to learn how to build a beautiful, functional lovelace dashboards for your smart home setup.

Home Assistant stands at the forefront of smart home automation, offering a powerful platform that unifies your entire smart ecosystem. While the Lovelace dashboard excels at bringing together your lights, sensors, thermostats, and cameras into one intuitive interface, accessing it solely through mobile devices or web browsers can limit its potential. What if you could have this information instantly visible, right where you need it?

Imagine walking into your home and immediately seeing your family’s schedule, real-time weather updates, energy consumption, and security camera feeds—all without reaching for your phone. A dedicated Home Assistant screen transforms your setup into a true command center, providing at-a-glance information that enhances your daily routines.

However, with the growing variety of display options—from wall-mounted panels to e-paper displays—choosing the right solution can be challenging. This comprehensive guide will help you navigate these choices and create the perfect dashboard display for your smart home. In this guide, we’ll explore:

  • A detailed comparison of display options: wall panels, touch screens, and ePaper displays
  • Seeed’s cutting-edge display solutions for Home Assistant, and an exclusive preview of Seeed’s upcoming display innovations
  • Inspiring dashboard layouts and information organization strategies
  • Step-by-step setup guides for different display types
home assistant display

Due to the length of blog, well break into 2 piece. For this first blog, well focus on the first two topics: available disply options for Home Assistnat on the market and also the cutting-edge display solutions for Home Assistant from Seeed Studio. The second blog is here: Home Assistant Display Showcase: From Community Designs to Your Own Setup 

Understanding Your Display Options

When setting up a Home Assistant display panel, you’ll encounter several display technologies, each with unique advantages. Your choice should align with your specific needs, budget, and installation environment. Let’s explore the key options:

Three Core Display Technologies

1. E-Ink (Electronic Paper Display)

  • How it works: Reflects ambient light like real paper using charged particles
  • Best for: Low-power consumption and excellent readability in bright light
  • Perfect as: Home Assistant epaper display for always-on information viewing
  • Key advantage: Can display content for weeks or months on a single charge
home assistant epaper display

2. LCD (Liquid Crystal Display)

  • Technology: Uses backlit liquid crystals to create images
  • Variants: TN, VA, and IPS – each optimizing different aspects of performance
  • Best for: Cost-effective Home Assistant wall panels and touch screens
  • Key advantage: Balanced performance and value for interactive displays
LCD Display

From What is LCD? on Electronicsforu

3. OLED (Organic Light-Emitting Diode)

  • Technology: Self-emissive pixels for superior contrast
  • Types: PMOLED and AMOLED
  • Best for: Premium Home Assistant display panels where visual quality is crucial
  • Key advantage: Perfect blacks and vibrant colors for stunning dashboards
OLED Display

Touch or No Touch? Making the Right Choice

Information Display vs. Control Panel

Your primary use case should guide your decision:

Passive Information Display

  • Weather updates
  • Time and calendar
  • Status monitoring
  • Energy usage
  • No touch required
Home Assistant Display

Interactive Control Panel

  • Dashboard navigation
  • Device control
  • Scene management
  • Automation triggers
  • Touch capability essential
home assistant touch screen

Touch Technology Considerations

Modern Home Assistant touch screen implementations typically use capacitive technology, offering:

  • Natural finger-touch response
  • Multi-touch capability
  • Better durability
  • Clearer display quality

Installation and Placement Strategy

Wall-Mounted Solutions

The Home Assistant wall panel approach offers:

  • Clean, professional appearance
  • Permanent positioning
  • Central control location
  • Requires careful planning for power and mounting

Desktop/Table Placement

Alternative placement options include:

  • Flexible positioning
  • Easier access to power
  • Simple installation
  • Perfect for personal spaces
Home Assistant desk display

Size and Weight Considerations


Large Format Displays

  • Ideal for main living areas
  • Requires professional mounting 
  • Better for whole-home visualization
  • Enhanced visibility from distance

Compact Displays

  • Perfect for bedside tables or fridge
  • Easy to relocate
  • Multiple mounting options
  • More installation flexibility
home assistant display

Making Your Final Decision

In summery, please do consider these following key factors when choosing your Home Assistant display.

  1. Primary purpose (information vs. control)
  2. Installation location
  3. Power requirements
  4. Budget constraints
  5. Visual performance needs

Quick Reference Guide

Display TypeBest ForPower UsageTouch Support
E-InkInformation displayLowestLimited
LCDInteractive controlModerateExcellent
OLEDPremium visualsLow-ModerateExcellent

Apart from the above quick reference guide, our design team also created a informative graphic for display technologies. You can view it below for a graphical deepdive too.

Home Assistant Display Solutions from Seeed: From E-ink to Industrial HMI

As the Home Assistant community increasingly demands physical dashboard solutions, Seeed Studio continues to innovate in the display space. Since 2008, we’ve developed diverse open source hardware solutions, with a growing focus on Home Assistant compatible displays. Let’s explore our current lineup, designed to meet various smart home visualization needs:

reTerminal E1001, Monochrome ePaper Display

Perfect for Passive Information Display and Trigger Automation at $79

  • Key Features:
    • ESPHome firmware option
    • Ultra-low power consumption
    • 3-month battery life 
    • Premium metal casing
    • With Button, LED and Buzzer for Automation
  • Perfect For: Monochrome dashboard display anything anywhere
  • Unique Advantage: Combines elegance with incredible battery life

reTerminal E1002 Full-color ePaper Display

Perfect for Passive Information Display and Trigger Automation at $109

  • Key Features:
    • Full color dashboard
    • ESPHome firmware option
    • Ultra-low power consumption
    • 3-month battery life 
    • Premium metal casing
    • With Button, LED and Buzzer for Automation
  • Ideal For: Full-color dashboard display anything anywhere
  • Unique Advantage: Combines colorful elegance with incredible

XIAO 7.5″ ePaper Panel: The Energy-Efficient Choice

Perfect for Passive Information Display at $69.99

  • Key Features:
    • ESPHome pre-flashed
    • Ultra-low power consumption
    • 3-month battery life (2000mAh)
    • Customizable 3D-printed enclosure
    • Wire-free installation
  • Ideal For: Always-on dashboard display without power constraints
  • Unique Advantage: Combines elegance with incredible battery life

SenseCAP Indicator: Smart Display Meets Environmental Monitoring

4-inch Interactive Touch Interface at least $56.99

  • Core Capabilities:
    • Dual MCU architecture (ESP32S3 + RP2040)
    • Multi-protocol support (Wi-Fi/BLE/LoRa®)
    • Built-in environmental sensors
    • Grove expansion ports
    • MQTT integration with Home Assistant
  • Perfect For: Combined display and environmental monitoring
  • Standout Feature: Expandable sensor ecosystem

reTerminal: The Compact Command Center

5-inch Professional Control Panel at least $209

  • Highlights:
    • Raspberry Pi CM4 powered
    • IPS multi-touch display
    • Dual-band Wi-Fi & Bluetooth
    • Pre-installed Raspberry Pi OS
    • Compact form factor
  • Best For: Wall-mounted control panels and desktop terminals
  • Key Advantage: All-in-one Home Assistant solution

reTerminal DM: Industrial-Grade Smart Home Hub

10.1-inch Professional HMI Solution at least $364

  • Advanced Features:
    • Industrial-grade construction (IP65 front panel)
    • Extensive I/O options
    • PCIe expansion capability
    • Wide temperature tolerance
    • Professional mounting options like VESA Wall Mount, Panel, DIN-rail
  • Ideal For: Advanced home automation control centers
  • Distinguished By: Industrial reliability meets smart home functionality

If you prefer to explore the Seeed display lineup via video, we had a livestream focusing on available display solutions for Home Assistant on Youtube back in May, 2025. Watch below:

Coming Soon: Next-Generation E-ink Display

We’re continuing to expand our Home Assistant display lineup with an innovative new E-ink solution. This upcoming product will further enhance our range of smart home visualization options. Stay tuned for the announcement!

Summary and What's Next

Today we explored the world of Home Assistant displays, from the fundamentals of display technologies to Seeed’s diverse solutions. Whether you’re considering the energy-efficient XIAO 7.5″ ePaper Panel, the compact SenseCap Indicator, or the professional-grade reTerminal series, choosing the right display depends on your specific needs:

  • Power consumption requirements
  • Installation environment
  • Interaction preferences
  • Long-term maintenance

Check out our next article, where we’ll showcase inspiring community dashboard designs and guide you through creating your own perfect display setup. From simple information panels to advanced control interfaces, we’ll help you bring your Home Assistant display vision to life.

Still have questions about your Home Assistant display selection? Share them in the comments below!

About Author

Calendar

August 2025
M T W T F S S
 123
45678910
11121314151617
18192021222324
25262728293031