How to Build a Raspberry Pi Router – Step by Step Tutorial
Whether it’s watching a video, sending an email, or simply surfing the web, all our interactions with the Internet are fundamentally data exchanges that go back and forth. To facilitate these exchanges, routers play an indispensable role in, well, routing data. In this article, I’m going to share exactly why you should consider building a custom Raspberry Pi Router – and more importantly, how!
What is a Router?
A router is a piece of hardware that connects a Local Area Network (LAN) to other networks. In most cases, this “other network” is known as a Wide Area Network (WAN), or none other than the Internet.

A router’s purpose is to serve as the bridge between the two networks, which is done by forwarding data packets that need to be transmitted “across borders”. To achieve this, devices are connected to the router either through a network cable like ethernet or over a wireless connection like WiFi, As a result, local devices not only gain access to the Internet but can also communicate with each other through the router – hence the term “Local Network”.
A router is very much the “administrator” of this local network and plays an important role in managing connected devices. For instance, it is responsible for assigning IP addresses to incoming connection requests, typically through DHCP (Dynamic Host Configuration Protocol). Thus, each device can be identified and managed individually.
Can a router run an OS?
If I ask you whether the router provided by your ISP (Internet Service Provider) can run an OS (Operating System), your answer would probably be “NO”. This is because the primary role of traditional routers at home is simply to coordinate connections and forward data to Ethernet-connected devices or WiFi-connected devices. For this purpose, you do not need to run any OS on the router or have a router with good hardware.

But, can a router run an OS? Well..there are some special routers in the market with the ability to install an OS on them. These routers are different from traditional routers in hardware because these routers equip a CPU, RAM, and sometimes internal storage. I will talk further about these routers later in this blog.
What kind of OS a router can run?
So what kind of OS can these special routers run? Windows, Mac? Of course not. A router does not need to run this kind of heavy OS because it would not make sense. So, there are some special operating systems that are specifically designed to run on this type of router, and most are Linux-based. These operating systems are much lightweight allowing them to be run on low-end CPUs and low RAM available on these routers. Also, most of these operating systems are open-source, which means you do not need to pay extra to have access to them.
Some of the most common router operating systems are:
If you want to learn in-depth about these router OS, you can visit this blog
What benefits do you get from running an OS on a router?
There are a number of advantages of using a router with an OS when compared with a traditional router. To list the benefits, I will take OpenWrt OS as an example.
Free
Firstly, OpenWrt is free for you to use and download! There are no subscription or licensing fees.
Security
When setting up a router, security is always a big concern. With OpenWrt configurations, they are conservative which allows for full internet connectivity without exposing your router or connected devices to cyber attacks. OpenWrt’s resistance to common vulnerabilities also contributes to its security as its Linux OS is unaffected by many common attacks. Furthermore, OpenWrt is actively updated so any vulnerabilities are closed shortly after they are discovered.
Performance
Designed by network professionals, OpenWrt reduces latency/lag and increased network throughput via its buffer bloat control algorithms. In addition, OpenWrt has Wi-Fi improvements that support higher data rates and airtime fairness between stations which allows you to transmit data faster.
Extensibility
When you use other firmware for a router, it often comes with a fixed set of capabilities. On the other hand, OpenWRT provides more than 3000 packages ready to be installed. Here are some examples of what OpenWRT can do:
- Increase overall network performance when multiple devices are connected
- Run ad-blocking on your router so you can enjoy clean uncluttered web experience from any connected device
- Reduce latency/lag (bufferbloat) even during heavy traffic with Smart Queue Management
- Secure access to your home network when away with OpenVPN or WireGuard server
- Secure your internet access and prevent your ISP from snooping on your internet activity with OpenVPN or WireGuard client
- Prevent your ISP from spoofing and snooping on your DNS requests with DNS encryption.
- Share files between devices via an external storage drive connected directly to the router
- Run a BitTorrent client from the router
- Connect a printer directly to the router to create a networked printer
- Limit bandwidth usage of a particular device in the network
- Real-time network monitoring
Support
With OpenWrt’s vibrant community of developers, volunteers, and other long-time OpenWrt users, if you run into any problems, you can always find them for help to solve your issue in no time. Here are the platforms where you can find help:
- OpenWrt Forum – member-to-member conversations about OpenWrt
- OpenWrt Developer and OpenWrt Admin mailing lists
- #lede-dev and #lede-adm on IRC
Control
As OpenWrt is a true Linux-based system, you will have full control over all functions of your router and device. OpenWrt comes with a command-line interface (via SSH) and a web-based user interface for configuration. Information is also stored in plain-text files for easy editing and copying. OpenWrt Image Generator allows you to create your own firmware images for your device with any customizations (pre-defined password, WiFi, etc). In addition, its LuCI WebUI allows you to select themes that suit your needs/tastes. Not to mention, it comes in over 20 languages! By the way, you can also control the external LEDs and buttons/switches to fit your project needs.
Is a router with an OS really worth it?
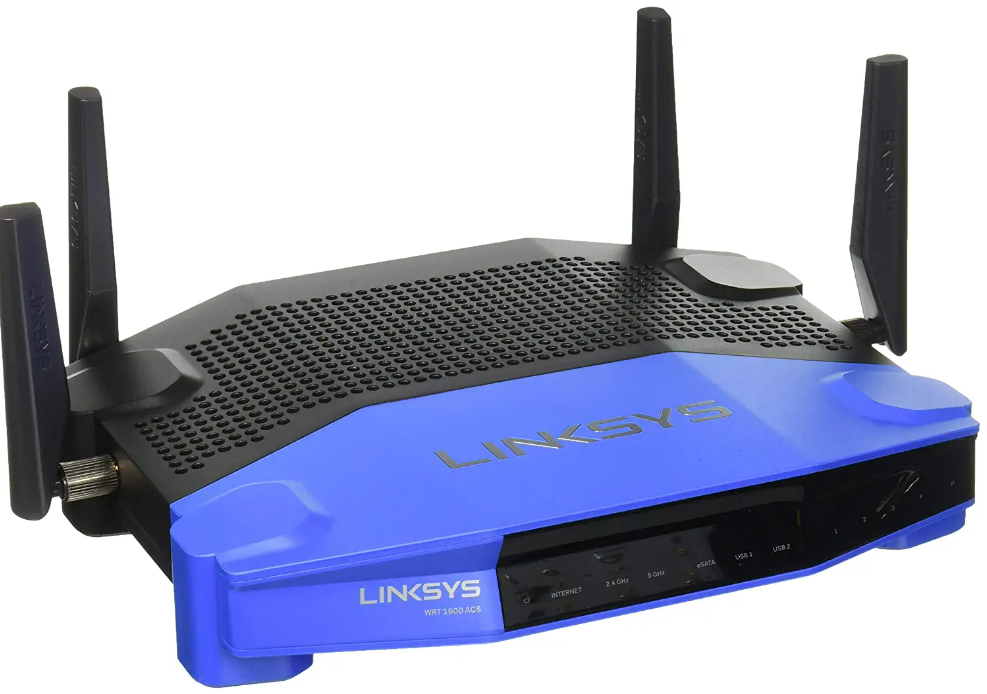
Someone would argue that it is pointless to buy a router with an OS such as OpenWrt because these routers are very expensive when compared with traditional routers. That is true. For example, if you look at Linksys WRT3200ACM router which supports OpenWRT OS, it costs nearly $200.
Can you DIY a router with OpenWrt using a Raspberry Pi?
If you want to cut down the costs of an OpenWrt-enabled router, the best option would be to DIY one. For this purpose, Raspberry Pi 4 is a good candidate because it can provide enough hardware resources and processing power to use as an OpenWrt router.
You can find many guides on how to build a Raspberry Pi OpenWRT router if you search on Google. So is that it? Do we stop the blog here? Of course not.
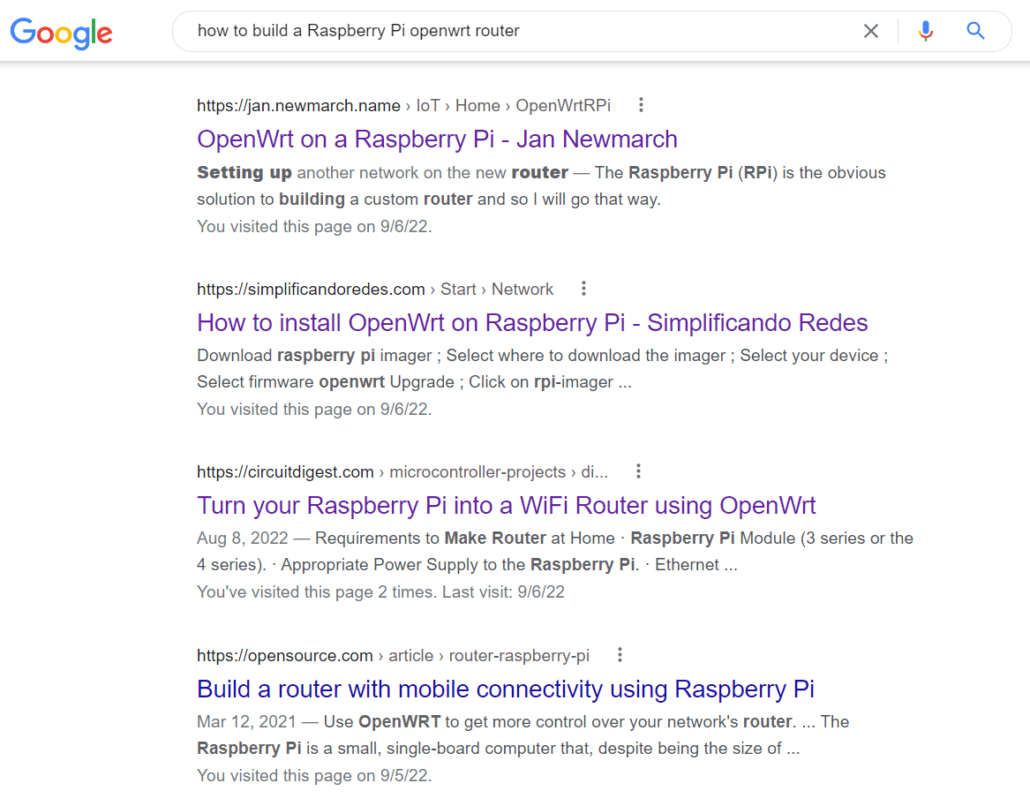
When I tried to follow these guides to configure OpenWRT with a Raspberry Pi 4, I faced a number of challenges.

Ethernet port limitation on Raspberry Pi 4
First of all, Raspberry Pi 4 only comes with 1 Gigabit Ethernet connector on board. This means if you want to connect your DIY Raspberry Pi 4 router to a switch and pass the network traffic to other devices via Ethernet, you will have to add another Ethernet port to your Raspberry Pi 4 by using a USB to Ethernet adapter. Even if you find an Ethernet adapter, you need to find the proper drivers that will be supported by the OpenWrt system. Not all USB to Ethernet adapters will work.
Troublesome initial OpenWrt configuration
After flashing OpenWrt image to an SD card you will have to do a number of configurations to get your DIY router up and running. First of all, you will have to connect the Raspberry Pi 4 to a PC via an Ethernet cable and configure LAN and WAN ports. Also, you will have to configure the firewall settings.
Limited packages out-of-the-box
Even after finishing all the setting up and getting into the OpenWrt web UI, the packages that come with the base system will be very limited. You will have to manually install most of the packages that you need based on your application.
Overheat issues
When running OpenWrt on a bare Raspberry Pi 4, the CPU tends to overheat dramatically with all the processing. So to avoid that, you will have to either add a heat sink, fan, or a case that comes with a heatsink/ fan to bring the temperatures down. Otherwise, when it overheats, the system performance dramatically decreases.
SD card corrupt issues
Since Raspberry Pi 4’s are normally booted with an sd card, the probability that the sd card gets corrupted is very high. This is because SD cards are not able to handle a large number of writes. To overcome this issue, you can boot using a USB flash drive.
Let’s DIY a router with minimum effort using Seeed Mini Router
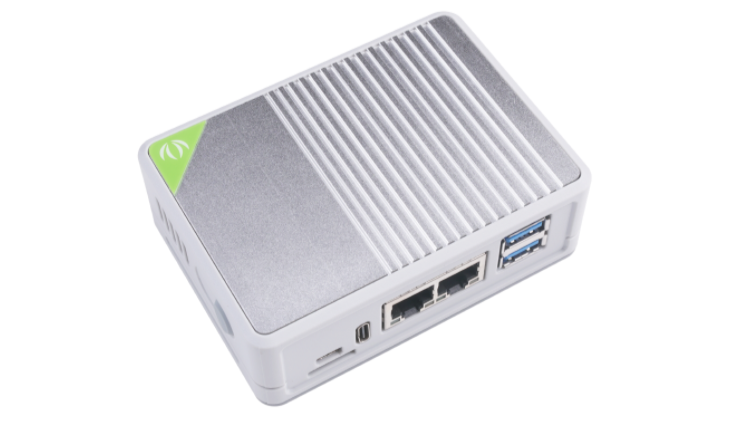
As we discussed before, we can definitely build a DIY router using a Raspberry Pi 4 but with some challenges. Even though we can overcome these challenges by tinkering around, wouldn’t it be better if we had a system that has a smooth overall out-of-the-box experience? Well…Meet the Seeed Mini Router.
Seeed Mini Router consists of a Raspberry Pi Compute Module 4 as the brains, with a carrier board to extend many different I/O interfaces.
So first of all, I will talk about how the Seeed Mini Router overcomes the challenges I mentioned earlier.

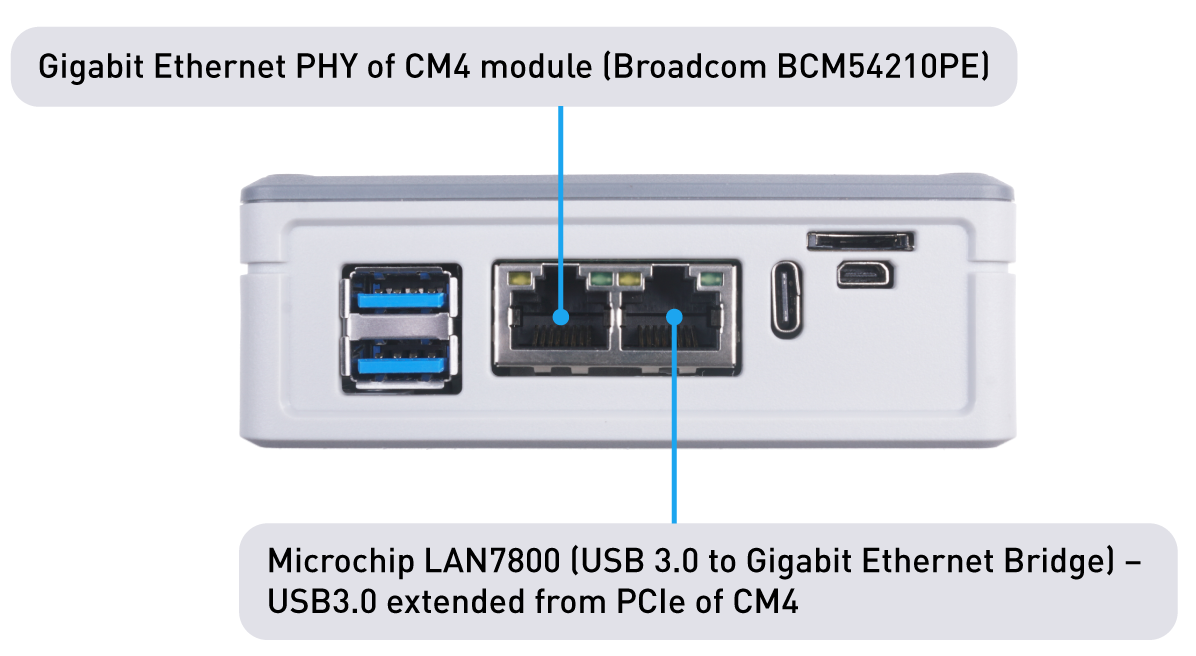
Dual Gigabit Ethernet ports
Unlike a traditional Raspberry Pi 4, the Seeed Mini Router comes with 2 Gigabit Ethernet ports, which means you will easily be able to connect the LAN interface to another switch to extend the router functionality. One Ethernet Port is connected to the Gigabit Ethernet PHY of the CM4 module which is based on Broadcom BCM54210PE. On the other hand, the other Gigabit Ethernet Port is connected to Microchip’s LAN7800 which is a USB 3.0 to GbE (Gigabit Ethernet Bridge). The USB 3.0 interface here is extended from the PCIe interface of the CM4 Module. Also, both ports can support speeds up to 1Gbps.
Trouble-free initial OpenWrt configuration
When you buy the Seeed Mini Router, you will find that a custom OpenWRT built by Seeed comes pre-installed with the board. This means you do not even need to flash anything to the board. You do not need to configure LAN, WAN ports, and firewall settings. They all come preconfigured. So after you open the box, you simply need to make the necessary Ethernet connections, open the Web UI at 192.168.2.1 on the PC and you will be good to go!
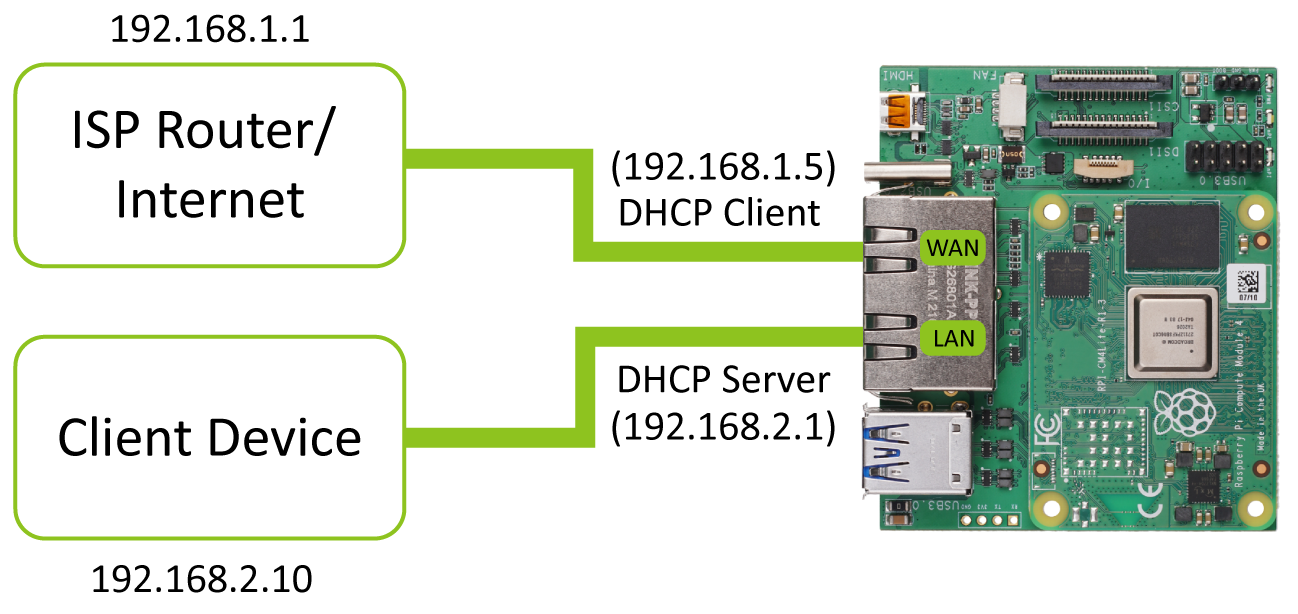
However, here is an explanation of how the 2 ports are configured.
One port is configured as a LAN interface and the other as a WAN interface. The WAN interface is the one that can be connected to the internet and it is configured as a DHCP client. On the other hand, the LAN interface is the one that can be connected to the client devices and it is configured as a DHCP server.
Here the LAN interface is configured so that it has a static IP address of 192.168.2.1. However, if you connect this OpenWrt router to another router with the default gateway IP of 192.168.2.1, you might want to change the IP address on the LAN interface or else, OpenWrt will have an IP conflict. Please follow the FAQ to learn more!
Also, we are actively maintaining this OpenWrt build on GitHub and you can flash the new builds as they are rolled out by flashing the onboard eMMC
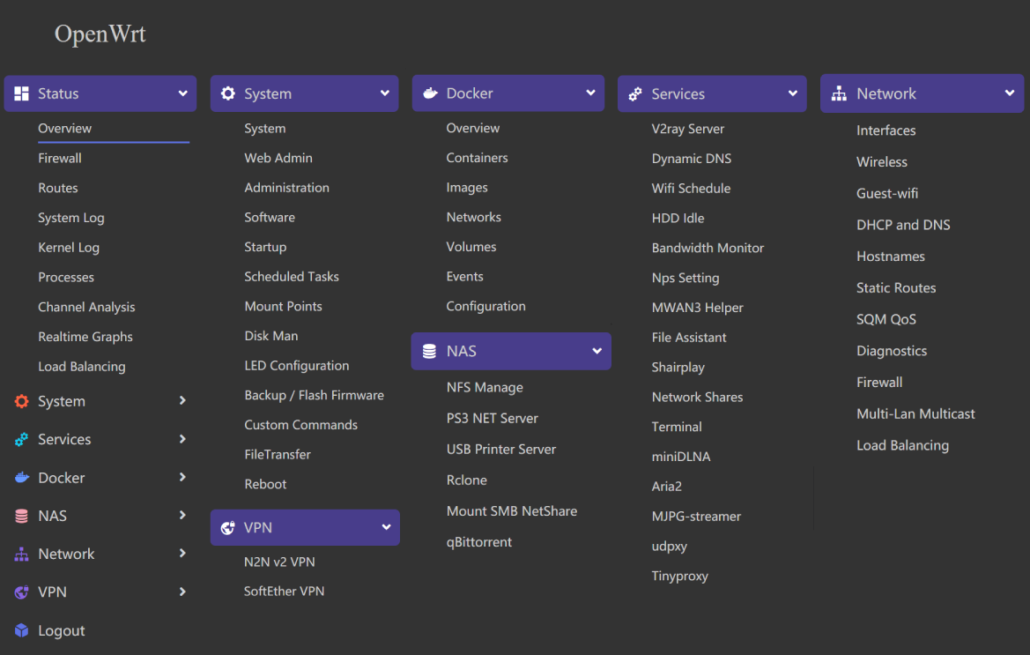
Pre-installed packages out-of-the-box
The OpenWrt system that comes out-of-the-box with the Mini Router board includes a number of packages already pre-installed such as NAS, VPN, File Server, Printer Server, Media Server, qBittorent server, and much more. So you will easily be able to experiment and deploy your favorite application on the board.
Built-in heat sink case
When running OpenWrt for long hours, the CPU tends to get very hot and reduces system performance. To overcome this, the Mini Router board comes with a nice enclosure having an Aluminum alloy on top which acts as a large heatsink.
Built-in eMMC storage
Since the Mini Router board comes with the Raspberry Pi Compute Module 4 with a built-in 32GB eMMC, you will not have to worry about system corruption issues anymore. Because the eMMC is much more durable and stable to handle writes than a traditional SD card.
Additional I/O
Apart from the Dual Gigabit Ethernet ports as the IO, Seeed Mini Router features a variety of I/O peripherals such as MIPI CSI, MIPI DSI, micro-HDMI to connect displays/ cameras, a standard 9-pin USB 3.0 header for more USB expansion, a micro-SD card slot, and an FPC connector.
Enter OpenWRT on Seeed Mini Router
As explained before, power on the Mini Router, make the necessary connections and visit 192.168.2.1 on your PC to view this page

Congratulations, you have now set up your very own Raspberry Pi router!
If you want to learn more about using OpenWrt with the Seeed Mini Router, please check our wiki guide here
OpenWrt Router Applications to Inspire
Here are some of the things that you can do after setting up OpenWrt on a Seeed Mini Router
Block Ads using Adguard Home
Configure a VPN Server and a Client
Plex Media Server for your home media library
Summary & More Resources
Routers, while important to the way we experience the internet and transmit information, have now largely been taken for granted. Today, I hope that I have given you the reasons and steps to improve your local network with a brand new Raspberry Pi router, which will boost your internet speeds, improve security and let you take advantage of additional features!
To learn more about routers and embedded computing, be sure to read the following articles!
- OpenWrt for Routers! – Why & How to Get Started
- Building Edge GPU Clusters – Edge Computing Guide
- Edge AI – What is it and What can it do for Edge IoT?
- How Machine Learning has Transformed Industrial IoT