Introducing PN532 NFC RFID with Arduino Guide

PN532 is an NFC RFID module, popular in enabling your mobile payment, Arduino NFC capabilities, and serves as a tool for other communications in your smartphone! It can be found embedded in modules, that allow for easy pairing with your Arduino projects!
Introduction to NFC
Before understanding PN532 as a whole, let’s dive deeper into what NFC is truly about and how does it work?
What is NFC
NFC, in short for Near Field Communications is a technology standard based on Radio Frequency Identification (RFID), transmitting information wirelessly over short distances. Think of it as an authentication-free Bluetooth!
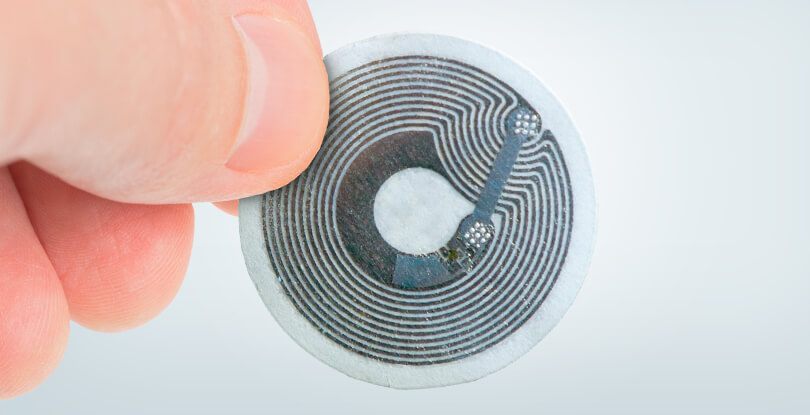
Packed like a sticker, NFC tags may seem unimpressive but what goes into it made applications possible in places where other technologies couldn’t.
Types of NFC Devices
There are two types of NFC devices; Active NFC, Passive NFC:
| Active NFC | Passive NFC |
|---|---|
| Has a power source Collect and read information from NFC tags |
Has no power source, connects to active devices Can only send data, do not read information itself |
| Present in Smartphones; Apple, Andriod, etc. | NFC tags, other small transmitters |
Passive NFC Device Example: NFC Display

To further understand passive NFC devices, let’s take a look at this 4.2inch NFC screen that’s powered without battery or cables!
How is it powered then?
As mention in the earlier comparison, passive NFC devices connect to active ones, and this screen is no exception. As long as you have a smartphone with NFC function, you can use it to control this screen and transmit images to it!

No battery, no cables, no trouble, just passive NFC technology by swiping like a credit card!
Interested to find out more about it? You can head to our product page!
Main applications of NFC
- Mobile payments; Apple Pay NFC, Google Wallet
- Tap-to-Pair; Pairing Bluetooth devices just by tapping, instead of manual entering
- Embedding digital experience in physical products; NFC’s small form factor allows for it to be embedded into physical products, enabling a unique experience when interacted
- Security
- Password replacement
- Product Authentication
Want to find out more about the differences between NFC and RFID? Check out this article!
What is PN532
Now that we’ve understood more about NFC and its applications, I’ll quickly introduce PN532 before moving on to an integrated module.
PN532 is an NFC controller by NXP that’s based on the 80C51 microcontroller, allowing for contactless communication at 13.56 MHz. Furthermore, the support for MIFARE Classic 1K/MIFARE Classic 4K card allows for higher transfer speeds up to 424 kbit/s in both directions.
Features:
- 80C51 microcontroller core with 40 KB ROM and 1 KB RAM
- Highly integrated demodulator and decoder
- Integrated RF level detector
- Supports ISO/IEC 14443A/MIFARE
- Supports ISO/IEC 14443B (Reader/Writer mode only)
- Up to 50mm of operating distance in Reader/Writer mode for communication to ISO/IEC 14443A/MIFARE, ISO/IEC 14443B or FeliCa cards
- Up to 50mm of operating distance in NFCIP-1 depending on antenna size, tuning, and power supply
- Approximately 100mm of operating distance in ISO/IEC 14443A/MIFARE or FeliCa card emulation mode
- Possibility to communicate on the RF interface above 424 kbit/s using external analog components
- Dedicated host interrupts
- Low power modes
- Hard-Power-Down mode
- Soft-Power-Down mode
- Programmable timers
- Crystal oscillator
- 2.7 to 5.5 V power supply operating range
As the full list of PN532’s features may be exhaustive, I’ll only be highlighting the key ones. For the full list of features and benefits, you can check out PN532 datasheet!
PN532 NFC Module: Grove – NFC

Now that we’ve talked about NFC and PN532, let’s put them together and take a look at a pn532 NFC module, unlike other breakout boards!
What’s good about the Grove – NFC PN532 Module?
Flexibility
The PN532 allows for microcontroller pairing flexibility, with support for I2C, and UART interfaces.
Independent PCB antenna
What comes with this PN532 module is an independent PCB antenna that can easily stretch out of any enclosure you use, leaving more room for you to design the exterior of your project!
Specifications
- Working Voltage: 3.3V
- Working Current: Static Mode: 73mA, Write/Read Mode: 83mA
- Support host interface: I2C, UART(default).
- Serve for contactless communication at 13.56MHz.
- Support ISO14443 Type A and Type B protocols.
- Max operating distance for detecting NFC tags is 28mm depending on current antenna size.
- Support P2P communication.
- Dimensions: 25.43mm x 20.35mm
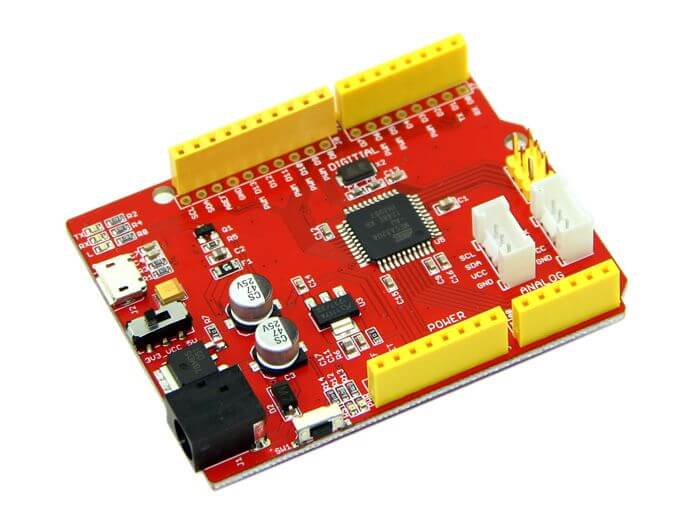
Looking for a PN532 NFC shield instead? Not to worry, we provide just that!

Built around the PN532 module, this NFC shield allows for a 5cm max effective range, with support for SPI interface, allowing you to stack it on your Arduino boards!
Key Features include:
- Use of the ICSP header for SPI. This means that the shield works with the following Arduino development boards: Uno, Mega, Leonardo
- Wireless NFC communication at 13.56MHz
- SPI protocol – pin saving interface that requires only 4 pins
- Input Voltage: 5V from the Arduino’s 5V pin
- Typical Current: 100mA
- 5cm max effective range
- Supports P2P communication
- Support ISO14443 Type A and Type B protocols
Note: This NFC shield can be used for Raspberry Pi as well, but you’ll need to modify the library
Interested in finding out more on the NFC Shield? You can head to its product page to find out more!
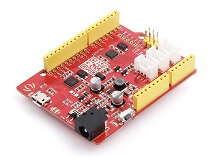
What about a PN532 NFC Hat for your Raspberry Pi, Arduino or STM32 boards? We got you covered too!

This is an NFC HAT based on PN532 operating in the 13.56MHz frequency range that not only supports Raspberry Pi with its GPIO pins, it easily works on host boards like STM32 and Arduino as well!
Its features include:
- Standard Raspberry Pi 40PIN GPIO extension header, supports Raspberry Pi series boards
- Onboard PN532 chip, supports various NFC/RFID cards like MIFARE/NTAG2xx, etc.
- Three interface options: I2C, SPI, and UART, configured via jumpers and switches
- Breakout control pins, for easily connecting with host boards like STM32/Arduino
- Comes with development resources and manual (examples for Raspberry Python/C, STM32, Arduino)
Interested in finding out more on the NFC Shield? You can head to its product page to find out more!
Getting Started with PN532: Arduino Guide
Before we begin with the Arduino Guide, do consider if you need interface changes into I2C. If needed, you should cut the UART connection and solder the I2C pins as below:

Considered the above? Let’s get started now!
This guide will utilize the Seeed Arduino NFC library, which supports:
- Arduino Uno/Seeeduino v4.2
- Arduino Mega/Seeeduino Mega
- Arduino Zero/Seeeduino Lorawan
- Arduino Leonardo/Seeeduino Lite
*Seeeduino is Seeed’s very own Arduino, built with benefits over the regular Arduino boards
First tutorial: Play with Seeeduino Lite (UART)
What do you need?


Note: Do prepare NFC Tags yourself
Hardware configurations
- Step 1: Connect Grove – NFC to port UART of Grove-Base Shield
- Step 2: Plug Grove – Base Shield into Seeeduino Lite
- Step 3: Connect Seeeduino Lite to PC via a USB cable
Software configurations
- Step 1: Download Seeed Arduino NFC Library
- Step 2: Refer to How to install library to install Seeed Arduino NFC library for Arduino
- Step 3: Download PN532 Library and put it under C:\Program Files (x86)\Arduino\libraries\Seeed_Arduino_NFC-master\src.
- Step 4: Open “ReadTag” code via the path:
- File → Examples → ReadTag.
- Step 5: Modify the code as below to enable UART communication
#if 0 // use SPI
#include <SPI.h>
#include <PN532/PN532_SPI/PN532_SPI.h>
PN532_SPI pn532spi(SPI, 9);
NfcAdapter nfc = NfcAdapter(pn532spi);
#elif 1 // use hardware serial

#include <PN532/PN532_HSU/PN532_HSU.h>
PN532_HSU pn532hsu(Serial1);
NfcAdapter nfc(pn532hsu);
#elif 0  // use software serial

#include <PN532/PN532_SWHSU/PN532_SWHSU.h>
#include "SoftwareSerial.h"
SoftwareSerial SWSerial(2, 3);
PN532_SWHSU pn532swhsu(SWSerial);
NfcAdapter nfc(pn532swhsu);
#else //use I2C

#include <Wire.h>
#include <PN532/PN532_I2C/PN532_I2C.h>

PN532_I2C pn532_i2c(Wire);
NfcAdapter nfc = NfcAdapter(pn532_i2c);
#endif- Step 7: Upload the code. If you’re unsure on how to do so, please check How to upload the code
- Step 8: Open the Serial Monitor of Arduino IDE by clicking Tool-> Serial Monitor. Or tap the Ctrl+Shift+M key at the same time. Set the Baud Rate at 9600
- Step 9: Use the Grove – NFC to get close to an NFC Tag. If everything goes well, you will get the NFC Tage Information in the Serial Monitor.
Note:
For connection to Arduino Mega UART ports, you can change the PN532_HSU pn532hsu (Serial 1) to PN532_HSU pn532hsu (Serial X)
For the connection of Grove-NFC sensors to Arduino Uno, you can use the software serial. Do follow below to configure software serial.
#if 0 // use SPI
#include <SPI.h>
#include <PN532/PN532_SPI/PN532_SPI.h>
PN532_SPI pn532spi(SPI, 9);
NfcAdapter nfc = NfcAdapter(pn532spi);
#elif 0 // use hardware serial

#include <PN532/PN532_HSU/PN532_HSU.h>
PN532_HSU pn532hsu(Serial1);
NfcAdapter nfc(pn532hsu);
#elif 1  // use software serial

#include <PN532/PN532_SWHSU/PN532_SWHSU.h>
#include "SoftwareSerial.h"
SoftwareSerial SWSerial(2, 3);
PN532_SWHSU pn532swhsu(SWSerial);
NfcAdapter nfc(pn532swhsu);
#else //use I2C

#include <Wire.h>
#include <PN532/PN532_I2C/PN532_I2C.h>

PN532_I2C pn532_i2c(Wire);
NfcAdapter nfc = NfcAdapter(pn532_i2c);
#endif
Second tutorial: Play with Seeeduino V4.2 (I2C)
You can connect the PN532 with Seeduino V4.2, an Arduino Uno alternative
Seeeduino V4.2 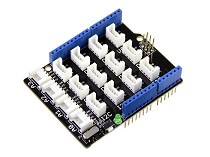
Base Shield 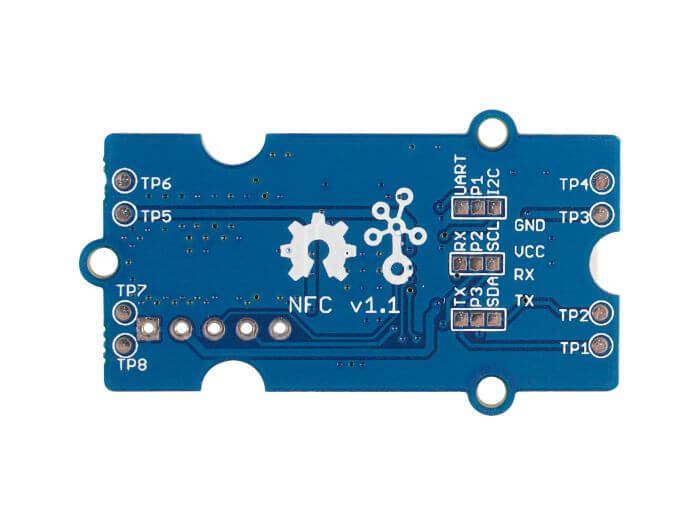
Grove – NFC 
NFC Tags
Note: Do choose 13.5MHz, ISO14443 NFC Tags, if not the Grove-NFC module may not read the tag
For this demo, it works without the base shield since the Seeeduino V4.2 has an onboard Grove I2C connector
Let’s get started!
Hardware configurations:
- Step 1. Connect Grove – NFC to port I2C of Grove-Base Shield. Please make sure you follow hardware overview to change the default UART setting to I2C.
- Step 2. Plug Grove – Base Shield into Seeeduino V4.2.
- Step 3. Connect Seeeduino V4.2 to PC via a USB cable
Software configurations:
- Step 1. Download Seeed Arduino NFC Library.
- Step 2. Refer to How to install library to install Seeed Arduino NFC library for Arduino.
- Step 3. Download PN532 Library and put it under C:\Program Files (x86)\Arduino\libraries\Seeed_Arduino_NFC-master\src.
- Step 4. Open “ReadTag” code via the path: File → Examples → ReadTag.
- Step 5. Modify the code as below to enable I2C communication.
#if 0 // use SPI
#include <SPI.h>
#include <PN532/PN532_SPI/PN532_SPI.h>
PN532_SPI pn532spi(SPI, 9);
NfcAdapter nfc = NfcAdapter(pn532spi);
#elif 0 // use hardware serial

#include <PN532/PN532_HSU/PN532_HSU.h>
PN532_HSU pn532hsu(Serial1);
NfcAdapter nfc(pn532hsu);
#elif 0  // use software serial

#include <PN532/PN532_SWHSU/PN532_SWHSU.h>
#include "SoftwareSerial.h"
SoftwareSerial SWSerial(2, 3);
PN532_SWHSU pn532swhsu(SWSerial);
NfcAdapter nfc(pn532swhsu);
#else //use I2C

#include <Wire.h>
#include <PN532/PN532_I2C/PN532_I2C.h>

PN532_I2C pn532_i2c(Wire);
NfcAdapter nfc = NfcAdapter(pn532_i2c);
#endif- Step 6: Upload the code. If you’re unsure on how, please check How to upload code
- Step 7: Open the Serial Monitor of Arduino IDE by click Tool-> Serial Monitor. Or tap the Ctrl + Shift+ M key at the same time. Set the baud rate 9600
- Step 8: Use the Grove – NFC to get close to an NFC Tag. If everything goes well, you will get the NFC Tag information in the Serial Monitor
Getting Started with Grove NFC (PN532): Projects
Particle Photon + Grove NFC + Grove LCD via I2C
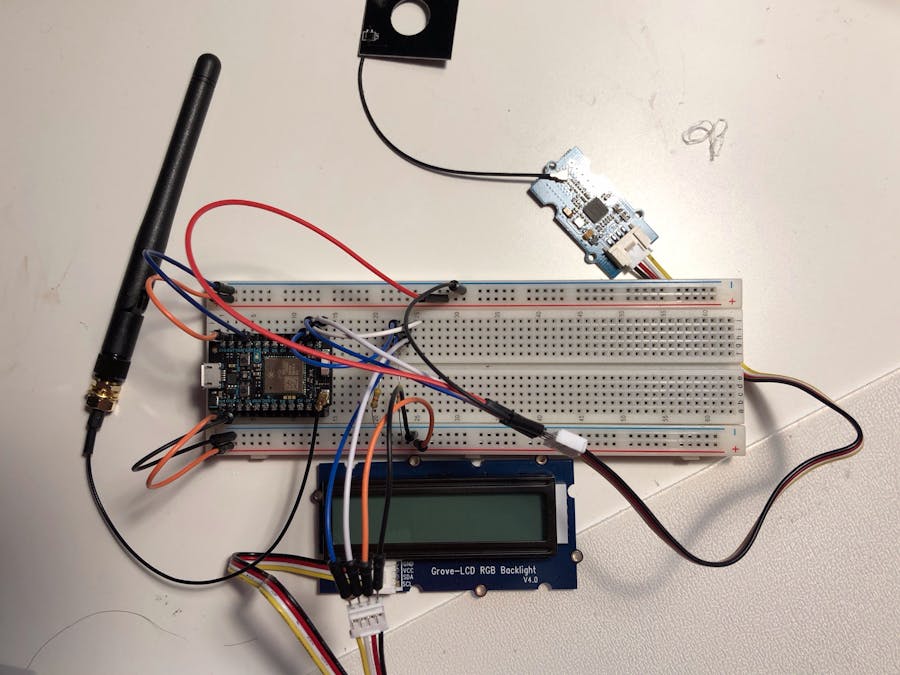
With most of the tutorials on Photon and NFC using SPI and RC522 Modules, this tutorial helps you read out the UID of an NFC card!
What do you need?
Hardware components
Interested? Check out the full tutorial by An Tran on hackster.io!
Resources and Going Further
- [Zip] Grove – NFC v1.0 EAGLE (schematic and board) files
- [Zip] Grove – NFC v1.1 EAGLE (schematic and board) files
- [PDF] PN532 Datasheet PDF
- [Library] Seeed Arduino NFC Library
- [Library] PN532 Library
Summary
That’s all for today’s blog. I hope you learnt more about NFC and PN532.
Overall, with the rise of NFC technology in recent years and the countless possibilities for using NFC and RFID, start building your own project ideas today!
Do consider the products covered in today’s blog to help you get started:
- Grove – NFC built around PN532 module
- NFC Shield V2.0
- 4.2 inch Passive NFC E-paper screen