VL53L0X Time-of-Flight Distance Sensor: Arduino Guide to get started
VL53L0X, a Time-of-Flight distance sensor, measuring distance with Arduino like no other! The VL53L0X sensor houses ST FlightsenseTM patented technology alongside leading-edge SPAD array in the smallest package of laser-ranging modules in the market!
In today’s blog, I’ll be covering:
- What is the VL53L0X sensor? Introduction
- VL53L0X module
- VL53L0X Arduino Guide
This blog will include VL53L0X datasheet and its API user manual under the Resources Section as well!
VL53L0X Sensor: Overview
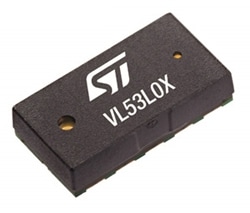
Introducing the world’s smallest time of flight ranging and gesture detection sensor, VL53L0X. Part of ST new generation of laser ranging modules, it provides accurate distance measurement, unlike other proximity sensors!
Despite its small form factor, it still contains a plethora of features, namely the following:
- Fully integrated miniature module
- 940 nm laser VCSEL
- VSCEL driver
- Ranging sensor with an advanced embedded microcontroller
- 4.4 x 2.4 x 1.0mm (Yes, that small!)
- Fast, accurate distance ranging
- Measures up to 2m (absolute range)
- Range reported is independent of the target reflectance
- Advanced embedded optical cross-talk compensation to simplify cover glass selection
- Safe to use, with compliance with IEC
- Class 1 laser device that’s compliant with latest standard IEC 60825-1:2014 – 3rd edition
- Easy integration
- Single reflowable component
- No additional optics
- Only require a single power supply
- Device control and data transfer is done through the I2C interface
- Xshutdown (reset) and interrupt GPIO
- Programmable I2C address
In awe of all these features? There’s more! The VL53L0X is widely applicable, catering to all your potential needs! The applications follow:
- User detection for personal computers/laptops/tablets and IoT (energy saving)
- Obstacle detection with Robots (Robotics)
- White goods (hand detection in automatic faucets, soap dispensers, etc.)
- 1D gesture recognition
- Laser-assisted autofocus. Enhances and speeds up camera autofocus system performance, especially in difficult scenes (low light levels, low contrast) or fast-moving video mode
Why is VL53L0X better than other proximity sensors?
| VL53L0X (Time-of-Flight technology) | Other proximity sensors (IR technology) | |
|---|---|---|
| How distance is measured | Directly measure distance to an object based on the time for emitted photons to be reflected | Measure distance to an object based on amount of light bounced off |
| Variables affected | Not affected by object characteristics: Size, dimesions, materials used, etc. | Affected by object characteristics Affected by environmental factors; lighting conditions |
With VL53L0X using time-of-flight technology for distance measurement, it’s insensitive to external variables such as object characteristics. This makes it a far more precise option as compared to other proximity sensors like IR technology as seen!
Now for a Fun Fact!

Do you know before the VL53L0X, early adopters of the time of flight sensor technology is what you see above? Yes, Microsoft Kinect for XBOX 360!
The Kinect controller technology is then miniaturized, improved, and simplified to create distance ranging sensors seen in your VL53L0X!
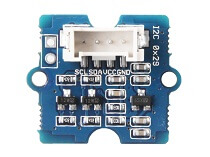
VL53L0X Module: Grove – Flight of Time Distance Sensor

To get started with the VL53L0X sensor, you’ll need a module that integrates it for easier microcontroller interfacing. This is the Grove – Time of Flight Distance Sensor, based on the VL53LOX, and it does just that!
Its specifications:
| Features | Details |
|---|---|
| Operating Voltage | 3.3V / 5V |
| Operating Temperature | -20℃ – 70℃ |
| Recommended measuring distance | 30mm – 1000mm (3cm – 100cm) |
| Resolution | 1mm |
| Infrared emitter | 940 nm |
| Bus rate | Up to 400kHz (FAST mode) serial bus |
| IIC Address | 0x29 |
Apart from its specifications, the Grove – Flight of Time Distance contains exactly the same features, applicational possibilities, and more!
Why pick this sensor as compared to other VL53L0X sensors?
You can find other VL53L0X breakout boards, sensors, modules, etc. available, but what makes the Grove – Time of Flight Distance Sensor the one to go with? Here’s why!
Ease of pairing VL53L0X with Arduino through Seeed’s very own Grove system
Grove system is Seeed very own initiative, mainly aimed at helping users like yourself to easily use different modules, through our plug and play system!
This means no more using messy and complicated jumper wires, soldering, breadboard, or debugging electronic circuits!
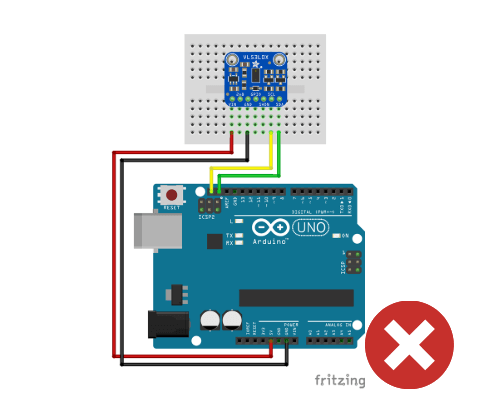
Like how simple and less messy it is compared to other VL53L0X modules?
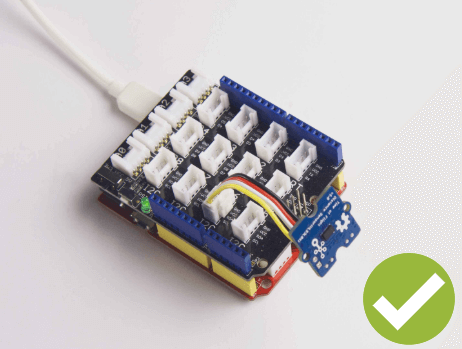
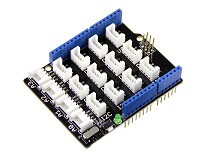
All you need is a Grove Base Shield alongside your Arduino and you’re good to go! Switch to using grove today!
VL53L0X Arduino Guide
We’ve talked about the VL53L0X, and now it’s time for the moment you’re waiting for; How to pair VL53L0X with an Arduino? Here’s a guide to help you get started right away!
Note: This module is compatible with the Raspberry Pi as well, but users have to write their own software library as it’s not possible to provide software library/demo code for all platforms
What you’ll need:
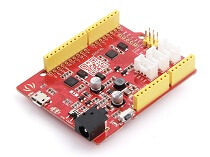
*Seeeduino is Seeed’s very own Arduino, built with benefits over the regular Arduino boards.
Hardware configurations:
- Step 1: Connect Grove – Time of Flight Sensor to port IIC of Grove-Base Shield
- Step 2: Plug Grove – Base Shield into Seeeduino
- Step 3: Connect Seeeduino to PC via a USB cable
It should now look something like this after pairing things up:

Software configurations
- Step 1: Download the VL53L0X Library from Github
- Step 2: Extract the
Grove-Ranging-sensor-VL53L0X-master.zipfile into theArduino library folder.
Note: For example, I download this library into D:\Software\WorkWork\arduino-1.8.5\libraries, so only need to extract the zip file here. All in all, please make sure Grove-Ranging-sensor-VL53L0X-master folder is in your Arduino library folder, like the picture below.

- Step 3: Open the
Grove-Ranging-sensor-VL53L0X-master\examplesfolder you’ve just extracted, you will see five subfolders:

In our tutorial, we are using the high_accuracy_ranging.ino
However, you can choose a different example according to your own needs, you can choose different examples. Then double click the xxx.ino file to open the Arduino IDE.
- Step 4: Upload the demo. If you’re unsure on how to do so, please check How to upload code
- Step 5: Open the Serial Monitor of Arduino IDE by clicking Tool-> Serial Monitor. Or press the CTRL+Shift+M key at the same time.
If everything goes well, you should now achieve the result as follow:
time of mesurement: 205
Measured distance:115 mm
time of mesurement: 205
Measured distance:117 mm
time of mesurement: 205
Measured distance:120 mm
time of mesurement: 205
Measured distance:125 mm
time of mesurement: 204
Measured distance:130 mm
time of mesurement: 205
Measured distance:138 mm
time of mesurement: 205
Measured distance:143 mm
time of mesurement: 205
Measured distance:144 mm
time of mesurement: 205
Measured distance:152 mm
Resources
- [ZIP] Grove-Time of Flight Distance Sensor VL53L0X Eagle files
- [PDF] VL53L0X User Manual
- [PDF] VL53L0X Datasheet
Summary
Overall, the VL53L0X not only offers performance advantages over other proximity sensors, but it also delivers it in such a small form factor.
If you liked what you have seen in today’s blog, I’ll highly recommend the Grove – Flight of Time Distance Sensor to help you easily get started with your proximity sensing needs!
Start building projects with the VL53L0X today!