A complete guide to help you choose lenses for your Raspberry Pi High Quality Camera
Introduction
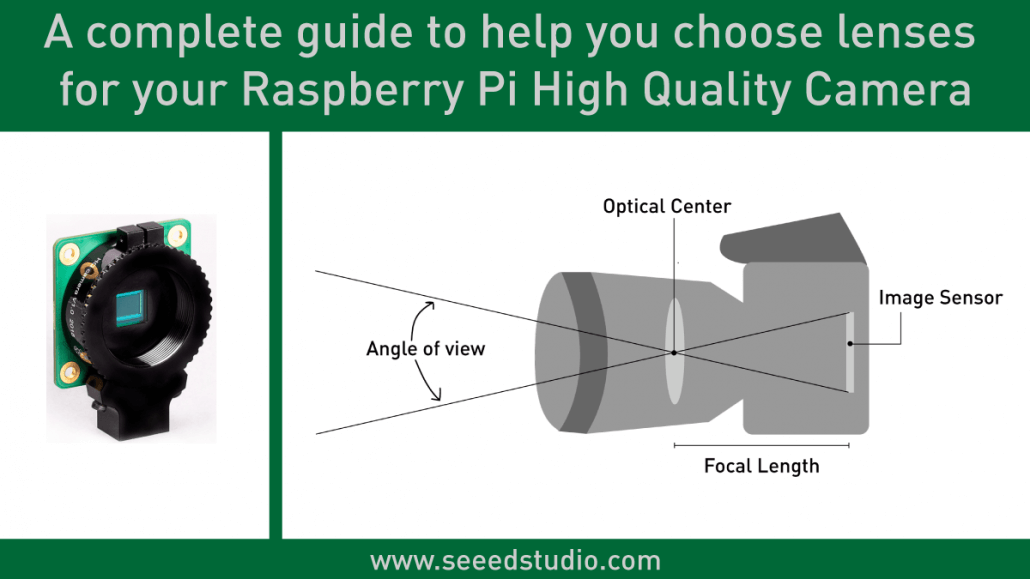
The Raspberry Pi High Quality Camera got released recently and it is the highest resolution camera ever offered by the Raspberry Pi Foundation. The Raspberry Pi community is already loving this camera and implementing it for cool projects!

Unlike the previous version which is Raspberry Pi Camera Module V2 where you were able to use it out-of-the-box, the new Raspberry Pi High Quality Camera is not able to use as such. This is because you need to attach additional lenses to it in order to use it.
Even though this is an extra step, this feature opens a whole new world to a range of lenses you could use with this camera module to take your Raspberry Pi camera-based projects to the next level! So we have released a range of lenses for the Raspberry Pi High Quality Camera, but you might not have a clear idea as to which lens to choose. So, this blog will compare the different lenses that we offer and we hope this will help you decide which lens to buy for your next project!
Understanding the basic parameters when choosing a lens
We offer seven different Raspberry Pi High Quality Camera Lenses to allow you to explore more. But you might think…. what’s the difference between these camera lenses and which one should I choose?
Well, there are a few parameters you should look into when choosing a lens for your Raspberry Pi High Quality Camera. They are:
- Focal Length
- Angle of view
- Effective Focal Length from RPI HQ Camera
- Image Format
- Resolution
- Aperture
- Mount Type
- Minimum Object Distance
These seem a lot. But don’t worry. We will introduce you to each and every parameter to give you a quick explanation about them.
Focal Length
Simply, the focal length is the distance between the optical center of a lens and the camera image sensor and this is measured in millimeters. Optical center is the location where all the light rays coming into the lens, converge to produce a sharp image. We will illustrate this from the diagram below.
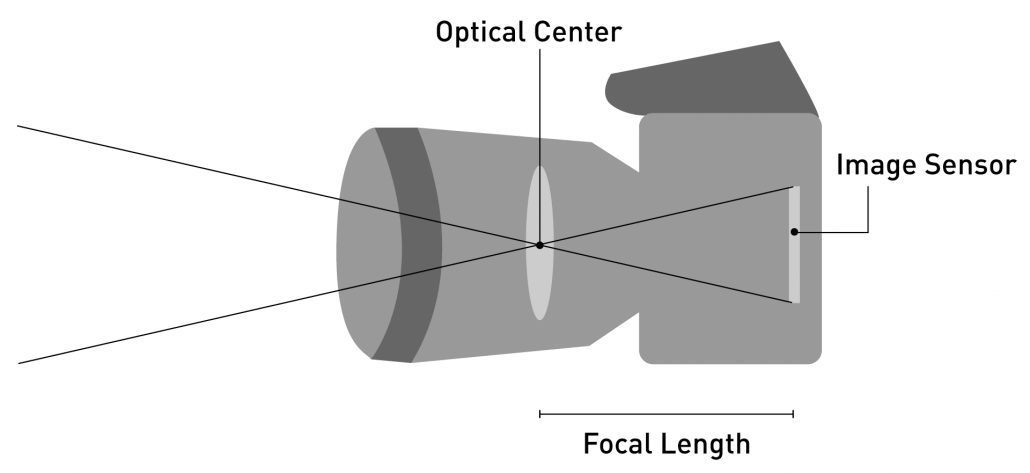
When the focal length is longer the physical length of the lens becomes longer and vice versa. Focal Length directly affects how much image area is shown on the camera. High focal length results in magnified images whereas low focal lengths result in more distorted images.
Angle of view
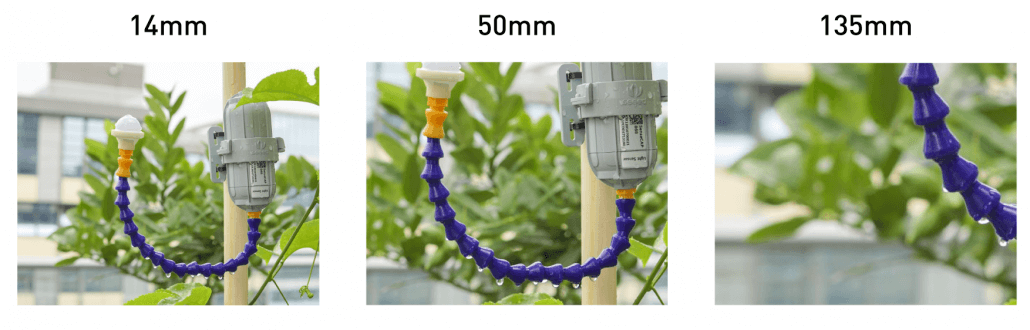
The angle of view is the area of the scene captured by the image sensor and is described as an angle. Wide-angle of view capture more area whereas a small angle of view capture less area. The angle of view is directly related to the focal length of a lens. When the focal length is shorter, the angle of view is wider with greater area captured and when the focal length is longer, the angle of view is narrower with subjects seem to appear larger.

Effective Focal Length from RPI HQ Camera
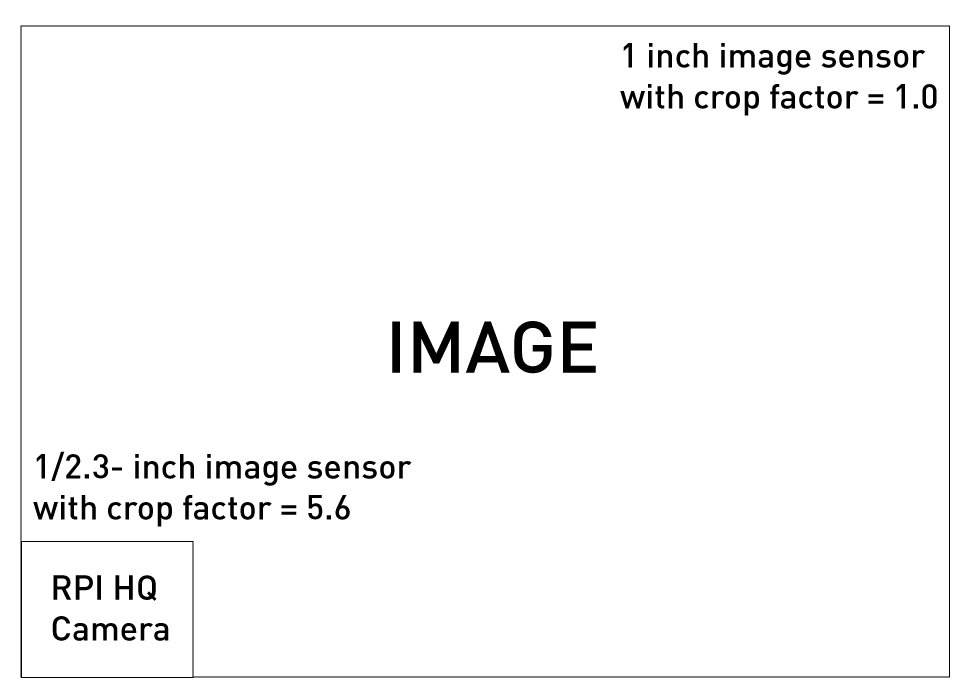
When talking about focal length, the effective focal length is something you should really care about. This is because the focal length of the camera is not the same when you attach with cameras having different sized image sensors. When the image sensor on the camera is smaller, the effective focal length becomes smaller and vice versa. The effective focal length can be calculated by taking “crop factor” into consideration. For example, the Raspberry pi High Quality Camera has a 1/2.3inch image sensor with a 5.6 crop factor. Therefore, when a 25mm lens is attached to it, the effective focal length will be 25mm*5.6 = 140mm.
You can learn more about crop factor in our blog How Does Crop Factor Affect Raspberry Pi Camera Lenses?
Image Format
This is the diameter of the lens. The image format of the lens is directly affected by the image sensor size on the camera. In order to obtain the complete image from the lens, the image format of the lens should be equal or greater than the size of the image sensor as illustrated below.

Resolution
Resolution describes how much detail a particular lens is capable of capturing. Therefore, when the resolution is higher, resulting images have higher details and you are able to magnify those images without losing clarity. But for low resolution, the resulting images have lower details and when they are magnified, the images tend to be pixelated.

Aperture
Aperture is related to the size of the opening at the back of a lens and it controls how much light is passed on to the image sensor of the camera. When the aperture opening is narrow, less light is passed on to the image sensor and therefore the exposure is lower. When the aperture opening is wide, more light is passed on the image sensor and therefore the exposure is higher. Normally this is described in “F/stops” and it is written as F1.4, F2, F2.8 etc… Aperture also affects the focus of the image or rather the “depth of field”.

When the aperture opening is wide with a low F stop value, the image background becomes more blurred resulting in a shallow depth of field whereas when the aperture opening is narrow with a high F stop value, the complete image stays in focus resulting in a flat image with a deeper depth of field. Let’s illustrate the aperture from the diagram below.
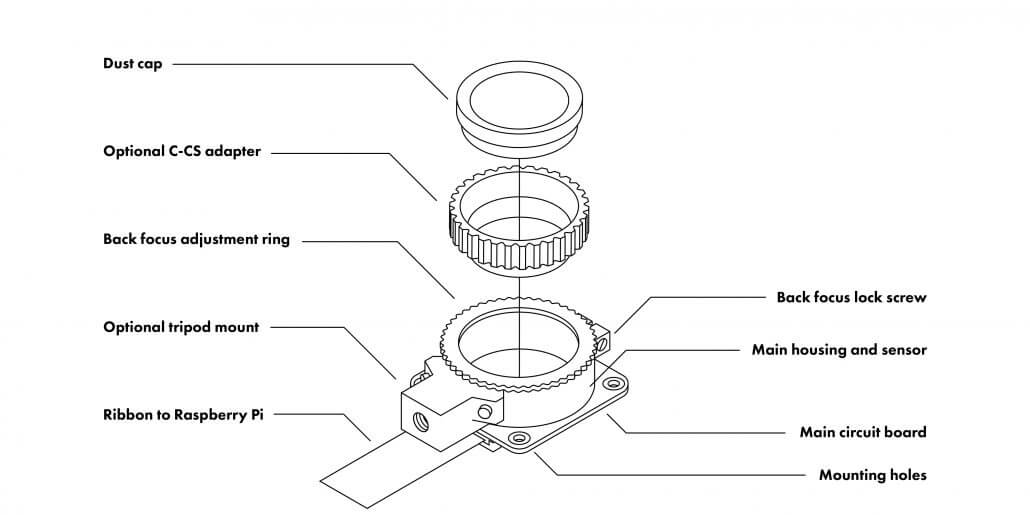
Mount Type
Different camera lenses have different connector types when connecting to a camera. This connector type is called as a mount type. The Raspberry Pi High Quality Camera is equipped with a CS lens mount by default. So if you want to connect a lens such as the 6mm lens, you can directly connect it to the Raspberry Pi High Quality Camera since it has a CS-mount.

However most other lenses that we offer have a C mount type. In this case you can use the additional C-CS adapter which comes with the Raspberry Pi High Quality Camera and connect to it.

Minimum Object Distance
When you use lenses with cameras, you always have to use the focus ring to focus on subjects. Minimum object distance describes the shortest distance between the foremost lens and the subject which you can still focus on.

Which Raspberry Pi High Quality Camera Lens to Choose?
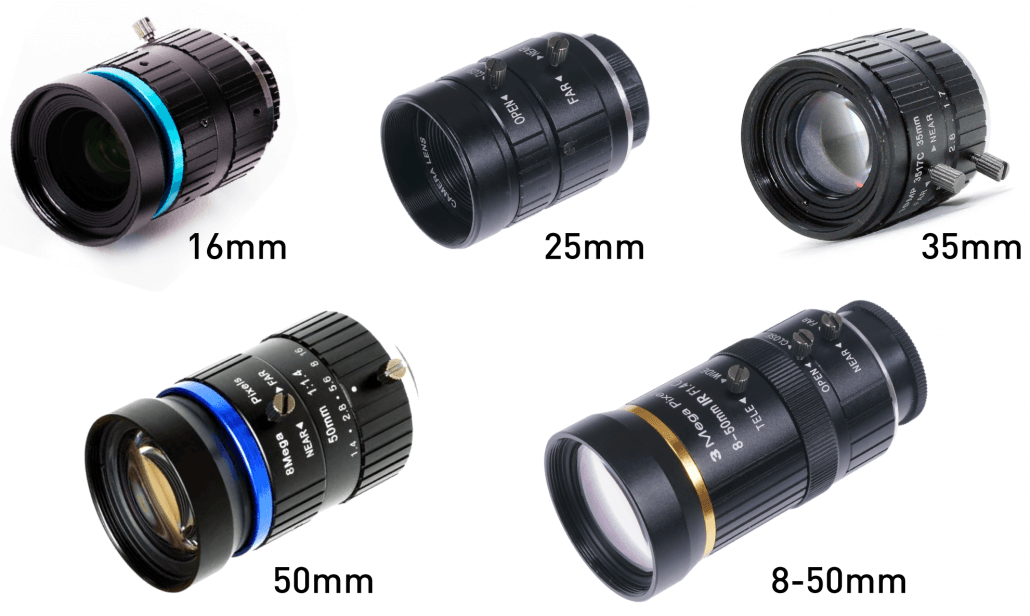
Now that we know what to consider when choosing a lens, let’s have a comparison of the lenses that we offer along with their different parameters.
| 113990818 | 101990643 | 114992274 | 114992275 | 114992276 | 114992278 | |
|---|---|---|---|---|---|---|
| Image Format | 1/2″ | 1″ | 1/2″ | 1/2″ | 1″ | 1/2.3″ |
| Focal Length | 6mm | 16mm | 25mm | 35mm | 50mm | 8-50mm |
| Resolution | 3 Megapixel | 10 Megapixel | 10 Megapixel | 10 Megapixel | 8 Megapixel | 3 Megapixel |
| Aperture | F1.2 | F1.4 to F16 | F1.4 to F16 | F1.7 to F16 | F1.4 to F16 | F1.4 to F16 |
| Mount Type | CS | C | C | C | C | C |
| Angle of View | 63° | 1″ 44.6°× 33.6° 2/3″ 30.0°× 23.2° 1/1.8” 24.7°× 18.6° 1/2″ 21.8°× 16.4° |
19.6° | 14.3*10.7° | 1″ 14.5°x10.8° 2/3″ – 10°x7.5° 1/1.8″ 8.2°x6.2° 1/2″ – 7.3°x5.5° |
Wide: 41.8°x30.8° / Tele: 6.42°x4.80° |
| Minimum Object Distance | 0.2m | 0.2m | 0.3m | 0.35m | 0.3m | 0.5m |
You can clearly see from the table, every parameter of each lens.
We also offer a microscopic lens with an amazing 300x zoom which suits well for your microscopic projects!
Different categories of lenses
Now let’s talk about the type of scenarios these lenses are suitable for.
Wide Angle Lens: This type of lens allows your camera to capture more of the scene than a normal lens and ideal for landscape photography.
Lens options: 6mm

Telephoto Lens: This type of lens has a long reach and allows you to shoot a subject that is far away.
Lens options: 16mm, 25mm, 35mm, 50mm, 8-50mm
Macro Lens: This type of lens is ideal for closeup photography to get high details images of tiny objects (this is ideal for microscopic application as well)
Lens Options: 300x

Conclusion
We hope you got a clear understanding about all the lenses that we offer and hope this guide helped you to select your favorite lens! We are looking forward to seeing you build amazing projects using our lenses along with the Raspberry Pi High Quality Camera!