Build a Raspberry Pi Security Camera using Raspberry Pi Camera!
Have you ever thought of building your very own affordable security camera network at home? You can actually do so with a Raspberry Pi and Raspberry Pi Camera! This project will take you through everything from what you’ll need to how exactly you should build one. This amazing project is by PiMyLifeUp’s Gus!
Now let’s look at what you’ll be required to have before starting with this project:
- Raspberry Pi 4B 4GB (Any RPI will work!)
- Raspberry Pi Camera Module v2 (Any Pi Camera will work as well!)
- Power Supply
- Micro SD Card (8GB + Recommended)
- Ethernet Cord (Recommended) or WiFi Dongle
- Raspberry Pi Case (Optional, but we offer a variety of cases if you’re interested)
Let’s Begin!
If you’re someone who prefers step-by-step instructions visually, they have kindly attached a video instruction to help you out!
However if you prefer to written instructions, do scroll down to follow along with the step-by-step instructions!
Installing your Raspberry Pi Camera
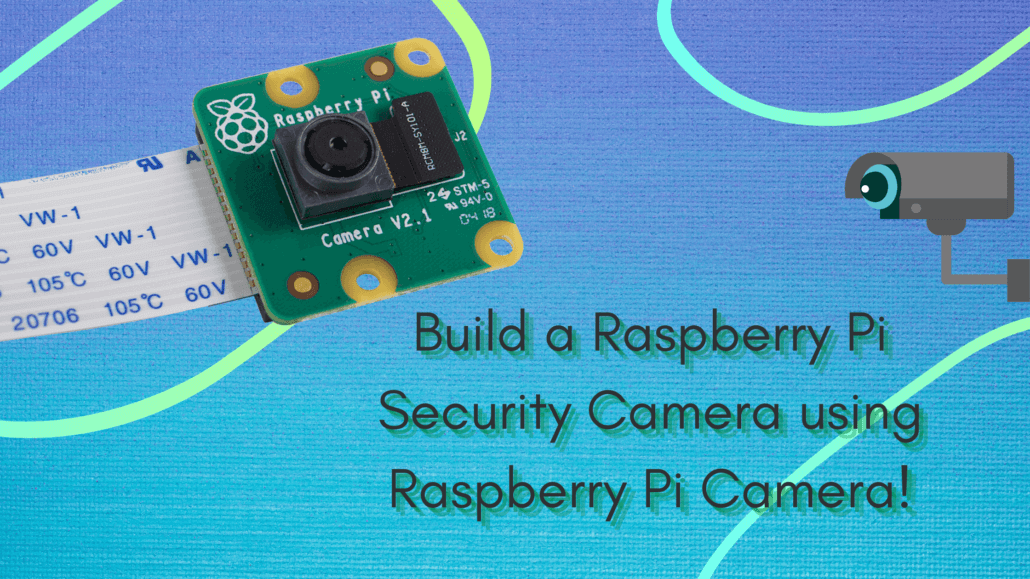
As mentioned, you’ll need a Raspberry Pi Camera. A regular IR camera, Raspberry Pi Camera Module v2 was used in this case, the one as shown below. But you can select any Pi camera as you like!

Once you got your camera, we will need to install the camera, and to do this go to the ribbon slot (the one directly behind the Ethernet port) using two fingers gently pull up on both sides of the connector as you can see from the image below.
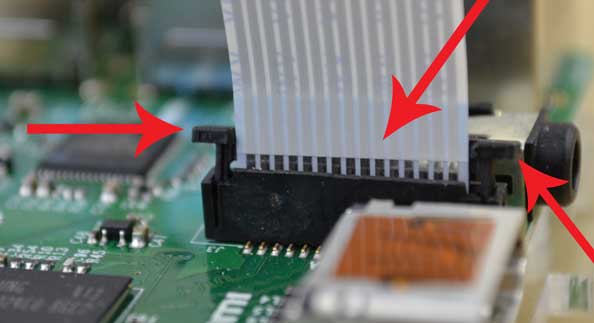
Once the connector is opened, insert the ribbon cable with the metal leads facing away from the Ethernet port. Line it up nicely and gently press back down on the connector. The cable should now be locked in place!
Installing Software: MotionEye OS
As usual, feel free to choose other software but MotionEye OS is just easy to set up for what this project needs. The instruction to setup are as follows:
Download MotionEye OS and formating SD card
Step 1: Download the MotionEye OS SD Card Image from the MotionEye OS GitHub repository.
Step 2: Visit the SD Association’s website and download SD Formatter for either Windows or Mac. The purpose of this is to format your software, then proceed.
Step 3: Insert your SD card into the computer or laptop’s SD card reader and check the drive letter allocated to it, e.g. G:/
Step 4: In SD Formatter, select the drive letter for your SD card (eg. G:/) and format
Install MotionEye OS Image onto SD Card
Step 1: Download Win32DiskImager
Step 2: Unzip MotionEye OS img file to install it onto the Pi safely.
Step 3: Select the MotionEye OS img file and the drive letter your SD card is assigned (Eg. G:/)

Step 4: Confirm you have the correct details and click on Write.
Step 5: Once you’re done, you can then safely remove your SD card from the computer.
Setting up MotionEye OS
Now, insert your SD Card, Ethernet cord, and the power cord to prepare for rebooting. And now you can reboot your RPI and proceed to setup.
Setting up your Raspberry Pi Security Camera
Step 1: You’ll need to know your IP or hostname, so in order to do so:
- If you’re using Windows, simply go to network on the right-hand side in the File Explorer.
- You should see a computer names something like MP-E28D9CE5
- Go to your browser and add this to your browser bar e.g.
http://MP-E28D9CE5 - You should now have the MotionEye OS interface up.
- Though you can also find out the IP of the Pi by going to your router.
Step 2: To log in as the admin go to the key symbol in the upper-left corner.
- The username is
adminand the password is blank (Don’t enter any password), this can be changed later.
And it should do the trick! Though if you want to run more than one security camera, keep scrolling.
If you’re setting up multiple networks Raspberry Pi security cameras
Step 1: Click on the three lines with dots on them in the upper left-hand corner.
Step 2: Now up in the upper-left-hand corner and click on the drop-down box and select add camera.
Step 3: There four settings to set up:
- Device: This allows you to select where the camera is located(network/local) and type. (Eg. MotionEye, MJPEG camera)
- URL: This is the URL to the other network camera. Eg.
http://othercamera:8080 - Username: This is the username of the camera device. (If no username/password is required, then leave the fields blank)
- Password: This is the password for the username chosen above.
- Camera: Select the camera you wish to add.
Here’s an example to help you out, Camera1 (Pi Camera) and camera2 (USB WebCam) are connected to the Pi running MotionEye OS. While camera3 is coming from a different Pi that was set up using the webcam server tutorial:

Summary
And that’s is just about the basics you need to know how you can build your very own Raspberry Pi Security Camera Network! Should you require more information about this project, do head over to PiMyLifeUp for more details! For more Raspberry Pi Camera related content, do check out the suggested readings below!
Suggested Readings
- 15 Best Raspberry Pi Cameras and Lenses
- Raspberry Pi Camera: Comparison of High Quality Camera with Camera Module V2
- 20 Best Raspberry Pi Camera Projects to Help You Get Started!
- A complete guide to help you choose lenses for your Raspberry Pi High Quality Camera