Arduino Tutorial: How to drive a DC and Servo Motor

The Arduino has always been used to control motors. A few examples would be the DC motor, servo motor, and stepper motor. Today, we are going to cover 2 motors, DC and Servo Motor, which are widely being used by many electronic hobbyists and makers due to their simplicity and functions.
To get you started, in today’s blog, we will cover 2 ways you can control a DC motor using your Arduino and how to control a Servo Motor with the Arduino.
Today blog will cover:
- What is a DC motor
- Controlling a DC motor with an Arduino Motor Shield
- Controlling a DC motor with an Arduino Motor Driver
- What is a Servo Motor
- Controlling a Servo motor with the Arduino
What is a DC motor?
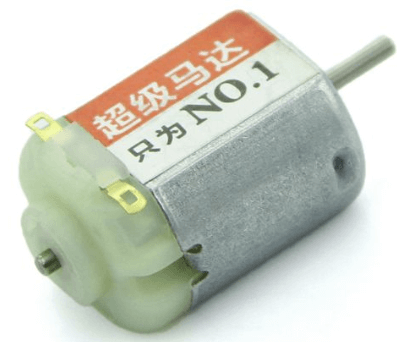
- DC Motor refers to a rotating electrical machine that converts direct current electrical energy into mechanical energy. It is a motor that can convert electrical energy into mechanical energy in order to run. Correspondingly, the motor that uses AC power is an AC motor
- When current is passed through, opposite polarity between the two magnetic fields inside the motor causes it to spin continuously in one direction until the current stops.
- DC motors have no polarity (Unless marked with + or -), which means you can reverse the direction of the motor by swapping the two wires.
- They consist of:
- Stator
- Armature
- Rotor
- Commutator with Brushes
- DC motors are used widely in many places. Some of them are your vacuum cleaner, hairdryer, elevators, electric windows in cars, etc.
- DC motors are still used commonly due to its high starting torque (Able to deal with high resistive torques and absorb sudden rises in load effortlessly), simplicity, and also efficiency compared to other motors.
Without further ado, let us jump right in on how to control a DC motor using an Arduino Motor Shield.
Why can the DC motor rotate?
That’s because of the left-hand rule. When the current flows through the rotor, the rotor generates a force in the magnetic field, which can rotate. When current passes through, the opposite polarity between the two magnetic fields inside the motor will cause it to spin continuously in one direction, and then stop when the current stops.
DC motors have no polarity (Unless marked with + or -), which means you can reverse the direction of the motor by swapping the two wires.
Basically, when a DC motor two leads (positive and negative) are connected directly to a power source, the motor will rotate and in a direction. When the leads are switched, the motor will rotate in the opposite direction.
Controlling a DC motor with an Arduino Motor Shield
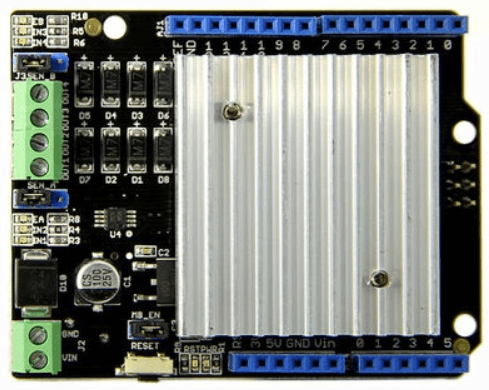
- The Motor Shield is a driver module for motors that allows you to use Arduino to control the working speed and direction of the motor.
- The working principle of the motor drive module is to control the power electronic devices according to the signal from the Arduino to control the work of the motor.
- The Motor Shield is based on the Dual Full-Bridge Drive Chip L298, it is able to drive two DC motors or a step motor. If you do not know what is L298, you can check out our other blog on the L298 motor driver here!
- So how do you drive a DC motor with an Arduino motor shield?
What do you need?
Step by step instructions on how to drive DC motor with Motor Shield
- Step 1
- Set SEN_A and SEN_B and connect the left 2 pins together with a jumper.
- Step 2
- Connect MB_EN together with a jumper, as we are not going use external power.
- Step 3
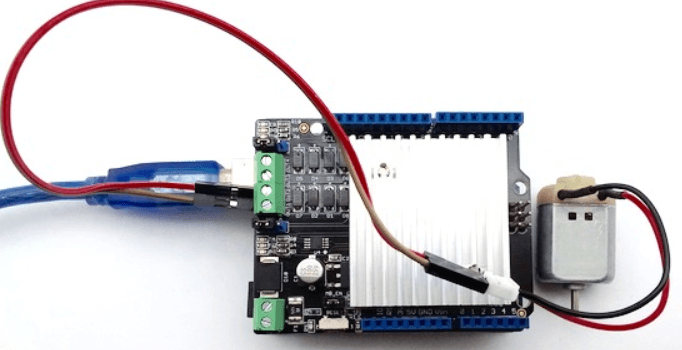
- Connect DC motor to Chanel 0 (OUT1 and OUT2) and plug Motor Shield into Arduino.
- Connect Arduino to PC via a USB cable.
- Your connection should look like this:
- Step 4
- Download Motor shield library here and install the library
- For users who do not know how to install an Arduino library, you can follow our guide on how to install and Arduino library.
- Step 5
- Upload the following code to Seeeduino:
//  Demo function:The application method to drive the DC motor.
//  Author:Loovee ([email protected])
//  2016-3-11

#include "MotorDriver.h"

MotorDriver motor;

void setup()
{
    // initialize
    motor.begin();
}

void loop()
{
    motor.speed(0, 100);            // set motor0 to speed 100
    delay(1000);
    motor.brake(0);                 // brake
    delay(1000);
    motor.speed(0, -100);           // set motor0 to speed -100
    delay(1000);
    motor.stop(0);                  // stop
    delay(1000);
}
// END FILE
Your motor should move for 1 second, stop for another second, move back for 1 second, stop for a second and loop. If nothing happens, please make sure:
- The code has been uploaded successfully
- The motor is connected properly
- The LED indicators blink right
That’s all! You have managed to run a DC motor with an Arduino Motor shield in 5 steps! The motor shield can also be used to run a servo motor! Interested? Click here to find out how.
Controlling a DC motor with an Arduino Motor Driver
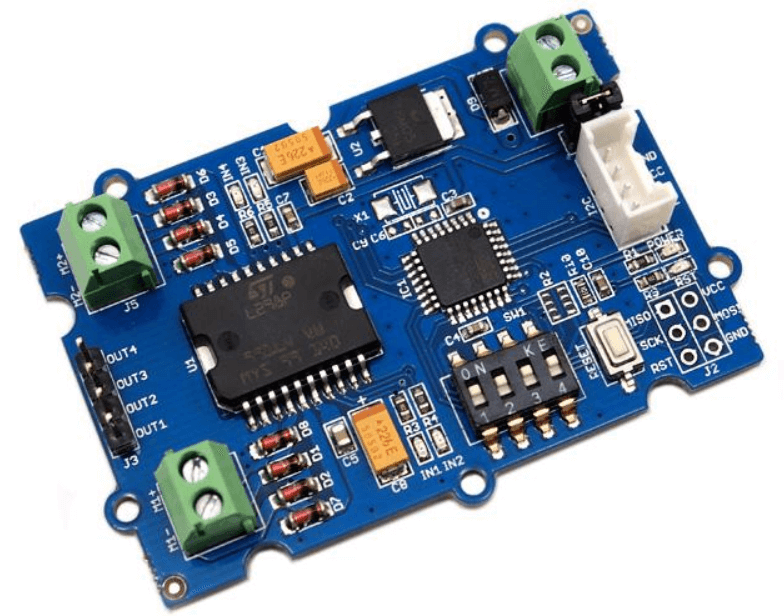
- The Grove – I2C Motor Driver V1.3 (latest version) can directly control Stepper Motor or DC Motor.
- Its heart is a dual channel H-bridge driver chip(L298N)that can handle current up to 2A per channel, controlled by an Atmel ATmega8L which handles the I2C communication with platforms such as Arduino.
- You can read more about the L298N driver chip on our other blog here!
- Both motors can be driven simultaneously while set to a different speed and direction and can also power two brushed DC motors or one 4-wire two-phase stepper motor.
- All driver lines are protected by diodes from back-EMF.
- So how do you drive a DC motor with an Arduino and a Motor driver?
What do you need?
- Seeeduino V4.2
- Base Shield V2 – Optional, To make connections simpler
- Grove – I2C Motor Driver V1.3
Step by step instructions on how to drive DC motor with Motor driver
- Step 1
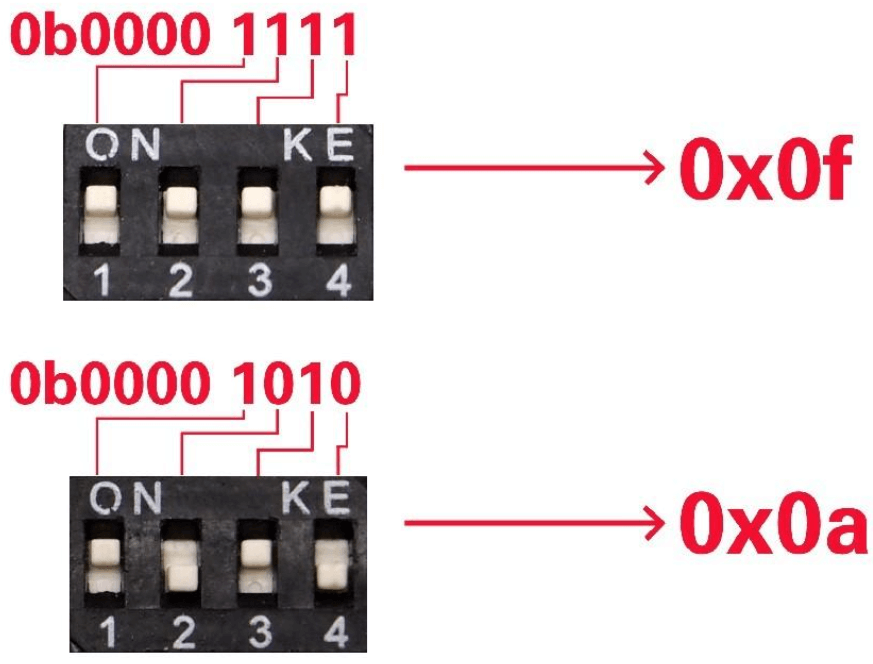
- Set the address using the dial switch which is a new function added to our Grove I2C motor driver V1.3.
- Do note to keep the address setup in the program the same as the address setup on the I2C motor driver. The default address setup in the program is 0x0f.
- Step 2
- Connect Grove – I2C Motor Driver V1.3 to port I2C of Grove-Base Shield and plug Grove – Base Shield into Seeeduino
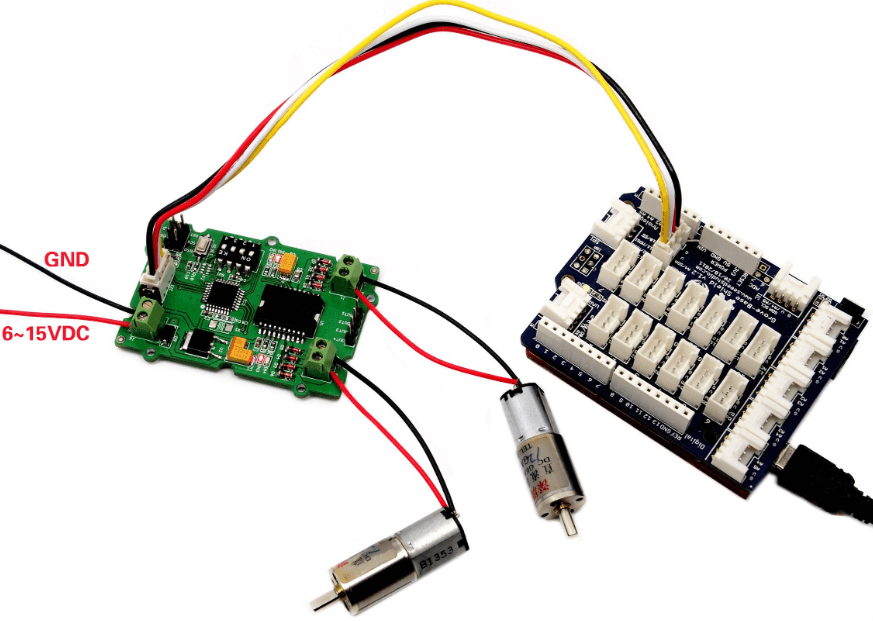
- If you do not have a grove base shield, you can directly connect the Grove-I2C Motor Driven V1.3 to the Seeeduino as shown below:
- Step 3
- Plug Grove – Base Shield into Seeeduino and connect the Seeeduino to the PC via a USB cable.
- Your connection should look like this:
| Seeeduino V4.2 | Grove – I2C Motor Driver V1.3 |
| 5V | Red |
| GND | Black |
| SDA | White |
| SCL | Yellow |
- Step 3
- Connect the Seeeduino to the PC via a USB cable.
- Your connection should look like this:
- Step 4
- Download the Grove I2C Motor Drive V1.3 Library from Github and install library.
- If you do not know how to install library for Arduino, you can refer to our guide on How to install library.
- Step 5
- Copy the following code into Arduino IDE and upload.
- If you do not know how to upload the code, you can refer to our guide on how to upload code.
// default I2C address is 0x0f
#define I2C_ADDRESS 0x0f

void setup()
{
    Motor.begin(I2C_ADDRESS);
}
With that, you have successfully connected the DC motor, motor driver and Arduino together. Here are 2 functions which you can use to control your DC motors:
// Set the speed of a motor, speed is equal to duty cycle here
void speed(unsigned char motor_id, int _speed);

// Stop one motor
void stop(unsigned char motor_id);- With speed() function, you are able to drive one motor at the speed you want.
- Motor_id represents which motor to use, either MOTOR1 or MOTOR2
- _speed represents the speed you set to the motor. You can fill -100~100 here. When _speed>0, DC motor runs clockwise, while _speed<0, DC motor runs anticlockwise. The bigger the absolute value of _speed, the faster the speed of DC motor.
- With stop() function, you are able to stop a running DC motor.
- Motor_id represents which motor to use, either MOTOR1 or MOTOR2.
What is a Servo Motor
- The Servo motor is a rotary actuator that allows for precise control of angular position which makes them suitable for use in closed-loop systems where precise position control is needed.
- Servo motors are part of a closed-loop system and they are a self-contained electrical device that rotate parts of a machine with high efficiency with great precision.
- Servo Motors are made up of:
- Control Circuit
- Small DC Motor
- Potentiometer
The working principle of servo motor
- Servo motors are attached by gears to the control wheel when the motor rotates, the potentiometer resistance changes so the control circuit can precisely regulate how much movement there is and in which direction.
- The motor is controlled with an electric signal, either analog or digital, which determines the amount of movement which represents the final command position for the shaft.
- With its closed-loop mechanism, it incorporates positional feedback to control the rotational or linear speed and position.
- As Servo Motors are high in efficiency and power, they are used in many applications like robots, airplanes and also in industrial and commercial applications where precise position control is needed.
Application of Servo motor
Fields that require high precision, such as machine tools, packaging equipment, textile equipment, laser processing equipment, robots, automated production lines, and other equipment that require relatively high process precision.
Controlling a Servo motor with the Arduino
Through this tutorial, you will learn how to control a Servo Motor with your Arduino in 3 simple steps
What do you need
- Seeeduino V4.2 (Arduino UNO Compatible Board)
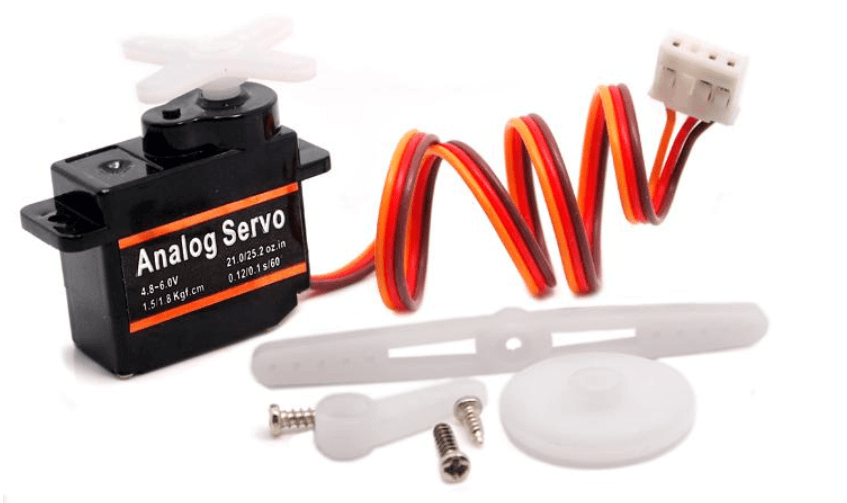
- Grove – Servo
- Base Shield V2 (For easy connection)
Step by step instructions on how to drive a Servo Motor with the Arduino
- Step 1: Connect Servo to the Seeeduino
- The Servo has three wires: power, ground, and signal.
- The power wire is typically red, and should be connected to the 5V pin on the Arduino/Seeeduino board.
- The ground wire is typically black or brown and should be connected to a ground pin on the Arduino board.
- The signal pin is typically yellow, orange or white and should be connected to D5 on the Arduino board.
- You can change to the digital port as you like, but don’t forget to change the port number in the definition of the demo code!
- Step 2: Connect the Module to the PC
- Connect the module to D5 port of Base Shield
- Plug Grove-Base Shield into Arduino
- Connect Arduino to PC via a USB cable.
- Step 3: Software
- We will be sweeping the shaft of a servo back and forth across 180 degrees by using the Arduino Servo Library.
- Open the code directly by the path: File -> Examples ->Servo->Sweep.

/* Sweep
 by BARRAGAN <http://barraganstudio.com>
 This example code is in the public domain.

 modified 8 Nov 2013
 by Scott Fitzgerald
 http://www.arduino.cc/en/Tutorial/Sweep
*/

#include <Servo.h>

Servo myservo;  // create servo object to control a servo
// twelve servo objects can be created on most boards

int pos = 0;    // variable to store the servo position

void setup() {
  myservo.attach(5);  // attaches the servo on pin 5 to the servo object
}

void loop() {
  for (pos = 0; pos <= 180; pos += 1) { // goes from 0 degrees to 180 degrees
    // in steps of 1 degree
    myservo.write(pos);              // tell servo to go to position in variable 'pos'
    delay(15);                       // waits 15ms for the servo to reach the position
  }
  for (pos = 180; pos >= 0; pos -= 1) { // goes from 180 degrees to 0 degrees
    myservo.write(pos);              // tell servo to go to position in variable 'pos'
    delay(15);                       // waits 15ms for the servo to reach the position
  }
}
And you are done! After uploading the sketch, you should see the Servo sweep.
Summary
The Arduino has always been popular when it comes to running motors and today we have just covered two of it which is using it to run a DC Motor and a servo motor. If you have any questions on how to drive a DC or Servo motor using Arduino, please feel free to leave them down in the comments below.
There are also many more motors that the Arduino can run like the stepper motors! Interested? You can check out all of our motor products here!