Lately, the Home Assistant community has been buzzing with discussions about using E-Ink displays as dashboards — and for good reason. These screens offer ultra-low power consumption, making them perfect for 24/7 status displays without needing extra wiring or frequent charging. Their paper-like readability, wide viewing angles, and no glare under sunlight make them ideal for any room, even bright spaces.
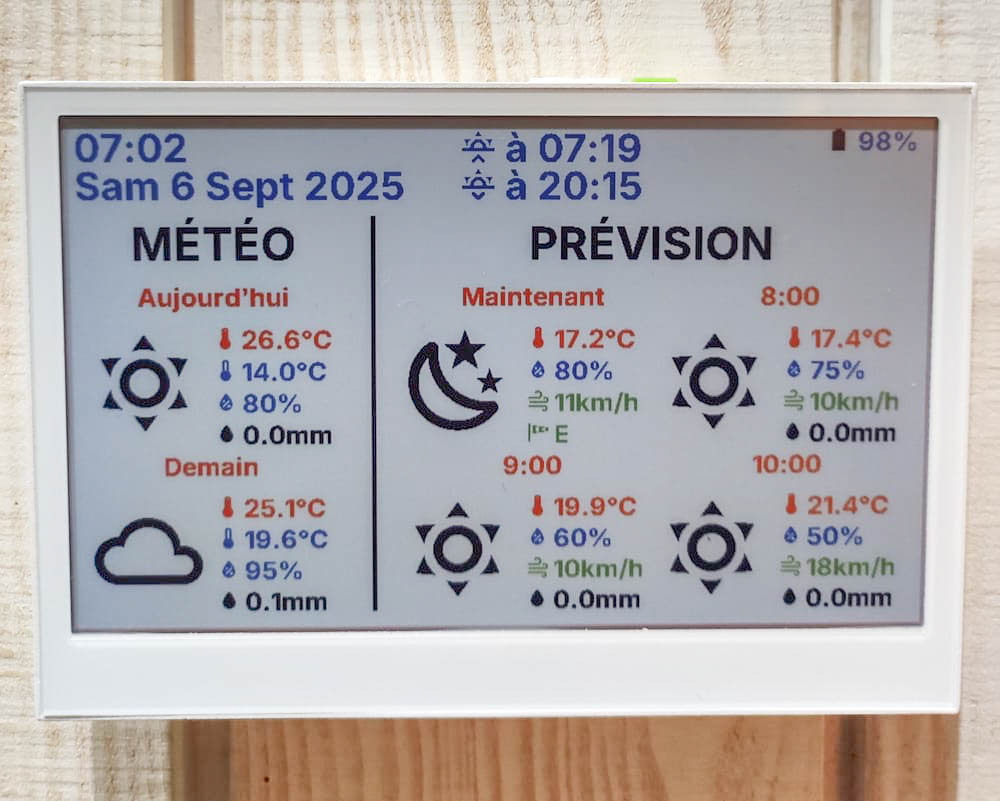
Unlike traditional LCDs or tablets, ePaper panels stay visible even when the screen isn’t actively refreshed, providing a minimalist yet always-on way to show temperature, humidity, weather, energy stats or to-do list.
🧭 In this article, you’ll learn:
- What home assistant enthusiastics are using to create beautiful, low-power E-Ink dashboards.
- How different E-Ink displays perform with Home Assistant, and which one fits your project best.
What Home Sssistant Enthusiastics Are Using
In the Home Assistant community, people have taken three main paths to build E-Ink dashboards. Some repurpose existing e-readers like Kindles, transforming them into always-on information displays through creative hacks and integrations. Others take the DIY route, using E-Ink display modules with microcontrollers to create fully customized dashboards connected via ESPHome. Additionally, there are also plug-and-play ePaper displays that can directly integrate with Home Assistant, eliminating the need to build everything from scratch.
Build From Scratch With Esphome and E-Ink Modules
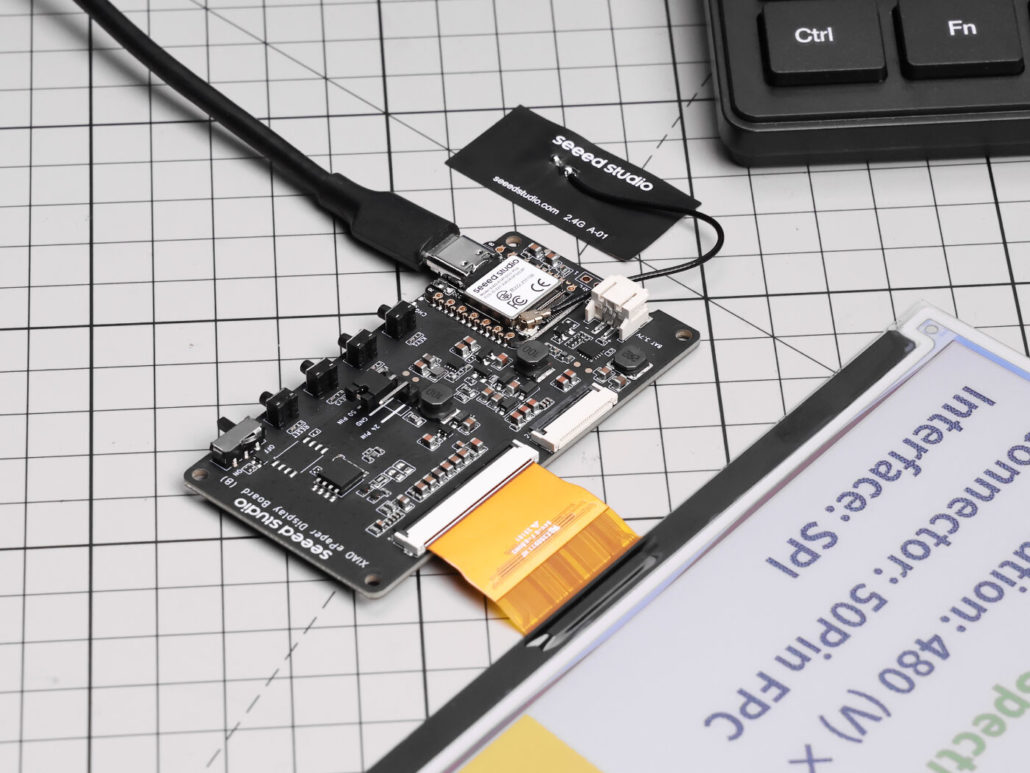
For makers who enjoy hands-on projects, building an ePaper dashboard from scratch offers the most freedom. Using a driver board with an MCU or a Raspberry Pi paired with an E-Ink display module, you can decide every detail yourself — from screen size and color type to enclosure design and interface layout.
However, while the hardware cost is low, this approach demands time and technical skill. You’ll need to handle wiring, firmware setup, and often build your own enclosure. The result is highly rewarding — but far more complex and time-consuming than plug-and-play options.

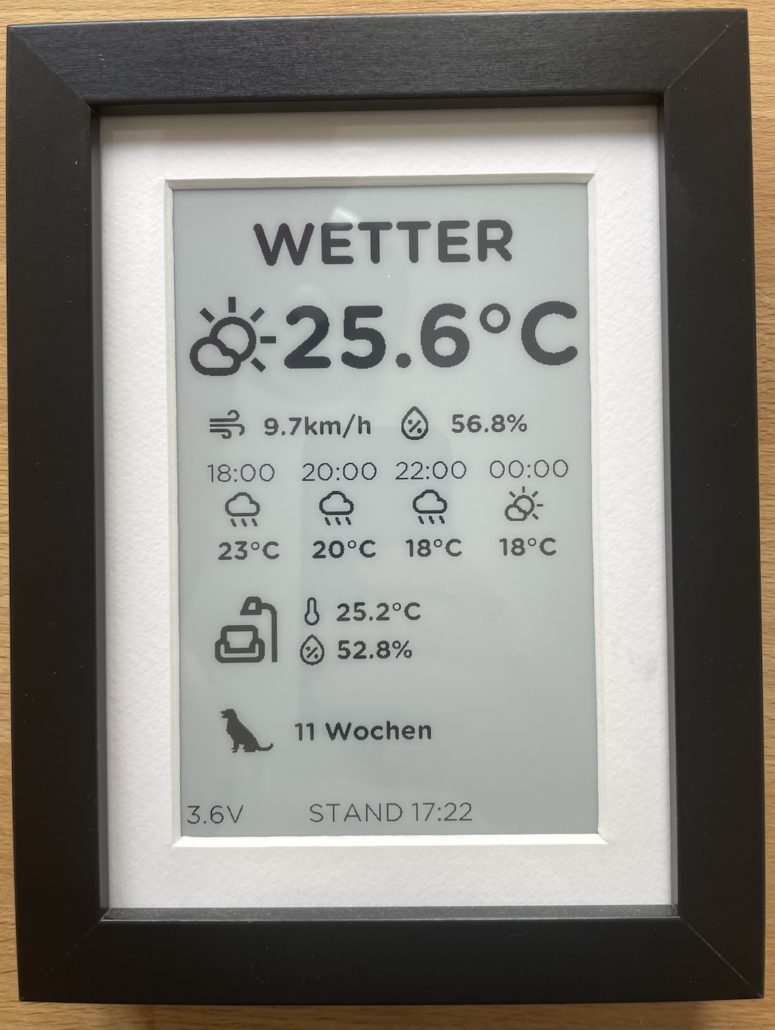

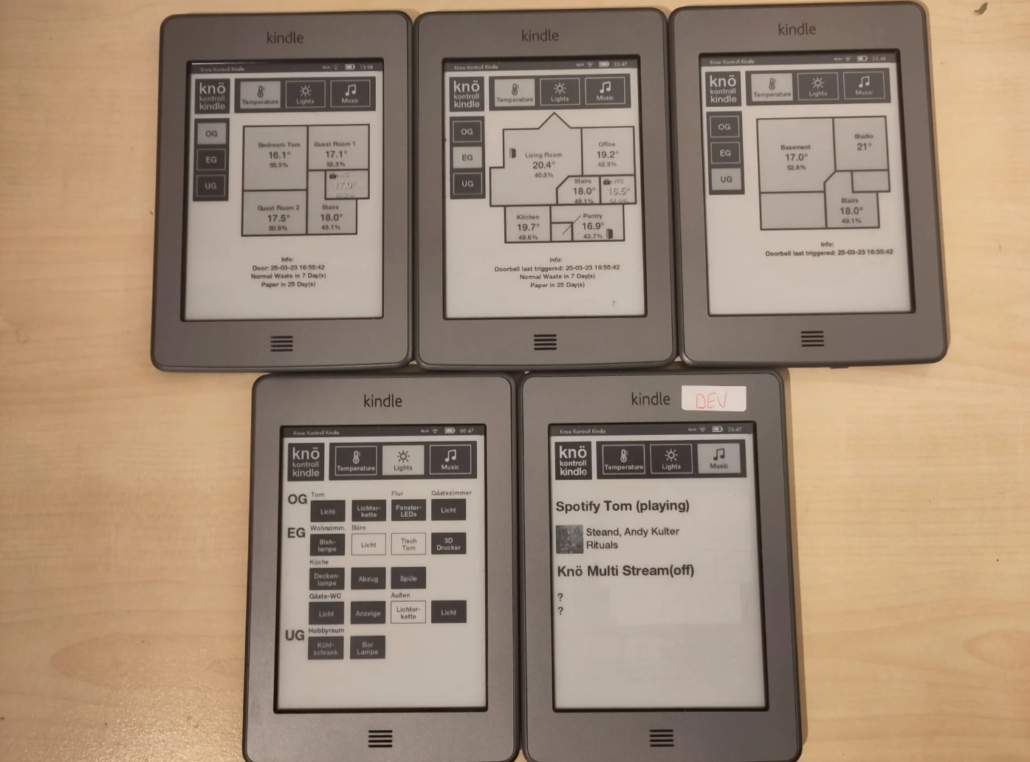
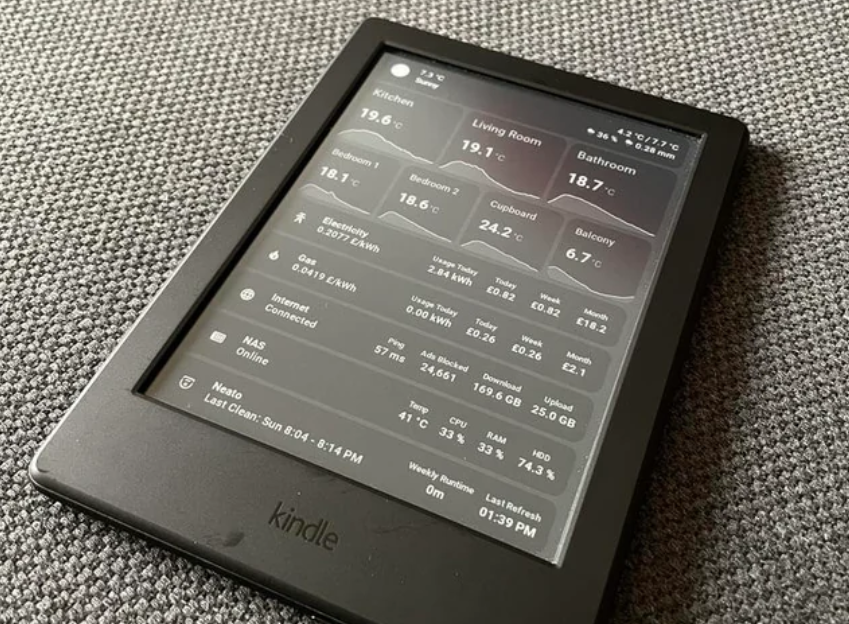
Hack Your Kindle or Old E-Reader Into an Always-on Dashboard
Many Home Assistant enthusiasts have old Kindles or e-readers lying around — perfect candidates for a second life as smart home dashboards. Repurposing an old Kindle is a creative and eco-friendly way to build an always-on E-Ink display without investing in new hardware. These devices already feature high-resolution, ultra–low-power screens that can stay updated for days while consuming almost no energy.
However, setting them up can be tricky. The process often involves jailbreaking, running custom scripts, and fine-tuning refresh intervals to keep the display stable. This method is inexpensive and sustainable, but it takes time, patience, and a bit of technical skill to achieve a reliable and polished result.
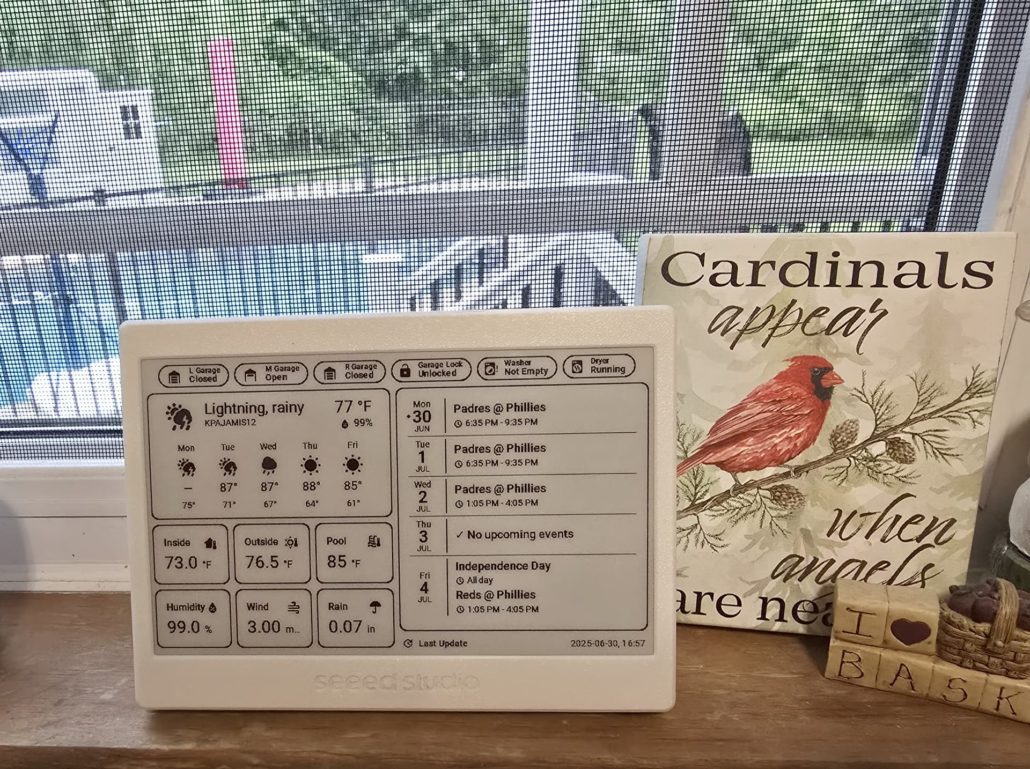
Plug-and-Play E-Paper Displays That Work Seamlessly with Home Assistant
Unlike DIY builds, these displays come pre-integrated and optimized for stable long-term operation — perfect for users who want a reliable, elegant interface without dealing with wiring or enclosure fabrication. If you’re not familiar with hardware development and simply want to display your Home Assistant dashboard on an E-Ink screen with minimal setup, these ready-to-use displays are the ideal choice.
That said, fully plug-and-play E-Ink displays that work seamlessly with Home Assistant are still quite rare. Fortunately, Seeed has recognized this need and now offers a wide range of options to make your setup effortless. Keep reading to explore what’s available!👇

Which ePaper Display Fits Your Home Assistant Applications Best
As many Home Assistant community members have shown strong interest in e-paper displays, Seeed has also introduced a range of E-Ink products designed specifically for Home Assistant applications. So In the next section, we’ll take a closer look at how different E-Ink displays perform with Home Assistant — and help you choose the one that fits your project best, including our own latest models designed specifically for seamless HA integration.
Choosing the Modules for DIY Home Assistant Epaper Panel
Choosing the right modules is key to a successful DIY ePaper dashboard. Most builds use an ESP32 or Raspberry Pi with an E-Ink display module. Next, let’s take a look at the Seeed ePaper modules and Kit designed for seamless DIY integration.
Here’s a detailed parameter comparison table to help you make an informed selection.
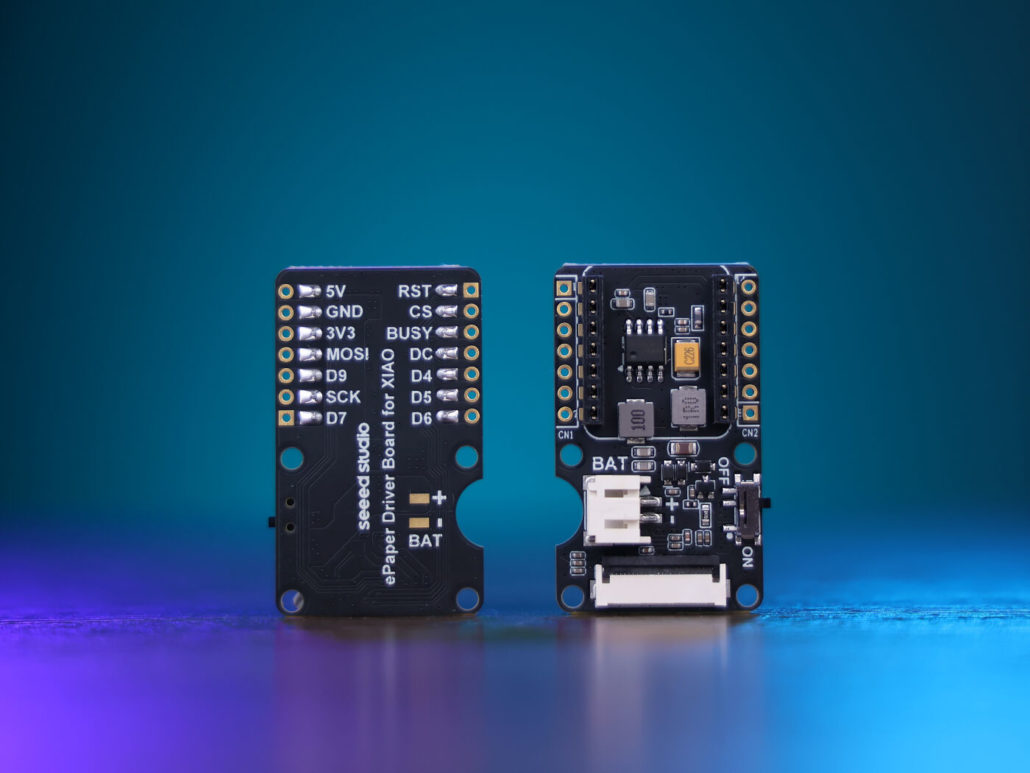
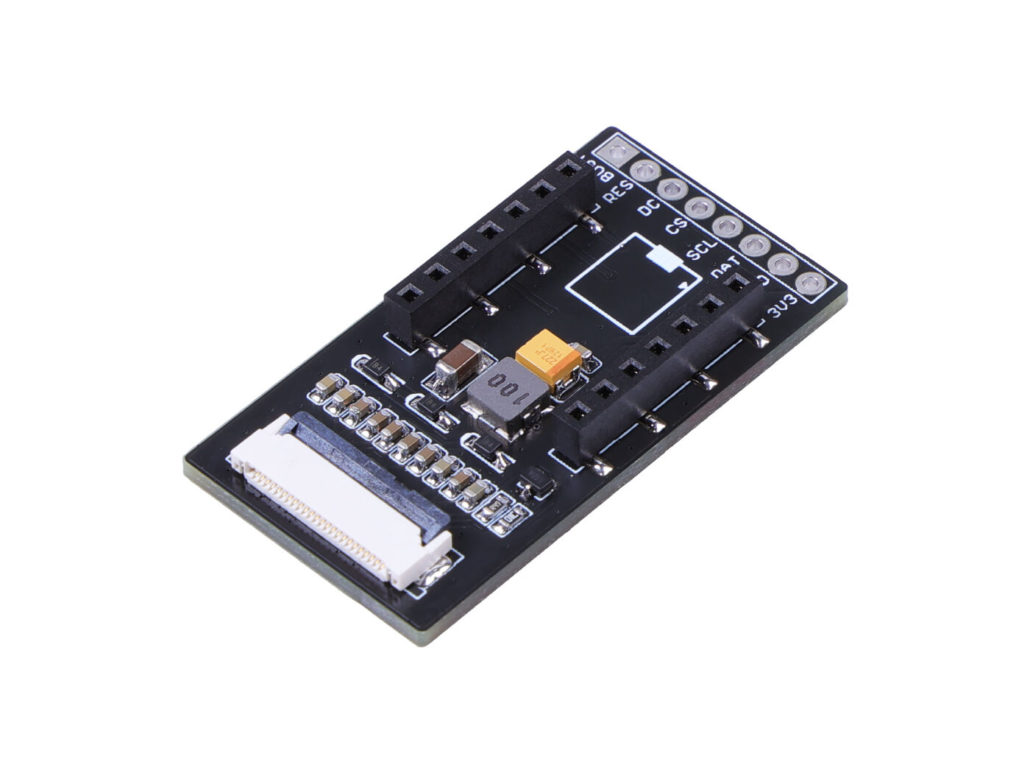
| Parameter | ePaper Display Board EE04 | ePaper Driver Board for Seeed Studio XIAO | ePaper Breakout Board for Seeed Studio XIAO |
|---|---|---|---|
| onBoard MCU | XIAO ESP32-S3 Plus | N/A but compatible with all XIAO dev boards | N/A but compatible with all XIAO dev boards |
| Compatible ePaper Displays | -24 Pin ePaper -50 Pin epaper | 24 Pin ePaper | 24 Pin ePaper |
| ePaper Connector | -FPC 24 Pin, 0.5mm -FCP 50 Pin, 0.5mm | FPC 24 Pin 0.5mm | FPC 24 Pin 0.5mm |
| Specific Compatible ePaper Modules | 1.54" Monochrome eInk / ePaper Display 2.13" Monochrome eInk / ePaper Display 2.9" Monochrome eInk 4.2" Monochrome eInk / ePaper Display 4.26" Monochrome ePaper Display 5.83" Monochrome eInk / ePaper Display 7.5" Monochrome eInk / ePaper Display 2.13" Quadruple Color eInk / ePaper Display 2.9" Quadruple Color eInk / ePaper Display 7.3" spectra™ 6 E-Ink / ePaper Display | 7.5" Monochrome eInk / ePaper Display | 7.5" Monochrome eInk / ePaper Display |
| Battery Connector | JST 2.0mm | JST 2.0mm | / |
| Switch | Battery Power ON/OFF | Battery Power ON/OFF | / |
| Power Supply | - 3.7V Li-Battery - USB Type-C | - 3.7V Li-Battery - USB Type-C | - USB Type-C |
| Button | -1x Reset button -3x User button | / | / |
| Extension IO Port | / | connection of additional sensors | connection of additional sensors |
Don’t want to wrestle with hardware specs and component matching? No problem — this kit lets you focus on what truly matters: building, customizing, and designing your own unique enclosure.
TRMNL 7.5″ (OG) DIY Kit — $44.9
Serves as a DIY “dashboard prototype” platform, perfect for experimenting with layout, display behavior, and interaction design before building a final version.
Features:
- Comes pre-configured — no need to select individual components.
- Supports both black-and-white and full-color E-Ink modules.
- Includes ready-to-flash firmware for quick setup.
- Highly flexible and customizable, offering plenty of room for creativity.
- Requires some hands-on assembly and wiring.
- No enclosure included — users need to design and 3D-print their own case.

Choosing the Right Plug-and-Play E Ink Display for Your Smart Home Dashboard
Seeed currently offers three plug-and-play E-Ink display products that are well-suited for Home Assistant applications — the XIAO 7.5” ePaper Panel, reTerminal E1001, and reTerminal E1002. All of them feature seamless connectivity via ESPHome. In the following sections, we’ll take a closer look at how these three models perform, their unique features, and which one best fits your specific project or setup.
reTerminal E1001 — $79 ( Limited time early bird price – $10 = $69)
Pros:
- Complete, ready-to-use device out of the box.
- ESP32-S3 chip for high performance.
- Premium metal enclosure with 3D-printed removable stand and wall-mount holes.
- Built-in sensors, buttons, and buzzer for versatile functionality.
- Faster refresh speed, supports partial refresh.
- Multiple Home Assistant integration options — suitable for beginners and advanced users (Puppet screenshots, ESPHome customization).
- Fully certified.
- Exposed PIN headers for expanded control.
Cons:
- Only black-and-white display.
Best For: Wide range of users — from beginners to ESPHome enthusiasts.
Recommended Scenarios: Fast refresh makes it ideal for monitoring real-time device status, such as checking if lights are off or doors locked. Partial refresh is great for low-power scenarios like balconies, warehouses, or basements far from the main controller. Can serve as an alert panel — instantly display warning icons or trigger buzzer when sensors (smoke, water leak, etc.) are activated. Flexible installation: wall-mounted, desktop, or embedded. PIN headers can be used as buttons to control Home Assistant scenes, with the interface updating in real time.

reTerminal E1002 — $109 ( Limited time early bird price – $10 = $99)
Pros:
- Complete, ready-to-use device out of the box.
- Supports full–color display.
- ESP32-S3 chip for high performance.
- Premium metal enclosure with 3D-printed removable stand and wall-mount holes.
- Built-in sensors, buttons, and buzzer for versatile functionality.
- Fully certified.
- Exposed PIN headers for expanded control.
Cons:
- Slower refresh speed about 12–15s, no partial refresh.
- Limited Home Assistant integration — primarily ESPHome customization.
Best For: Users with strong ESPHome YAML development skills.
Recommended Scenarios: Ideal for visual, static, or color-coded content. Perfect for highlighting important to-dos, showing holiday countdowns, or displaying energy usage overviews. Great for “exit reminders” near entryways — keys, umbrellas, trash, packages, or pet feeding. Best suited for low-frequency updates, layered information, and color-differentiated content. Combines practical home assistant functionality with aesthetic integration into home décor.
Picture Sources:
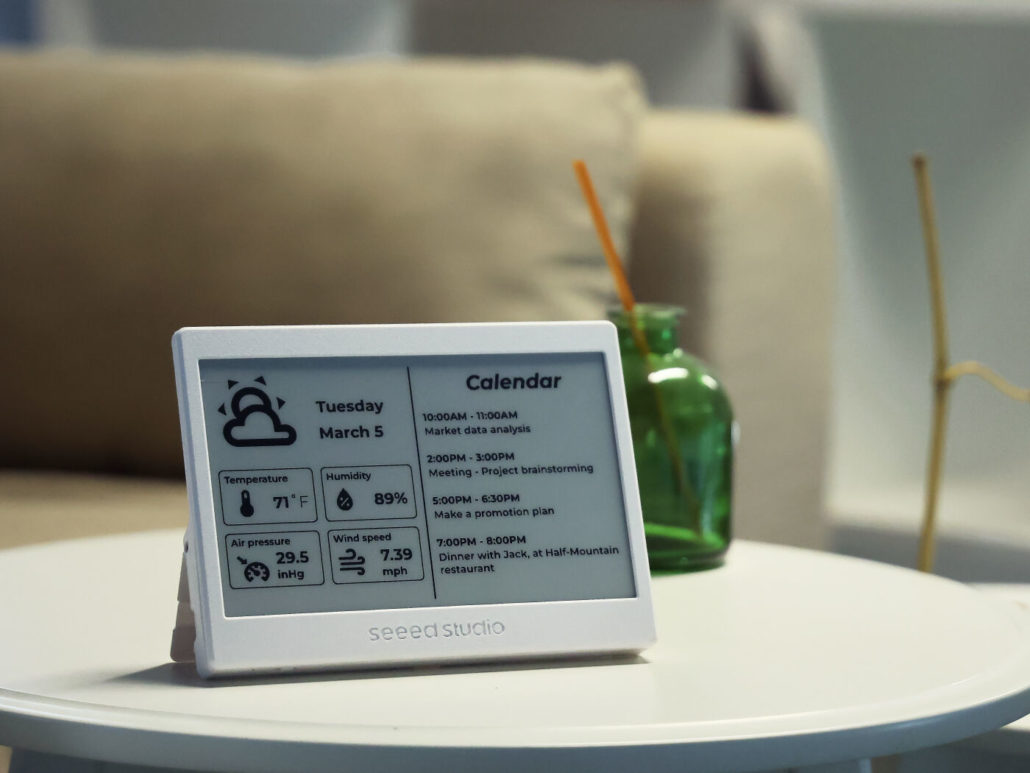
Pros:
- Affordable price.
- Modifiable enclosure.
- Pre-flashed firmware — plug-and-play.
- Multiple Home Assistant integration options, suitable for beginners and advanced users (Puppet screenshots, ESPHome customization).
- Plenty of community examples for reference.
Cons:
- Early-build product with 3D-printed enclosure — less premium than metal.
- Cannot read battery level.
- Display-only, no additional peripherals.
- Lacks certifications.
Best For: Wide range of users — from beginners to ESPHome enthusiasts.
Recommended Scenarios: Ideal as a desktop assistant for desks, bedside tables, or study areas. Displays daily Home Assistant data like schedules, to-dos, and reminders, updating automatically via automation. Low-cost solution combining practical HA dashboard functionality with DIY fun.
Here’s a quick overview of how each model performs, helping you choose the one that fits your setup best before you dive into the summary below.
| Item | XIAO 7.5'' ePaper Panel | reTerminal E1001 | reTerminal E1002 |
|---|---|---|---|
| Chipset | ESP32-C3 | ESP32-S3,higher performance | ESP32-S3,higher performance |
| Display Type | Monochrome | Monochrome | Full-Color |
| Casing Material & Process | PLA material, 3D printed | High-quality metal casing | High-quality metal casing |
| Battery Capacity | 2000 mAh | 2000 mAh | 2000 mAh |
| Battery Monitoring | 🚫 | ✅ | ✅ |
| Screen Size | 7.5'' | 7.5'' | 7.3‘’ |
| Resolution | 800 × 480 | 800 × 480 | 800 × 480 |
| Refresh Speed | 2–5 s | 2–5 s | 12–15 s |
| Partial Refresh Support | ✅ | ✅ | 🚫 |
| SD Card Support | 🚫 | Maximum supports up to 32 GB SD card, FAT32 format | Maximum supports up to 32 GB SD card, FAT32 format |
| Built-in Sensors | 🚫 | Temperature and humidity sensors | Temperature and humidity sensors |
| Interactions | 🚫 | Buttons, buzzer, and LED light | Buttons, buzzer, and LED light |
| Expansion Port | 🚫 | UART & I2C | UART & I2C |
| ESPHome Customization Support | ✅ | ✅ | ✅ |
| Home Assistant Application | Basic display | Full-featured terminal (control + display + sensing) | Full-featured terminal (control + display + sensing) |
| Certification | 🚫 | MIC Radio, FCC, CE, ROHS | MIC Radio, FCC, CE, ROHS |
Summary
By now, you’ve probably imagined where an ePaper display could fit perfectly in your home — on your desk, by the door, or beside your bed — and what information it would show: schedules, reminders, energy stats, or smart home status. Now it’s time to turn that vision into reality and start building your own personalized dashboard!
Beyond ePaper displays, Seeed also offers a wide range of smart gadgets and devices designed for seamless Home Assistant integration. Explore our collection on the landing page and start creating your smarter, more connected home today.