ESP-IDF Development Basics
reTerminal Sticky is an e-paper information display designed to keep weather, schedules, notes, and lightweight data visible over long periods. With ESP-IDF, you can use its e-paper display, touchscreen, physical buttons, and onboard peripherals to build your own always-visible information pages.
This guide walks you through running the Comprehensive Development Demo (Sticky_dashboard_demo) and learning how to use ESP-IDF to drive Sticky’s display, onboard peripherals, and interaction features. The example project provides a complete reference for hardware integration and page development, which you can use to create your own pages, integrate onboard peripherals, and build your own projects with Sticky.
Flashing the example project replaces the firmware currently running on Sticky. Make sure the device does not contain anything you need to keep before continuing.
Share Your Project
If you have built a project with reTerminal Sticky, we would love for you to contribute it to Sticky Playground and share your ideas with the community. We appreciate every developer who helps make the Playground better.
Follow the contribution guide in the repository README, prepare your project, and submit a Pull Request. Once your project has been reviewed and published, other users can install and try it through Sticky Playground.
Development Environment
Before you begin, prepare the following:
- reTerminal Sticky
- A USB-C cable that supports data transfer
- A Windows, Linux, or macOS computer
- ESP-IDF v5.4
Sticky_dashboard_demo was developed and tested on hardware with ESP-IDF v5.4. If ESP-IDF is not installed yet, follow Espressif’s ESP32-S3 ESP-IDF v5.4 Getting Started Guide to install it first.
After installation, run the following command in an ESP-IDF terminal:
idf.py --version
The output should include:
ESP-IDF v5.4
A charge-only USB-C cable can power Sticky, but the computer cannot detect its serial port through that cable. If the device charges but no serial port appears, try a cable that supports data transfer.
The main Sticky development resources used in the Demo are listed below:
| Hardware | Use in the Demo |
|---|---|
| 3.97-inch, 800 × 480 four-level grayscale e-paper display | Draw and retain page content over long periods |
| Capacitive touchscreen | Detect left and right swipes |
| UP, DOWN, and AI buttons | Change pages, refresh, and enter Deep Sleep |
| SHT40, RTC, battery gauge, and IMU | Provide environmental, time, battery, and orientation data |
| MicroSD and PDM microphone | Read text and capture audio |
| Buzzer | Provide operation feedback |
For complete specifications and hardware relationships, read the Hardware Overview first.
Run the Demo
This series includes two example projects:
| Project | Name | Best for |
|---|---|---|
Sticky_peripheral_demo | Minimal Peripheral Demo | Clean, standalone examples for testing and reusing individual onboard peripherals |
Sticky_dashboard_demo | Comprehensive Demo | A complete example covering pages, peripherals, interaction, and low-power features used throughout this Wiki series |
If you are familiar with ESP-IDF and want to work with a specific peripheral, start with Sticky_peripheral_demo. Each example is self-contained and easy to reuse in your own project.
To follow this Wiki series step by step, use Sticky_dashboard_demo. All code, project structure, and page examples in the following guides are based on this Demo.
Download and extract Sticky_dashboard_demo, then open an ESP-IDF v5.4 terminal in the project directory containing the top-level CMakeLists.txt.
For the first build, set the target chip:
idf.py set-target esp32s3
Build the project:
idf.py build
After you see Project build complete, connect Sticky with a USB-C data cable. Replace PORT with the device serial port, then flash the firmware and open the serial monitor:
idf.py -p PORT flash monitor
For example, if the serial port on Windows is COM5:
idf.py -p COM5 flash monitor
Linux usually uses /dev/ttyUSB0 or /dev/ttyACM0. macOS usually uses /dev/cu.usbserial-* or /dev/cu.usbmodem-*. Press Ctrl+] to exit the serial monitor.
After startup, the serial output includes:
I (...) sticky_dashboard: Starting reTerminal Sticky Dashboard Demo
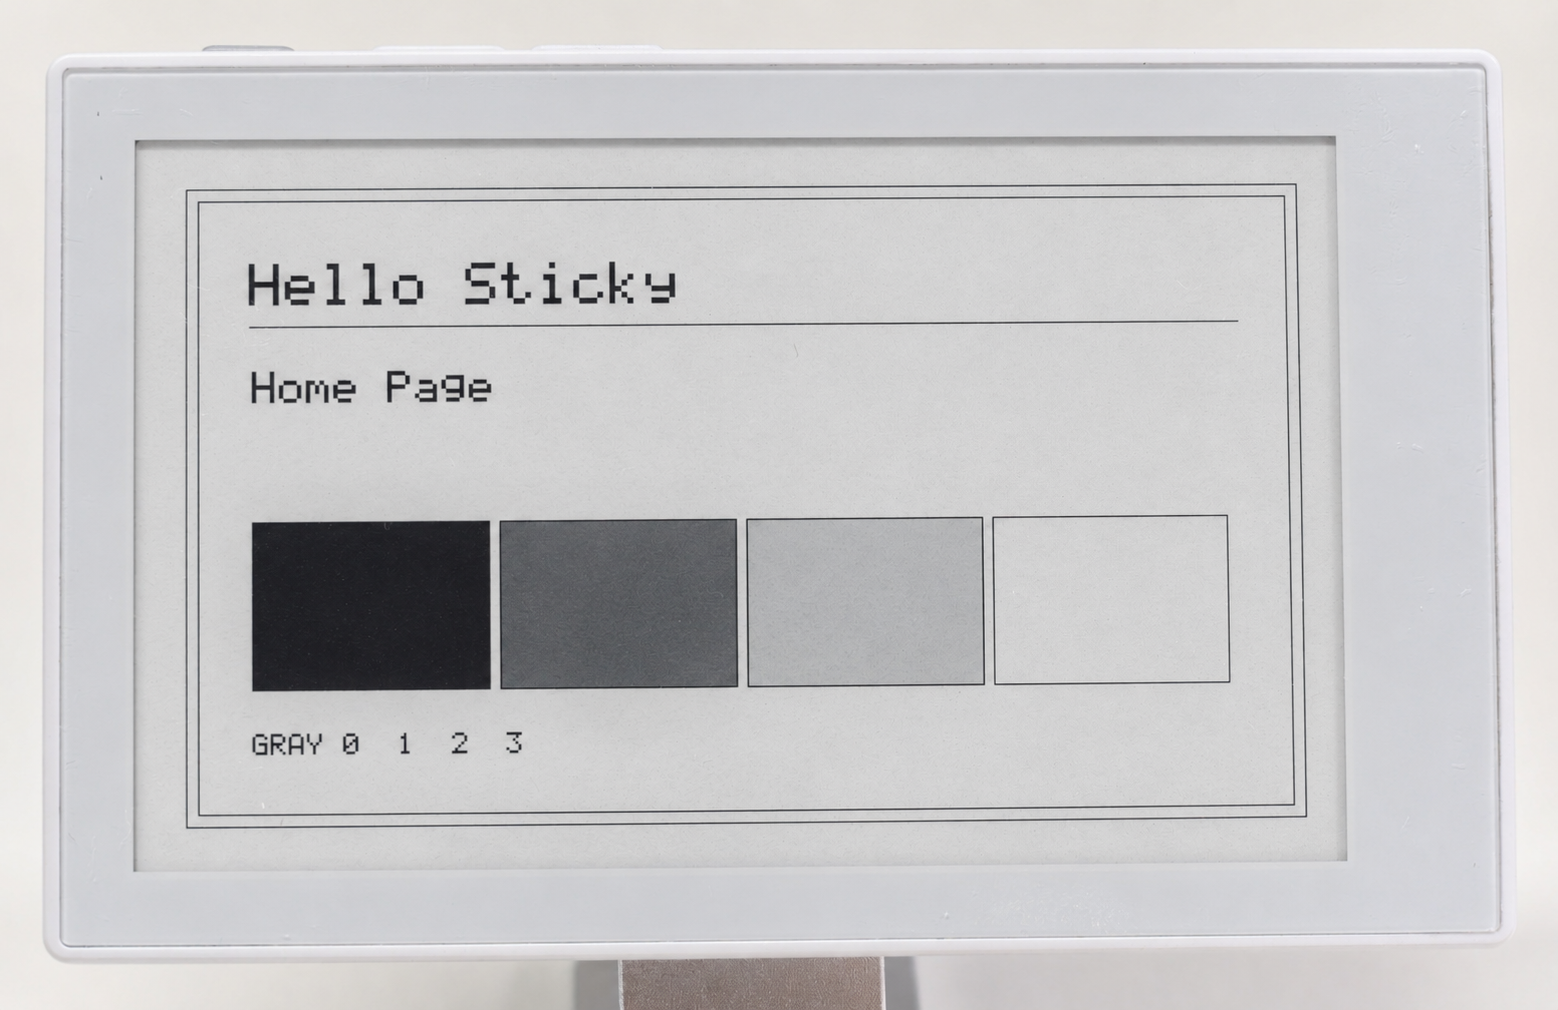
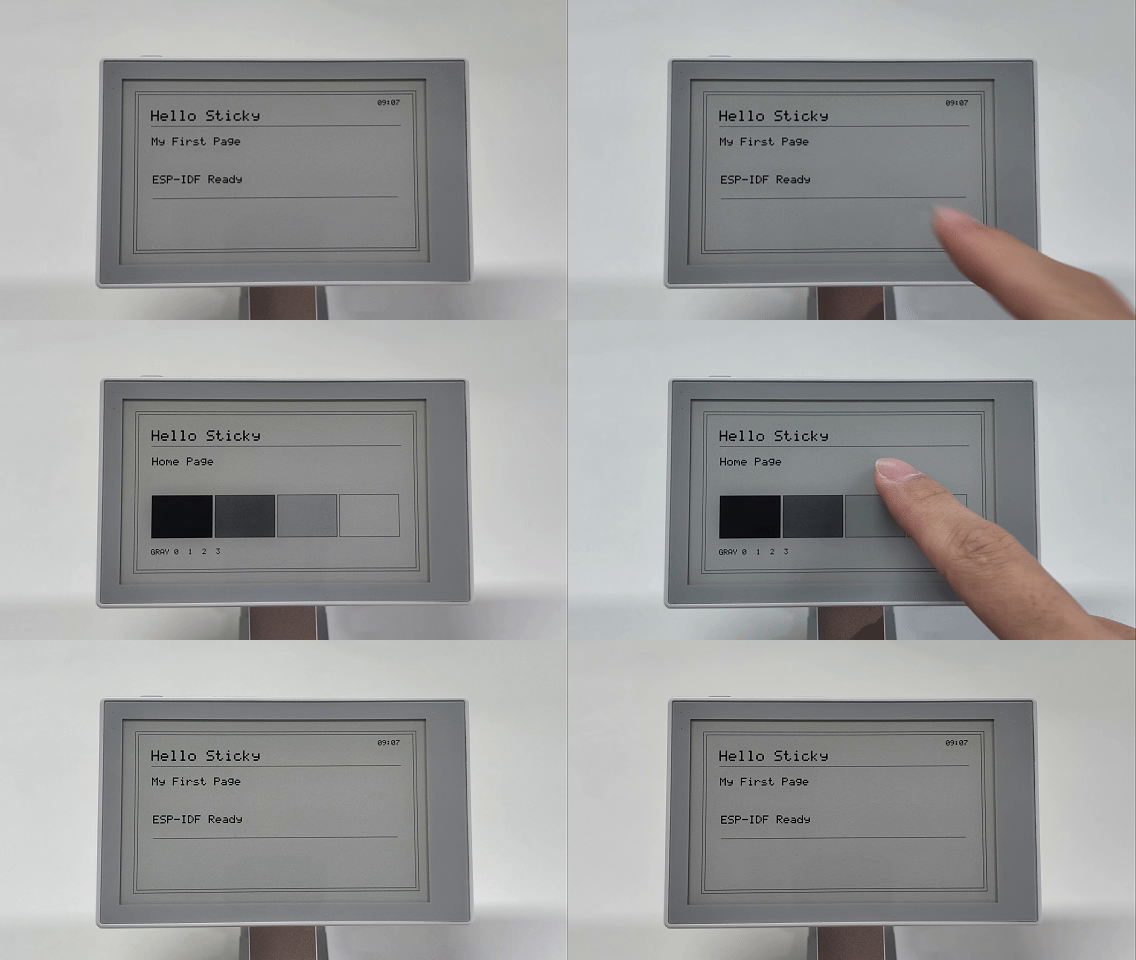
The Home page appears after the first screen refresh. Use the UP/DOWN buttons or swipe left and right to view the pages in sequence:
Home -> Sensor -> Battery -> Note -> IMU -> Microphone -> Home
Home demonstrates four-level grayscale and does not display RTC time. The other five pages use monochrome images and show RTC time in the status bar.
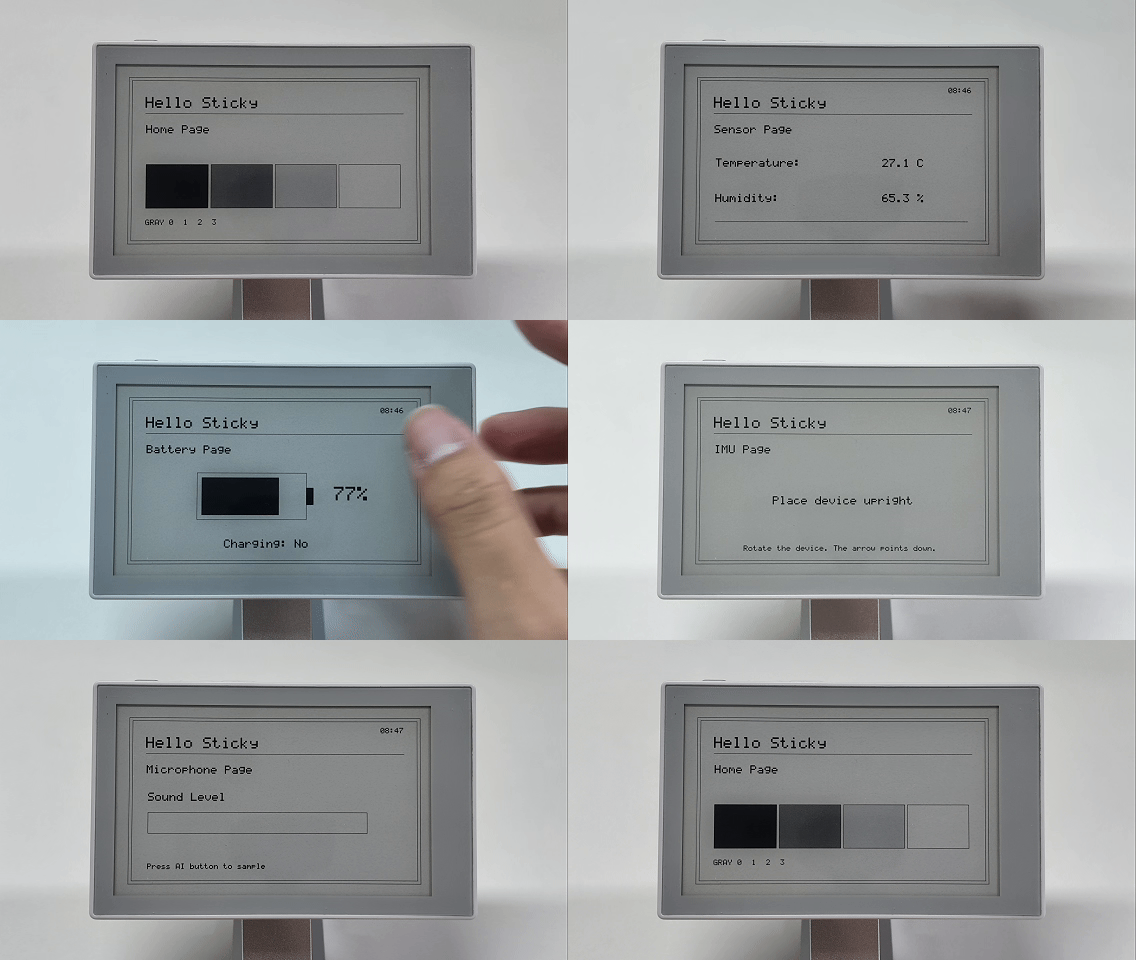
A full e-paper refresh completes a full pixel update. When it finishes, the new content remains stable on the screen.
Project Structure
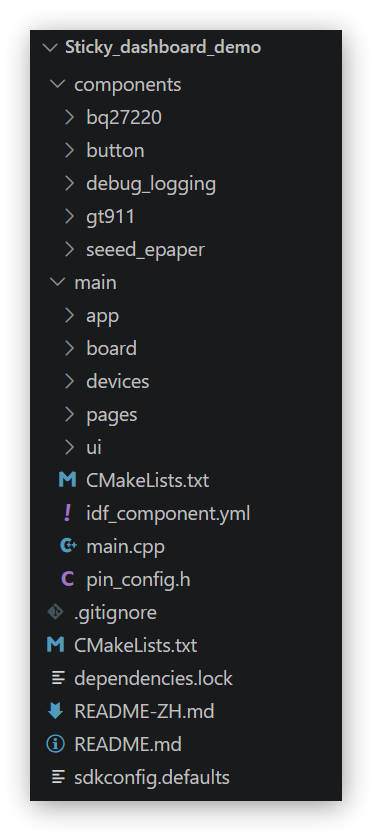
Sticky_dashboard_demo separates hardware access, application logic, and page rendering:
Sticky_dashboard_demo/
|-- components/                 External and low-level hardware components
`-- main/
    |-- main.cpp                Initialization and main event loop
    |-- pin_config.h            Pins and device addresses
    |-- board/                  Power, GPIO, and shared buses
    |-- devices/                Onboard peripheral access
    |-- app/                    State, data, events, and page navigation
    |-- pages/                  Page rendering
    `-- ui/                     Canvas, fonts, and shared status bar
When a page displays hardware data, the data follows this path:
Hardware
  ↓
devices        Read the device
  ↓
app_data       Update application data
  ↓
AppState       Store page state
  ↓
pages          Render the page
  ↓
Canvas         Produce the complete image
  ↓
display        Refresh the e-paper display
Each directory has a clear responsibility:
| Directory | Responsibility |
|---|---|
board/ | Initialize board-level power and buses shared by multiple devices |
devices/ | Initialize, read, or control specific hardware |
app/ | Store state, update data, process events, and select pages |
pages/ | Render pages from AppState |
ui/ | Provide Canvas, fonts, and the shared status bar |
This structure keeps hardware communication, data processing, and page rendering separate. When adding a feature, you usually only need to connect its data source, extend AppState, and create a page. You do not need to rebuild the existing display, input, or refresh framework.
Page rendering and screen refresh
A page Renderer (the page rendering function) only writes content to Canvas. After rendering, the App layer refreshes the e-paper display:
render_current_page(canvas, state);
ESP_RETURN_ON_ERROR(
    refresh_current_page(state), "app", "refresh current page");
refresh_current_page() selects the refresh method from state.current_page: Home uses a four-level grayscale full refresh, while the other pages use a monochrome full refresh. Page files therefore only draw to Canvas. The existing Device and App flow handles Display initialization and refresh.
Canvas uses 800 × 480 landscape logical coordinates with the origin at the top-left corner. Screen rotation is handled by sticky_display, so pages do not need to transform coordinates again.
Data Flow and Page Display
The Sensor page shows a complete data path: the SHT40 reads temperature and humidity, the application stores the data, and the page displays the result.
SHT40
  ↓
sticky_sht40_read()
  ↓
update_environment()
  ↓
AppState.environment
  ↓
sensor_page_render()
  ↓
Canvas
Read the sensor
main/devices/sticky_sht40.* wraps SHT40 hardware access. During initialization, it uses the sensor I2C bus already created by the Board layer:
ESP_ERROR_CHECK(sticky_sht40_init(board_sensor_i2c_bus()));
The RTC, battery gauge, and IMU also use this shared bus, so a separate I2C bus does not need to be created for each device.
Update application state
EnvironmentState in main/app/app_state.h stores the temperature, humidity, and read status needed by the page:
struct EnvironmentState {
    float temperature_c = 0.0F;
    float humidity_percent = 0.0F;
    bool valid = false;
    esp_err_t error = ESP_ERR_INVALID_STATE;
};
main/app/app_data.cpp calls the Device API and writes the result to AppState. The core relationship is:
Sht40Reading reading = {};
const esp_err_t result = sticky_sht40_read(reading);

state.environment.error = result;
state.environment.valid = result == ESP_OK;
After a successful read, the function also stores the temperature and humidity. If the read fails, valid remains false, while the error code and serial log help identify the problem.
Render sensor data
main/pages/sensor_page.cpp only reads the state. It displays the temperature when the data is valid, or N/A in the same position if the read failed:
canvas.draw_text(76, 235, "Temperature:", 3, GrayLevel::Black);
if (state.environment.valid) {
    std::snprintf(value, sizeof(value), "%.1f C",
                  static_cast<double>(state.environment.temperature_c));
    canvas.draw_text(500, 235, value, 3, GrayLevel::Black);
} else {
    canvas.draw_text(500, 235, "N/A", 3, GrayLevel::Black);
}
When the Sensor page opens, the App layer updates the data, renders the page, and refreshes the screen in sequence. The page does not read the SHT40 directly.
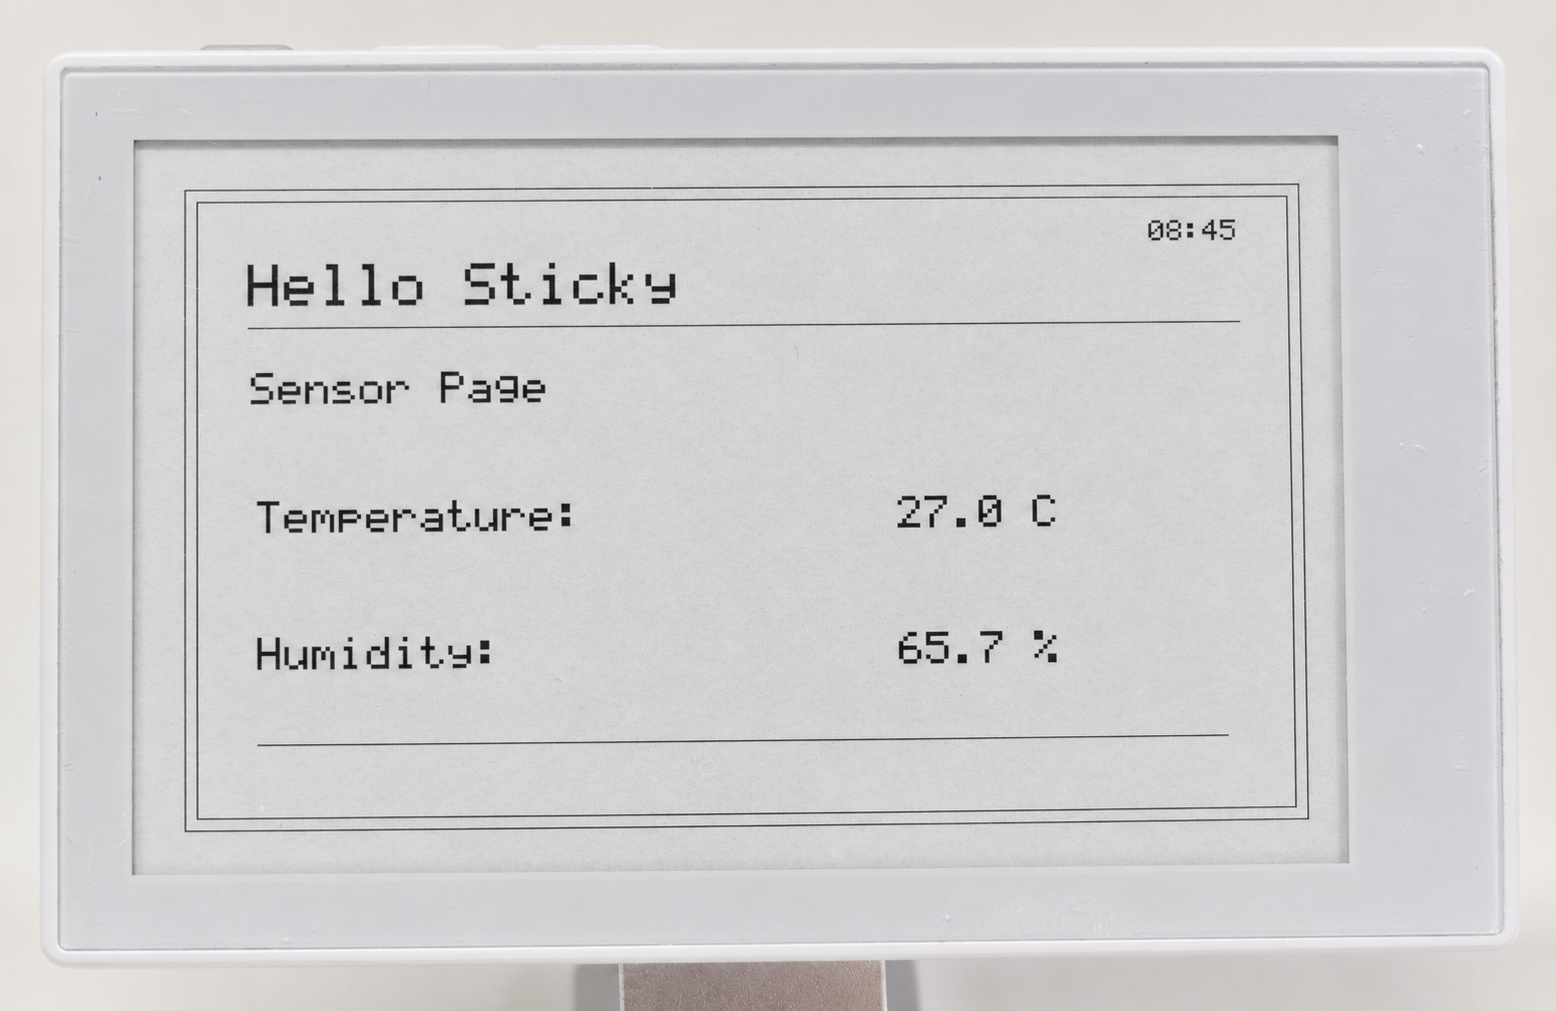
This path applies to most data pages: first identify the data source, then pass the data to the page through AppState. The second Wiki guide uses Battery, MicroSD, IMU, and Microphone to show different types of peripheral data.
Add the Hello Page
The following steps add a Hello page to the end of the existing page loop. It does not access hardware and is only used to complete the full page integration process.
After the change, the page order becomes:
Home -> Sensor -> Battery -> Note -> IMU -> Microphone -> Hello -> Home
Step 1: Create the page files
Create main/pages/hello_page.h:
#pragma once

class Canvas;
struct AppState;

void hello_page_render(Canvas &canvas, const AppState &state);
Create main/pages/hello_page.cpp:
#include "hello_page.h"

#include "app_state.h"
#include "canvas.h"
#include "page.h"

void hello_page_render(Canvas &canvas, const AppState &state)
{
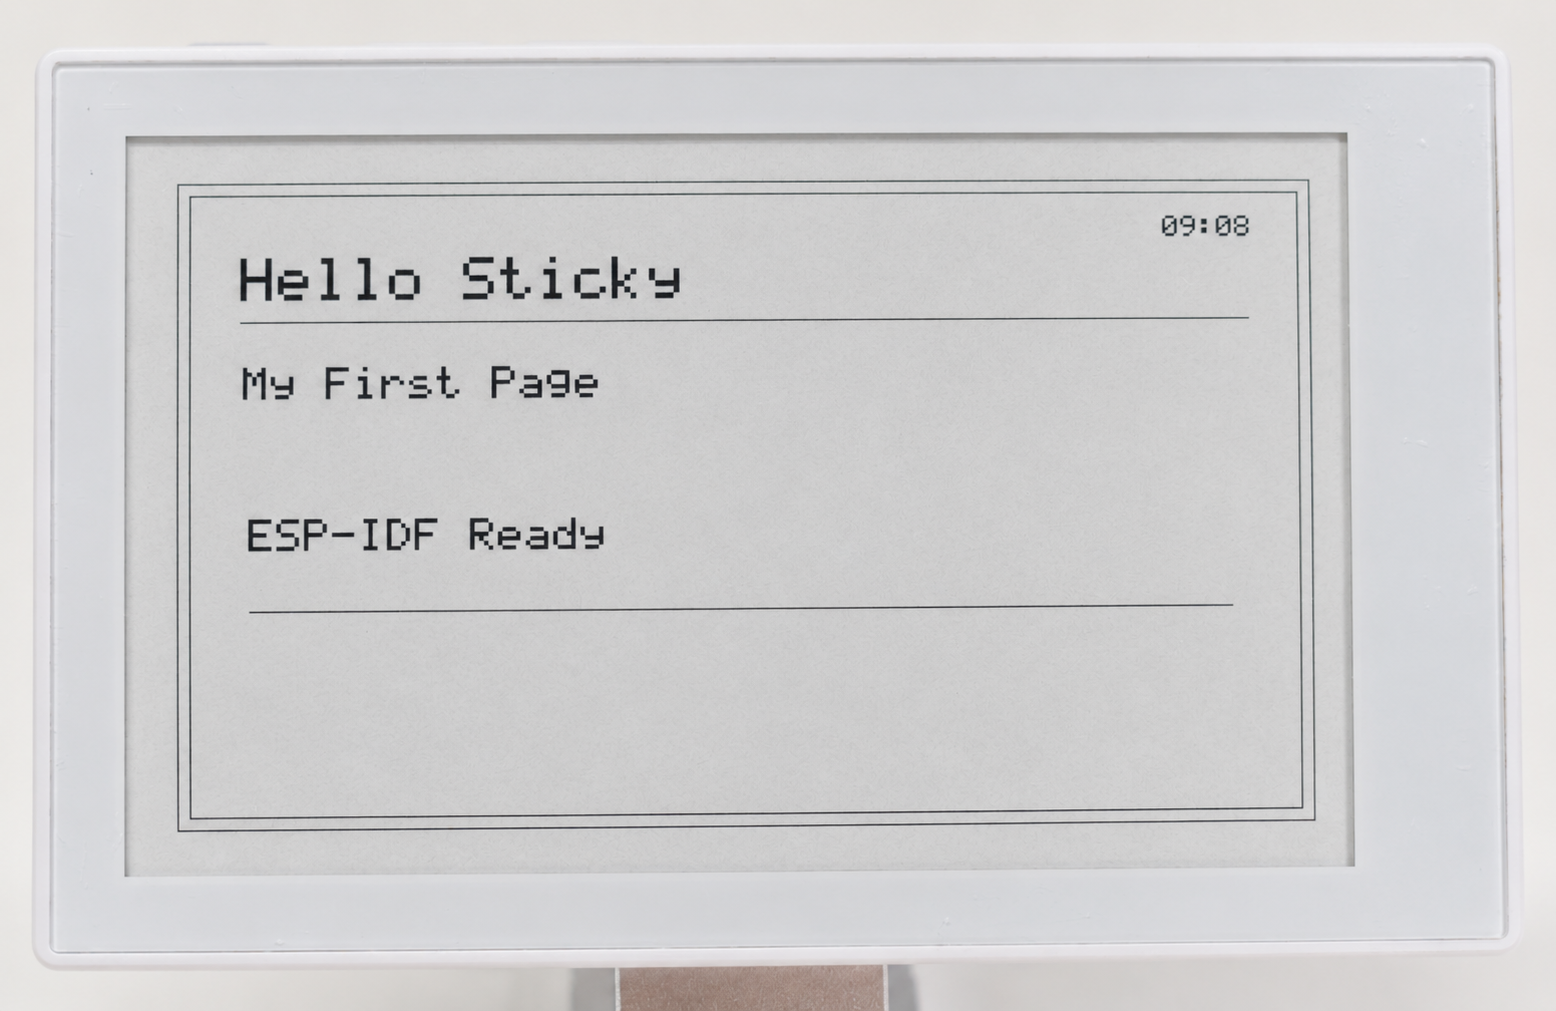
    page_draw_layout(canvas, state, "Hello Sticky", "My First Page");
    canvas.draw_text(76, 250, "ESP-IDF Ready", 3, GrayLevel::Black);
    canvas.draw_line(76, 310, 718, 310, GrayLevel::Black);
}
page_draw_layout() draws the same border, status bar, and title used by the other monochrome pages. The Hello page only needs to add its own content.
The Demo defines only Home as a four-level grayscale page, so the new Hello page automatically uses a monochrome full refresh. Use GrayLevel::Black and GrayLevel::White for a regular new page. If a page needs four-level grayscale, also add its PageId to page_uses_gray4().
Step 2: Add the page ID
Add Hello to the end of PageId in main/app/app_state.h:
enum class PageId {
    Home,
    Sensor,
    Battery,
    Note,
    Imu,
    Microphone,
    Hello,
};
The Hello page has no new data, so AppState does not need to change. If a page displays peripheral data, follow the previous section to add the corresponding state structure and data update function.
Step 3: Register the page
Include the page header in main/app/app.cpp:
#include "hello_page.h"
Add the page name to page_name():
case PageId::Hello:
    return "Hello";
Connect the Renderer in render_current_page():
case PageId::Hello:
    renderer = hello_page_render;
    break;
Step 4: Add the page to navigation
In select_next_page(), navigate from Microphone to Hello, then from Hello back to Home:
case PageId::Microphone:
    state.current_page = PageId::Hello;
    break;
case PageId::Hello:
    state.current_page = PageId::Home;
    break;
Add the reverse relationship in select_previous_page():
case PageId::Home:
    state.current_page = PageId::Hello;
    break;
case PageId::Hello:
    state.current_page = PageId::Microphone;
    break;
Step 5: Add the page to the build system
Add the following entry to the page source list in main/CMakeLists.txt:
"pages/hello_page.cpp"
Save the changes, then build and flash the project again:
idf.py build
idf.py -p PORT flash monitor
When you open the Hello page, the screen should show My First Page and ESP-IDF Ready.
Continue to the next page to return to Home. Switching to the previous page should also follow the complete page sequence.
At this point, you have completed the full page integration process:
Create page files
  ↓
Add PageId
  ↓
Register the Renderer
  ↓
Add page navigation
  ↓
Update CMakeLists.txt
  ↓
Build and verify on the device
Application Extension Workflow
Use the following sequence when creating a new information page:
- Identify the data the page needs and check whether the project already provides a corresponding Device API.
- If no API is available, add hardware access under
devices/. Otherwise, reuse the existing API. - Store the page data, validity state, and error code in
AppState. - Read the data and update the state in
app_data. - Create a Page Renderer, then add the page to
PageId, page routing, and the navigation order. - Add the new
.cppfile tomain/CMakeLists.txt, build the project, and verify both the display and error states on the device.
Keep these module responsibilities separate when extending the application:
- Pages only read
AppStateand draw to Canvas. They do not access hardware directly. - Device modules only handle hardware access. They do not draw UI.
- Shared buses and power resources are managed by the Board layer.
- After a page is rendered, the App layer refreshes the e-paper display.
FAQ
-
The new page causes an
undefined referenceerrorThe page
.cppfile is missing frommain/CMakeLists.txt, or the function declaration does not match its implementation. Confirm that the source file is included inSRCS, then check the function name and parameters before rebuilding. -
The new page builds but cannot be opened
Adding only a
PageIdor Renderer is not enough. Confirm that the page is registered inrender_current_page()and that itsPageIdis included in both forward and reverse navigation. -
Page content has the wrong orientation on the device
Pages should always use the 800 × 480 logical coordinate system with the origin at the top left. The Display layer handles the 180° rotation required by the physical screen, so do not rotate coordinates again in a Page Renderer.
-
Page text is displayed as
?The built-in bitmap font supports printable ASCII. Unsupported characters, such as Chinese characters and
℃, are displayed as?. Add the required glyphs or use characters already supported by the font. -
The project fails to build after moving to another computer
The
build/directory contains paths and configuration generated on the original computer. Confirm that ESP-IDF v5.4 and the ESP32-S3 target are selected. If the error remains, delete only the generatedbuild/directory and rebuild the project.
Next Step
This guide covered two basic development paths:
Page integration: Page files -> PageId -> Renderer -> Page navigation -> CMake

Data display: Device -> app_data -> AppState -> Page -> Canvas -> Display
The next guide continues with the same Demo and explains:
- Reading Battery, MicroSD, IMU, and Microphone data and displaying it on pages
- How Button and Touch trigger page changes and refreshes through
AppEvent - How different peripherals reuse shared resources managed by the Board layer
Continue with ESP-IDF Pages and Peripherals.