CrossPoint Reader
Overview
This document explains how to try CrossPoint Reader on reTerminal Sticky from Playground.
You will learn what the platform is for, what hardware you need, how to flash the firmware in the browser, what to check after flashing, and where to continue learning.
About the Platform
CrossPoint Reader is a community eReader firmware path for Sticky. It turns the device into a portable open-source reading device.
Its main value is simple: it lets you explore reading-first workflows on the same ePaper hardware.
Benefits include:
- Reading long-form content on a low-power ePaper screen
- Trying an open-source eReader experience on Sticky
- Testing community firmware before giving feedback or contributing
The firmware hosted in Playground is selected as a stable, tested version and may not always match the latest CrossPoint Reader release. If you want the newest CrossPoint Reader firmware, flash it from the official CrossPoint Reader website.
Flashing CrossPoint Reader replaces the firmware currently running on Sticky.
What You Need
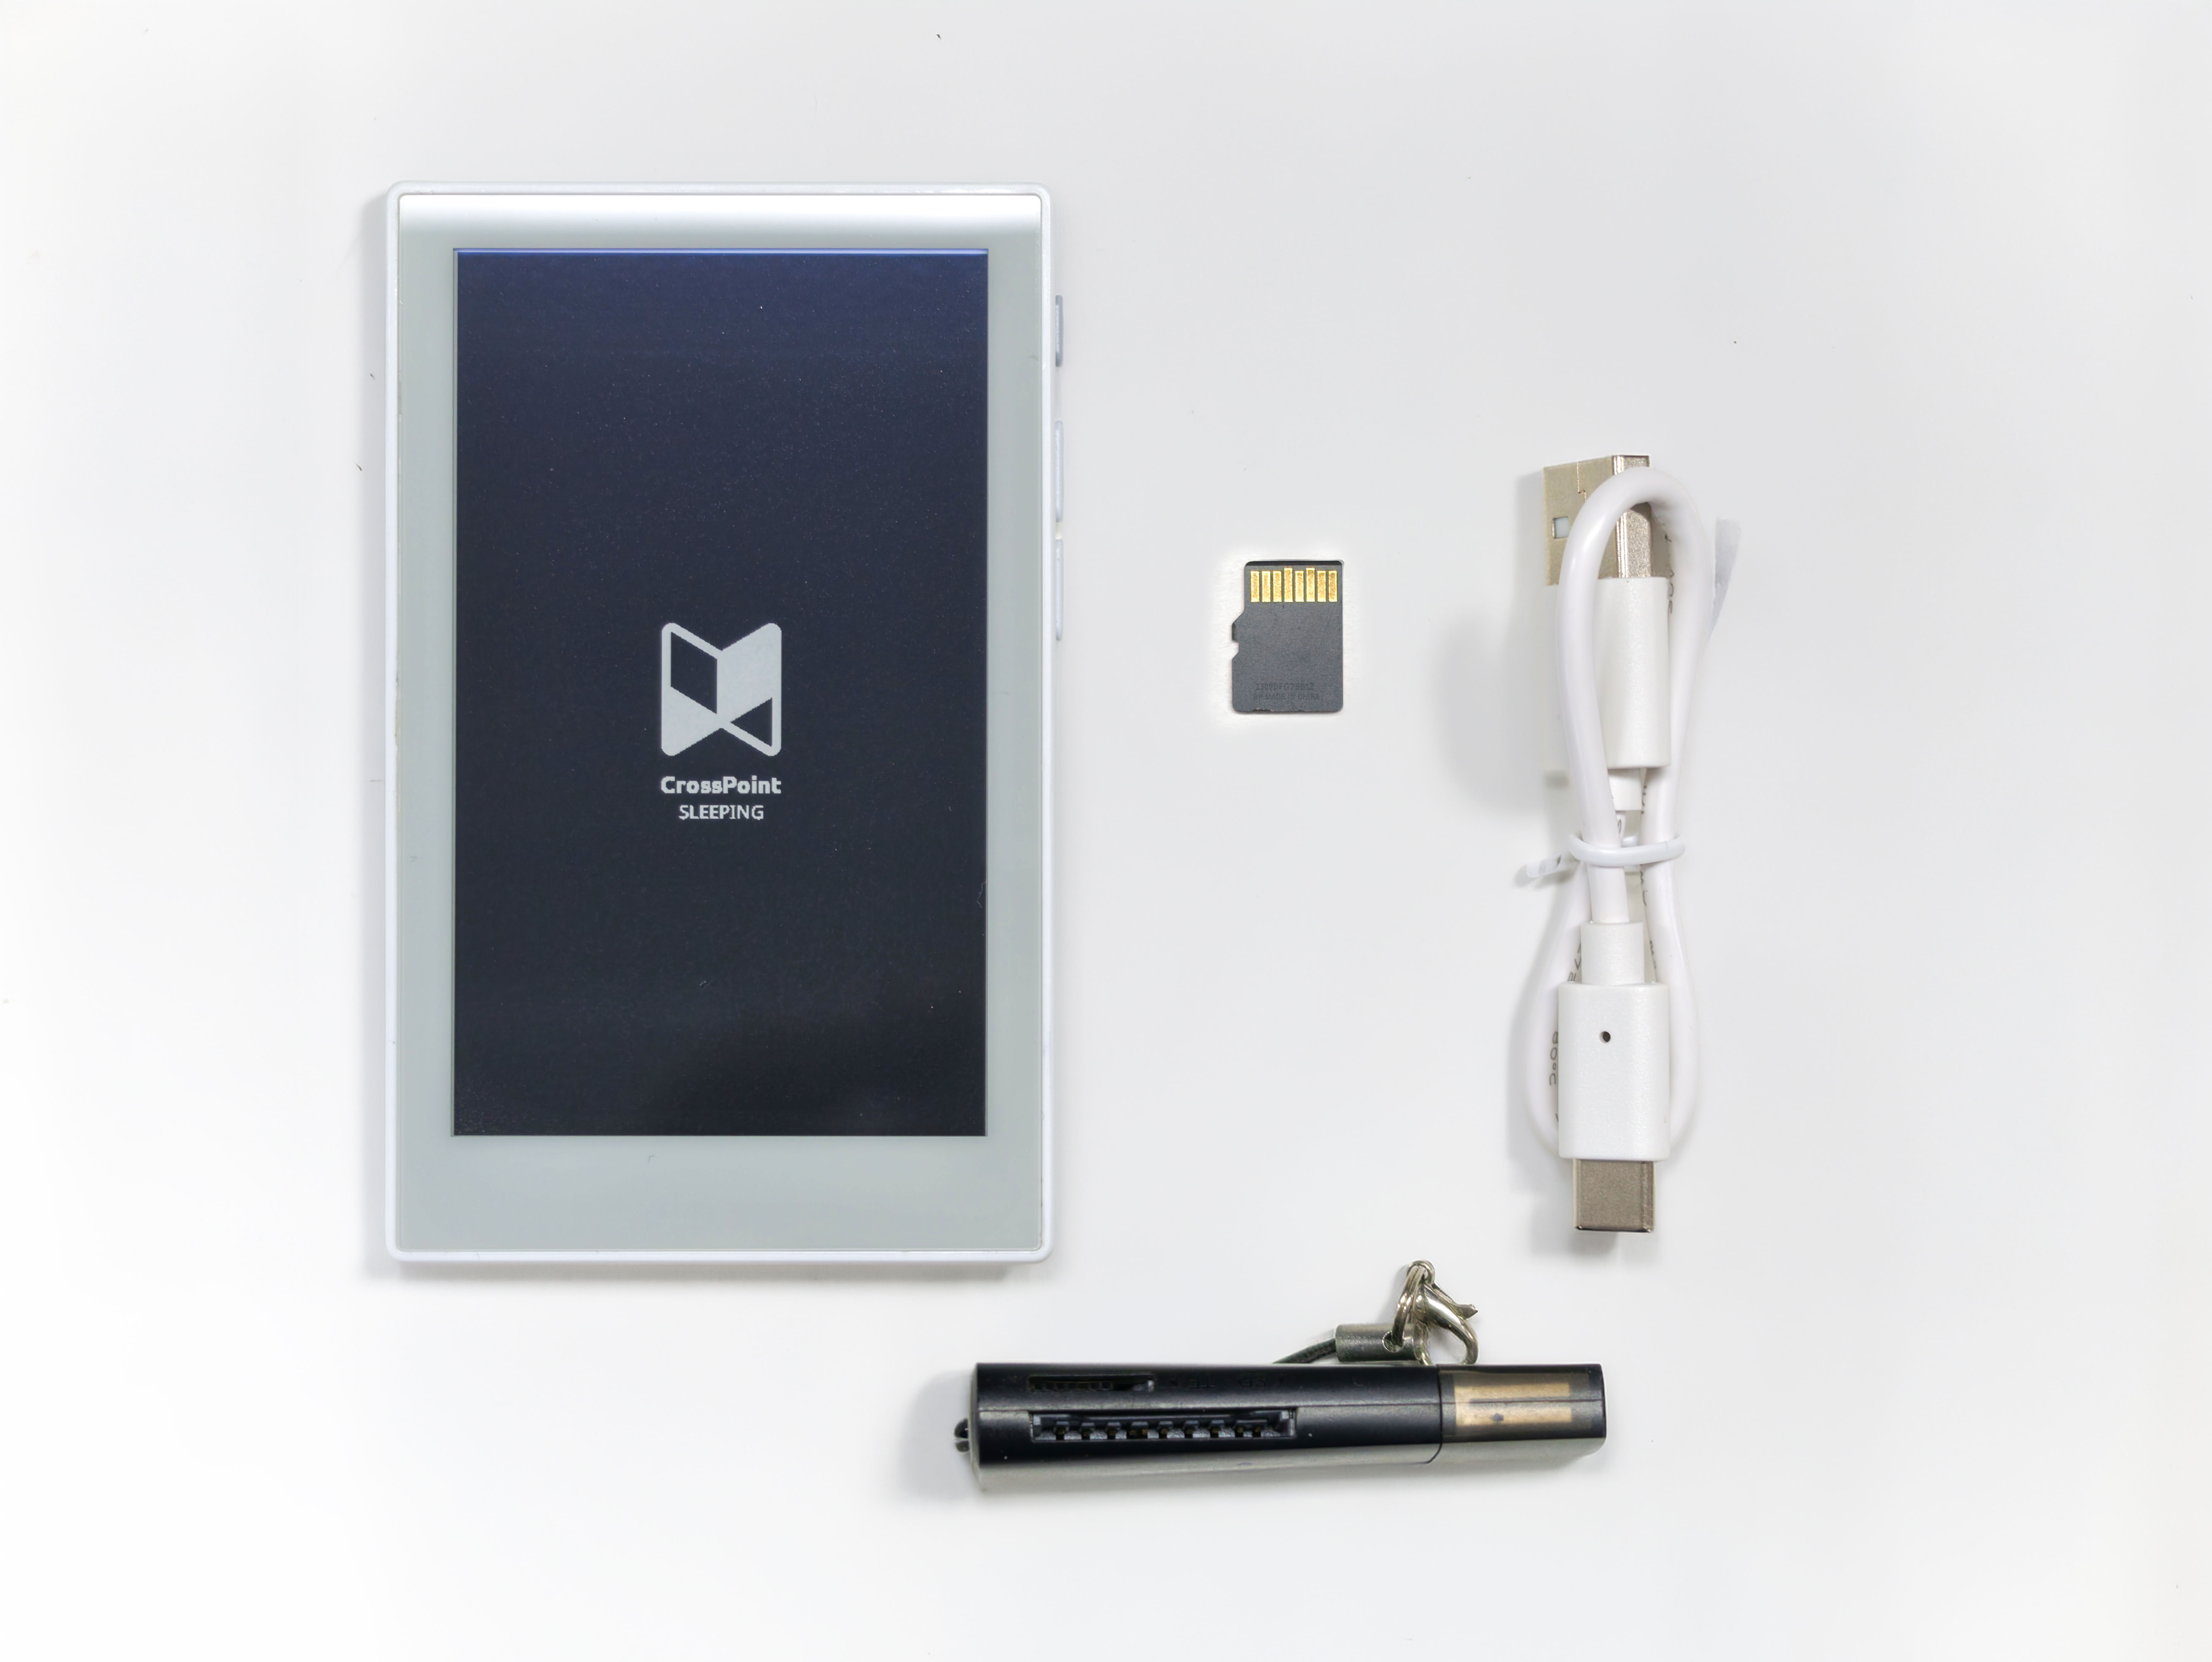
Prepare the following before you start:
- reTerminal Sticky
- microSD card
- USB-C data cable
- microSD card reader for your computer
- Desktop Chrome or Edge
- Stable power during flashing
Use a USB cable that supports data transfer. A charging-only cable can power Sticky but cannot expose the serial port.
Prepare the microSD Card
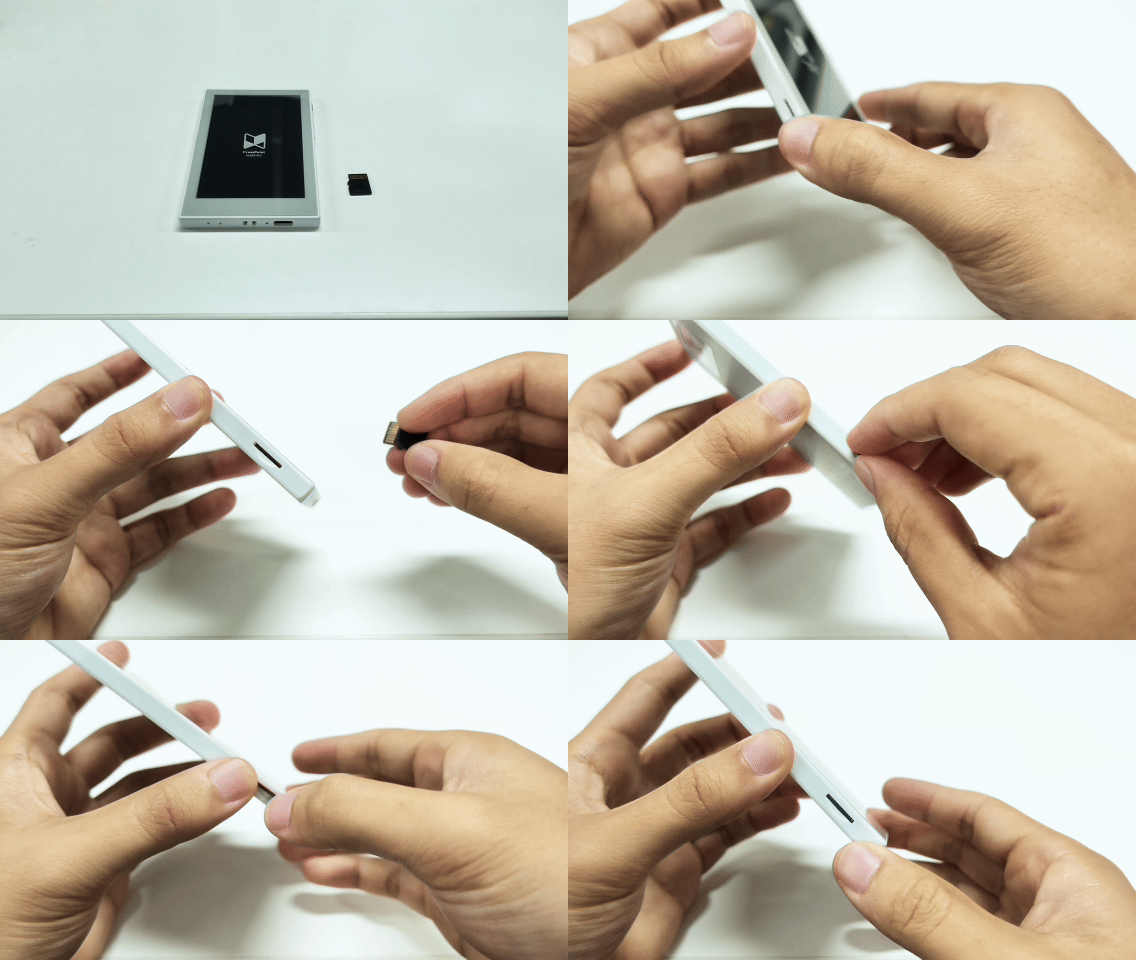
CrossPoint Reader uses the microSD card for books, settings, cache files, screenshots, and custom fonts. Insert a prepared microSD card before the first CrossPoint Reader startup. Without a valid card, the device can show an SD card error instead of entering the home screen.
Recommended card setup:
- Use a good-quality microSD card from 16 GB to 512 GB.
- Format the card as exFAT on your computer.
- If your formatting tool shows a partition scheme option, choose Master Boot Record.
- After formatting, safely eject the card and insert it into Sticky before starting CrossPoint Reader.
For a first test, keep the card simple: format it, copy one book to the card, insert it, then boot CrossPoint Reader.
Flash from Playground
Click the button below to open the flashing page:
Open CrossPoint Reader Playground
Then follow these steps:
- Connect Sticky to your computer with the USB-C data cable.
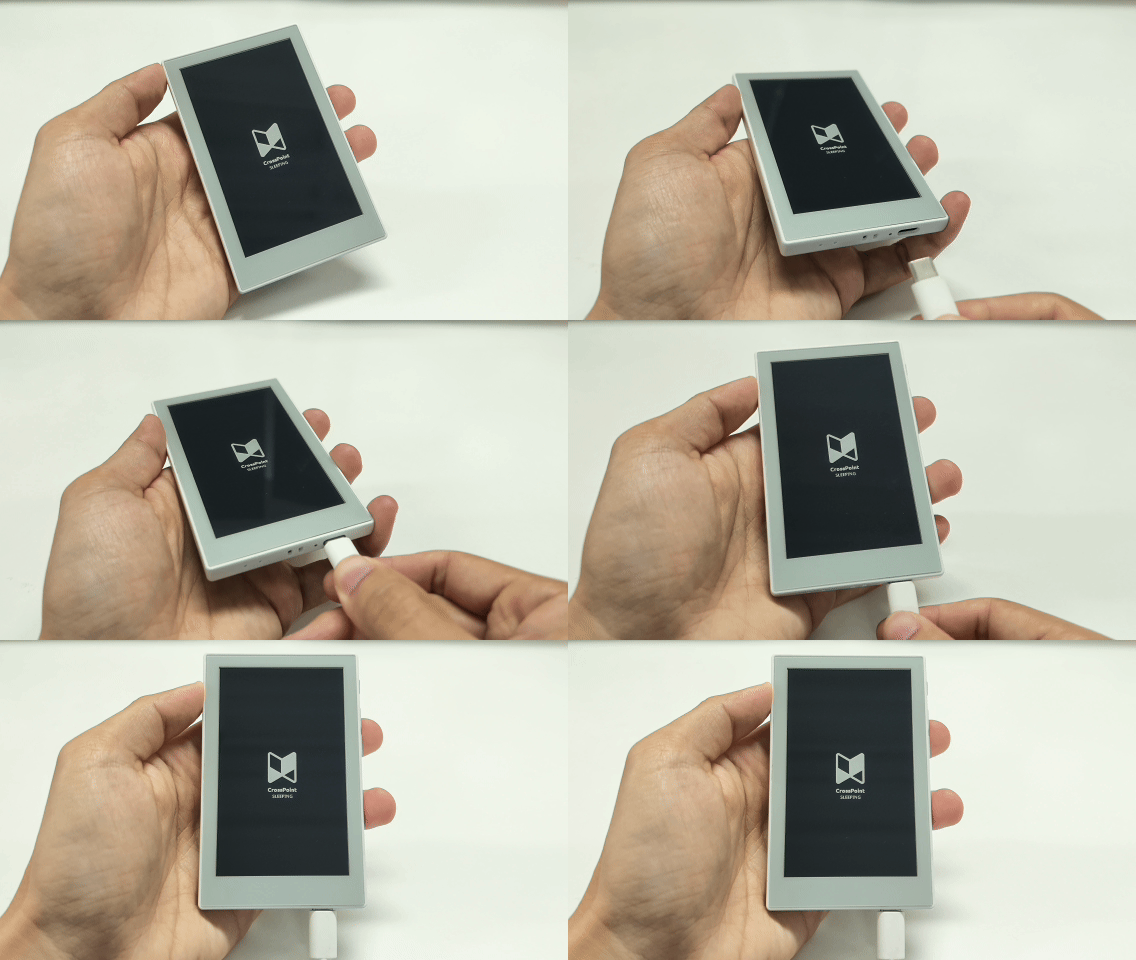
- Keep the device connected during the full flashing process.
- Choose the flash mode that matches your current firmware state.
Standard flash verifies and writes all four PIO firmware images directly. Erase flash + flash verifies the same package, clears the complete device flash, and then writes all four images.
- Click Connect & flash.
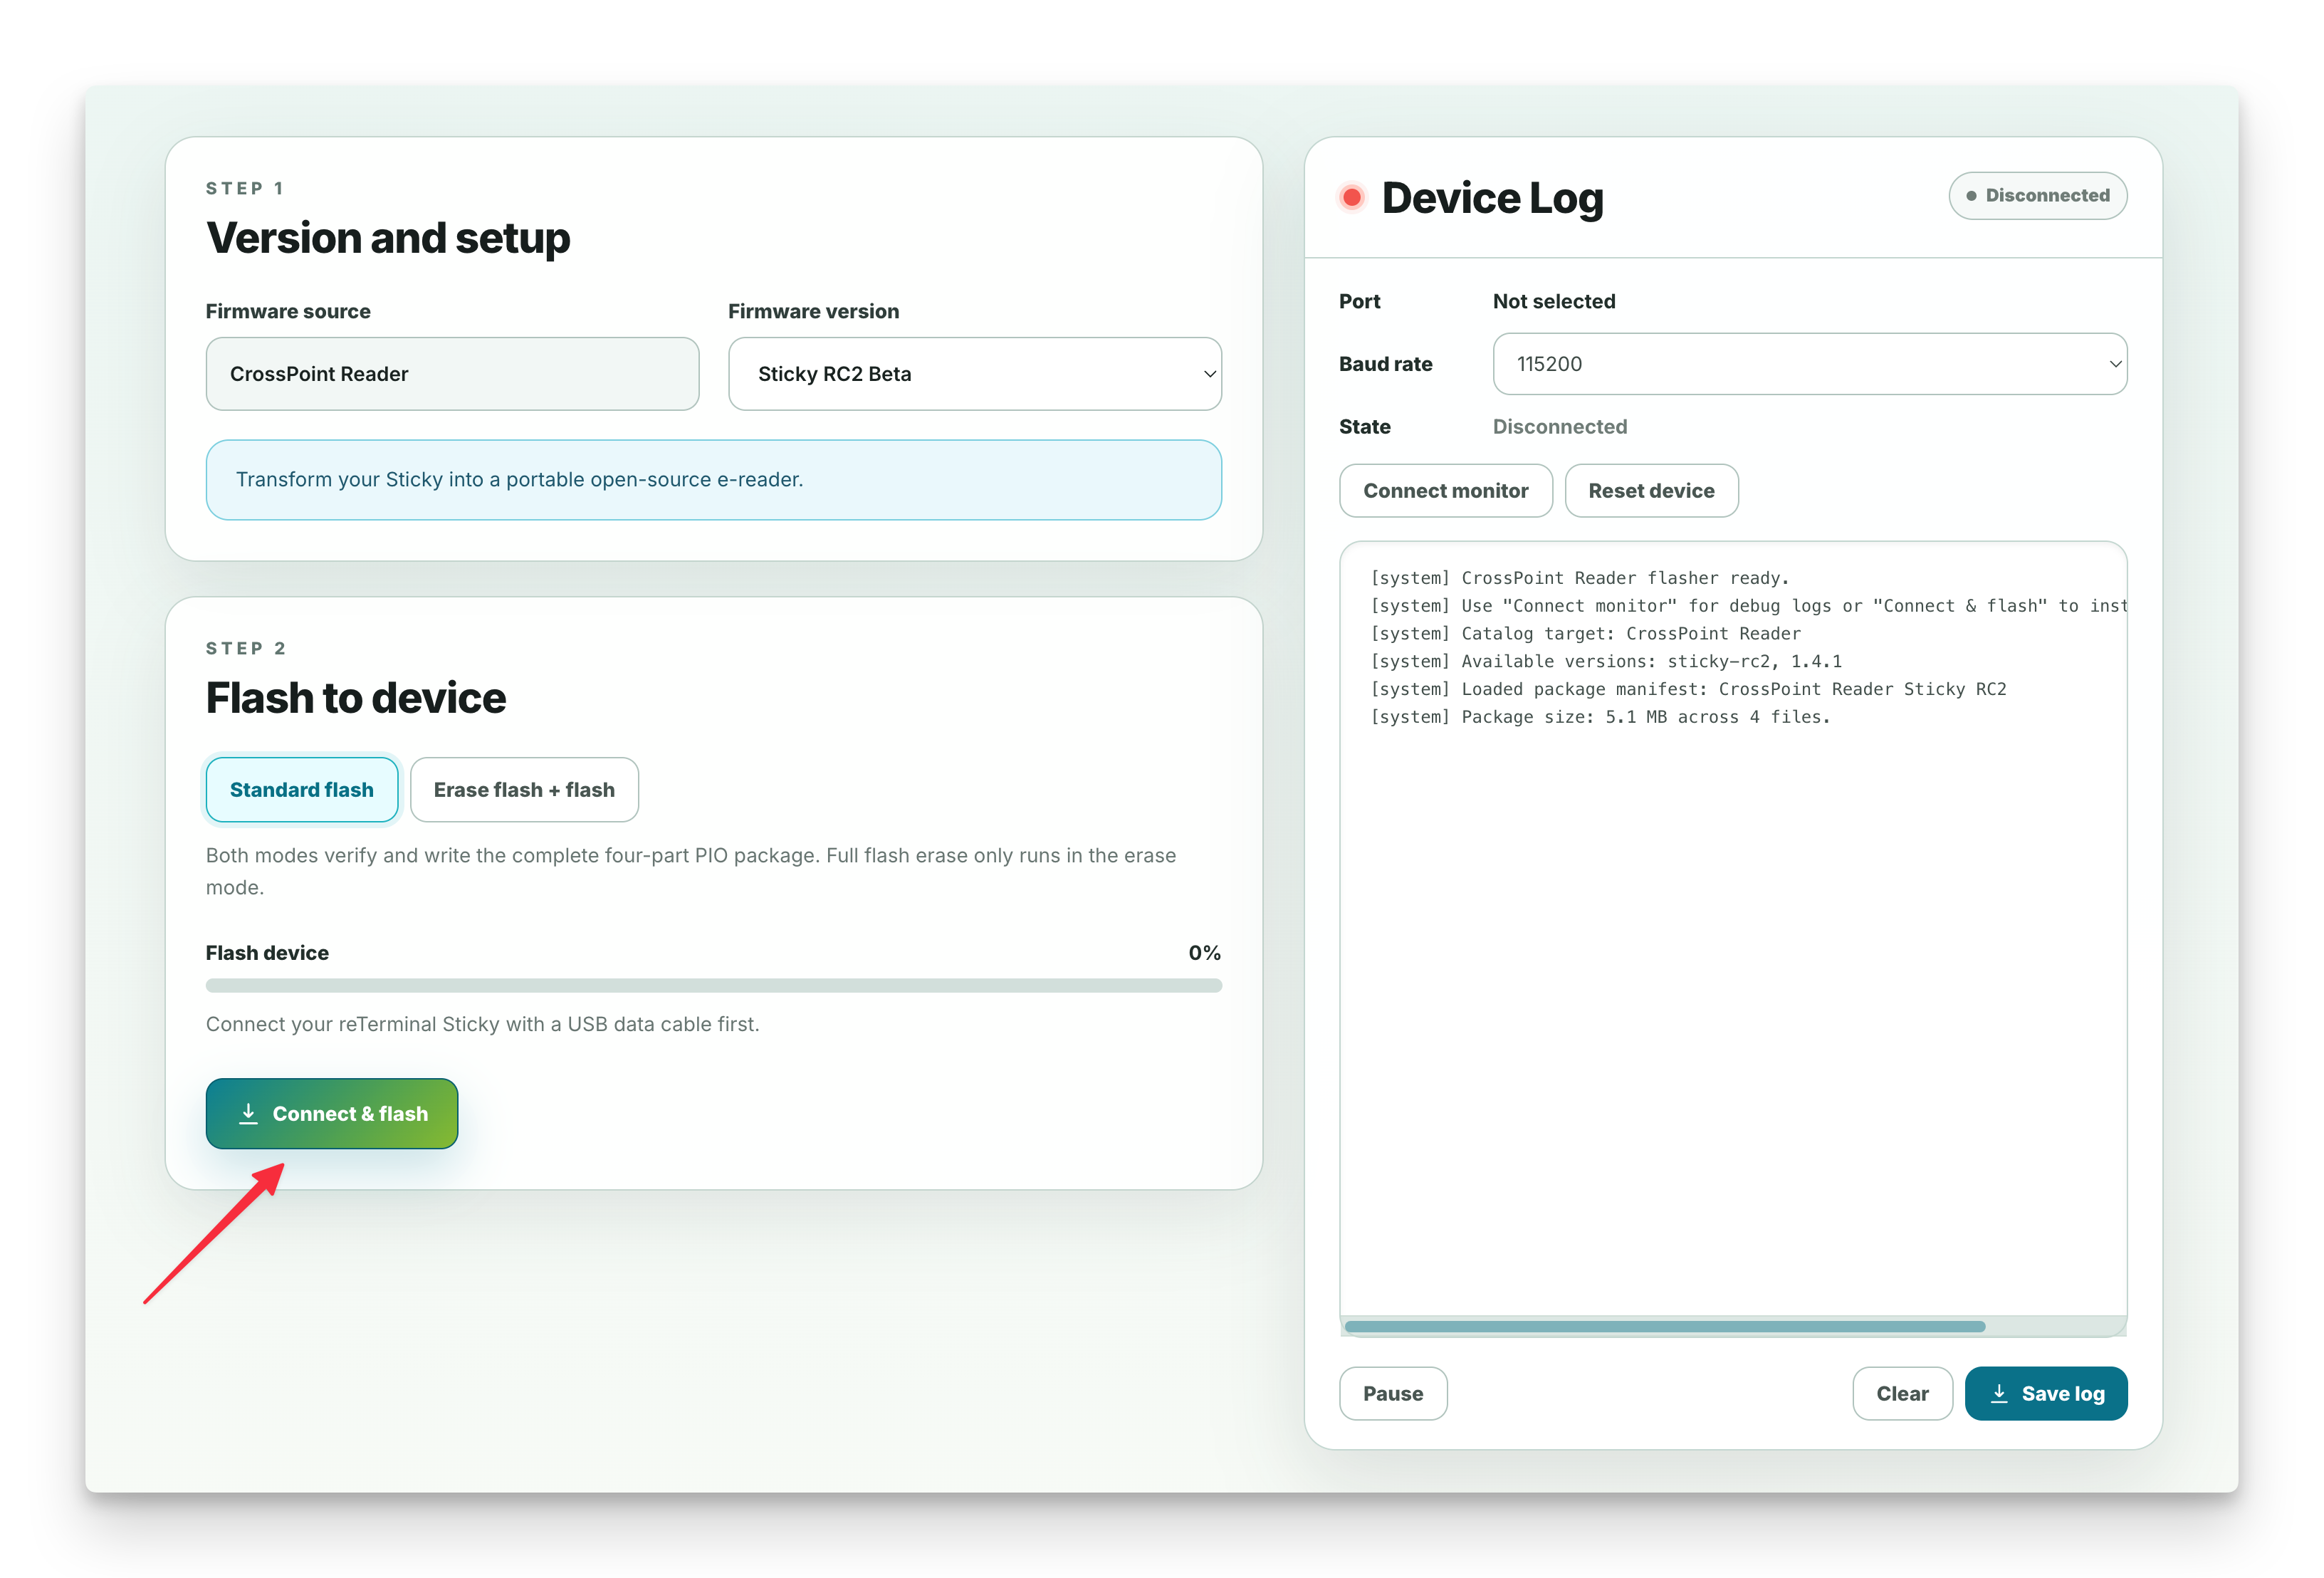
- When Chrome or Edge asks for serial-port access, select the Sticky serial port.
- Wait until the progress bar and device log show that flashing is complete.
The CrossPoint Reader Playground page writes the bootloader, partition table, OTA boot data, and application firmware from the release manifest.
Flashing usually takes about 1 to 2 minutes. Keep the flashing page open and wait until the progress bar and device log show that the process is complete.
After Flashing
After flashing completes:
- Wait for Playground to reopen the serial port and automatically perform the final device reset.
- Use Reset device above the Device Log panel if you want to restart Sticky again.
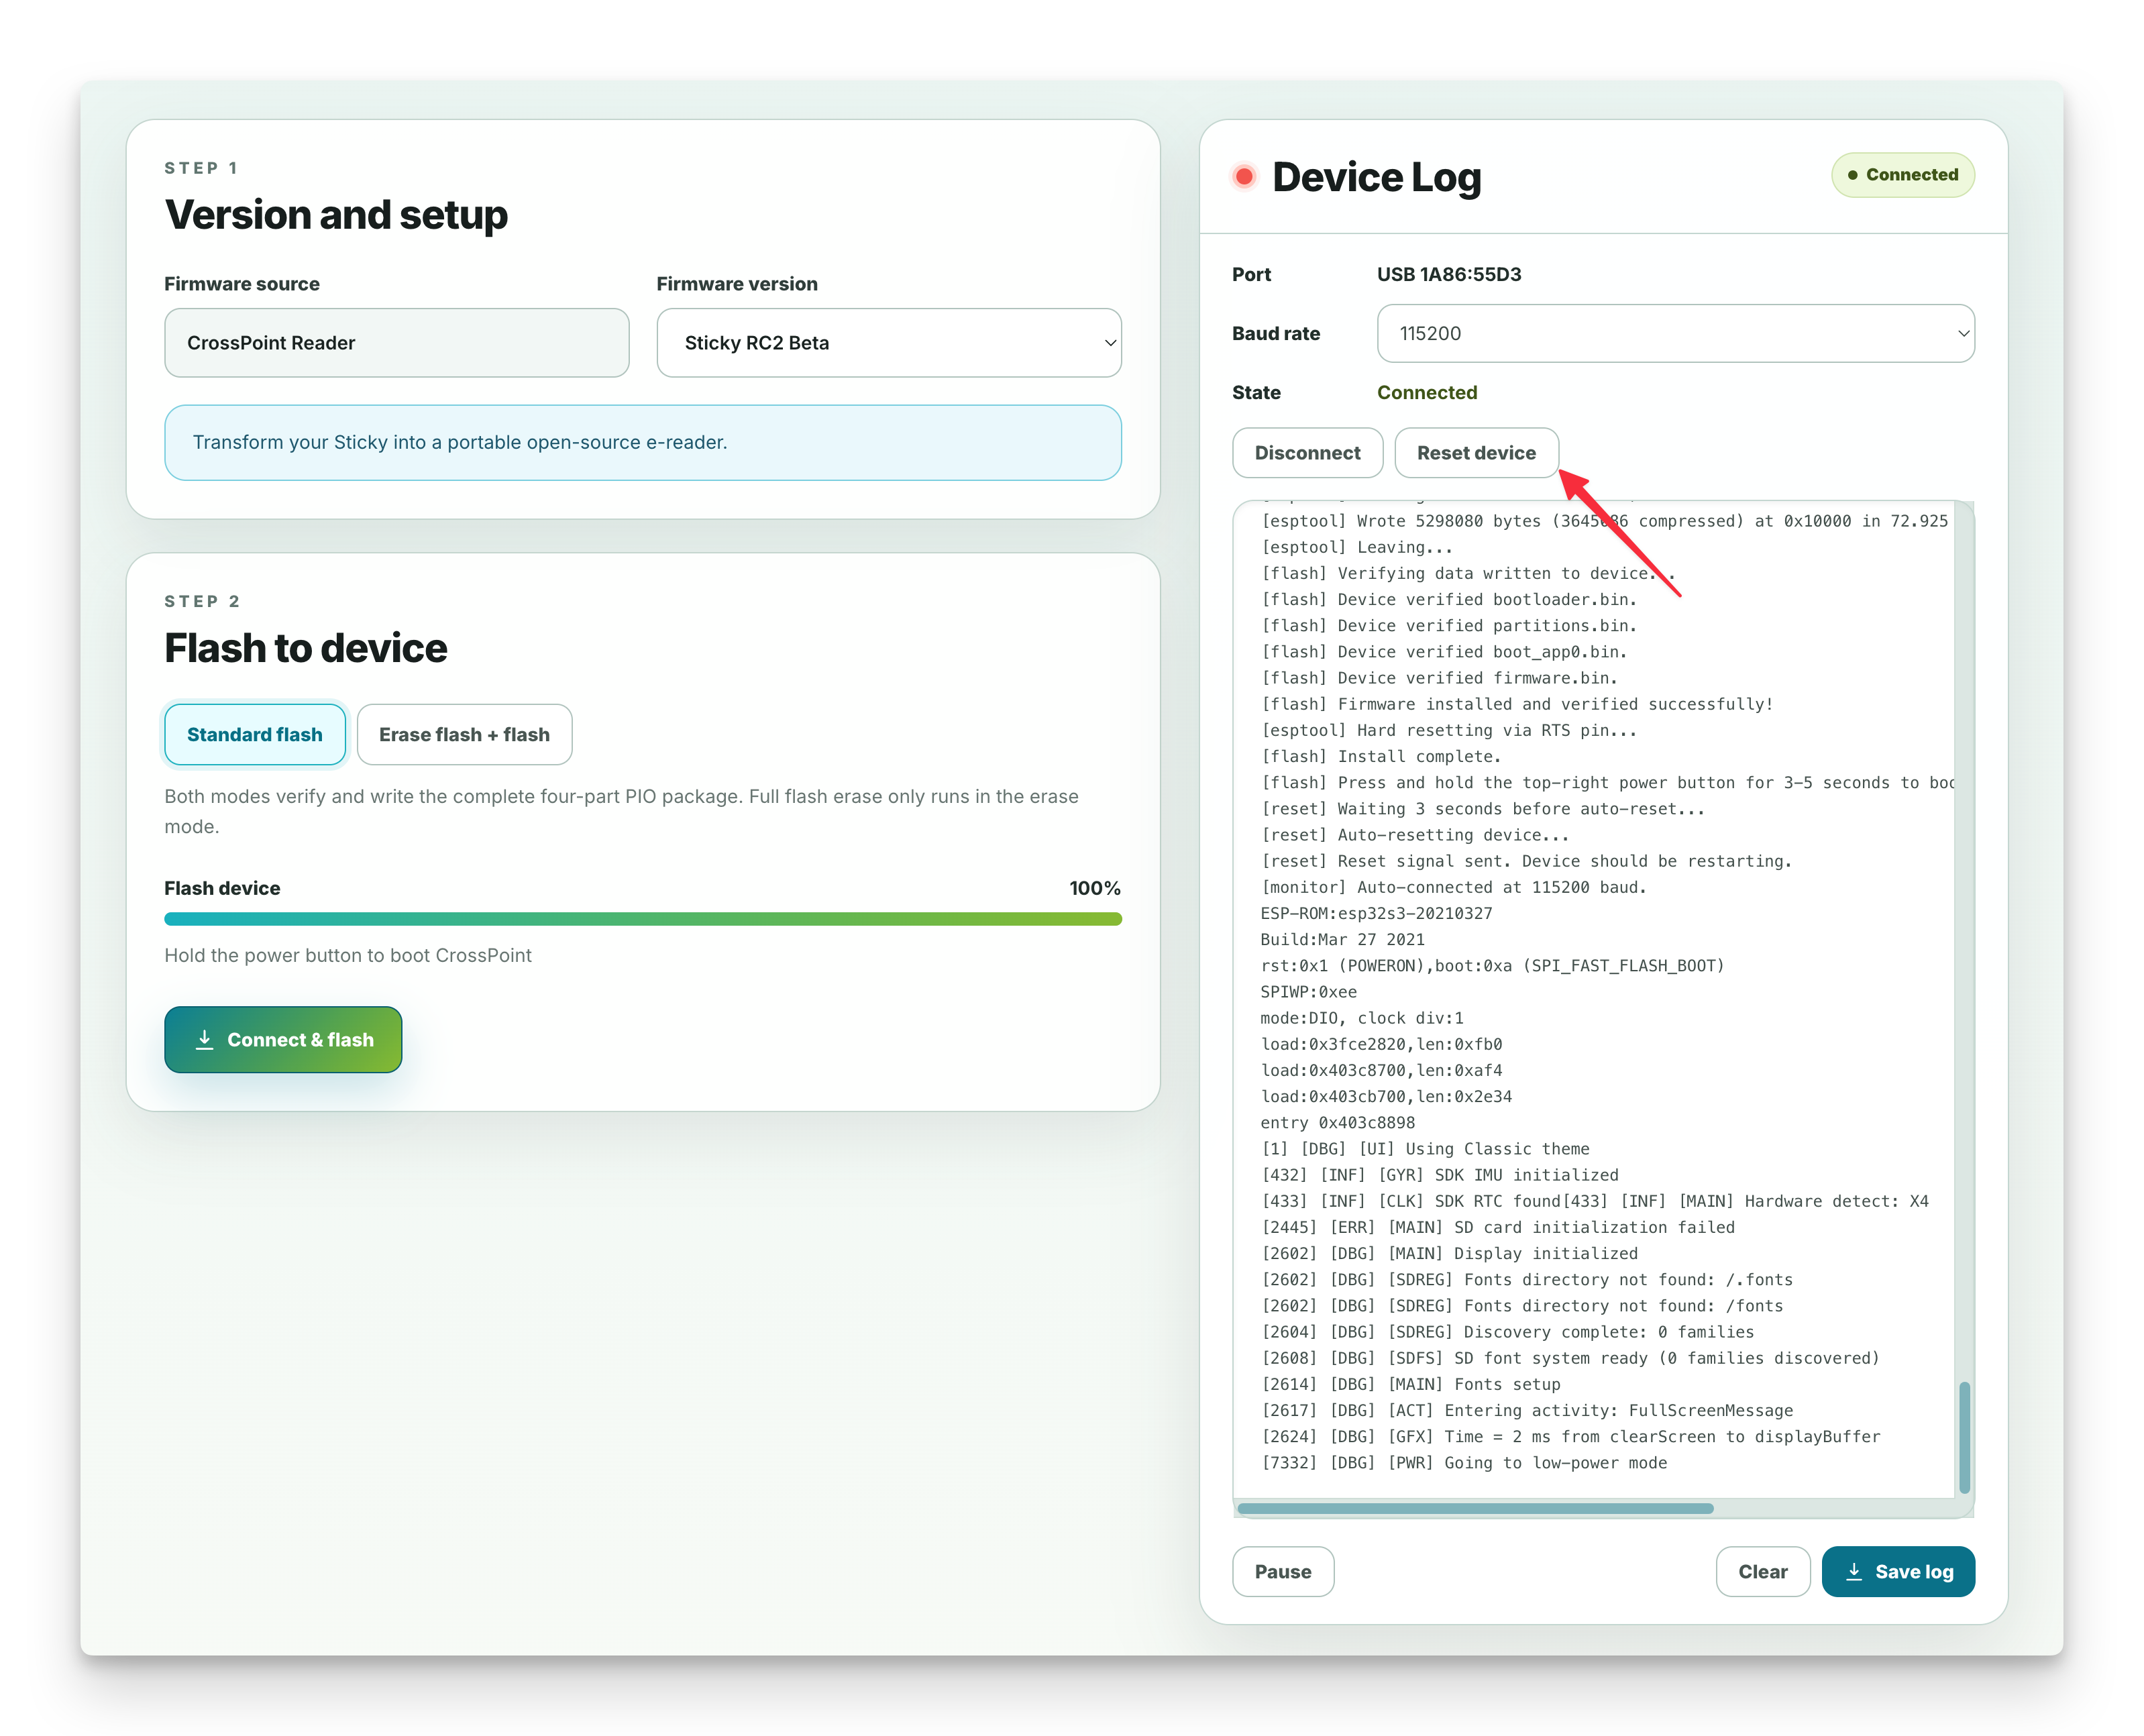
- Long-press the top-right power button on Sticky for about 3 seconds to wake the device.
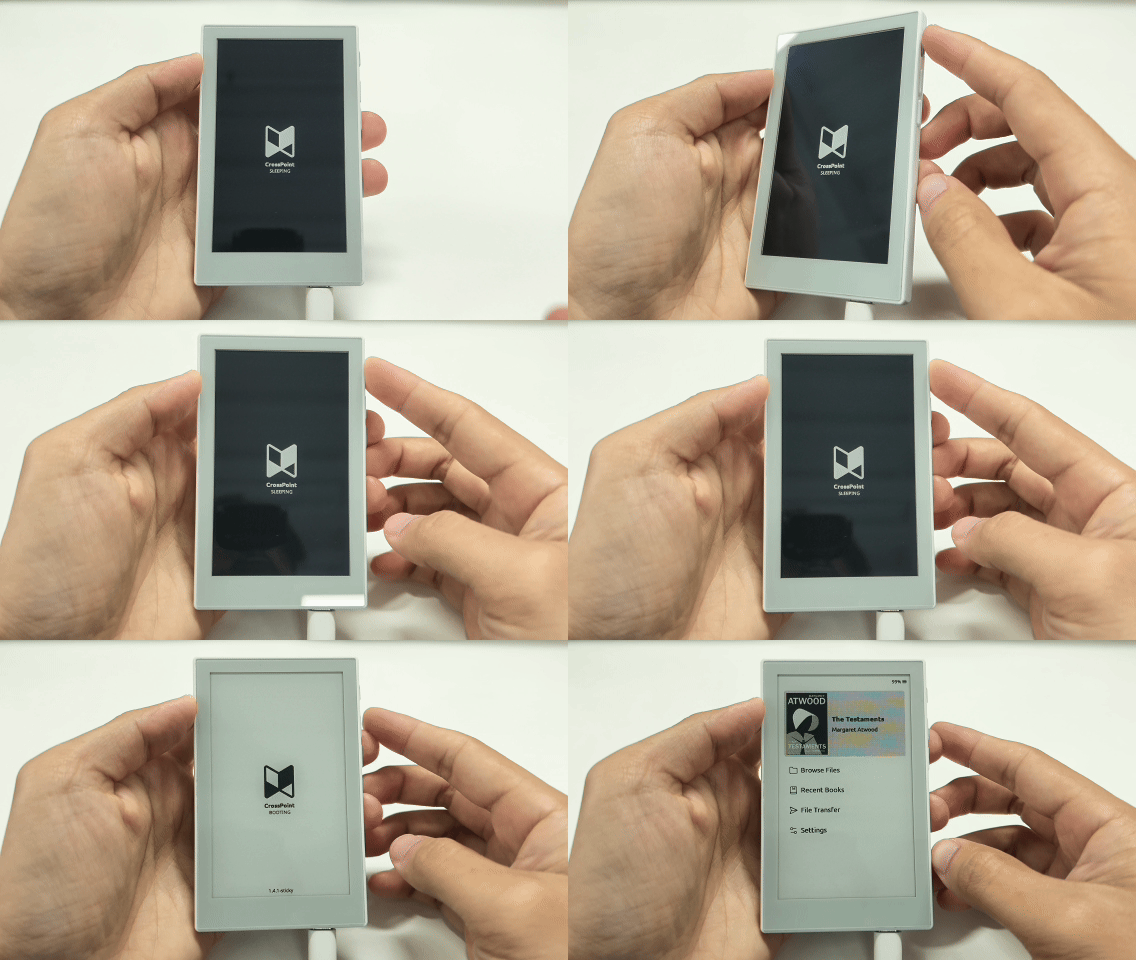
- Watch the ePaper display for the CrossPoint Reader startup or first-run state.
- Use the device log if you need to check boot output.
- Keep the USB cable connected until the device finishes restarting.
- Open a supported reading workflow from CrossPoint Reader and confirm basic navigation.
Basic CrossPoint Reader Use
After CrossPoint Reader starts, begin from its home screen. The home screen is the main entry point for reading, browsing files, opening recent books, transferring files, and changing settings.
For first use, the usual flow is:
- Open the file browser and choose a book or supported file from storage.
- Use recent books when you want to continue something you opened before.
- Enter reading mode to turn pages, navigate chapters, use bookmarks, and adjust reader options.
- Open file transfer when you want to upload and manage books from a browser or supported desktop workflow.
- Use settings to tune display, reader, controls, system, network, and sync options.
CrossPoint Reader supports reading workflows such as EPUB navigation, bookmarks, dictionary lookup, file browsing, recent books, file transfer, custom fonts, themes, and reader display options. The exact menu layout and available features follow the upstream CrossPoint Reader project.
Sticky Button and Touch Controls
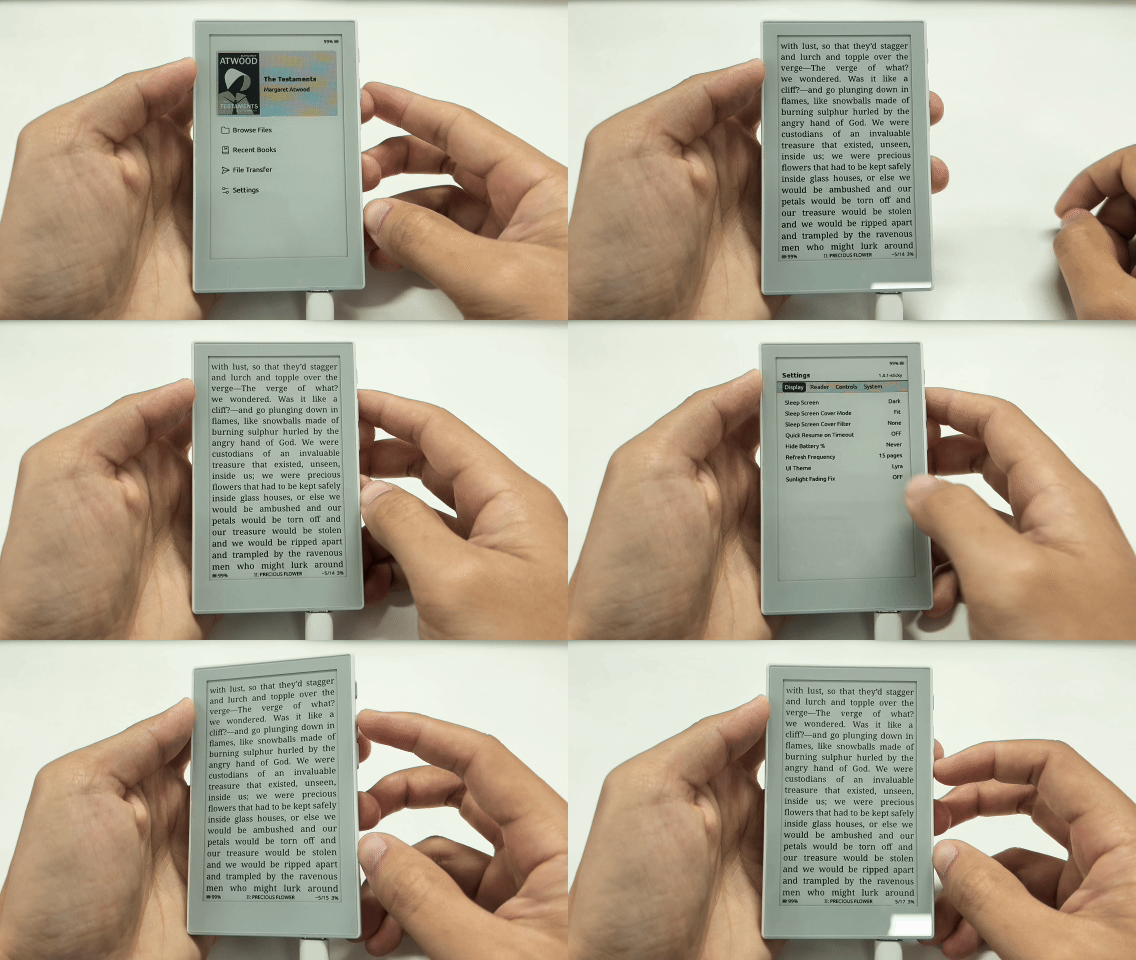
Sticky can be controlled with the physical buttons and the touchscreen:
- The top-right button can wake Sticky from sleep. Inside CrossPoint Reader, it also works as the Enter or Confirm button.
- The two buttons below the power button work as up and down controls. In menus, use them to move through options. Inside a book, use them to turn pages up or down.
- The touchscreen can be used for direct selection. Tap an item on the screen to open or choose it.
- While reading a book, tap the left or right side of the screen to turn pages.
- Swipe from the screen edge toward the center to go back.
Transfer Your First Book
The simplest way to add a book is to copy it to the microSD card:
- Remove the microSD card from Sticky and insert it into your computer with a card reader.
- Copy an
.epub,.txt,.xtc,.xtch, or.bmpfile to the card root or to a folder you created for books. - Safely eject the card and insert it back into Sticky.
- Start CrossPoint Reader, open Browse Files, select the book, and press Confirm to open it.
You can also transfer books over Wi-Fi:
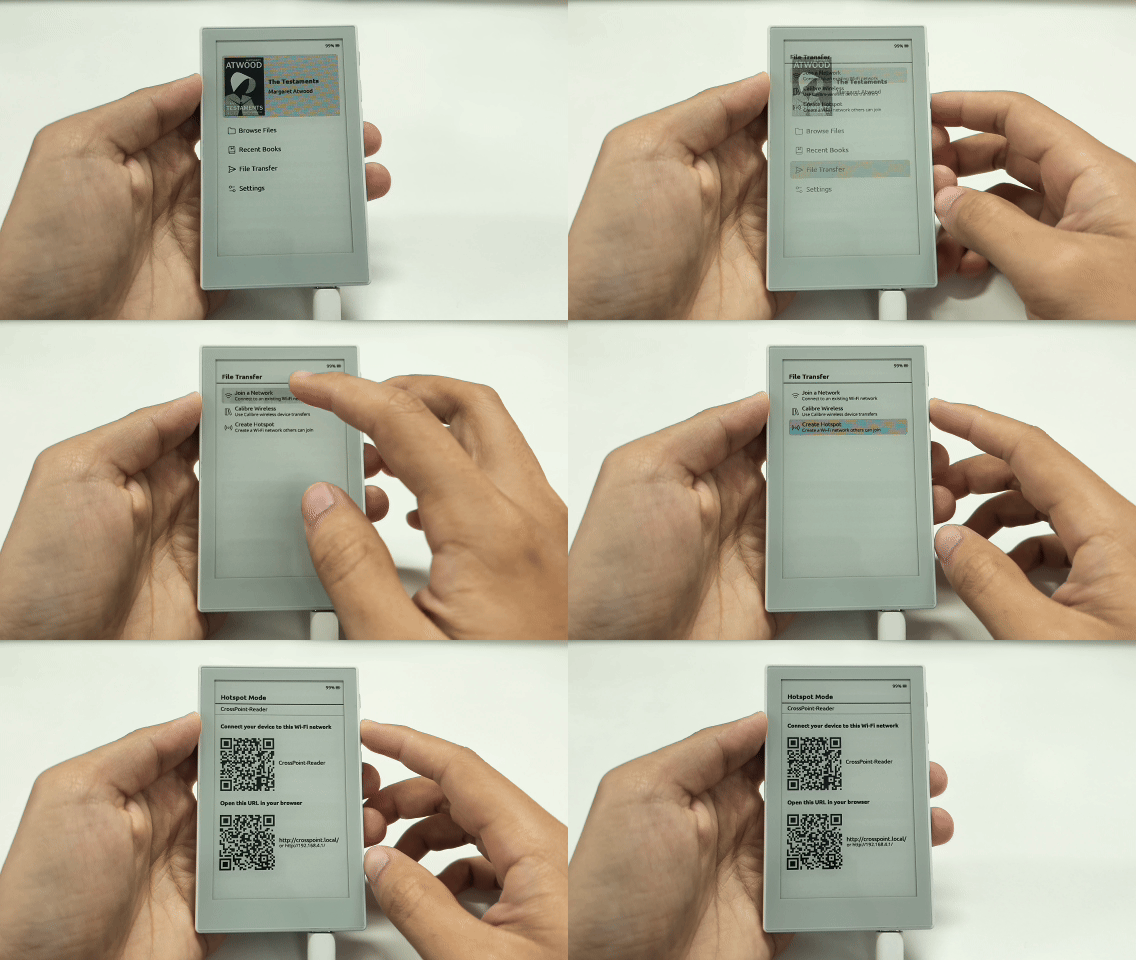
- On CrossPoint Reader, open File Transfer from the home screen.
- Choose Join Network to connect to an existing 2.4 GHz Wi-Fi network, or choose Create Hotspot when you want the reader to create its own Wi-Fi network.
- Open the URL or scan the QR code shown on the reader.
- Use the browser file manager to upload, rename, move, download, or delete files on the microSD card.
Calibre users can use File Transfer > Calibre Wireless with the CrossPoint Reader Calibre plugin to send books from Calibre.
Install Custom Fonts
CrossPoint Reader can load custom .cpfont font families from the microSD card. This is useful when you want CJK, Greek, Cyrillic, Hebrew, or other extended script coverage.
You can install fonts in three ways:
- On the reader, connect to Wi-Fi and open Settings > System > Manage Fonts to download available font families.
- In File Transfer mode, open the web interface in a browser, go to the Fonts tab, and upload
.cpfontfiles. - Copy font family folders to
/.fonts/or/fonts/on the microSD card.
After installing fonts, open Settings > Reader > Font Family and select the font you want to use.
Resources
Use these links when you need the full upstream guide, release notes, issues, or project updates.
- CrossPoint Reader User Guide: full upstream walkthrough for controls, reading, file transfer, fonts, and settings.
- CrossPoint Reader Project: releases, issues, source code, and project updates.
Special Thanks
Special thanks to Justin Mitchell (itsthisjustin), Uri-Tauber, and the CrossPoint Reader team and contributors for supporting CrossPoint Reader on reTerminal Sticky.
We are deeply grateful that they chose to explore Sticky, test the device experience, and bring software support for this hardware into the CrossPoint Reader platform. Their work makes it possible for Sticky users to try a richer open-source eReader workflow, and gives the community a practical path to read, experiment, and build on top of this device.