ESPHome
Overview
This document explains how to use the ESPHome Playground page for reTerminal Sticky.
You will learn what ESPHome is, what hardware and software you need, how to generate a YAML configuration from Playground, how to flash it, how to use the generated device, and where to continue learning.
About the Platform
ESPHome is a YAML-based firmware workflow commonly used with Home Assistant. It lets you describe device behavior in readable configuration files, then compile and flash firmware from that configuration.
For Sticky, the Playground page generates a starter YAML from your selected hardware options.
Benefits include:
- Building a local smart-home dashboard
- Displaying sensor, weather, or automation status
- Testing Sticky hardware features from generated YAML
- Keeping the device configuration readable and editable
The Playground page generates YAML. Flashing is done with ESPHome Web or the ESPHome CLI.
What You Need
Prepare the following before you start:
- reTerminal Sticky
- USB-C data cable
- Desktop Chrome or Edge for ESPHome Web
- Wi-Fi network details, or ESPHome
!secretvalues - ESPHome 2026.7.0 or newer
- ESPHome CLI if you prefer command-line flashing
- A Home Assistant setup if you want to add the device after flashing
Flash from Playground
Click the button below to open the ESPHome Playground page:
Then follow these steps:
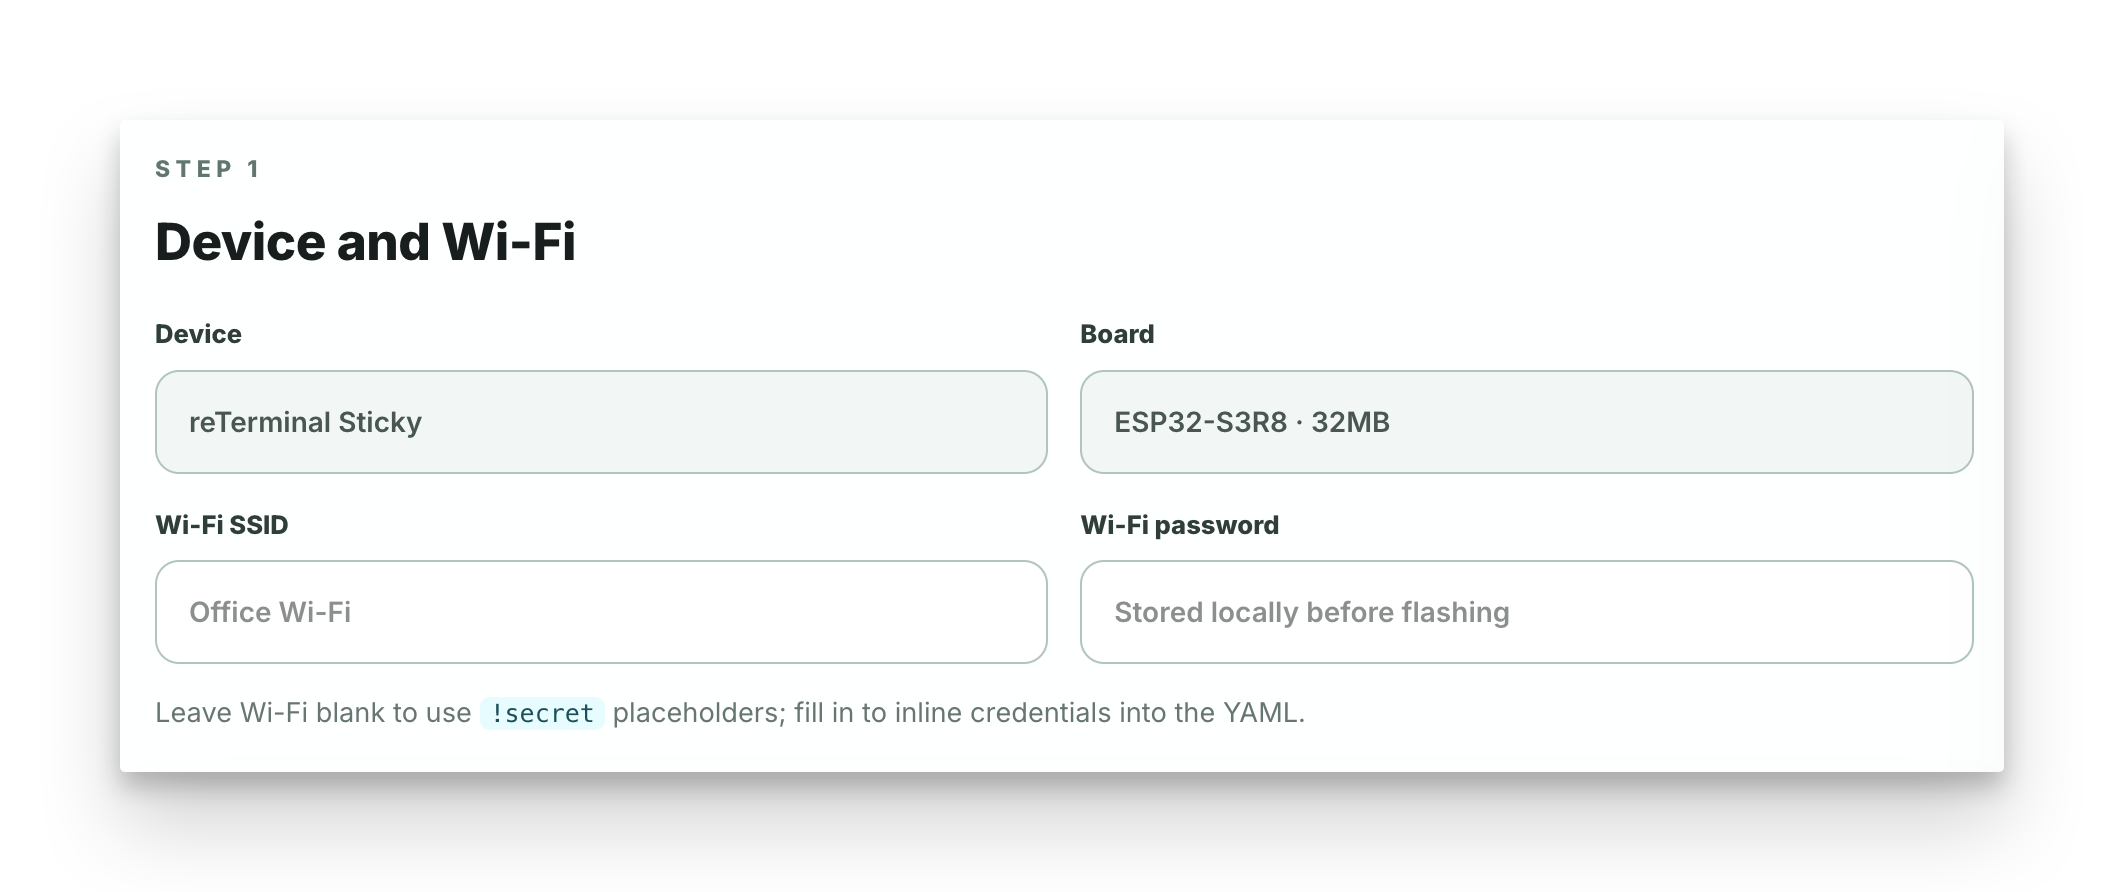
- In Device and Wi-Fi, keep the target device as reTerminal Sticky.
- Fill in Wi-Fi SSID and password, or leave them blank to keep
!secretplaceholders.
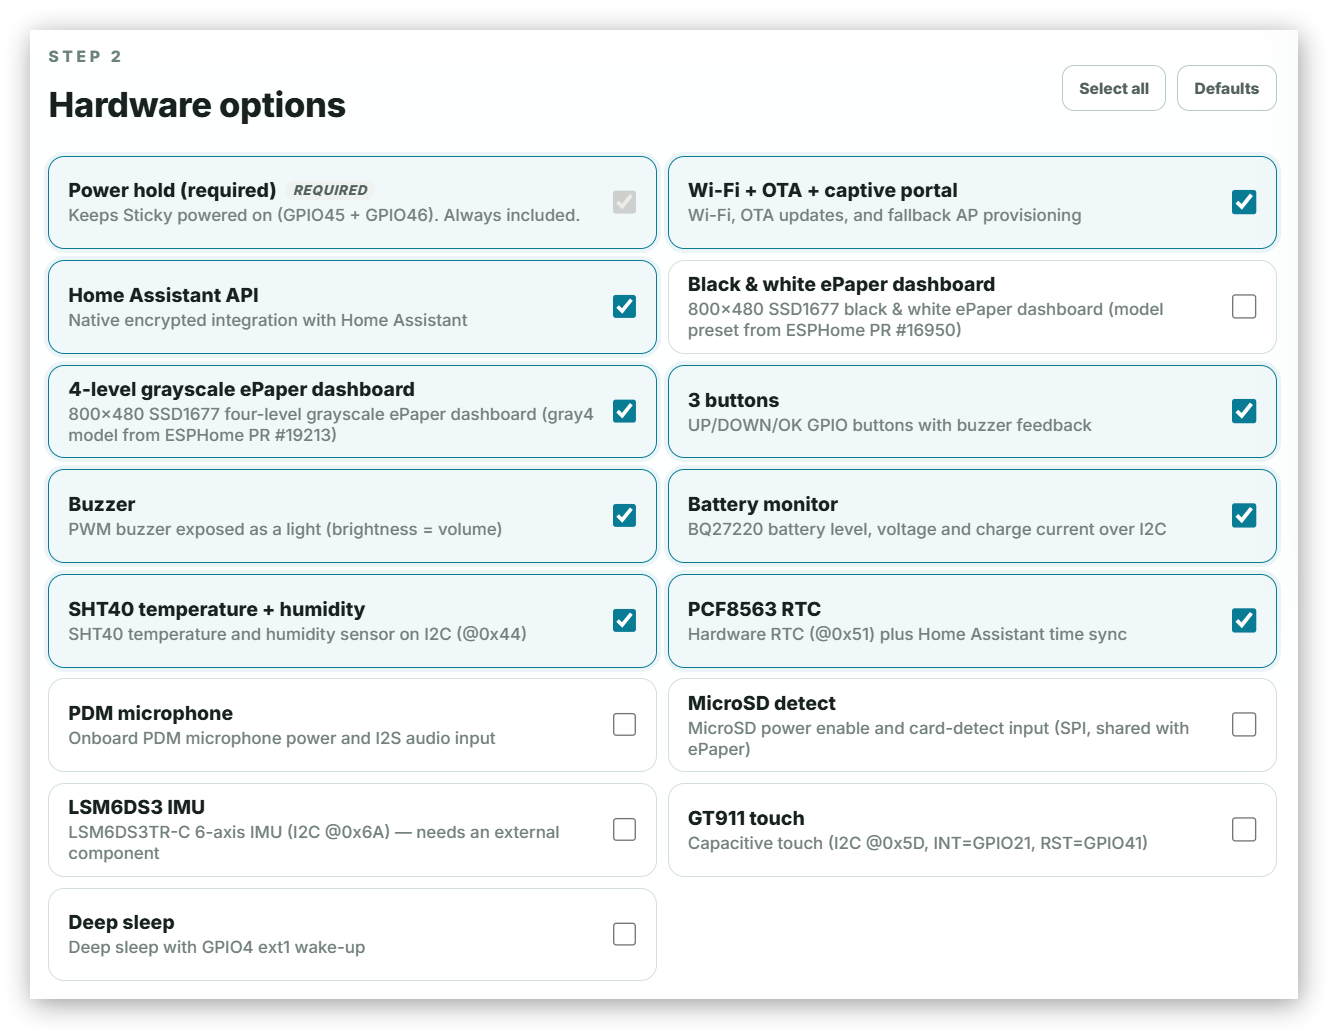
- In Hardware options, start with Defaults.
- Select the hardware features you want, and the black-and-white or four-level grayscale display mode. For grayscale, use ESPHome 2026.10.0b1 or newer, such as 2026.11.0-dev.
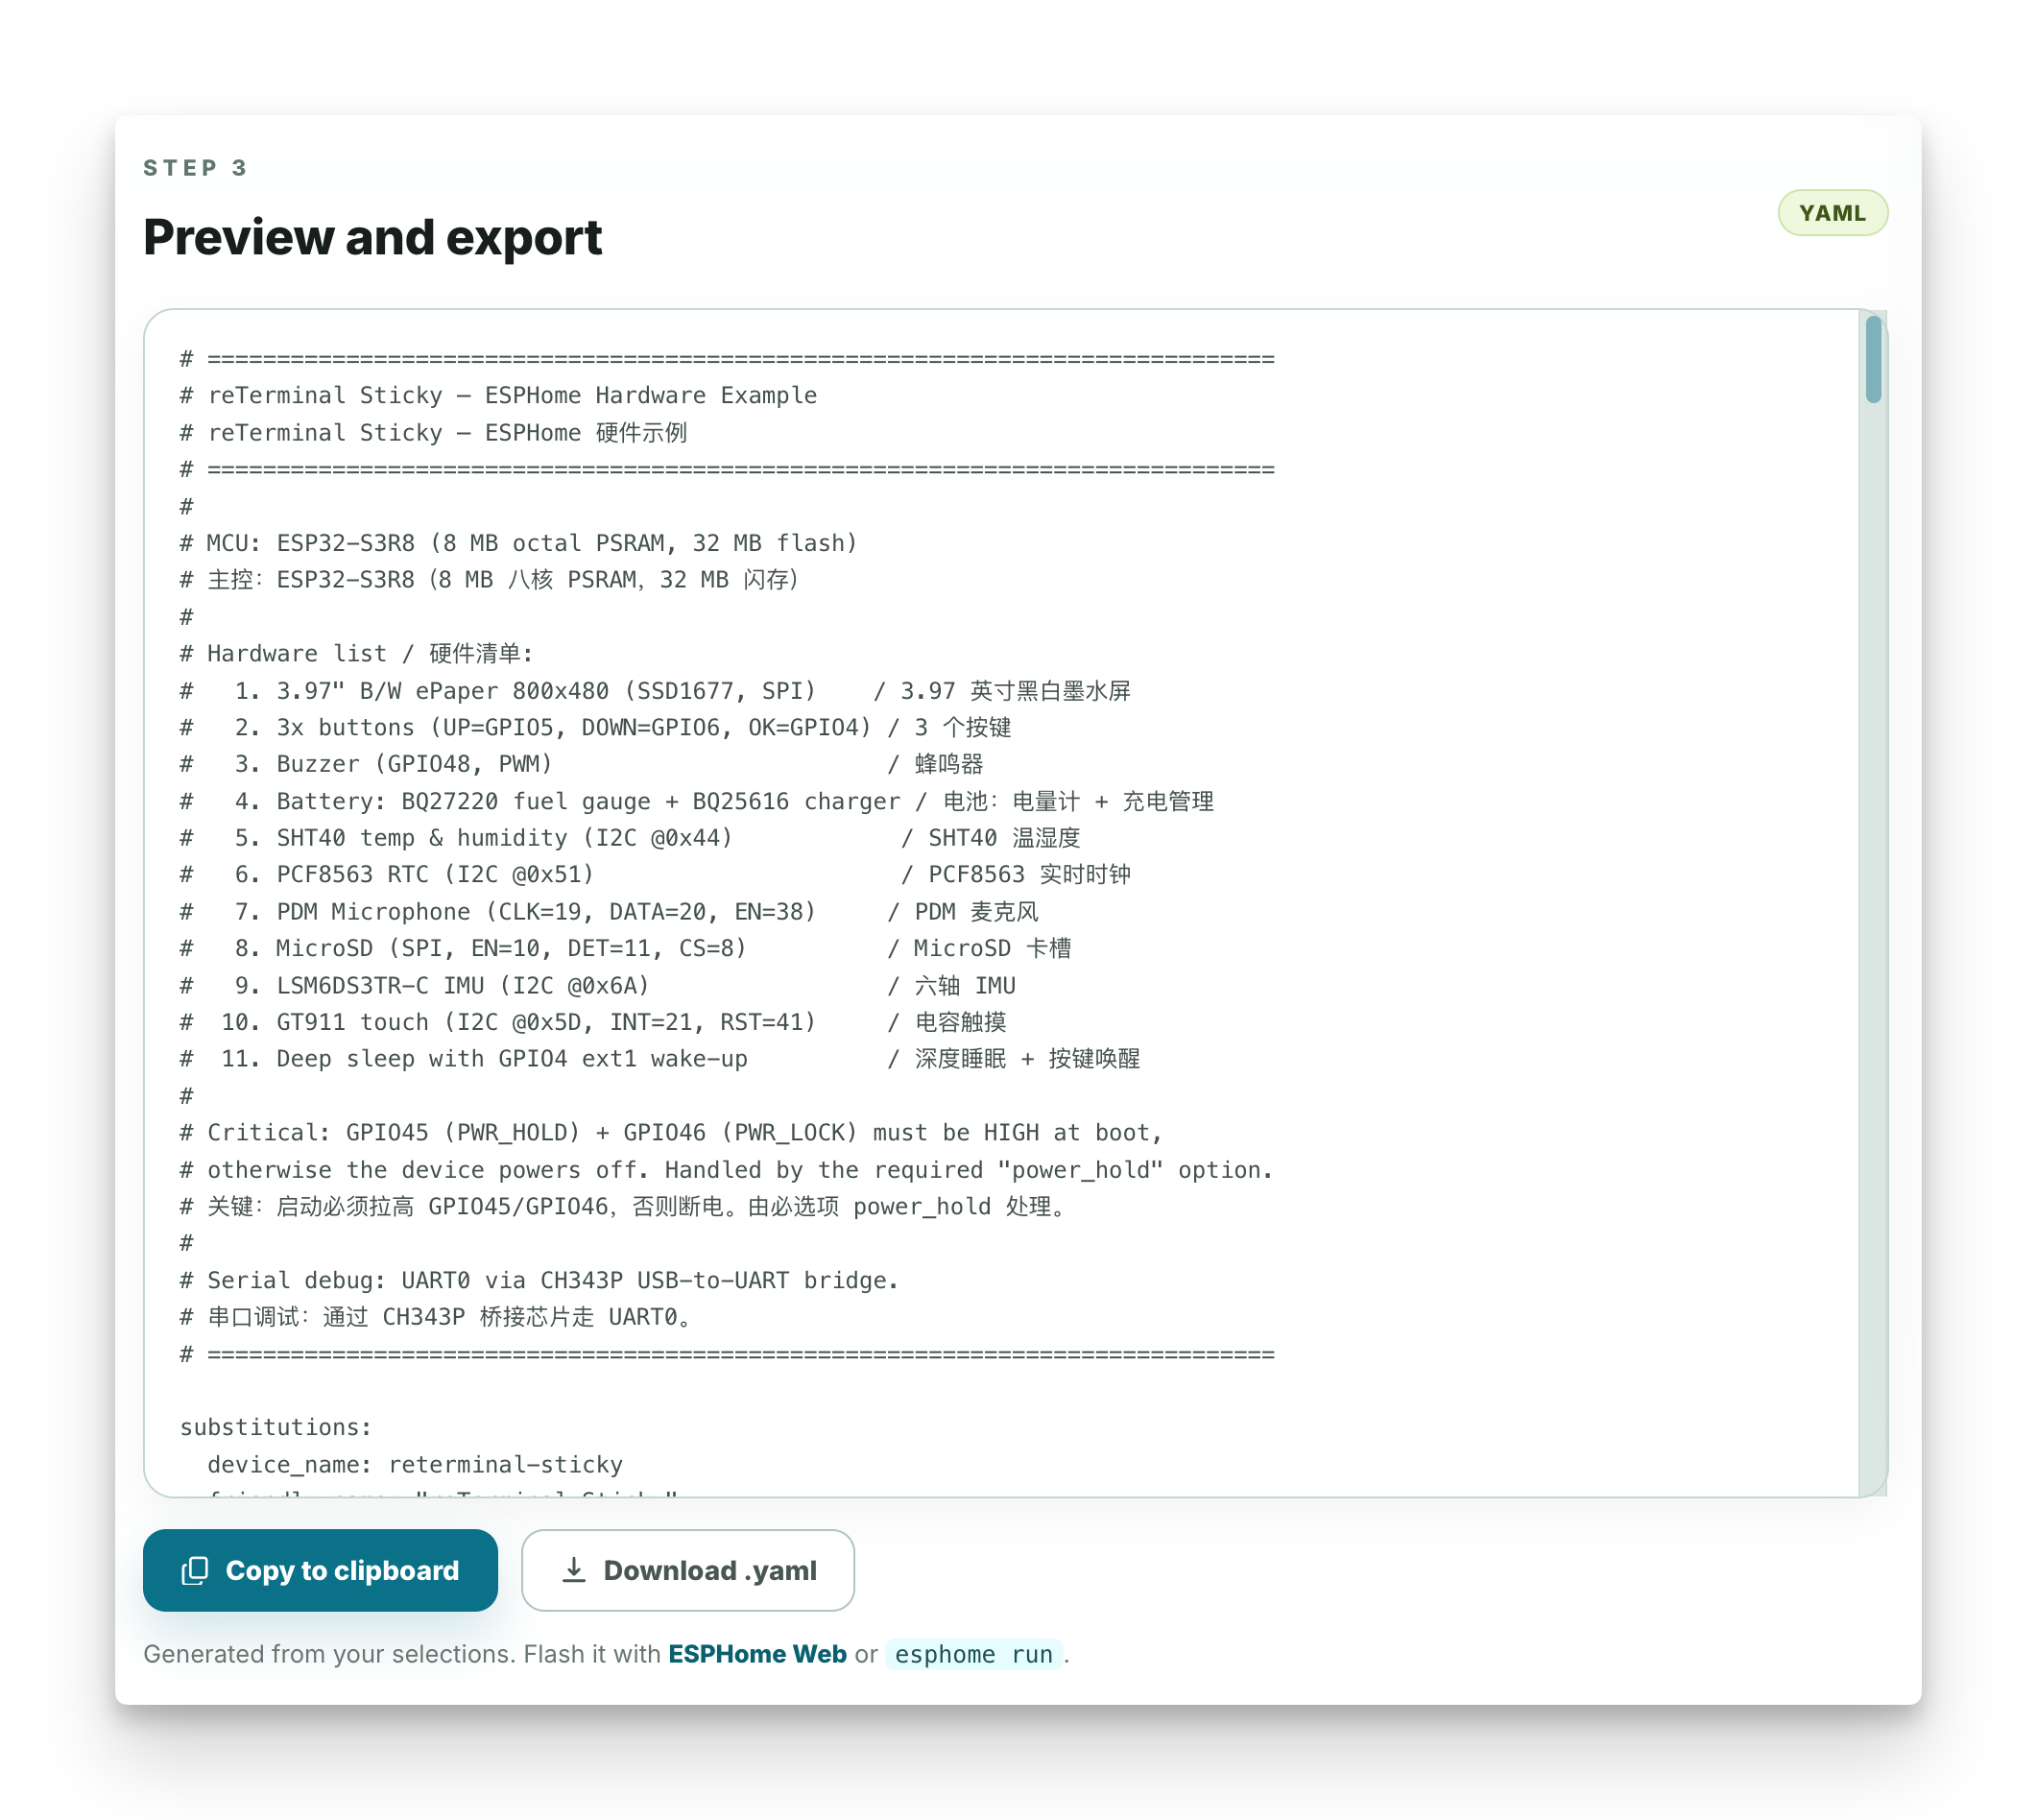
- Review the generated YAML in Preview and export.
- Use Copy to clipboard or Download .yaml.
Review and Customize the Generated YAML
Before you compile or flash the YAML, open the generated file and review the parts below. The default example is meant to prove the Sticky hardware path first, then become a base file for your own ESPHome project.
Add Required Secret Values
The generated YAML can use !secret values for Wi-Fi, the Home Assistant native API, and OTA updates. !secret means ESPHome should read the real value from a separate secrets.yaml file in the same configuration folder.
The API and OTA sections in the default YAML look like this:
# Home Assistant native API
api:
  encryption:
    key: !secret api_encryption_key

# OTA (Over-The-Air) firmware update
ota:
  - platform: esphome
    password: !secret ota_password
Create a secrets.yaml file next to reterminal-sticky.yaml and add the matching values:
wifi_ssid: "Your WiFi SSID"
wifi_password: "Your WiFi Password"
api_encryption_key: "Your 32-byte base64 API encryption key"
ota_password: "Your OTA update password"
You can generate the API encryption key with:
openssl rand -base64 32
When api_encryption_key or ota_password is still only referenced but not defined in secrets.yaml, ESPHome stops during configuration validation. For a one-time local test, you can also replace the !secret ... part with a quoted value directly in the YAML. For a reusable project, keeping secrets in secrets.yaml is the cleaner workflow.
Understand What the Example Does
The generated example enables the main Sticky hardware blocks and exposes them as ESPHome entities:
substitutions: sets the device name and friendly name used by ESPHome and Home Assistant.esphome.on_boot: turns on the Sticky power-hold outputs and reads the RTC when the device starts.esp32,logger,spi, andi2c: define the board, serial logging, ePaper SPI bus, and sensor I2C bus.font: loads the fonts used by the ePaper screen.outputandlight: keep the power rails on, control the charger-enable pin, and expose the buzzer as a controllable output.sensor: reads SHT40 temperature and humidity, plus BQ27220 battery level, voltage, and current.binary_sensor: maps the UP, DOWN, and OK buttons, and reports charging state.time: reads the PCF8563 RTC and can sync time from Home Assistant.api,ota,wifi, andcaptive_portal: connect Sticky to the network, Home Assistant, and OTA update flow.display: renders the ePaper screen.
The default display is a fixed template. It prints the title, RTC time, temperature, humidity, battery percentage, button hints, and a footer. It does not automatically mirror a Home Assistant dashboard. If you want the screen to show your own layout, weather, task list, room status, or other Home Assistant data, edit the display.lambda block.
Customize the ePaper Screen
The screen content lives here:
display:
  - platform: epaper_spi
    id: epaper_display
    model: seeed-reterminal-sticky
    update_interval: 300s
    lambda: |-
      it.printf(400, 15, id(font_medium), COLOR_OFF, TextAlign::TOP_CENTER,
                "reTerminal Sticky");
Inside lambda: |-, you write the drawing logic. Think of the screen as an 800 x 480 canvas: x moves from left to right, and y moves from top to bottom. For example, it.printf(30, 120, ...) prints near the left side and below the title area.
Common edits:
- Change fixed text by editing the string inside
it.print(...)orit.printf(...). - Change position by editing the first two numbers, such as
30, 120. - Change text size by switching between
id(font_small),id(font_medium), andid(font_large), or by adding another font underfont:. - Change refresh timing with
update_interval: 300s. - Print a sensor value only after checking
has_state(), so the screen can render cleanly while the sensor is still starting.
For example, this simplified display block shows a custom title, temperature, humidity, and battery:
display:
  - platform: epaper_spi
    id: epaper_display
    model: seeed-reterminal-sticky
    update_interval: 300s
    lambda: |-
      it.printf(400, 20, id(font_medium), COLOR_OFF, TextAlign::TOP_CENTER,
                "Kitchen Status");
      it.line(20, 60, 780, 60, COLOR_OFF);

      if (id(temp_sensor).has_state()) {
        it.printf(30, 110, id(font_large), COLOR_OFF,
                  "Temp: %.1f C", id(temp_sensor).state);
      }

      if (id(hum_sensor).has_state()) {
        it.printf(30, 180, id(font_large), COLOR_OFF,
                  "Humidity: %.1f %%", id(hum_sensor).state);
      }

      if (id(battery_level).has_state() && !isnan(id(battery_level).state)) {
        it.printf(30, 260, id(font_medium), COLOR_OFF,
                  "Battery: %.0f%%", id(battery_level).state);
      }
To show values from Home Assistant, first import the entity into the YAML, then print that imported value in display.lambda. Numeric entities can use the homeassistant sensor platform:
sensor:
  - platform: homeassistant
    id: living_room_temperature
    entity_id: sensor.living_room_temperature
Then use that id on the display:
display:
  - platform: epaper_spi
    id: epaper_display
    model: seeed-reterminal-sticky
    lambda: |-
      if (id(living_room_temperature).has_state()) {
        it.printf(30, 120, id(font_large), COLOR_OFF,
                  "Living Room: %.1f C", id(living_room_temperature).state);
      }
For text values from Home Assistant, use text_sensor and print .state.c_str():
text_sensor:
  - platform: homeassistant
    id: weather_summary
    entity_id: sensor.weather_summary

display:
  - platform: epaper_spi
    id: epaper_display
    model: seeed-reterminal-sticky
    lambda: |-
      it.printf(30, 120, id(font_medium), COLOR_OFF,
                "Weather: %s", id(weather_summary).state.c_str());
If you use ESPHome CLI, run esphome config reterminal-sticky.yaml after each YAML edit to validate the configuration first. Then run esphome run reterminal-sticky.yaml to compile and upload.
For browser-based flashing, open ESPHome Web:
Connect Sticky with the USB-C data cable, select the YAML when ESPHome Web asks for a configuration, choose the Sticky serial port, and keep the cable connected until flashing finishes.
If you prefer the command line, install ESPHome CLI first by following the ESPHome Command Line Guide. After the esphome command is available in your terminal, save the YAML as reterminal-sticky.yaml and run:
esphome run reterminal-sticky.yaml
After Flashing
After flashing completes:
- Use the device log panel on the ESPHome Playground page to check serial output.
- Confirm that Sticky boots and joins Wi-Fi.
- Add the generated device to Home Assistant if you use Home Assistant.
- Test the display, sensors, or controls included in your YAML.
- Save the YAML in your ESPHome configuration folder.
Basic ESPHome Use
ESPHome works from a YAML configuration file. The YAML describes what the device has, how it connects to Wi-Fi, what it should expose to Home Assistant, and what it should show or control.
For Sticky, the generated YAML is a starting point:
- Keep a copy of the generated YAML in your ESPHome configuration folder so future edits, rebuilds, and updates use the same source file.
- Use
!secretvalues for Wi-Fi credentials when you manage the file in a shared or versioned configuration folder. - Start with the default hardware blocks, then enable only the display, sensor, button, audio, or peripheral features you need.
- Use ESPHome logs after flashing to check Wi-Fi connection, boot messages, sensor readings, and display updates.
- Add the device to Home Assistant when it appears as a discovered ESPHome device, then place its entities in dashboards or automations.
- After the first USB flash works, use ESPHome over-the-air updates for later YAML changes when the device is reachable on the network.
Common Sticky workflows include local status dashboards, weather panels, Home Assistant entity summaries, battery or sensor monitors, button-triggered actions, and custom ePaper screens. ESPHome keeps these workflows editable because the device behavior stays in the YAML file.
Resources
Use these links when you need the main documentation, web flasher, Home Assistant flow, command-line flow, components, or source code.
- ESPHome Documentation: overview, guides, components, automations, cookbook, and release notes.
- ESPHome Web: browser-based flashing from Chrome or Edge.
- ESPHome with Home Assistant: setup flow for users who manage ESPHome from Home Assistant.
- ESPHome Command Line Guide: install, compile, upload, and log commands for CLI users.
- ESPHome Components: reference for sensors, displays, buttons, outputs, networking, and integrations.
- ESPHome YAML Guide:
!secret, substitutions, includes, and YAML structure. - ESPHome Security Best Practices: guidance for API keys, OTA passwords, and version-controlled configs.
- ESPHome Display Component: display
lambda, coordinates, fonts, text, shapes, and pages. - Home Assistant Sensor: import numeric Home Assistant entity states into ESPHome.
- Home Assistant Text Sensor: import text Home Assistant entity states into ESPHome.
- ESPHome GitHub: source code, issues, and project updates.
Special Thanks
Special thanks to clydebarrow for taking the time to use reTerminal Sticky, evaluate the ESPHome experience, and help bring Sticky support into the ESPHome workflow.
We sincerely appreciate this work because it turns Sticky from a piece of hardware into something that Home Assistant and ESPHome users can directly build with. This support gives the community a practical starting point for local dashboards, sensor views, automations, and custom ePaper projects on Sticky.
Thanks also to the ESPHome maintainers, the Home Assistant community, and all related contributors for building and sustaining the open local automation foundation that makes this integration possible.