TRMNL
Overview
This document explains how to use TRMNL on reTerminal Sticky from Playground.
You will learn what TRMNL is, what you need before flashing, how to install the Sticky-ready TRMNL firmware in the browser, how to connect the device to your TRMNL account, and where to continue learning.
About the Platform
TRMNL is an E Ink dashboard platform for calm, ambient information. Instead of showing a stream of notifications, it lets you build a simple playlist of dashboards such as calendar events, weather, tasks, metrics, RSS feeds, and custom messages.
For Sticky, TRMNL is a good fit when you want the device to behave like a low-power information display that can sit on a desk, shelf, or wall.
Benefits include:
- Dashboard content that is easy to configure from the TRMNL web app
- Low-power ePaper display behavior for glanceable information
- Plugins and integrations that can be arranged as a playlist
- BYOD support for using compatible third-party hardware with TRMNL
- A developer-friendly platform for custom plugins and API-based workflows
The TRMNL firmware hosted in Playground is prepared for reTerminal Sticky. It may not always match the latest upstream TRMNL firmware package. For the latest upstream TRMNL flashing path, use the official TRMNL Web Flasher.
Flashing TRMNL replaces the firmware currently running on Sticky.
What You Need
Prepare the following before you start:
- reTerminal Sticky
- USB-C data cable
- Desktop Chrome or Edge
- Stable power during flashing
- 2.4 GHz Wi-Fi network
- TRMNL account
- TRMNL BYOD access and Device ID
Use a USB cable that supports data transfer. A charging-only cable can power Sticky but cannot expose the serial port.
You can create a TRMNL account from the TRMNL web app.

If you plan to use your own hardware with TRMNL, purchase and activate BYOD access from the TRMNL BYOD page.

Flash from Playground
Click the button below to open the TRMNL flashing page:
Then follow these steps:
- Connect Sticky to your computer with the USB-C data cable.
- Keep the device connected during the full flashing process.
- Select the TRMNL firmware version shown on the page.
- Choose the flash mode that matches your current firmware state.
Standard flash verifies and writes the selected firmware package directly. Erase flash + flash verifies the same package, clears the complete device flash, and then writes the firmware package. For a first TRMNL install or when switching from another firmware, use Erase flash + flash.
- Click Connect & flash.
- When Chrome or Edge asks for serial-port access, select the Sticky serial port.
- Wait until the progress bar and device log show that flashing is complete.
The TRMNL Playground page writes the complete Sticky-ready firmware package from the release manifest.
After flashing TRMNL firmware, the device performs initial SPIFFS formatting. The screen may remain blank while only logs are shown. Keep the device connected and wait for the first screen to appear.
After Flashing
After flashing completes, finish the TRMNL setup from the device and the TRMNL web app:
- Wait for Playground to reopen the serial port and automatically perform the final device reset.
- Use Reset device above the Device Log panel if you want to restart Sticky again.
- Keep the USB cable connected until the first TRMNL startup finishes.
- If the screen stays blank during the first boot, keep waiting while the device log continues to update.
- Long-press the top-right power button on Sticky for about 3 seconds if you need to wake the device.
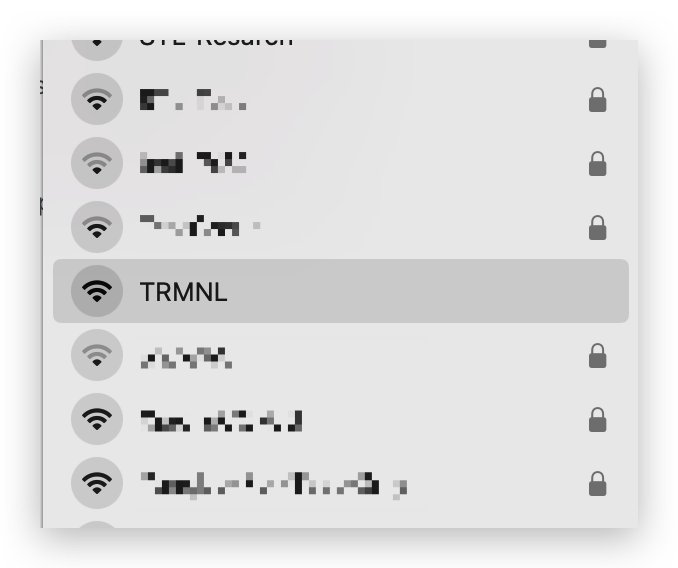
- Connect your computer or phone to the TRMNL Wi-Fi setup network shown by the device.
- Open the TRMNL setup page. If the captive portal does not open automatically, visit the TRMNL setup portal.
- Enter your 2.4 GHz Wi-Fi name and password.
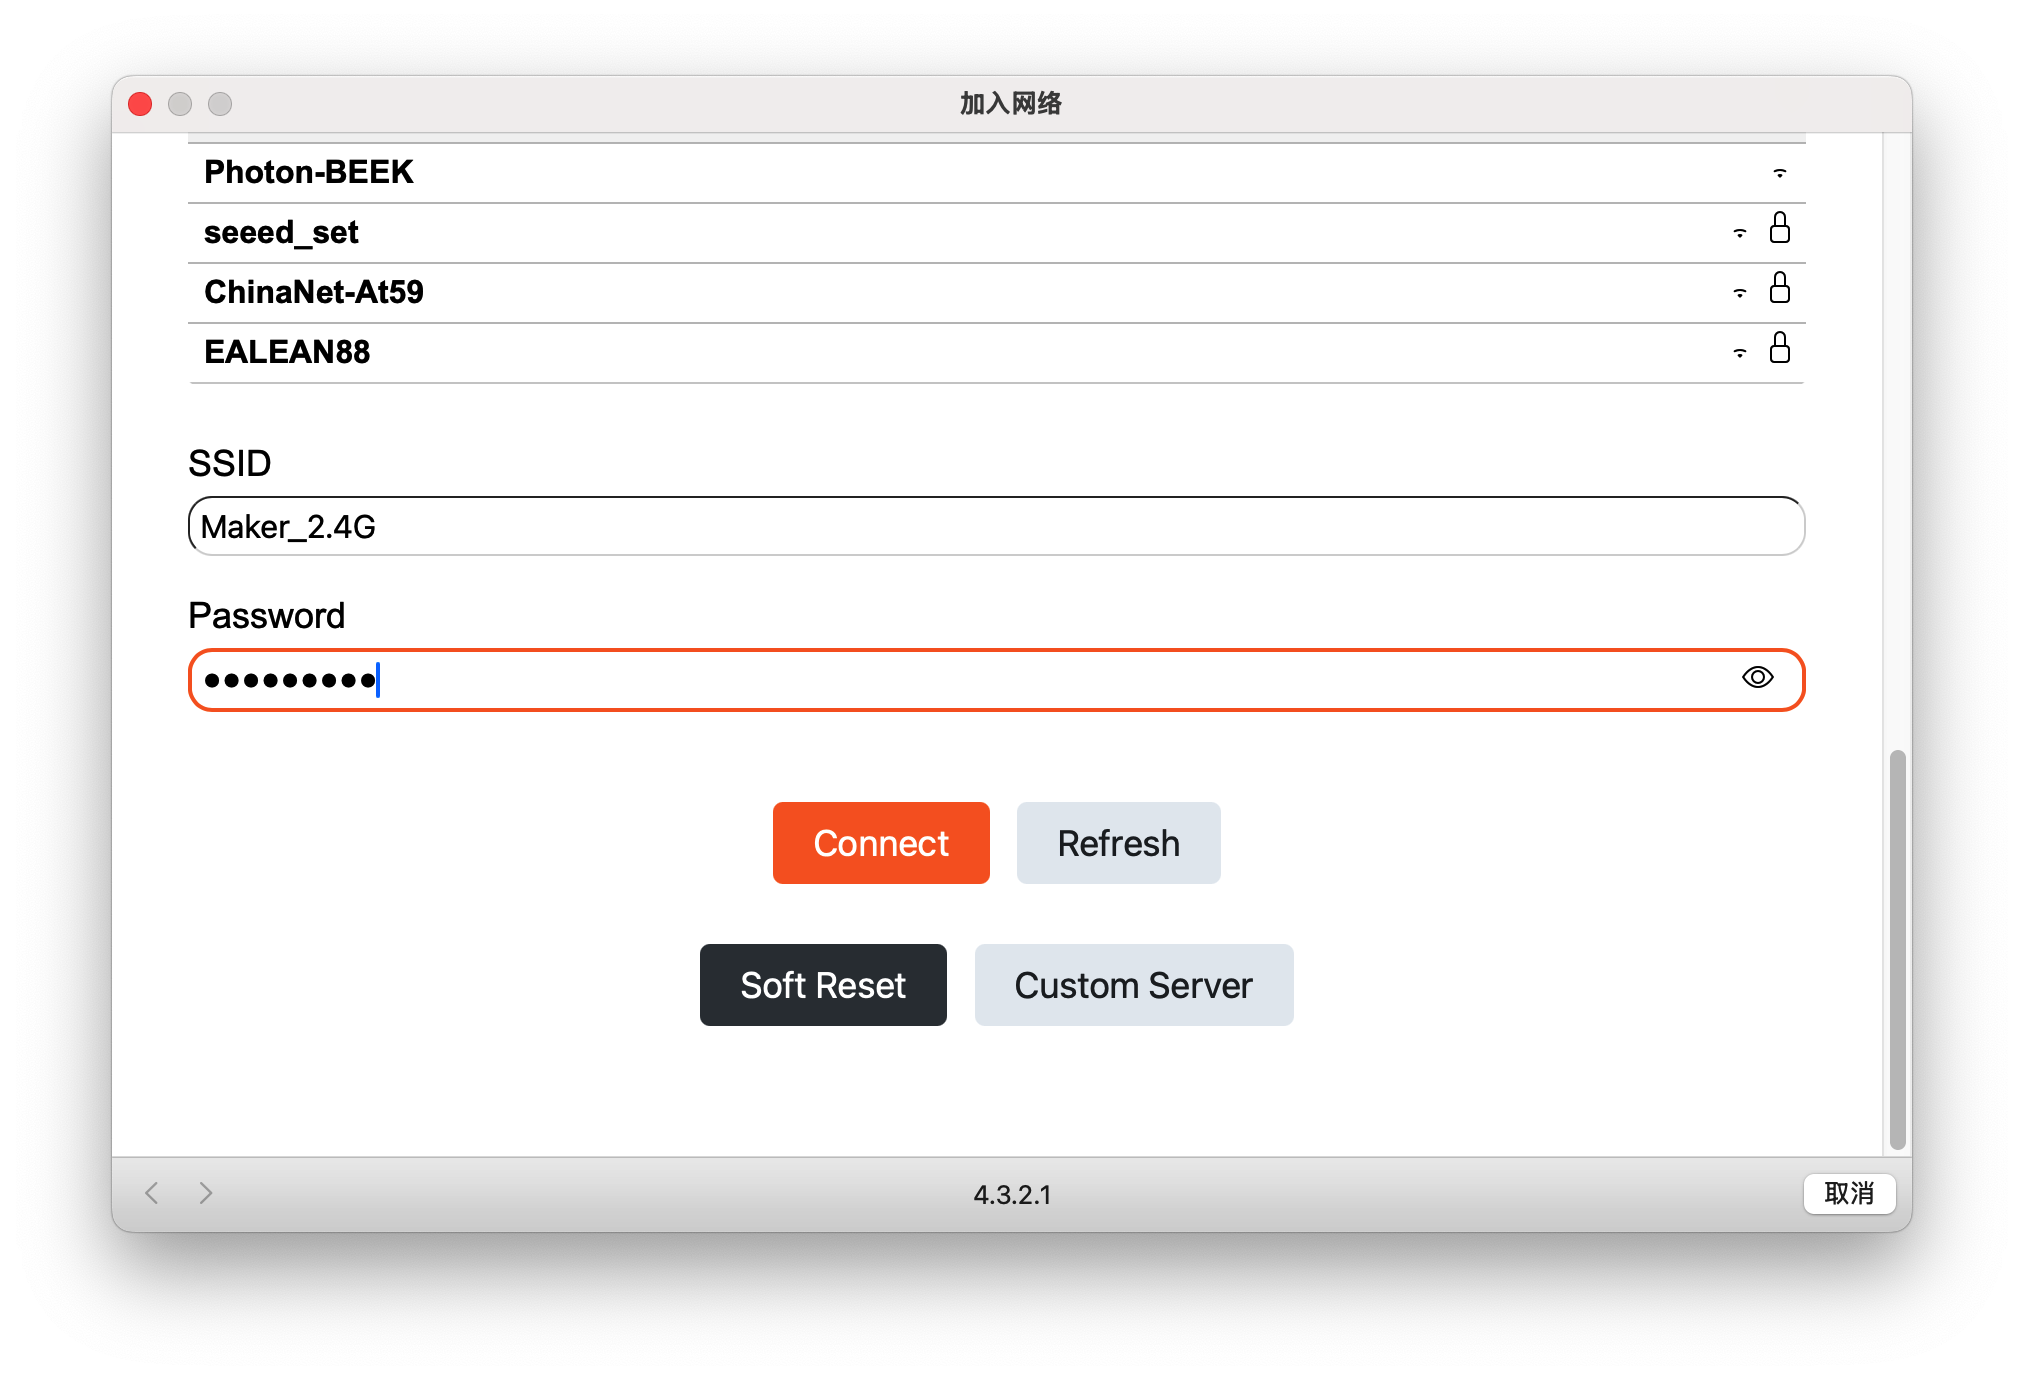
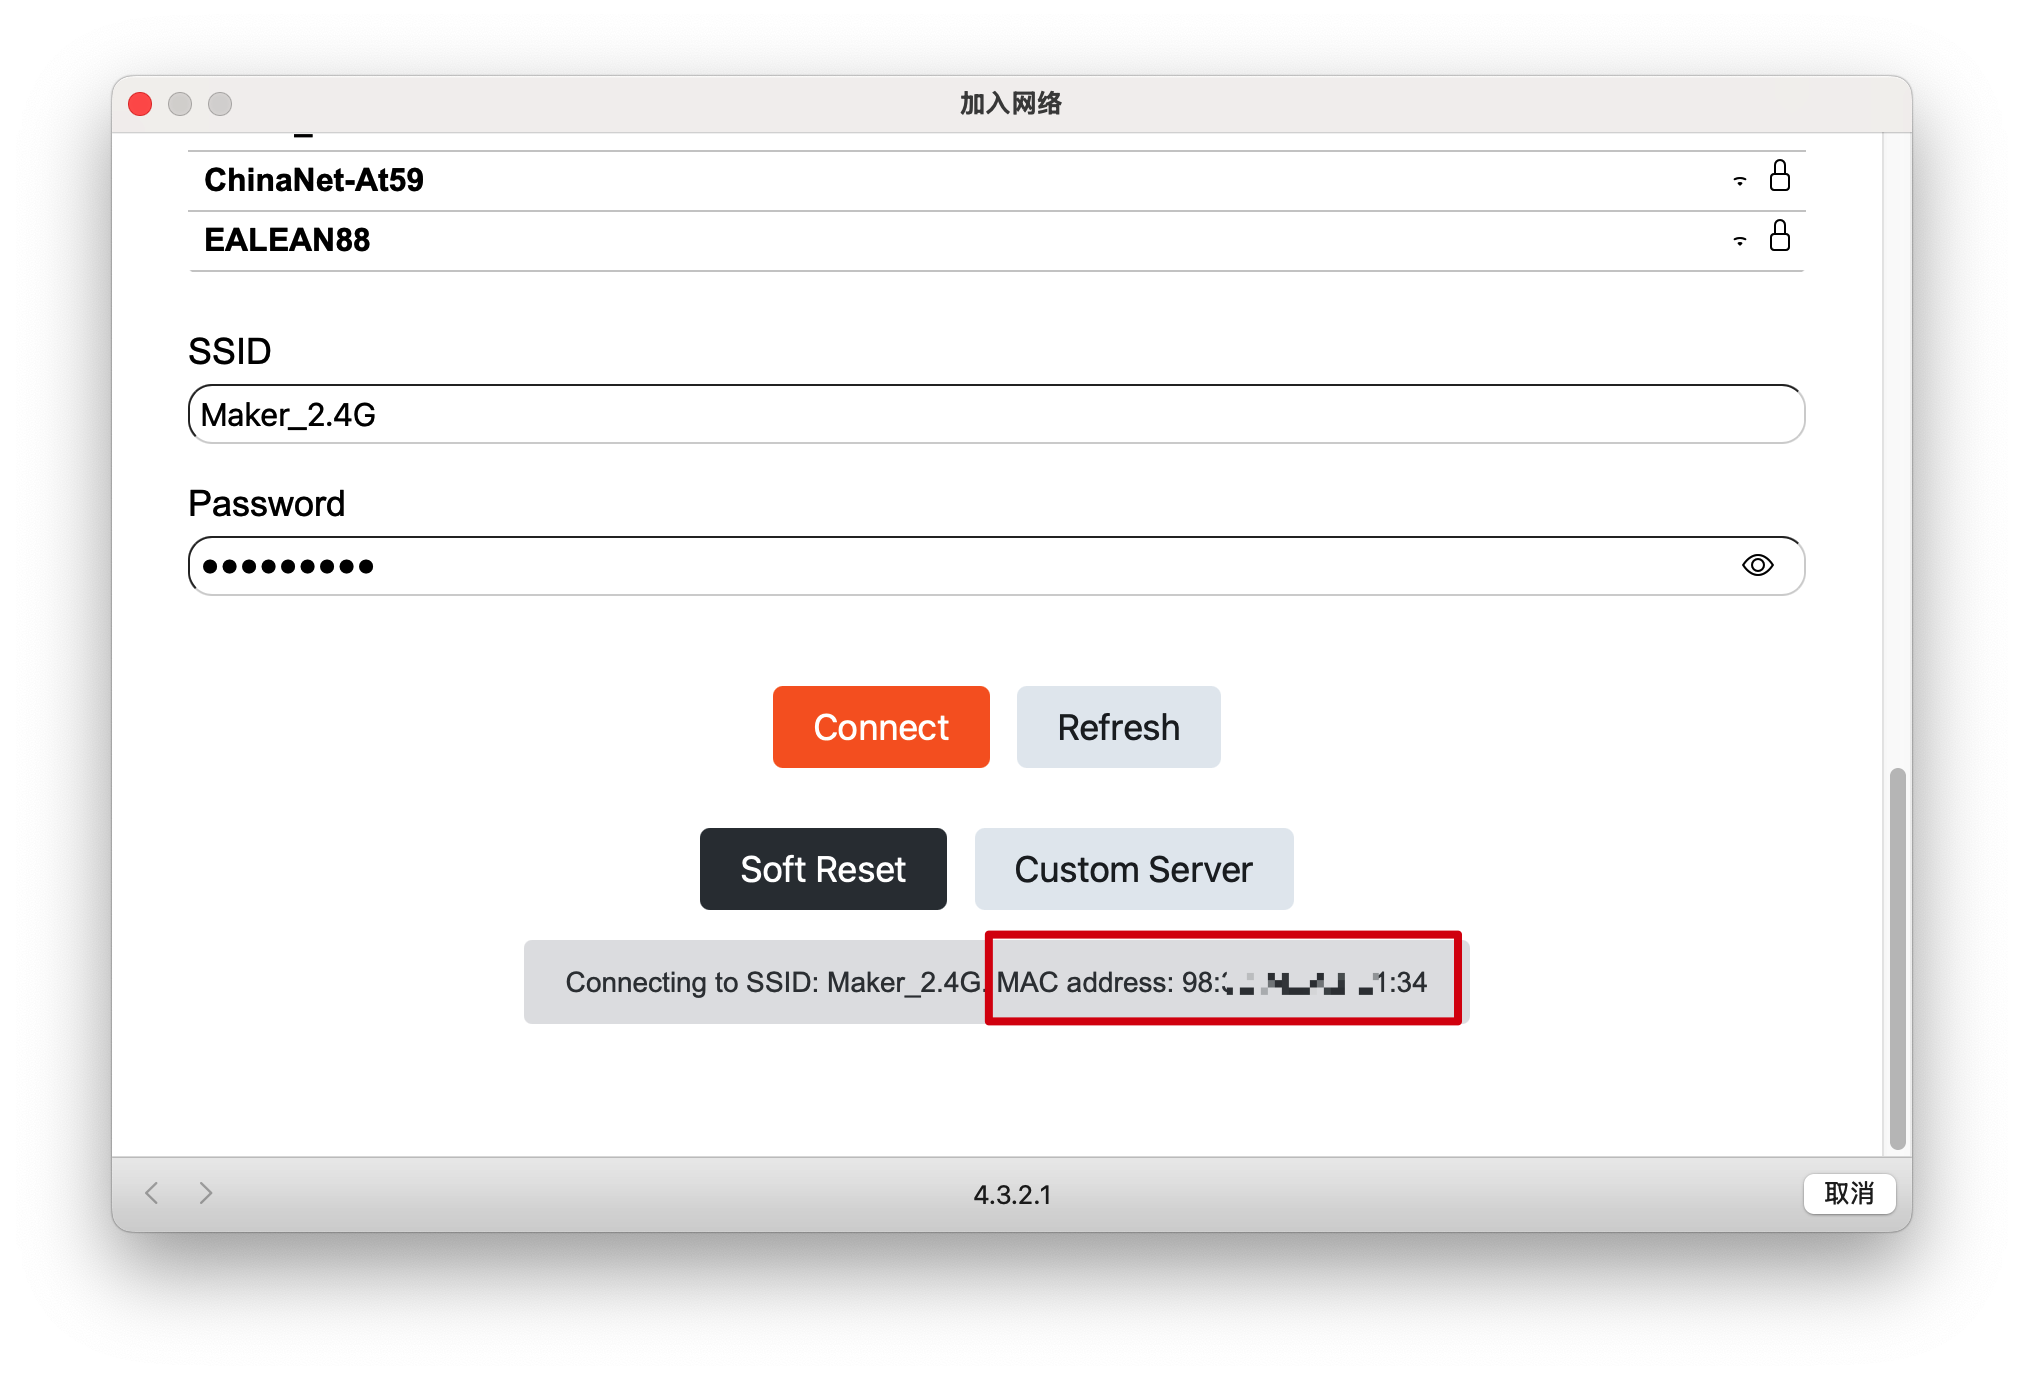
- Record the MAC address shown during setup.
- Open the TRMNL web app and add a BYOD device.

- Enter the Device ID from your TRMNL account.

- Bind the Sticky MAC address in the device settings page.

- In the TRMNL device settings, set Firmware Early Release to Off and OTA Updates Enabled to Off for the Sticky-compatible firmware path.

Basic TRMNL Use
Once Sticky is connected to TRMNL, the web app becomes the main control center.
The usual first workflow is:
- Open the TRMNL dashboard and select your Sticky device.
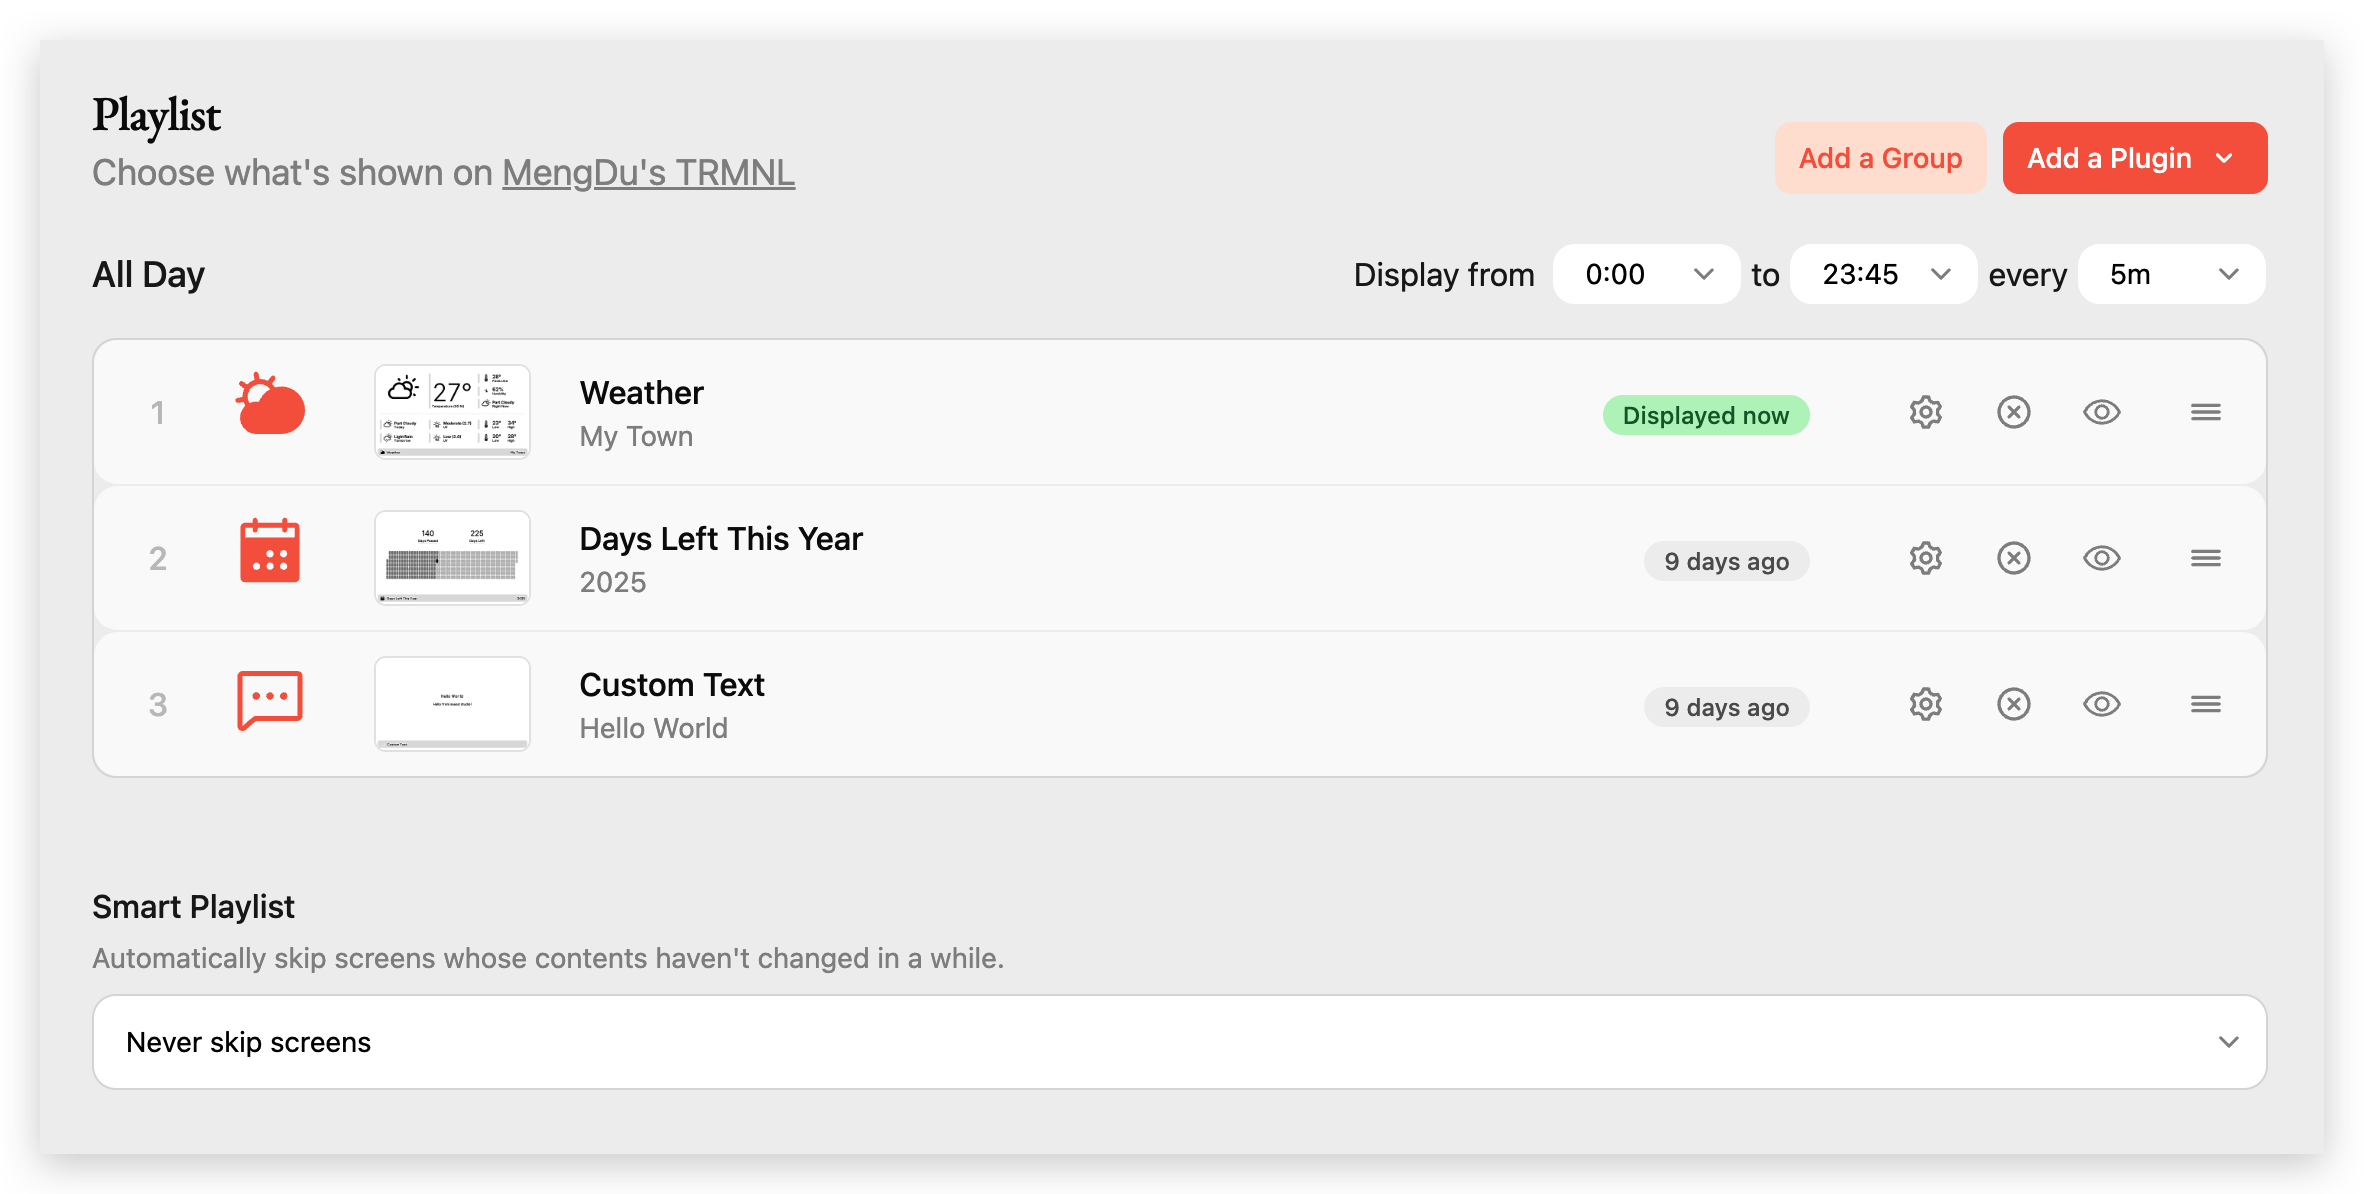
- Add a plugin such as weather, calendar, task list, RSS, metrics, image, or custom text.

- Arrange plugins into a playlist.
- Set the refresh interval and display order.
- Preview content in the TRMNL web app before it appears on Sticky.
- Let Sticky refresh on its schedule, or restart the device if you need to check the first sync.
TRMNL is best for information that should be visible at a glance without turning Sticky into an always-active screen.
Sticky Controls and Recovery
For normal use, manage content from the TRMNL web app and let Sticky refresh automatically.
Useful Sticky actions include:
- Long-press the top-right power button for about 3 seconds to wake the device.
- Use Reset device in Playground when the device is connected over USB and you want to restart it.
- If Chrome or Edge cannot find a serial port, reconnect the USB-C data cable, try another data cable, and close other serial tools that may already be using the port.
- If Wi-Fi setup fails, repeat the TRMNL setup flow with a 2.4 GHz Wi-Fi network.
Resources
Use these links when you need the full upstream guide, account setup, BYOD access, or TRMNL help pages.
- TRMNL Web App: create an account, add devices, configure plugins, and manage playlists.
- TRMNL BYOD: purchase BYOD access for compatible third-party hardware.
- TRMNL Documentation: official learning materials for TRMNL setup and usage.
- TRMNL Web Flasher: official upstream flashing page for TRMNL-supported hardware.
- TRMNL Wi-Fi Troubleshooting: setup help for network connection issues.
- Finding Your TRMNL MAC Address: official guide for locating the device MAC address.
Special Thanks
Special thanks to the TRMNL team, including Bogdan, Ryan Kulp, Fr3d, Schappi, and all related contributors, for their support and software work around the TRMNL experience.
We are grateful for their help in making it possible for Sticky users to explore a calm, plugin-driven dashboard workflow on reTerminal Sticky.