OpenDisplay
Overview
This document explains how to try OpenDisplay on reTerminal Sticky from Playground.
You will learn what OpenDisplay is, what hardware you need, how to install and configure it with OpenDisplay Toolbox, how to send a first image, and where to continue learning.
About the Platform
OpenDisplay is an open ePaper standard and firmware path. Its goal is to let a sender place images on an ePaper screen without depending on a cloud service in the middle.
For Sticky, OpenDisplay is useful when you want the device to behave like a local ePaper receiver.
Benefits include:
- Showing Home Assistant data on Sticky
- Sending rendered images to a low-power ePaper screen
- Testing an open sender-and-receiver workflow
- Configuring the device through OpenDisplay Toolbox
OpenDisplay uses its own firmware and configuration flow. Installing it replaces the firmware currently running on Sticky.
What You Need
Prepare the following before you start:
- reTerminal Sticky
- USB-C data cable
- SIM eject pin or a straightened paper clip
- Desktop Chrome or Edge for USB firmware installation
- Bluetooth enabled on your computer for configuration
- OpenDisplay Toolbox opened in a desktop browser
Flash from Playground
Click the button below to open OpenDisplay Toolbox:
Then follow these steps:
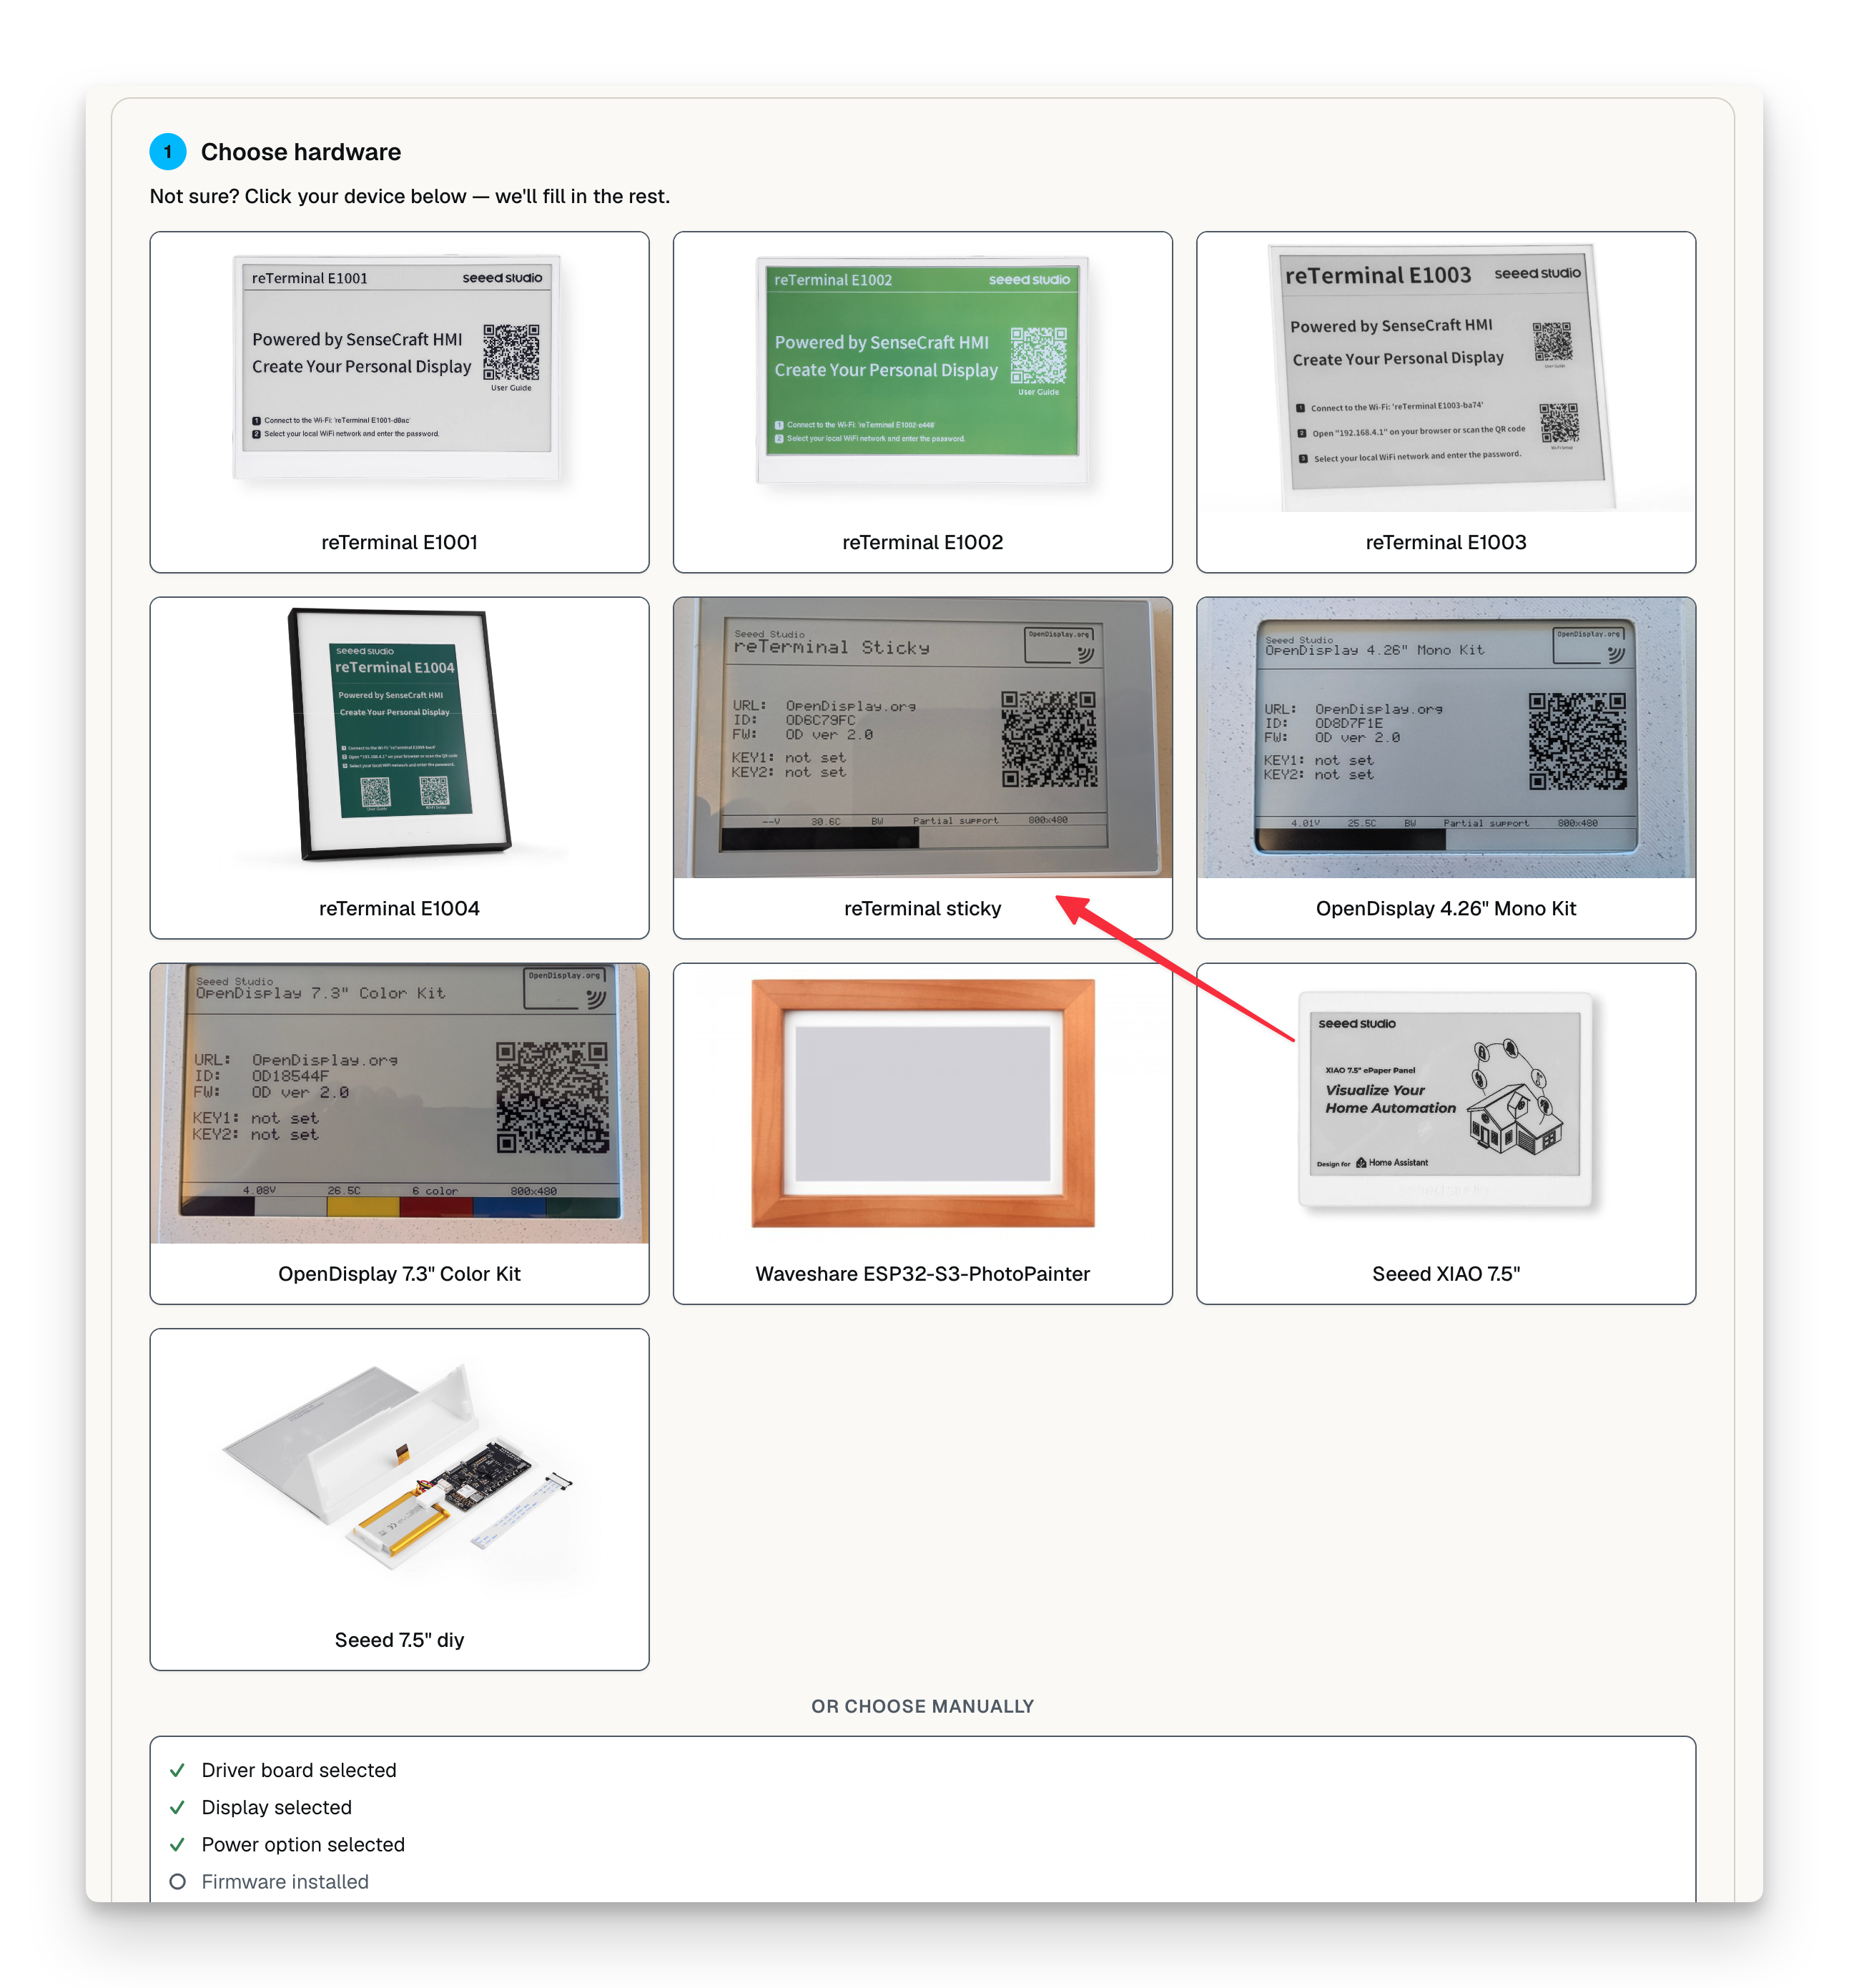
- In Choose hardware, select reTerminal sticky.
- Connect Sticky to your computer with the USB-C data cable.
- In the Toolbox, go to Install firmware (USB).
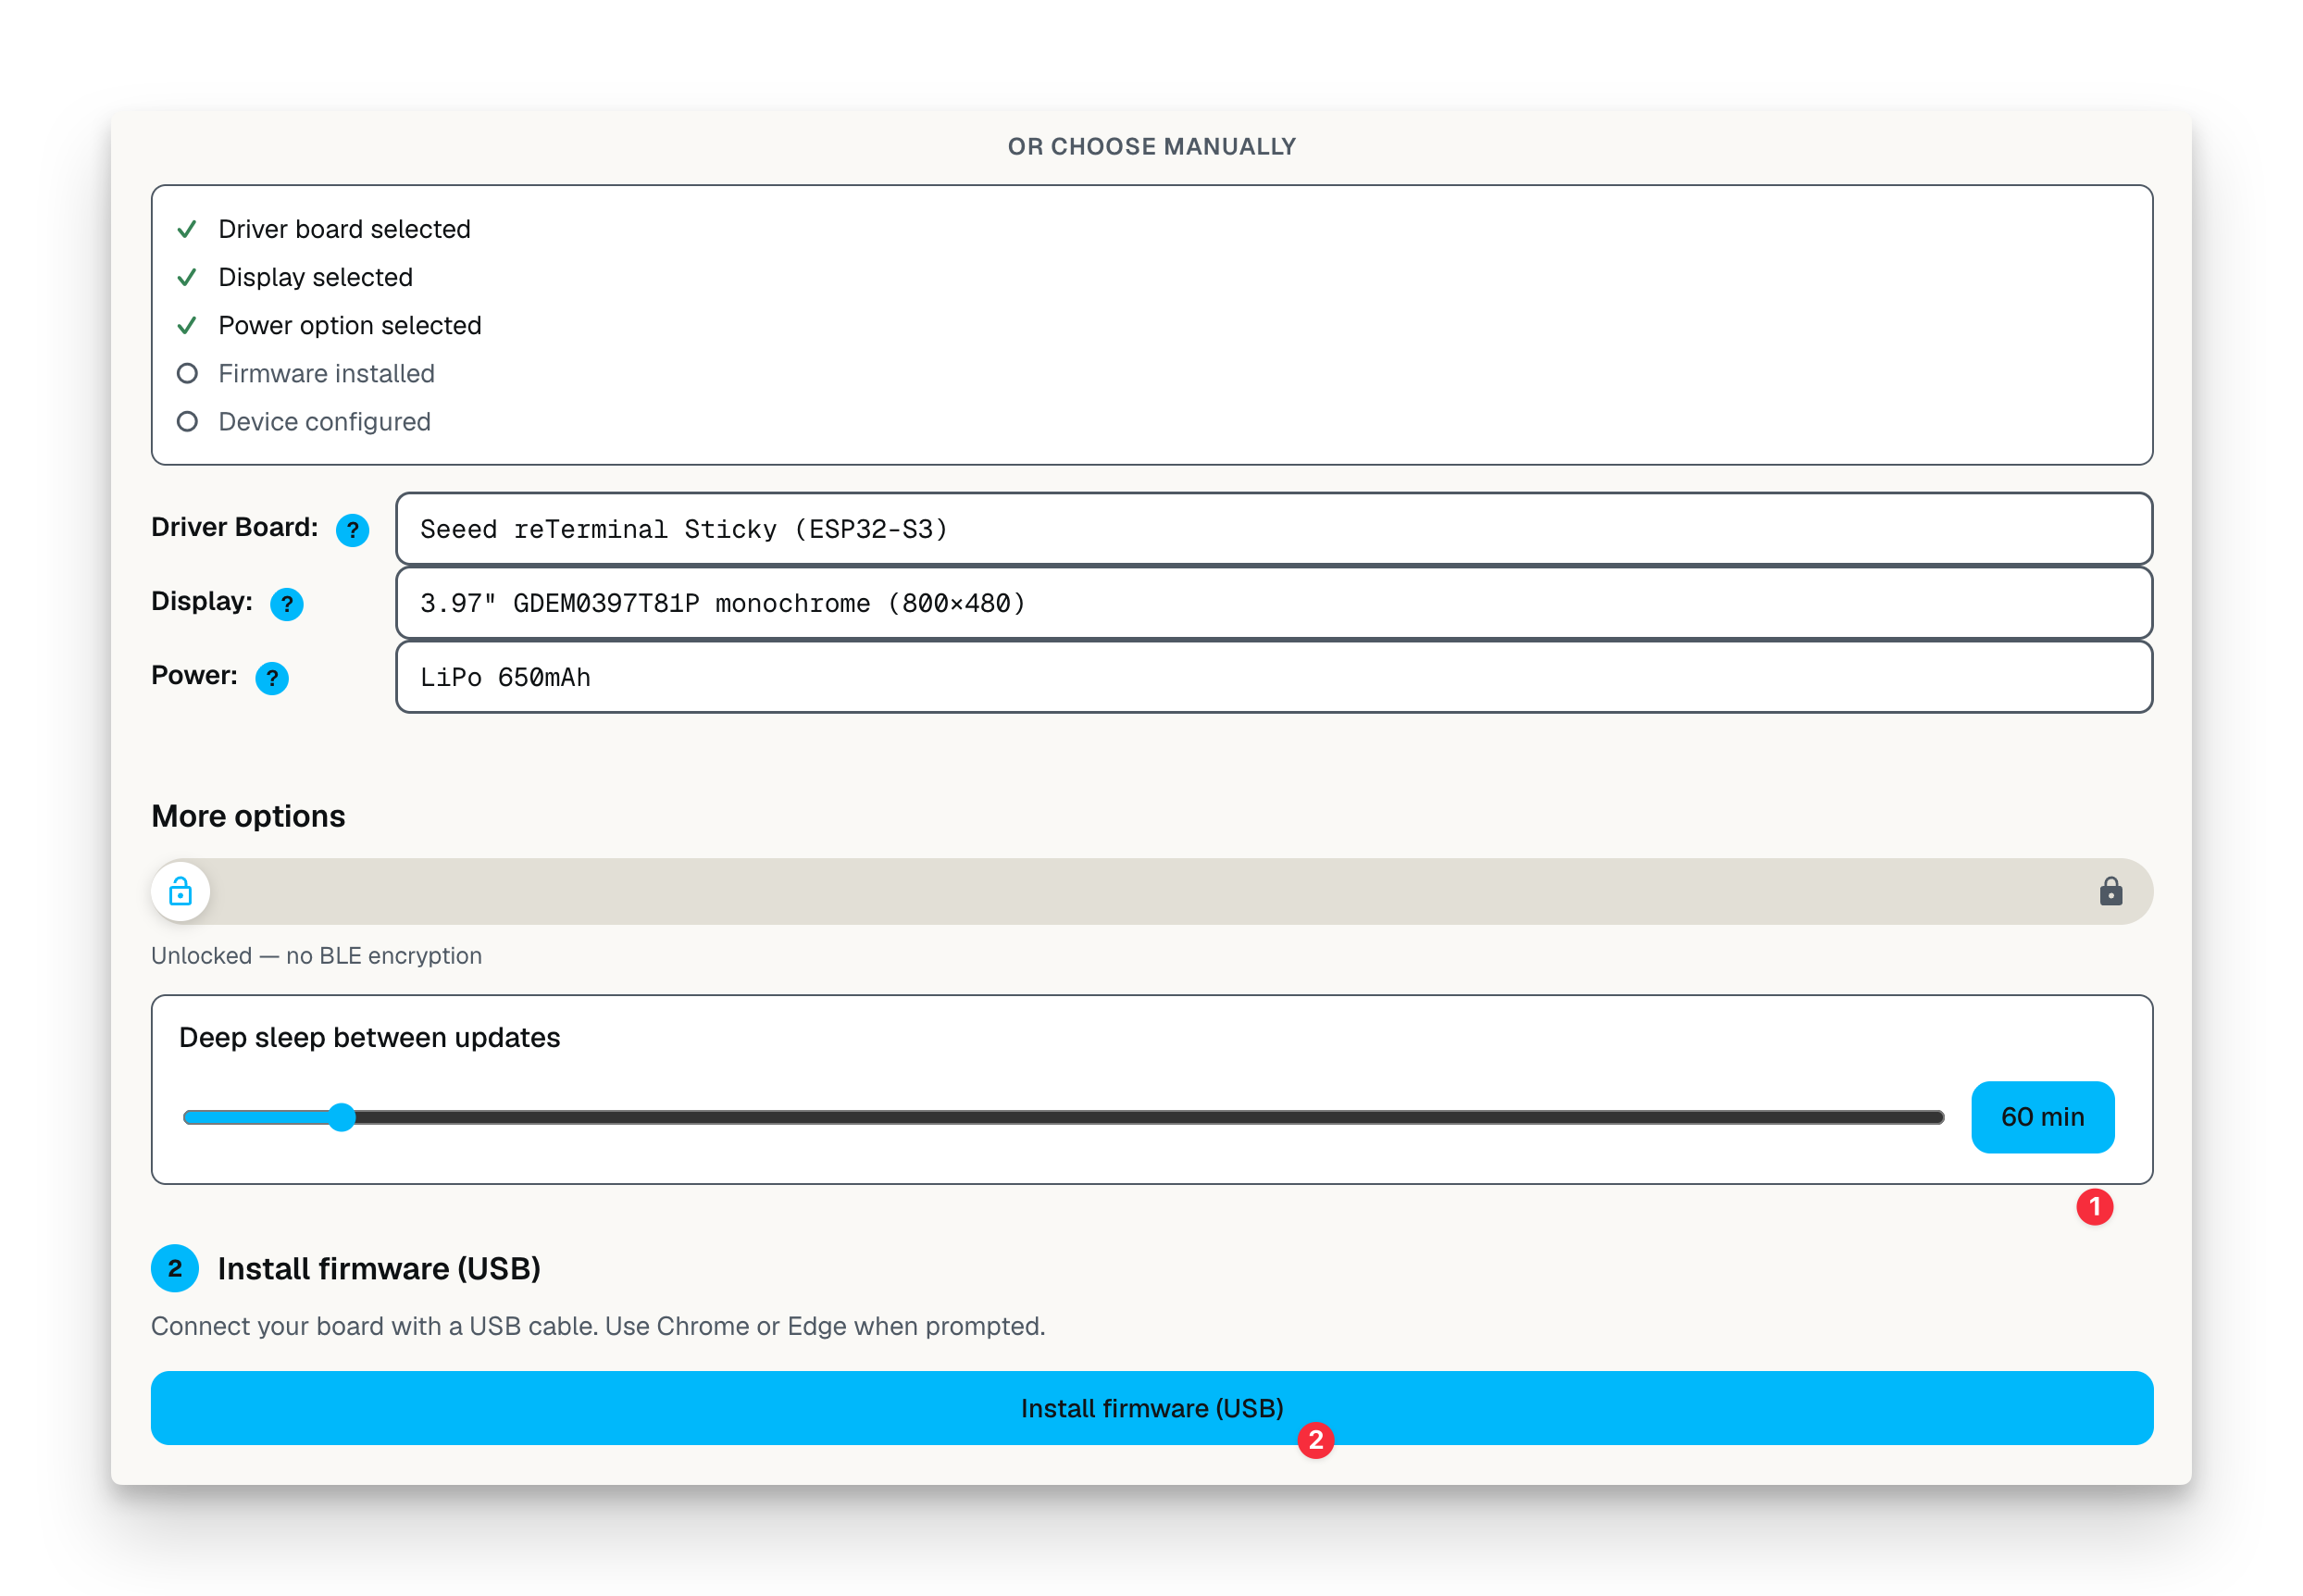
- Start the firmware installation.
- When Chrome or Edge asks for serial-port access, select the Sticky serial port.
- Keep the cable connected until installation finishes.
- After installation, use the SIM eject pin or a straightened paper clip to press the reset button inside the small reset hole at the lower-left corner of Sticky. The OpenDisplay firmware may start running only after this reset.
- Wait for Sticky to restart, then go to Configure over Bluetooth.
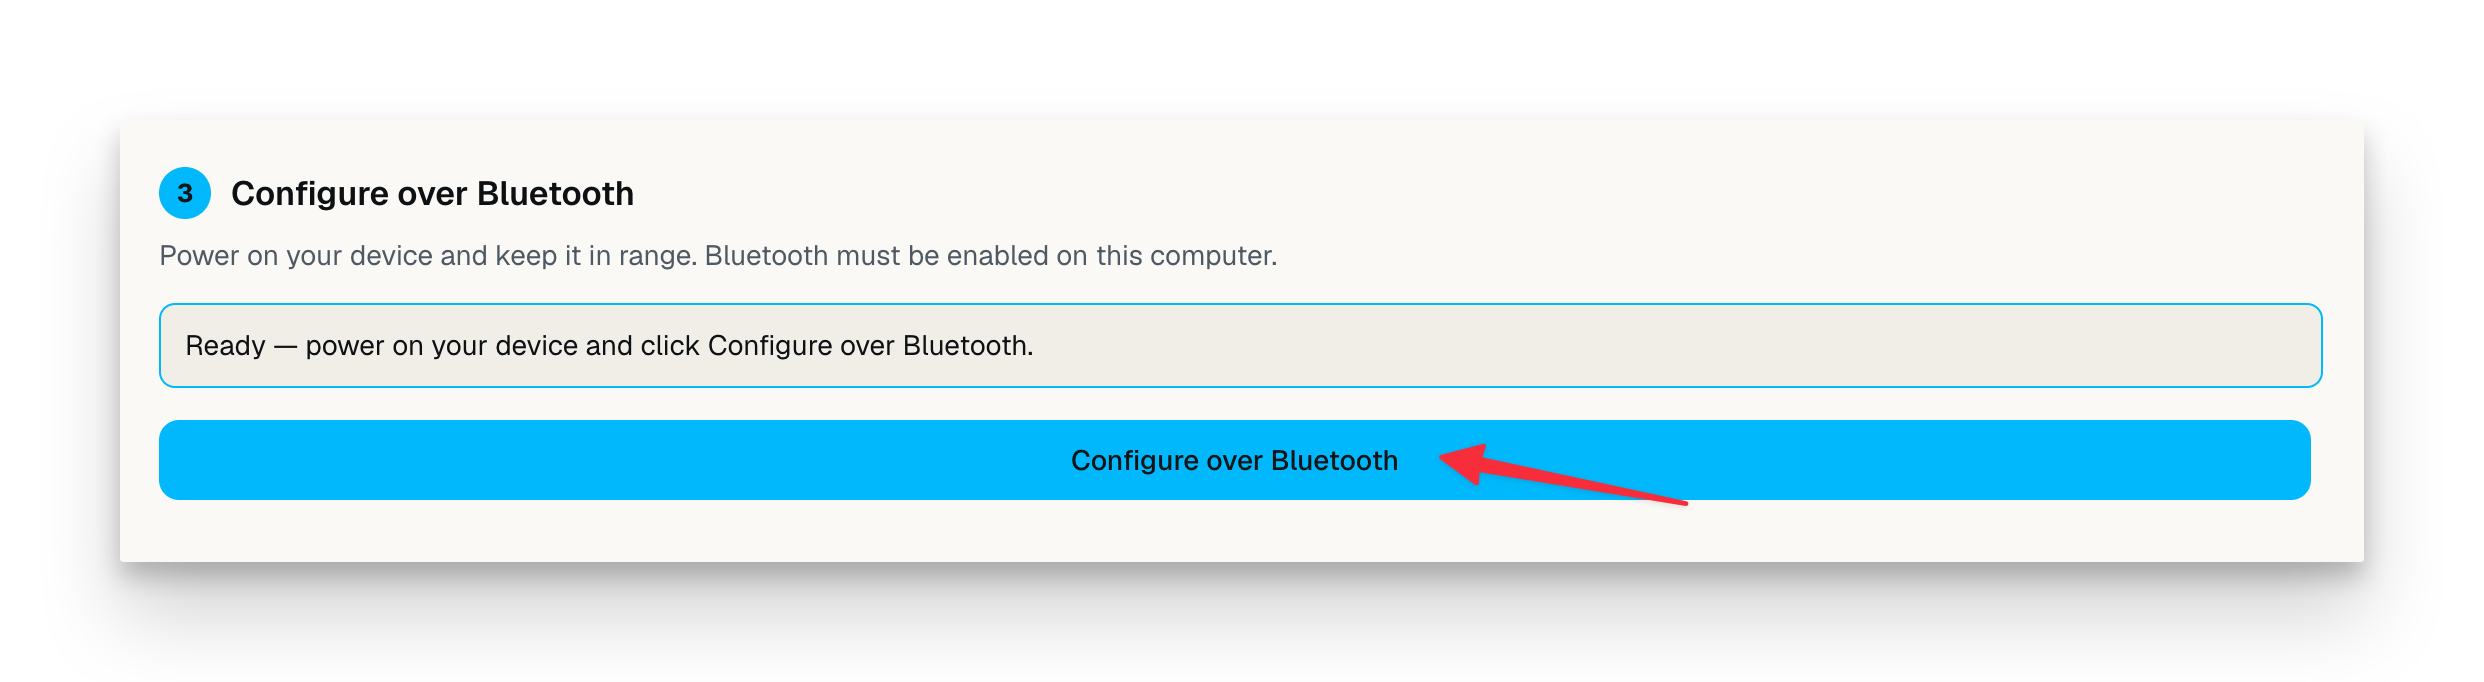
- Connect to the OpenDisplay device shown by the Toolbox.
- Write the generated configuration to Sticky.
The Toolbox also supports JSON import/export, setup URL sharing, and device reboot actions.
After Flashing
After installation and Bluetooth configuration:
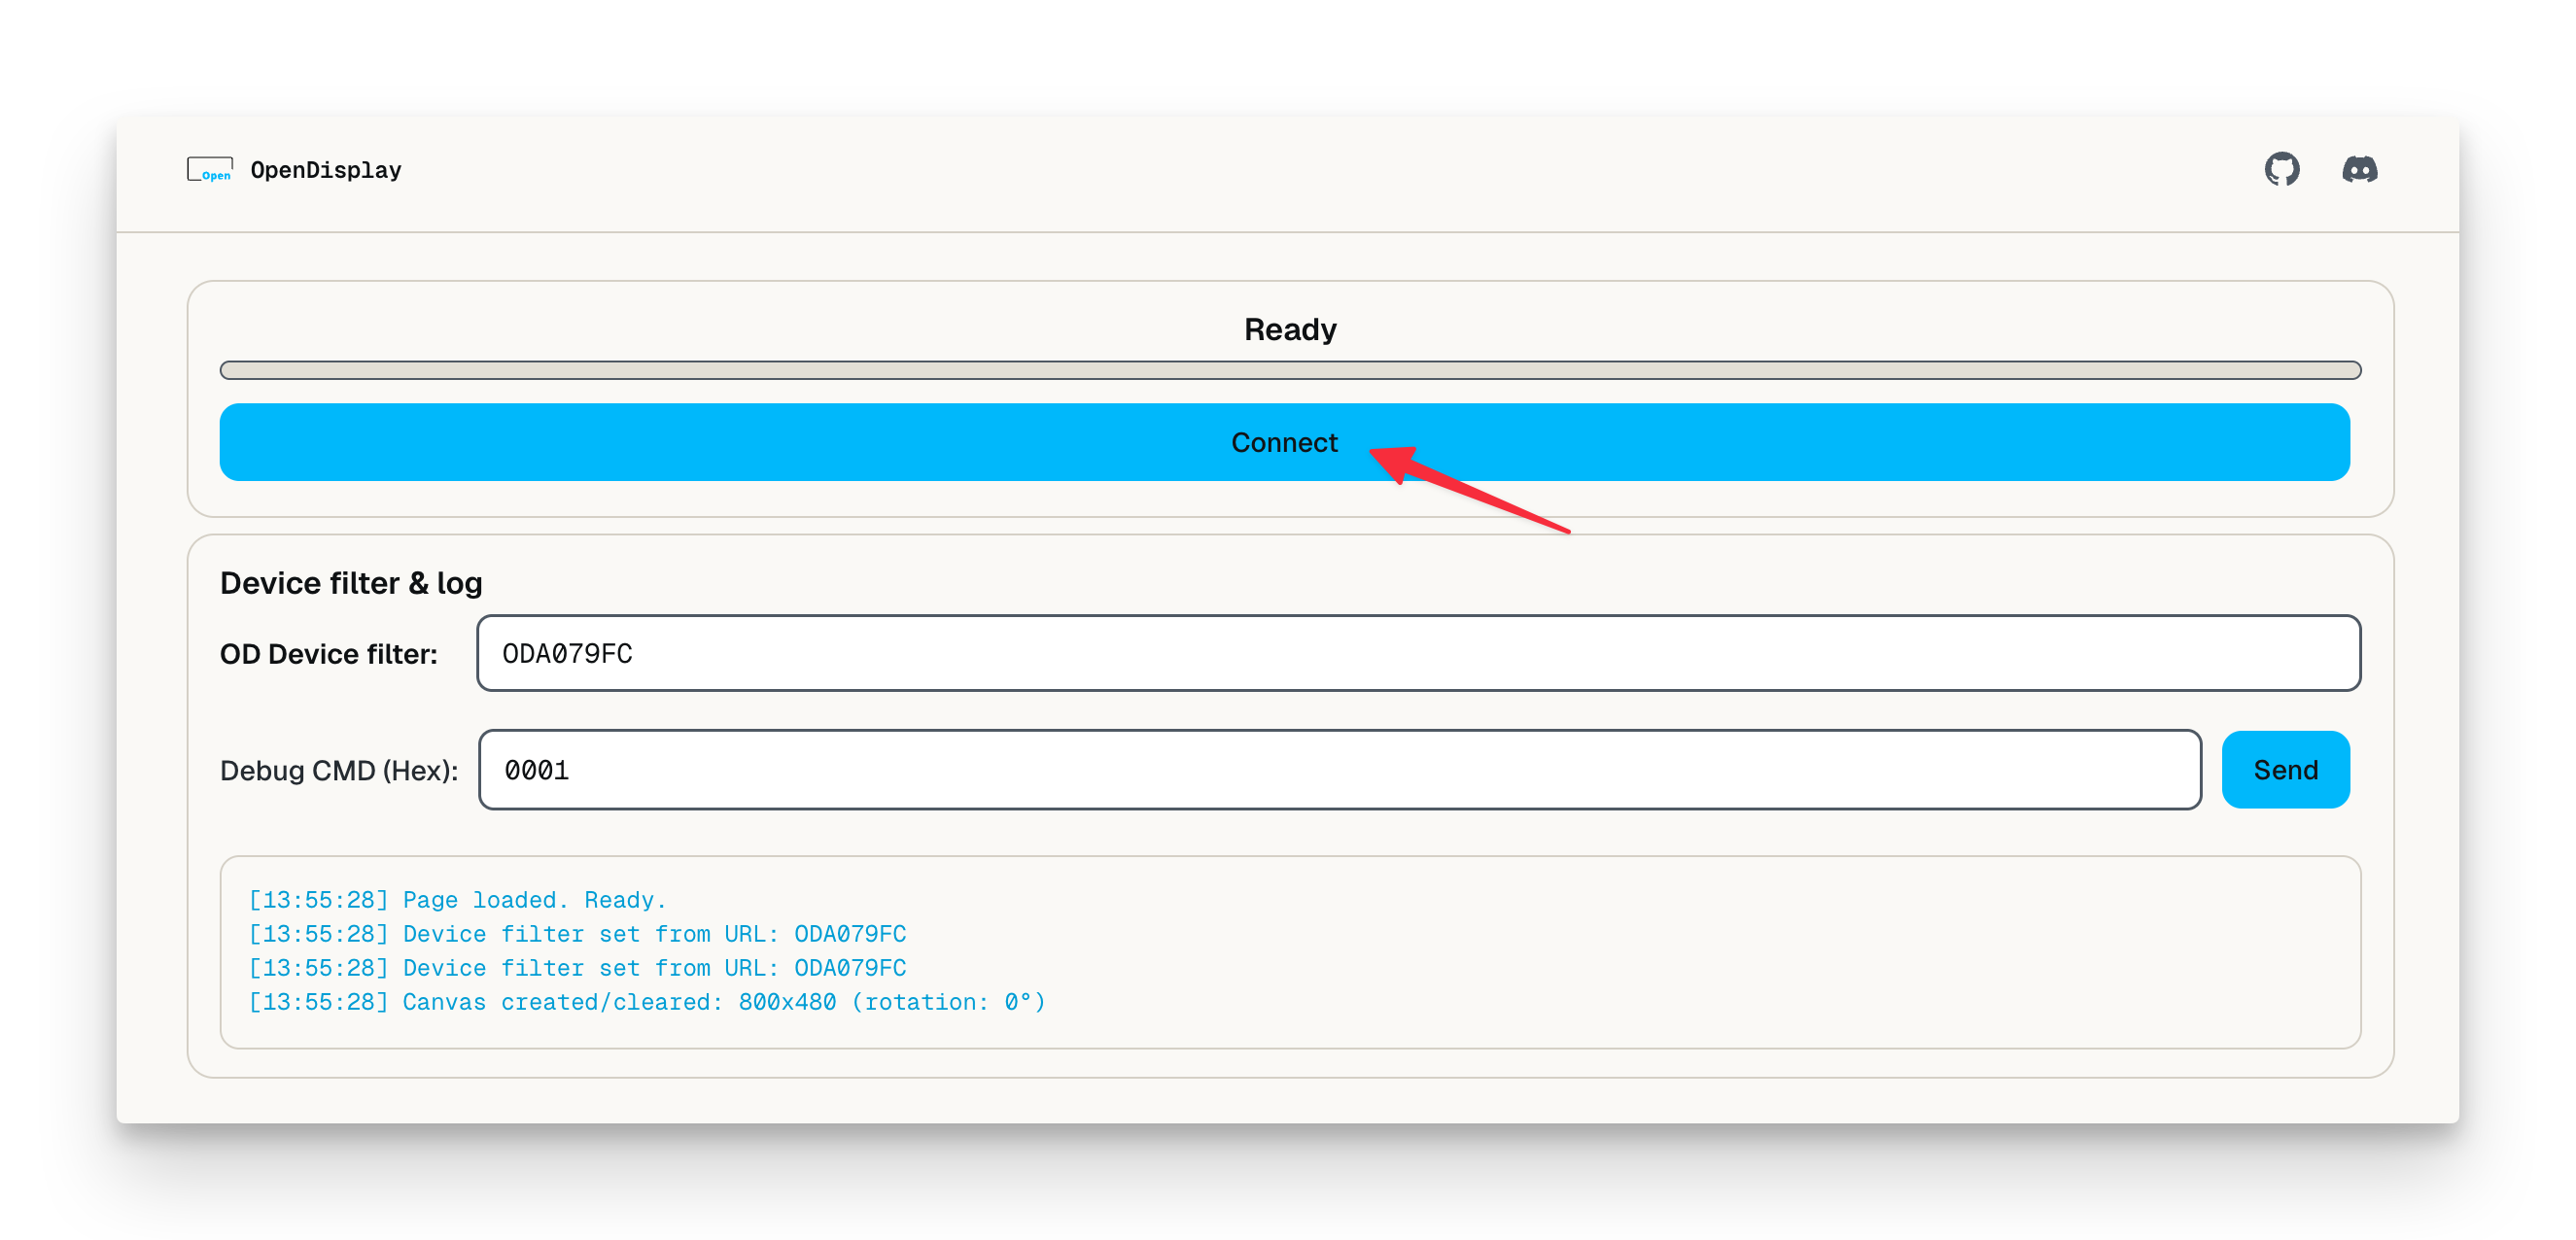
- If Sticky does not appear in the Bluetooth configuration list after firmware installation, press the lower-left reset button again with the SIM eject pin, then wait for the device to restart.
- Send a first test image before building a larger workflow.
- Confirm that the display refreshes and shows the expected content.
- Export your Toolbox JSON or save the setup URL for later use.
- Connect OpenDisplay to a sender such as Home Assistant when the basic test works.
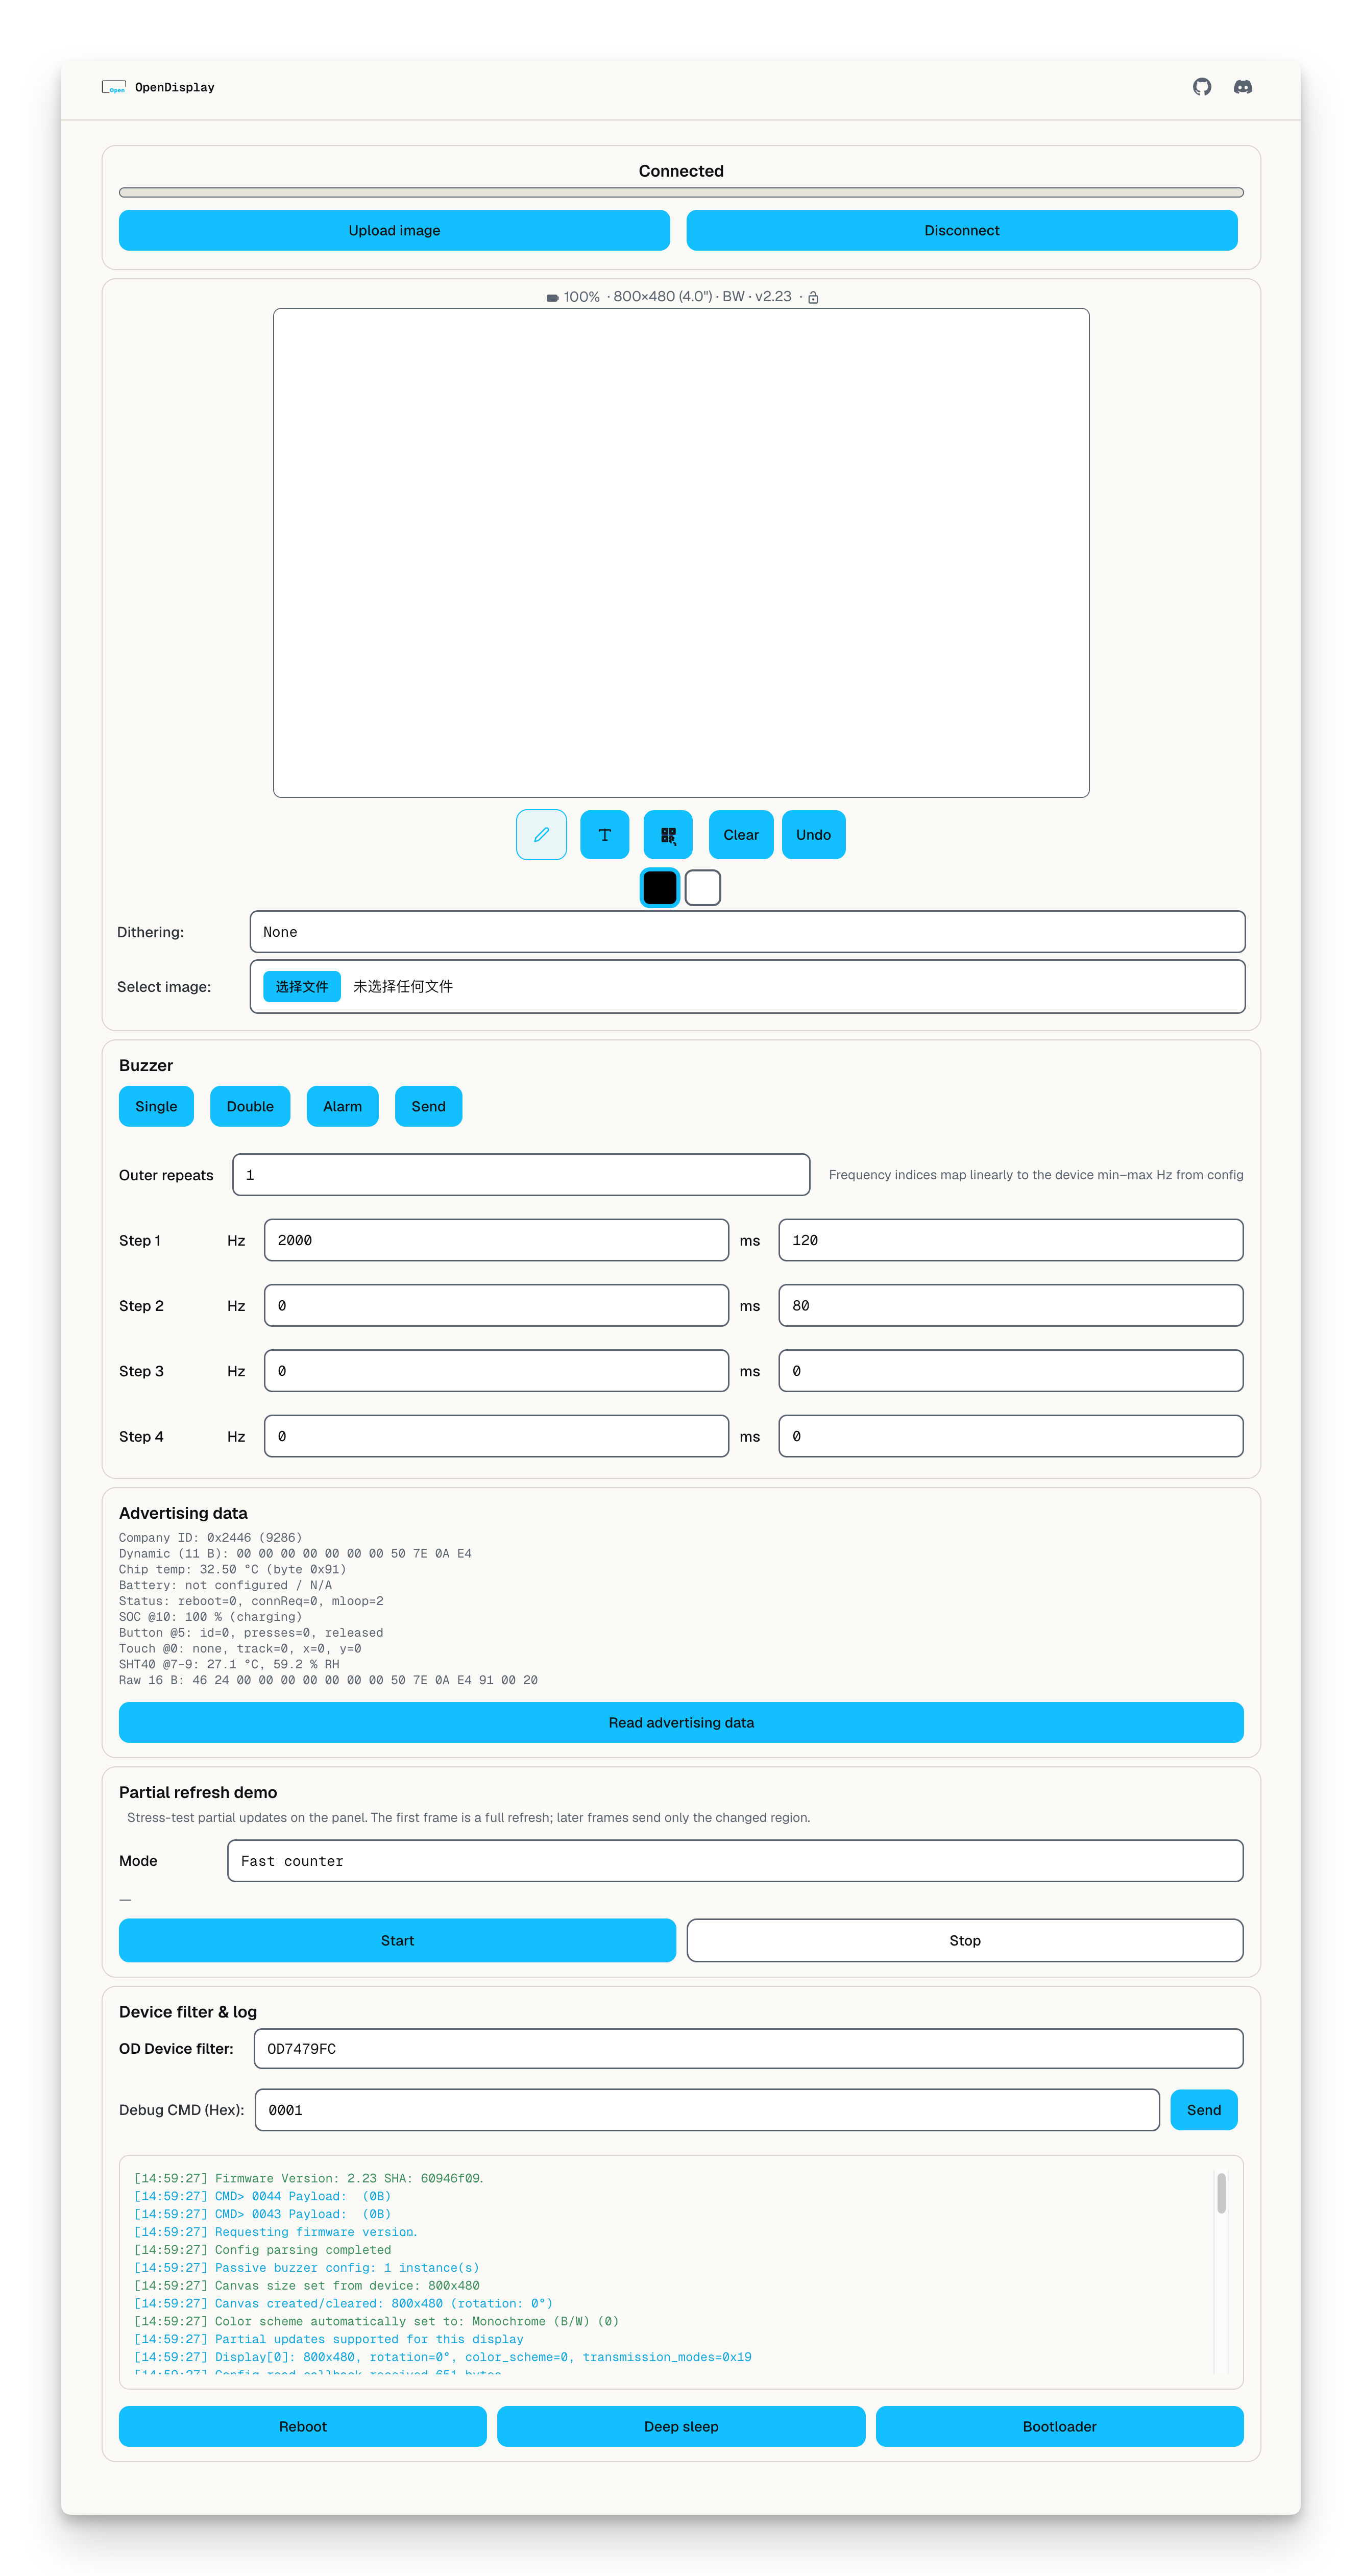
Basic OpenDisplay Use
OpenDisplay works as a sender-and-receiver system. Sticky becomes the receiver: it waits for a sender to provide a rendered image, then refreshes the ePaper screen with that image. The sender can be a browser test page, Home Assistant, a Python script, or another tool that follows the OpenDisplay protocol.
For a first run, keep the workflow simple:
- Use OpenDisplay Toolbox to pick reTerminal sticky, install the firmware over USB, and write the configuration over Bluetooth.
- Save the generated setup URL or export the Toolbox JSON. This keeps the same hardware, display, power, and protocol settings available for later changes.
- Use the OpenDisplay BLE Tester or a compatible sender to send one test image.
- Confirm the image size and colors match the Sticky display before building a more complex dashboard.
- After the first test works, connect a sender such as Home Assistant or a custom script to update the screen with real content.
Common use cases include local dashboards, Home Assistant status screens, weather panels, reminders, image frames, and small information displays. The sender does the rendering work, including image preparation, dithering, and color conversion, while Sticky focuses on receiving the image and refreshing the ePaper panel.
Resources
Use these links when you need the Toolbox, test sender, protocol details, or project updates.
- OpenDisplay Toolbox: install firmware, choose hardware, configure the device, export JSON, and save setup links.
- OpenDisplay BLE Tester: send a first test image from the browser.
- OpenDisplay Protocol Documentation: learn how senders, receivers, Bluetooth, optional Wi-Fi LAN, configuration, and image transfer fit together.
- OpenDisplay GitHub: source code, integrations, issues, and project updates.
Special Thanks
Thanks to the OpenDisplay maintainers and contributors for supporting open ePaper workflows on Sticky, and for the software assistance behind the Toolbox-based installation and configuration path.