Arduino RTC Tutorial: Using DS1307 RTC with Arduino

Do you want to maintain hours, minutes, and seconds, as well as, day, month, and year information for your Arduino Project? Well then using an RTC (Real Time Clock), will be for you!
Through this blog, you will learn how to use the DS1307 RTC module with your Arduino in a few steps!
Today’s blog will cover:
- What is an RTC (Real Time Clock) and Why do we need RTC for Arduino?
- What is DS1307 RTC?
- Grove RTC
- Tutorial: Using DS1307 RTC with Arduino
- RTC Arduino Project Ideas
What is an RTC (Real Time Clock), why do we need RTC for Arduino microcontroller?
An RTC (real-time clock) refers to a clock that tracks the current time and can be used to program actions at a specific time.
Arduino and almost all microcontrollers have built-in timers, they can run as long as there is power. However, once the power is turned off (either manually or due to a power failure), all timers will be reset to 0.
It is acceptable to use the internal timer for timing for simple projects if you don’t mind when the timer resets to zero once there is no power. But for projects such as data loggers, clocks, alarms, which requires the timer to run independently of the external power supply, you need to use an RTC.
Almost all RTC are low-current built-in ICs and able to run on a single lithium battery for many years. Currently, RTC based on the DS1307 real-time clock is one of the most popular RTC modules.
What is a DS1307 RTC?
- Also known as Real-Time Clock (RTC), this RTC module is based on the clock chip DS1307 that provides you with seconds, minutes, hours, day, date, month, and year information for your projects.
- However, you may be wondering, why do you need a separate module when your Arduino already has a built-in timekeeper?
- The answer is because as the RTC runs on a lithium battery, you can continue to keep track of the time even if you need to reprogram your Arduino or disconnect it from the main power.
- We choose to use the RTC based on DS1307 as it is low cost and also very energy efficient. It can run for years on a very small coin cell!
Grove – RTC ($6.90)
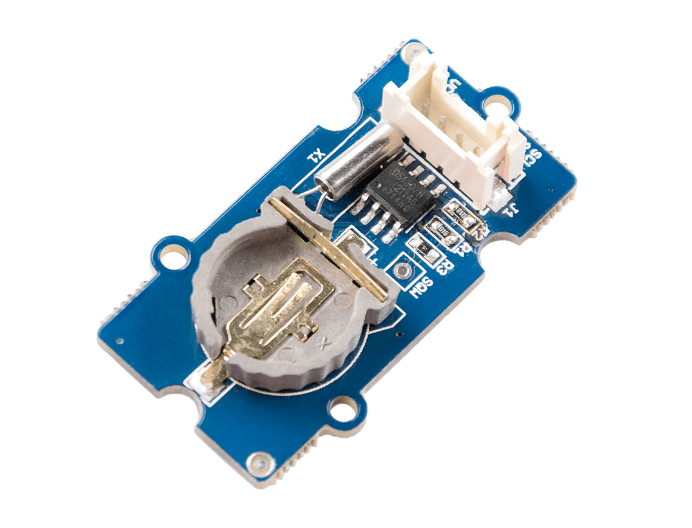
- This is Seeed very own RTC based on the clock chip DS1307 and supports I2C communication!
- It uses a Lithium cell battery (CR1225). The clock/calendar provides seconds, minutes, hours, day, date, month, and year information where the end of the month date is automatically adjusted for months with fewer than 31 days, including corrections for leap year valid up to 2100.
- The clock operates in either the 24-hour or 12-hour format with AM/PM indicator.
- It is 56-Byte, Battery-Backed and has Nonvolatile (NV)RAM for data storage.
- It works on 5V DC supply and able to consume less than 500nA in Battery-Backup Mode with Oscillator Running.
- It is also programmable with a Square-Wave output signal and has an automatic power-fail detect and switch circuitry.
We also offer a similar product: Grove – High Precision RTC. Compared to the Grove-RTC, this module can provide a more accurate result and provide a programmable clock output for peripheral devices as well as minute and half minute interrupt.

Without further ado let us jump right into the tutorial on how to use the DS1307 RTC with Arduino
Tutorial: Using DS1307 RTC with Arduino
Through this tutorial, you will learn how to use the DS1307 RTC with your Arduino in a few simple steps.
What do you need?
- Seeeduino V4.2 (Arduino UNO Compatible Board)
- Grove – RTC
- Base Shield V2 (For easy connection, optional)
Step by step instructions using the RTC with your Arduino
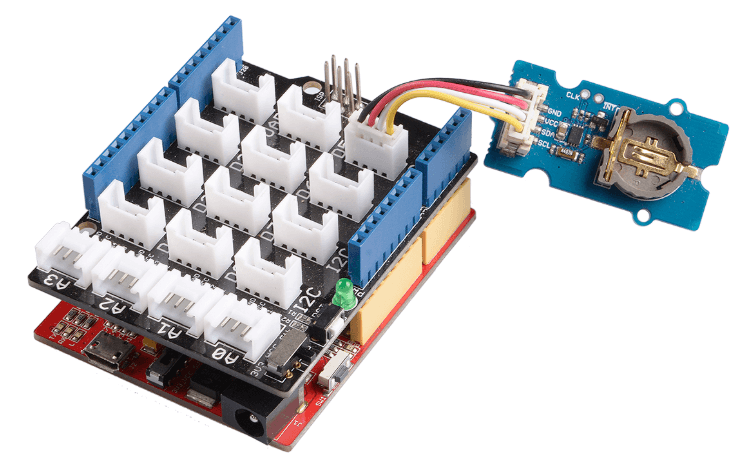
Step 1: Connecting the Hardware
- Connect Grove-RTC to port I2C of Grove-Base Shield.
- If you do not have a Grove- Base Shield, you can directly connect the Grove-RTC to the Arduino Board by following the table as shown below:
| Seeeduino V4.2 | Grove-RTC |
| 5V | VCC |
| GND | GND |
| SDA | SDA |
| SCL | SCL |
- Plug Grove – Base Shield into Seeeduino.
- Connect Seeeduino to PC via a USB cable.
- Do note that for a robust performance, it is highly recommended to put a 3-Volt CR1225 Lithium cell in the battery-holder. If you only use the primary power to run the module, the module may not work normally as the crystal may not oscillate.
- Your connection should look like this currently:
Step 2: Using Software
- Download the RTC library and install.
- Do not know how to install the library? Refer to our guide on How To Install Library!
- Create a new Arduino sketch and paste the codes below to it or open the code directly by the path: File -> Example ->RTC->SetTimeAndDisplay

#include <Wire.h>
#include "DS1307.h"

DS1307 clock;//define a object of DS1307 class
void setup()
{
    Serial.begin(9600);
    clock.begin();
    clock.fillByYMD(2013,1,19);//Jan 19,2013
    clock.fillByHMS(15,28,30);//15:28 30"
    clock.fillDayOfWeek(SAT);//Saturday
    clock.setTime();//write time to the RTC chip
}
void loop()
{
    printTime();
}
    /*Function: Display time on the serial monitor*/
void printTime()
{
    clock.getTime();
    Serial.print(clock.hour, DEC);
    Serial.print(":");
    Serial.print(clock.minute, DEC);
    Serial.print(":");
    Serial.print(clock.second, DEC);
    Serial.print("  ");
    Serial.print(clock.month, DEC);
    Serial.print("/");
    Serial.print(clock.dayOfMonth, DEC);
    Serial.print("/");
    Serial.print(clock.year+2000, DEC);
    Serial.print(" ");
    Serial.print(clock.dayOfMonth);
    Serial.print("*");
    switch (clock.dayOfWeek)// Friendly printout the weekday
    {
        case MON:
        Serial.print("MON");
        break;
        case TUE:
        Serial.print("TUE");
        break;
        case WED:
        Serial.print("WED");
        break;
        case THU:
        Serial.print("THU");
        break;
        case FRI:
        Serial.print("FRI");
        break;
        case SAT:
        Serial.print("SAT");
        break;
        case SUN:
        Serial.print("SUN");
        break;
    }
    Serial.println(" ");
}- Set the time. Change function arguments to current date/time. Please pay attention to arguments’ format.
clock.fillByYMD(2013,1,19);//Jan 19,2013
clock.fillByHMS(15,28,30);//15:28 30"
clock.fillDayOfWeek(SAT);//Saturday- Upload the code and open the serial monitor to receive the sensor’s data

That’s all on how to use the DS1307 with the Arduino! Want to do more with RTC with Arduino? Here are some RTC Arduino project ideas to get you started!
RTC Arduino Project Ideas
RTC Arduino Real-Time Garden Watering System

Tired of your plants dying because you forgot to water them or just lazy to water your plants? Why not try this automated plant watering project to save your plants today with the a RTC!
What do you need?
- Grove – RTC
- Arduino Nano v3 / Seeeduino Nano
- Water level switch
- 12V DC Water Pump
- Grove – Buzzer
- Grove – Relay
- 20 Litre Water Canister
- Weatherproof Electric Box
- 12V Power Pack
- Nano Terminal Adapter
- Arduino IDE Software
Interested? You can check out the full tutorial by Maximilian Dullo on Arduino Project Hub!
Compact Alarm with Card Reader and RTC
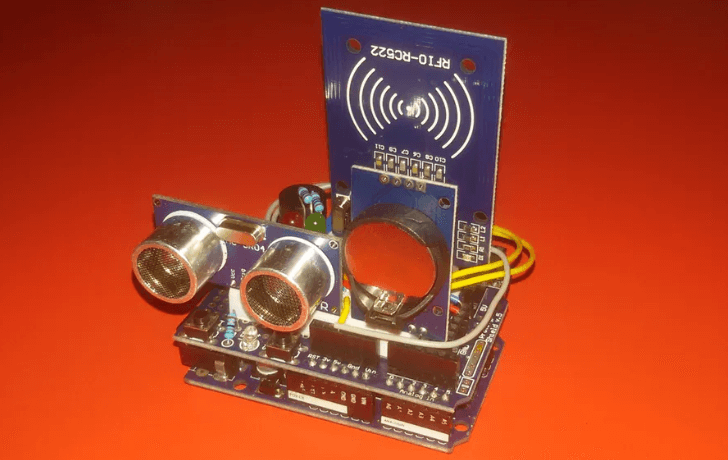
With this alarm, you can tell whenever someone enters your house which can be turned on and off with a card reader and also automatically activated with the RTC!
What do you need?
- Arduino Uno Rev3 / Seeeduino V4.2 ($6.90)
- Bread board Clear – 8.2 x 5.3cm
- LED (Generic)
- Resistor 221 ohm
- Grove – Ultrasonic Distance Sensor
- Grove – Buzzer
- Grove – RTC
- RC522 Card Reader
Interested? You can check out the full tutorial by Simonee Adobs on Arduino Project Hub here!
OLED RTC Clock
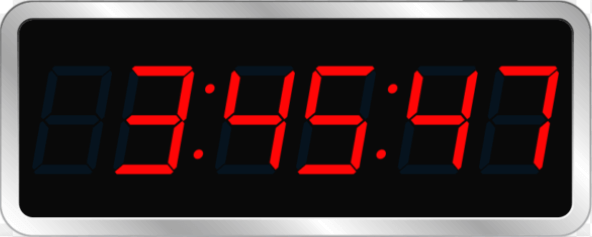
With an RTC module, you can of course also make your OLED digital clock with the Arduino which shows the date, time and day!
What do you need
- Arduino Uno Rev3 / Seeeduino V4.2 ($6.90) or
Arduino Nano v3 / Seeeduino Nano - Grove – RTC
- Grove – OLED Display 1.12” V2
- 2 x Grove – Button
- 32.768KHz crystal oscillator
- 2 x 10K ohm resistor
- 3V coin cell battery
Interested? You can find the full tutorial on Simple Projects!
Summary
That’s all on Arduino Tutorial: Using DS1307 RTC with Arduino! With the DS1307 RTC, you can now keep time and make awesome projects that involve data-loggers or clocks! As long as your project requires consistent timekeeping, using an RTC module would be the way to go.
If you have any questions regarding this tutorial or DS1307 Grove RTC, do leave them down in the comments section down below!