Raspberry Pi Zero and Zero W Guide – Set up, Accessories, Projects
Do not want to cause a hole in your wallet to get a Raspberry Pi 4? Well, the Raspberry Pi Zero and Zero W is just for you! You can now get a computer that is smaller than your credit card which costs less than your average movie ticket at just $5 and $10 respectively. Through this guide, we are going to learn about this $5 computer:
- Specifications and Features
- How to set up the Raspberry Pi Zero
- Raspberry Pi Zero accessories
- Raspberry Pi Zero Project ideas
SALE on Raspberry Pi Zero Kits
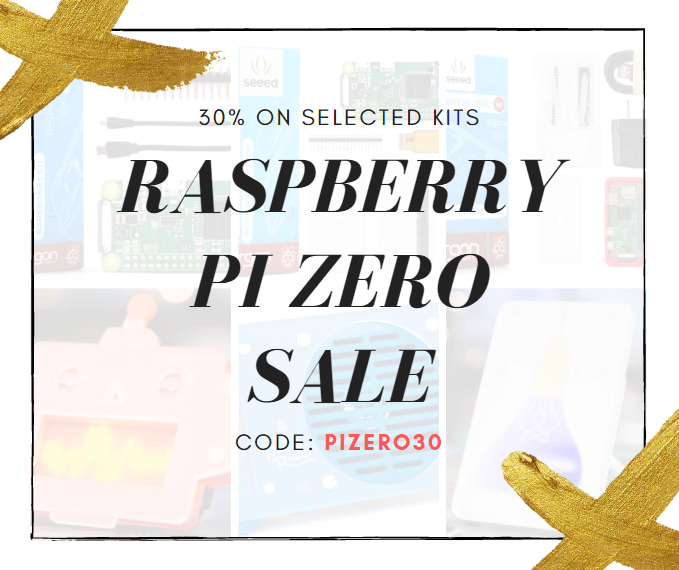
- Before we start, we have good news for you makers! Right now, Seeed is having a sale on Raspberry Pi Zero starter kits and project kits!
- With these Raspberry Pi Zero kits, they can help you get started with the Raspberry Pi Zero in no time!
- The starter and project kits currently on sale are:
- Seeedstudio Raspberry Pi Zero W Complete Starter Kit
- Seeedstudio Raspberry Pi Zero W Barebones Kit
- Seeedstudio Raspberry Pi Zero W with Official Case
- Pimoroni Scroll Bot – Pi Zero W Project Kit, scroll the news,weather,or your Twitter feed
- Pimoroni Pirate Radio – Pi Zero W Project Kit-Build your very own internet-connected radio
- Pimoroni Mood Light – Pi Zero W Project Kit, internet-connected
- Use code: PIZERO30 to get 30% off these selected Raspberry Pi Zero kits now!
Without further ado, let us jump right in to what this $5 computer offer!
Specifications and Features
Raspberry Pi Zero ($5.00)
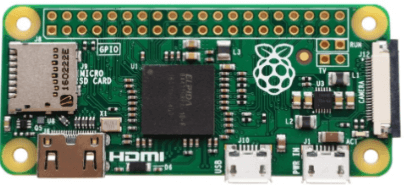
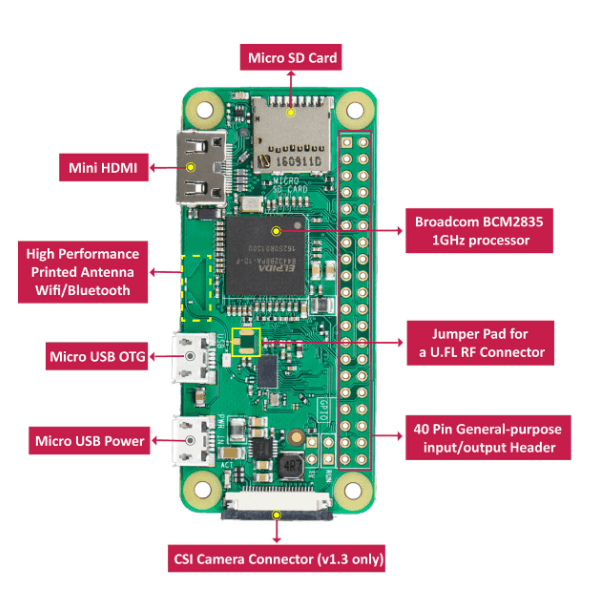
- The Raspberry Pi Zero is a low-power, incredibly cheap and small computer standing at only 65 mm by 30 mm and weighing just 9 grams.
- Do not belittle the Raspberry Pi Zero capabilities as even at its cost of $5, it can still be used for many projects.
- Its features include:
- 1GHz, Single-core CPU
- 512 MB RAM
- Single Mini HDMI port
- 2 Micro USB (One for power, one for OTG purposes)
- HAT-compatible 40-pin header
- Composite video and reset headers
- Unpopulated 40-pin GPIO connector
- CSI camera connector (need an adaptor cable)
- Compatible with Grove Base HAT to expand its possibilities with over 60 Grove modules and sensors.
Raspberry Pi Zero W ($10.00)
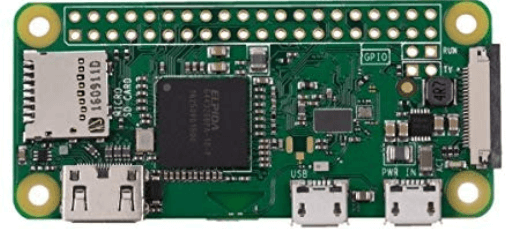
- The Raspberry Pi 0W which costs $10.00, double the price of the Raspberry Pi 0, comes with added connectivity on top of the Raspberry Pi 0 original features! They are:
- 802.11 b/g/n wireless LAN
- Bluetooth(R) 4.1
- Bluetooth Low Energy (BLE)
- With the original Raspberry Pi 0, you can already do so much with it. Now with built in connection to the internet, its possibilities are now multiplied.
Setting up your Raspberry Pi Zero
You have just gotten you own Raspberry Pi Zero. Now what?! Well, the first thing you need to do is to set it up and get it running before you can use it! Here is a simple tutorial for you on how to set up your own Raspberry Pi Zero.
What do you need?
- TV or monitor (For setting up purposes)
- Mini Wireless Keyboard and Touchpad Mouse (or any Keyboard and Mouse for setting up purposes)
- Seeedstudio Raspberry Pi Zero W Complete Starter Kit ($29.00)
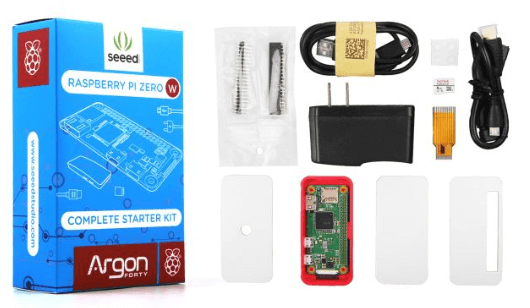
- It comes with everything you need from:
- A Raspberry Pi Zero W
- Mini HDMI OTG Cable – Mini HDMI to standard HDMI
- Micro USB OTG Cable – Micro USB to Type A, to connect mouse, keyboard, etc.
- 2×20 Pin Male Header – Can be soldered in to enable it to be able to plug in Pi HATs, GPIO cablees, etc like a normal Raspberry Pi
- 2×20 Pin Female Header – Can be soldered into the GPIO port position and expand its capabilities
- Official Raspberry Pi Camera Strip – Camera for your Pi Zero!
- Pi Zero Case –To keep your Pi Zero safe
- 8GB Micro TF card –Pre-Installed with NOOBS
- 5V 1.5A Power Adapter (US Standard) – To power your Raspberry Pi Zero
We recommend getting this Kit with a Raspberry Pi Zero W compared to the Raspberry Pi Zero as it will be cheaper as additional accessories would be required to add Wi-Fi support to your Raspberry Pi Zero. In addition, the SD card is already pre-installed with Raspbian which saves the trouble.
Step by Step Instructions
As the SD card is already pre-installed with NOOBS, we can immediately connect and start up your Raspberry Pi Zero!
- Step 1: Connecting your Raspberry Pi Zero
- Insert the 8GB Micro TF card into the microSD card slot.
- Using the Micro USB OTG Cable, connect your keyboard and mouse.
- Connect your screen with the Mini HDMI OTG Cable.
- Step 2: Powering and Running your Raspberry Pi Zero
- Plug the 5V 1.5A Power Adapter into a power socket together with a USB cable and connect it to your Raspberry Pi Zero micro USB power port.
- The Raspberry Pi does not have a power switch = it will turn on once connected to a power supply.
- Your Raspberry Pi Zero will start booting where you will see raspberries appear on the top left of your screen.
- After a few seconds, The Raspbian Desktop will appear.
- Step 3: Finishing the Setup
- The Welcome to Raspberry Pi Application will pop up once the Raspbian Desktop is powered.
- The application will guide you through the initial setup where you will you select your country, language, timezone, password and also connecting to Wi-Fi
That’s all! Your Raspberry Pi Zero W is now up and running. Interested in soldering on your 2×20 Pin Male Header and
2×20 Pin Female Header to your Raspberry Pi Zero but do not know how? No worries, you can get started here!
Raspberry Pi Zero Accessories
Think your Raspberry Pi Zero does not look cool enough? Why not add some accessories to your Raspberry Pi Zero! Here are some of our favourite accessories for the Raspberry Pi Zero:
Pi Zero Case
Raspberry Pi Zero Case $5.95 (Included in our Complete starter kit)
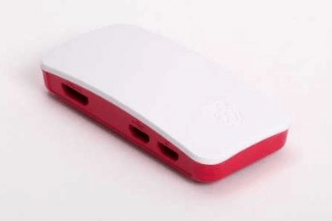
- The case consists of two parts which are
- Standard base featuring a cut-out to allow access to the GPIO,
- Three lids: a plain lid, a GPIO lid (allowing access to the GPIO from above), camera lid (which, when used with the short camera cable supplied, allows the Raspberry Pi Camera or Camera Noir to be fitted neatly inside it).
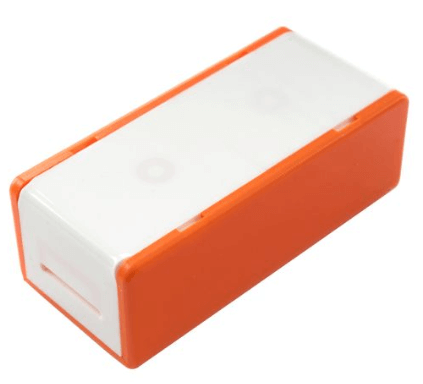
Flick Zero Case ($16.95)
This case is compatible with the Flick Zero which is a 3D tracking and gesture pHAT which we will explain in the HAT section later on!
- This vibrant and durable case is made up of three parts:
- An orange base and T
- Two white lids.
- This lid can be used in two different setups in either an open or closed position, allowing you to hide your Pi Zero and Flick Zero.
- Flick can work through materials such as acrylic, wood, and glass so our plastic case (even when the lid is in the closed position) will not negatively impact any of the fun you can have with Flick!
- The Flick Zero case features two knockout holes on the lid panels which can be pushed out with a pen. Two suction cup can then be installed in the knockout holes which are provided.
- For example, you want to set up your Flick Zero & Raspberry Pi Zero to only allow entry through a door if you swipe right – with this case, you could mount it right next to the door without the need to drill any holes or hammer any nails.
Raspberry Pi Zero HATs
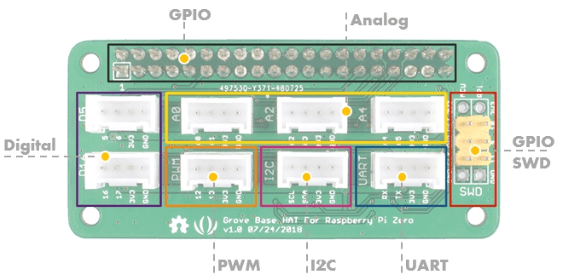
Grove Base Hat for Raspberry Pi Zero ($8.90)
- The Grove Base Hat for Raspberry Pi Zero provides Digital/Analog/I2C/PWM/UART port to meet all your needs. With the help of build-in MCU, a 12-bit 6 channel ADC is also available for Raspberry Pi.
- Grove is Seeed very own modular, standardized connector prototyping system. Grove takes a building block approach to assembling electronics where electronics are easier to connect, experiment and built which simplifies the learning system. You can find out more here!
- More than 60 groves are supported by the Grove Base Hat for Raspberry Pi which range from sensors, buzzers and also displays. We will continue to add new compatible modules to the compatible list, the more you use, the more grove will be added!
- Below is a diagram of the Pinout:
Flick Zero – 3D Tracking & Gesture pHAT for Raspberry Pi Zero ($25.50)
- Flick Zero is a 3D tracking and gesture pHAT that lets you control your Raspberry Pi Zero mini-computer like magic!
- It uses a technology that enables the PCB to detect your gestures from up to 15cm away in 3D space. Draw a circle, swipe your hand – Flick will track it.
- You can integrate Flick into your Raspberry Pi project to give you multiple ways of controlling it. Using the near field gesture technology, you’re able to hide your project behind non-conductive material (wood/acrylic) and still use Flick (please note however that mounting it in this way may reduce the sensor range).
- Some gestures are:
- Swiping
- Tapping and double tapping
- Airwheel
- Touch
- With Flick, you can control your computer, TV, music system and more all with a Flick of the wrist!
ReSpeaker 2-Mics Pi HAT (9.90)
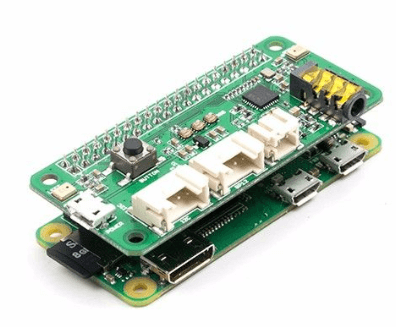
- This is a dual-microphone expansion board for Raspberry Pi designed for AI and voice applications. This means that you can build a more powerful and flexible voice product that integrates Alexa, Google Assistant, etc.
- The board is developed based on WM8960, a low power stereo codec. There are 2 microphones on both sides of the board for collecting sounds and it also provides 3 APA102 RGB LEDs, 1 User Button and 2 on-board Grove interfaces for expanding your applications. What is more, 3.5mm Audio Jack or JST 2.0 Speaker Out are both available for audio output.
- Here is a video of the ReSpeaker Pi HAT in action:
Not what you are looking for or interested in more HATs for your Raspberry Pi Zero? Check out all our HATs and Shields for the Raspberry Pi here!
Other Add-ons for your Pi Zero
USB3.0 HUB 4 ports ($3.90)
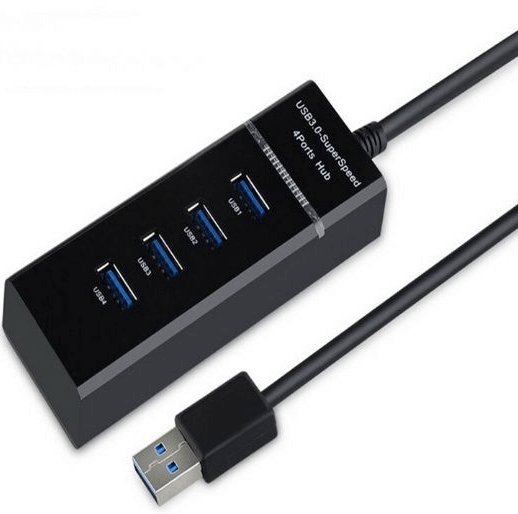
- This is a cost-effective 4 Port USB3.0 HUB, which supports almost all major operating systems and simple to use. Just plug it in to your Raspberry Pi 0 and you are good to go!
- This accessory is an essential for your Raspberry Pi Zero as it only contains 1 USB port which limits its capabilities and allow you to connect any kind of USB devices without overloading the Pi Zero’s power supply.
Raspberry Pi Camera Module V2 ($29.95)
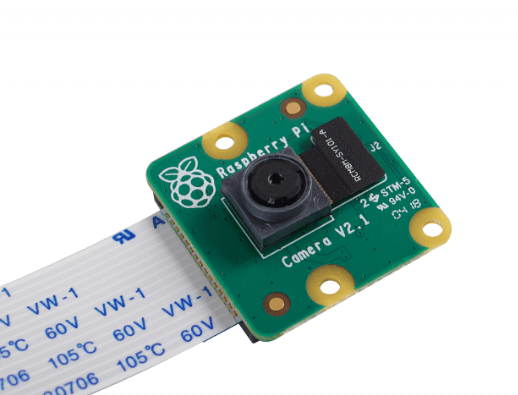
- The Camera v2 is the new official camera board released by the Raspberry Pi Foundation.
- The Raspberry Pi Camera Module v2 is a high quality 8 megapixel Sony IMX219 image sensor custom designed add-on board for Raspberry Pi, featuring a fixed focus lens.
- It’s capable of 3280 x 2464 pixel static images, and also supports 1080p30, 720p60 and 640 x 480p60/90 video. It attaches to Pi by way of one of the small sockets on the board upper surface and uses the dedicated CSI interface, designed especially for interfacing to cameras.
Mini USB Microphone
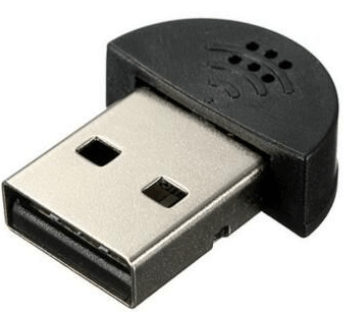
- Want to record sound on your Raspberry Pi Zero? This mini USB microphone is just for you!
- This is a very small USB microphone with plug-and-play features, which means you can use it on any computer and SBC.
- It has a sensitivity of -67 dBV/pBar,-47 dBV/Pascal +/-4dB and frequency response of 100-16KHz.
- Here is a video of the Mini USB microphone in action with a Raspberry Pi 4:
Not what you are looking for? You can check out all our accessories for the Raspberry Pi Zero here!
Raspberry Pi Zero Projects
Alright you have geared up your Raspberry Pi 4……. now what? No worries as we’ve got you covered with our favourite Raspberry Pi Zero Projects that you must try!
Raspberry Pi Zero Mini Mechanical Keyboard
Want to build your own aesthetic and colourful mechanical keyboard? With this project, you can build your own Marco Pad with the Raspberry Pi Zero.
What do you need?
- micro SD Card with Card Reader-32GB(Class 10)
- Linear (quiet) keys – Keybow Mini Mechanical Keyboard Kit
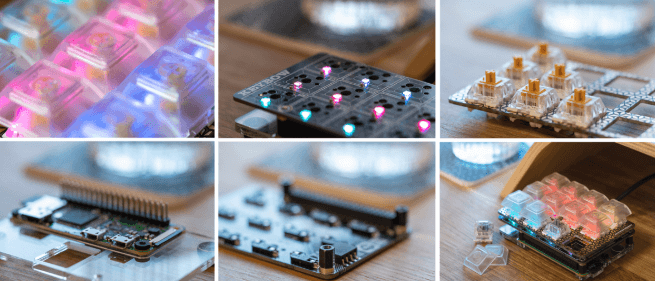
- The kit includes:
- Raspberry Pi Zero WH
- Keybow PCB
- Switch plate
- Twelve Kailh Speed switches (Gold or Silver)
- Twelve clear DSA-profile key caps
- Acrylic baseplate
- Fixings and feet
- Micro-USB cable
- Comes in a reusable kit box
Interested? You can find out more and instructions to build your very own Pi Zero Mini Mechanical Keyboard here!
Raspberry Pi Zero CCTV
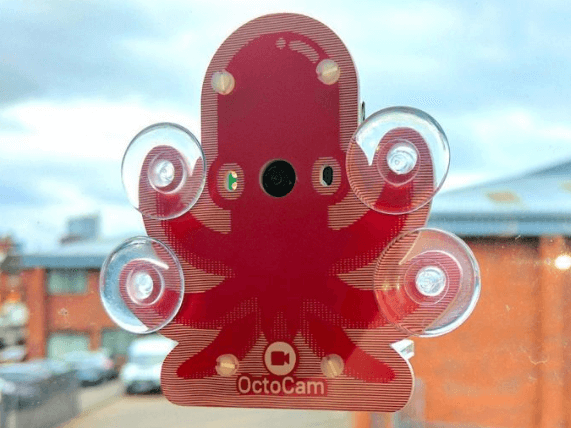
Want a cute CCTV or camera to capture time lapses that sticks on your window or sit on your dining table? Then this project is for you!
What do you need
- motionEyeOS Software
- Pimoroni OctoCam – Pi Zero W Project Kit – A compact CCTV camera/Time lapses recording kit
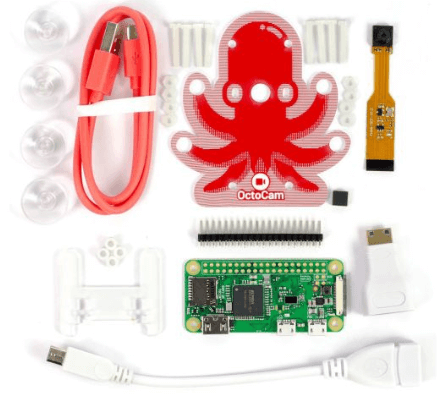
- This kit has everything you need from:
- Raspberry Pi Zero W
- Super-small 5MP camera
- Octopus acrylic mount with Four suction cups
- Desk stand
- USB A to Micro-B cable
- USB A to Micro B adaptor
- Mini to Full-size HDMI adaptor
- Male 2×20 Pin Header
This project will only take 30 minutes for you to put everything together! Did I mention that we are having a sale for this kit too? You can now get it for $38.40 instead of $49.50! You can get it now here! For the full tutorial, you can click here.
Build and Control a Pi Zero Robot
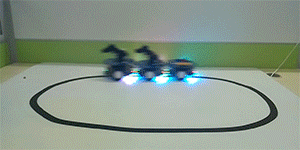
Ever wanted to build and control your very robot car? Even with the Raspberry Pi Zero, you can do just that!
What do you need? (Other than a Pi Zero/Zero W)
- AlphaBot2 robot building kit for Raspberry Pi Zero/Zero W (no Pi)
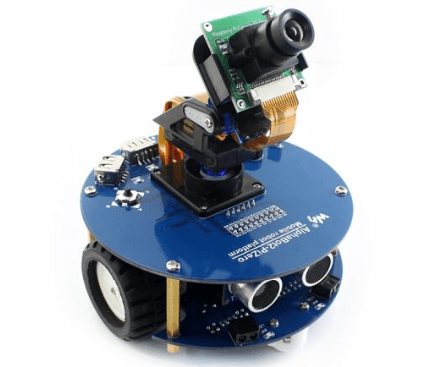
- The kit has everything you need from:
- The adaptor board
- Base Chassis
- Raspberry Pi camera
- Ultrasonic Sensor
- Micro SD card 16GB
- Power adapter US standard 5V/2.5A USB output
- SG90 servo
- IR remote controller (To easily control your robot)
- Micro USB connector
- RPi Zero V1.3 Camera Cable 30cm
- USB type A plug to micro B plug cable
This robot has an auto obstacle avoiding function, ultrasonic sensing, auto line tracking and also a bluetooth remote control function. The possibilities are endless! Furthermore, this kit can be easily assembled within minutes by a snap without any soldering or wiring.
Interested? You can check out the full tutorial here!
Pi Zero Retro Gaming Console
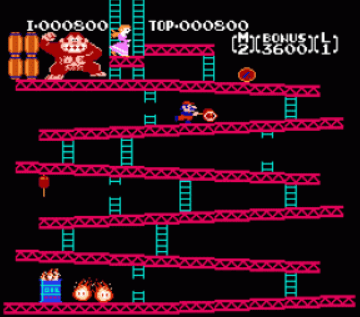
Doesn’t this game look familiar? Want to bring back the old memories and play some retro games? Well you can do that with your very own Raspberry Pi Zero!
What do you need? (Other than a Pi Zero/Zero W)
- Retropie Software
- Mini Wireless Keyboard and Touchpad Mouse (or any Keyboard and Mouse)
- TV or monitor
- micro SD Card with Card Reader-32GB(Class 10)
- HDMI Male to Micro HDMI Male Cable – 1.5m
- Raspberry Pi Acrylic DIY Retro Game Arcade Kit (or any game controller)
Interested? You can check out the full tutorial at Makeuseof here!
Raspberry Pi Zero Media Centre
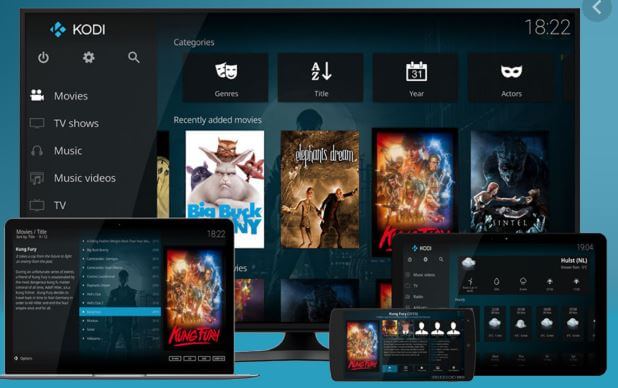
Ever wanted to build your own home media centre? With the Raspberry Pi Zero, you can now create your own media centre at under $35!
What do you need?
- OSMC Software
- Image Flashing Software (eg. Etcher)
- Mini Wireless Keyboard and Touchpad Mouse (or any Keyboard and Mouse)
- Seeedstudio Raspberry Pi Zero W Complete Starter Kit
Can’t wait to build your own media centre with the Raspberry Pi Zero? You can check out Peppe8o for the full tutorial here!
These are just some Raspberry Pi Zero and Zero W projects for you to get your brain juices flowing! Even though the Raspberry Pi Zero capabilities are not the best, there are still many things you can do with it!
Summary
There you go! That is all for our Raspberry Pi Zero and Zero W Guide to get you started! If you have any questions, do list them down in the comments down below.
Still don’t own a Raspberry Pi Zero or Zero W yet? What are you waiting for? Click here to get a Raspberry Pi Zero or Zero W for yourself now!