SSH into a Raspberry Pi allows remote access, enabling management, maintenance, development, and server operations without needing physical interaction with the device, making it convenient and versatile for a variety of projects and applications. We’ll show you step by step how to SSH to Raspberry Pi from your pc, which works for all Raspberry Pi products, such as Raspberry Pi 5, Raspberry Pi 4, Seeed Studio Raspberry Pi whole product line,including EdgeBox Series and reTerminal Series.
Table of Contents
Preparation
Power Adapter: An adapter used to power the Raspberry Pi, typically Micro USB or USB-C type.
MicroSD Card: A storage medium used to store the Raspberry Pi operating system and data.
Keyboard and Mouse: Input devices used for direct interaction with the Raspberry Pi when connected to a monitor.
Display: A monitor connected to the Raspberry Pi, usually through an HDMI interface.
HDMI Cable: A cable used to connect the Raspberry Pi to a monitor’s HDMI port.
Ethernet Cable (or WiFi dongle): A cable used to connect the Raspberry Pi to the network, or alternatively, a Wi-Fi dongle for wireless connectivity.
Step 1: Ensure SSH is enabled on Raspberry Pi
Before connecting to the Raspberry Pi , we need to make sure that the SSH service is enabled on the Raspberry Pi .
Once the Raspberry Pi is started, the SSH service should already be enabled. You can connect to the Raspberry Pi using an SSH client such as a terminal or MobaXterm.
*note:if it is not enabled, you can enable it by following these steps.
Use the Raspberry PI command line tool (ctrl+alt+t)to enter the following command ‘sudo raspi-config’
In the pop-up window, choose ‘Interface Options’-> ‘SSH’.
Select‘Yes’
Enable the SSH service.
*note:If you’re installing a Raspberry PI from a removable device for the first time, follow these steps.
Prepare the SD Card: Write the Raspberry Pi OS image file to the SD card using a computer. Tools like Raspberry Pi Imager or Etcher can help with this step.
Enable SSH: After writing the image, insert the SD card back into the computer. In the boot partition of the SD card, create an empty file named SSH. This action enables SSH on boot for the Raspberry Pi.
Insert SD Card into Raspberry Pi: Insert the prepared SD card into the Raspberry Pi’s card slot.
Power On: Connect power to the Raspberry Pi to start it up.
Find Raspberry Pi’s IP Address: Once the Raspberry Pi is connected to the network, find its IP address. (The following are detailed steps for reference)
SSH into Raspberry Pi(The following are detailed steps for reference)
Step 2: Find the IP Address of Your Raspberry Pi
To find the IP address of your Raspberry Pi, you can try the following methods:
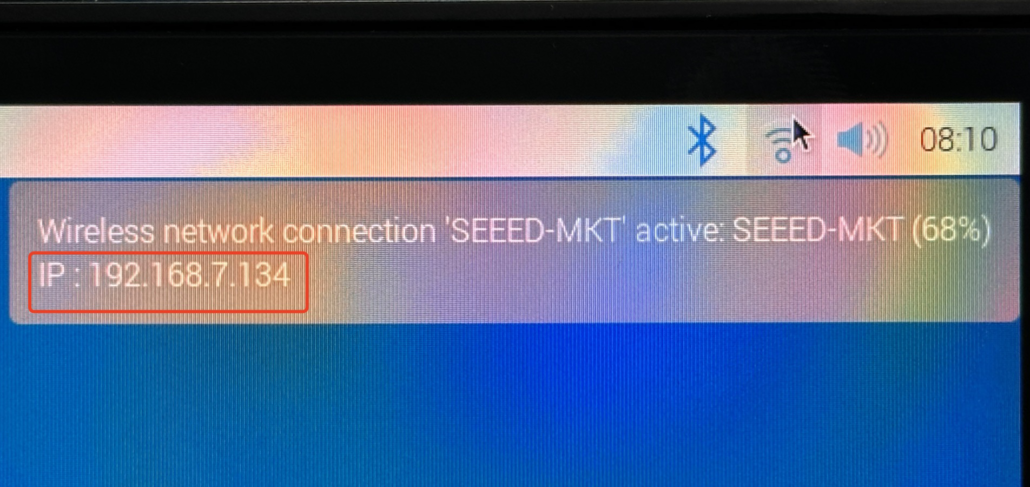
method1:After the system is connected to WiFi, hover the mouse on the WiFi icon and you can see the corresponding IP address.
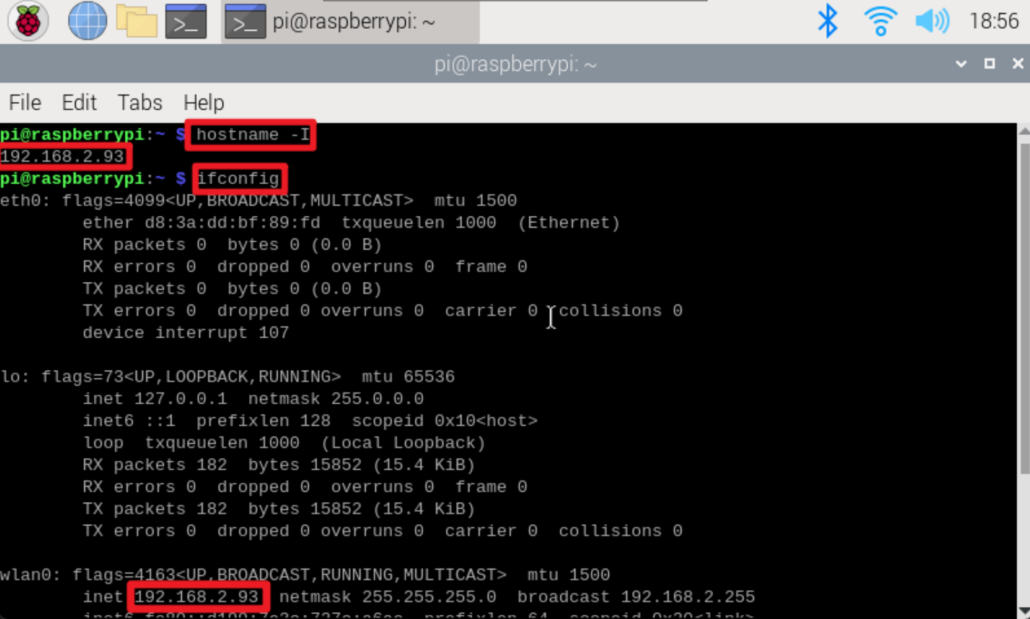
method2:Open the Raspberry PI command line window (ctrl+alt+t) and type‘hostname -I’ or ‘ifconfig’ to view the IP address.
Step 3: Open a Terminal or Command Prompt on Your PC
Enter the following command in the terminal ‘ssh pi@IP address’, after executing the SSH command,you’ll be promoted to enter the password for your Raspberry Pi. Type the password and press Enter.
note:The IP address is the Raspberry PI IP address you found in the previous step. pi is the default username for the Raspberry Pi, and if you’ve changed your username, you’ll need to replace it with yours.
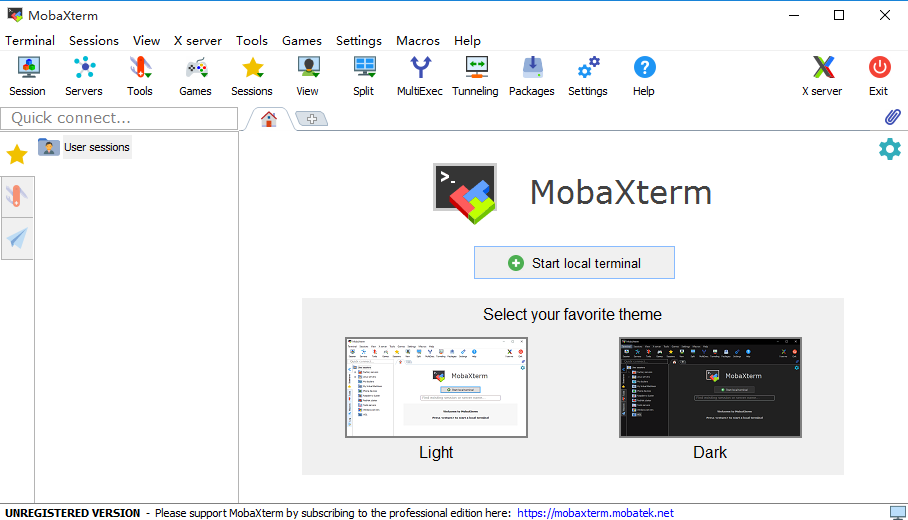
MobaXtermis recommended for connection as follows:
After opening, the running interface is as follows:
1.Click the ‘Session’button
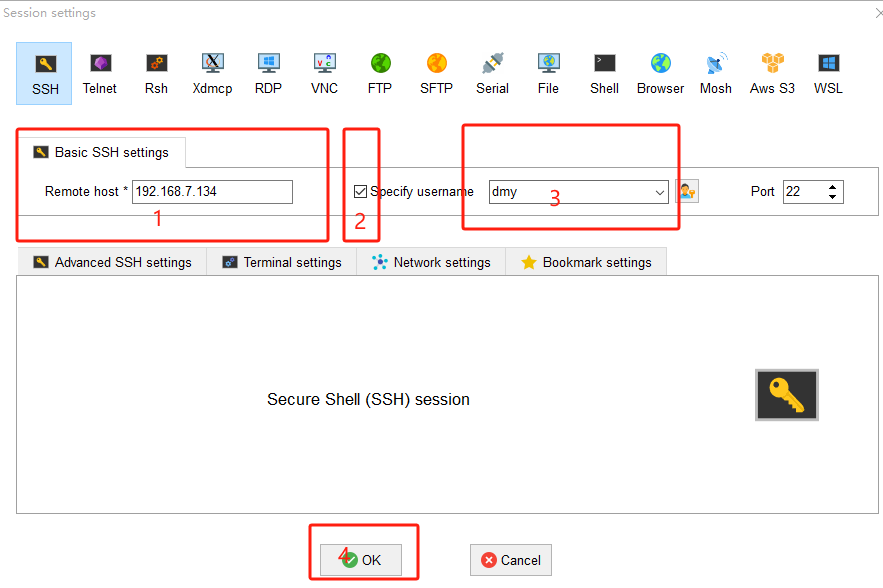
2.In the new window that pops up, select ‘SSH’
3.In the dialog box that is displayed,enter the IP address of the Raspberry Pi,select the specified user name,enter the user name,and click ‘ok’
4.In the new screen, type raspberry, the user password for the Raspberry PI, and press Enter.
note:
*Enter the password without any prompt by default, the first time you use it is easy to misunderstand as not entered, but the Linux system input password is like this, pay attention to it.
*If you change the user name and password, you need to enter the changed user name and password.
–If the following message is displayed, the user name or password is wrong. If the password is wrong, continue to enter it again. If the user name is wrong, you need to close the current command line window and start from the second step.
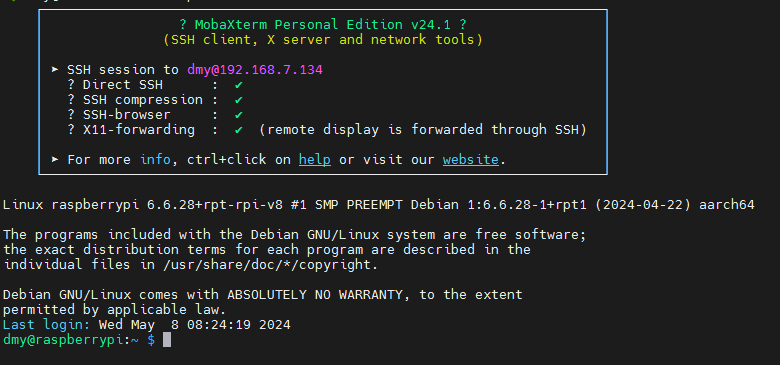
—If the following interface is displayed, displaying the command line interface with the user name, the login is successful.
Step 5: Connected Successfully
If the username and password are correct, you should now connect to the Raspberry PI via SSH. Once turn on ssh raspberry pi, you will see the Raspberry PI command line interface in the command prompt on your terminal or PC.
You can now execute commands on your Raspberry Pi remotely through SSH. Remember to keep your Raspberry Pi’s software updated and use secure practices, such as changing default passwords and disabling SSH access for the root user if not needed.
Recommend Reading
Looking to expand your knowledge about Raspberry Pi? Check out these articles that cover a range of practical and interesting topics to enhance your Raspberry Pi projects.
Since 2008, Seeed has supplied edge computing devices to various industries, including manufacturing, automation, smart buildings, and retail. As your trusted partner in AIoT/IIoT, we offer cost-effective options utilizing Shenzhen manufacturing resources, an efficient supply chain, and a warehouse. Explore our Edge Computing Device Catalog Now!
10 years in the IoT hardware industry. I’m here to share practical guides on Home Assistant, NVIDIA Jetson, Meshtastic/Meshcore, Raspberry Pi, LoRa, PCB/PCB Assembly and more to help bring your creative ideas to life.