How to Export Gerber Files from KiCad, Fusion 360, and Altium Designer
Before starting PCB fabrication or PCBA production, Gerber files and drill files need to be exported correctly from your PCB design tool.
This quick guide shows how to export Gerber files from three commonly used PCB design tools: KiCad, Fusion 360, and Altium Designer.
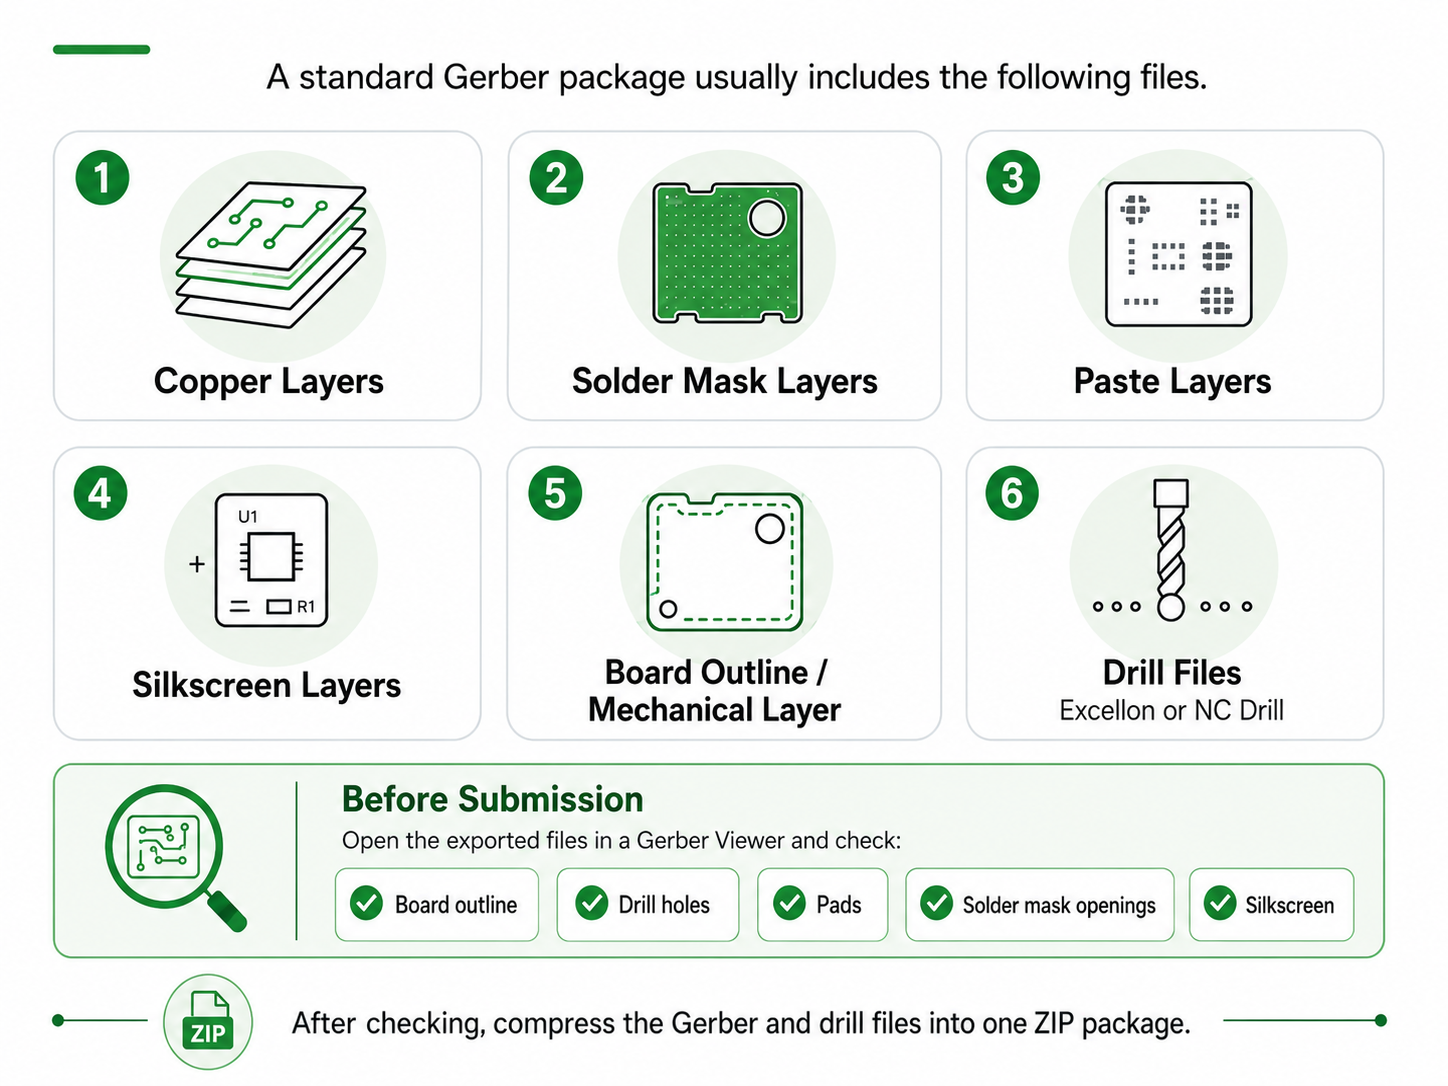
🔍What Should Be Included in a Gerber Package?
📍KiCad Gerber Export
Operation path: Open PCB Editor → File → Fabrication Outputs → Gerber
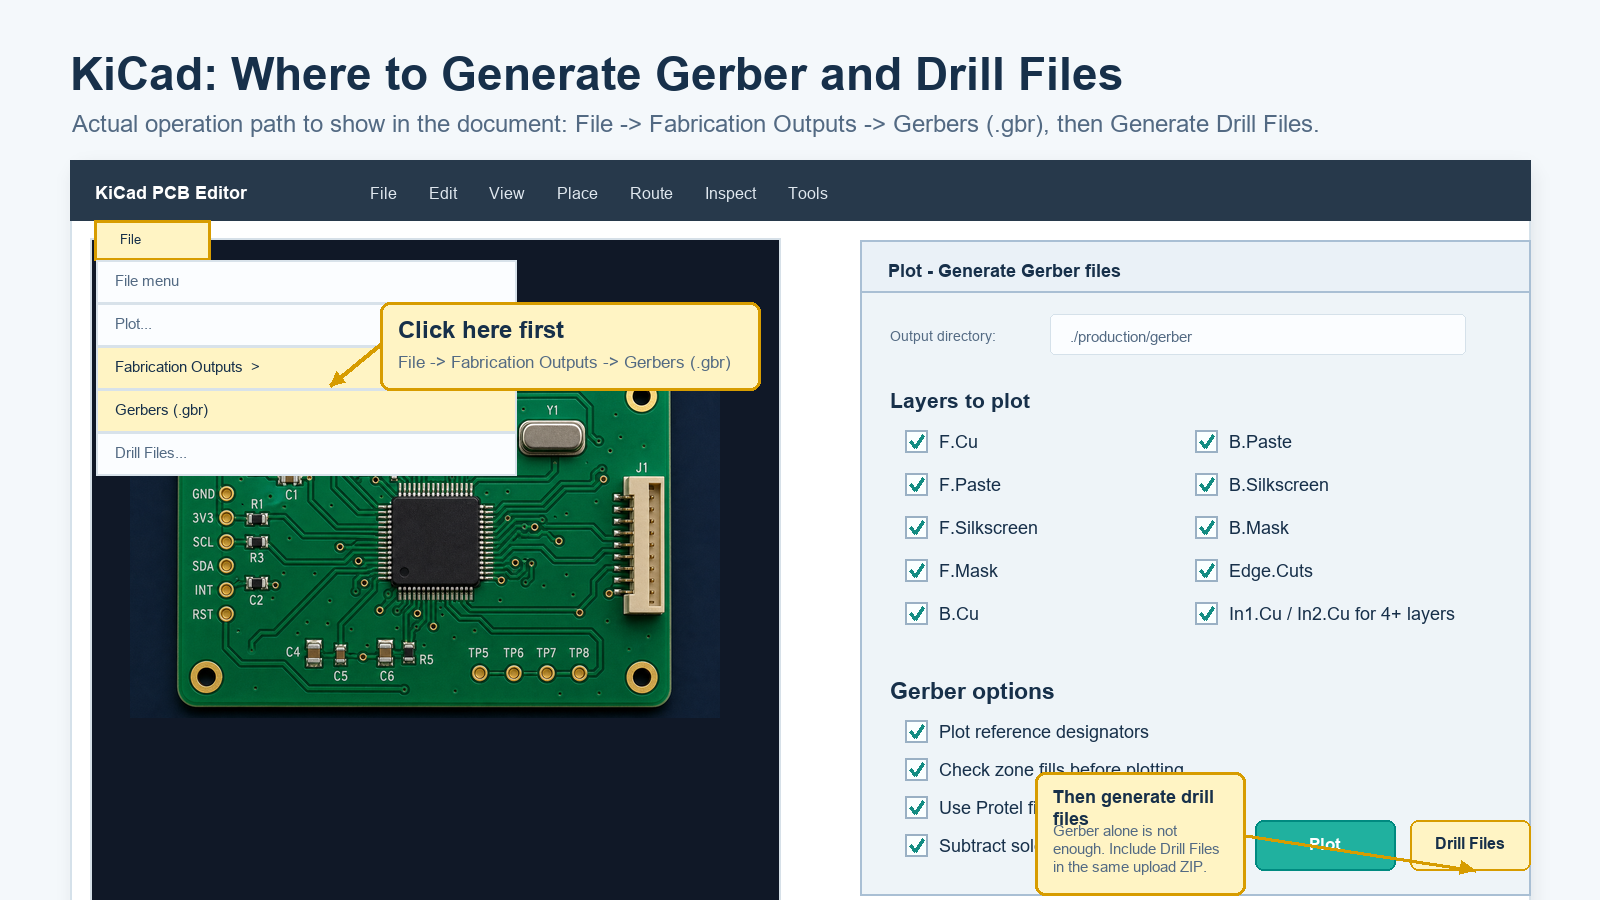
Concise steps:
1. In PCB Editor, confirm that the current PCB is the final production revision.
2. Go to Gerbers / Plot, and select copper layers, solder mask layers, paste layers, silkscreen layers, and Edge.Cuts.
3. Click Plot to export Gerber files, then click Generate Drill Files to export Excellon drill files.
4. Use a Gerber Viewer to check board outline, drill holes, pads, and silkscreen. After confirmation, compress Gerber + Drill files into one zip.
Key Checkpoints
- Make sure Edge.Cuts is included as the board outline.
- Confirm that drill files are generated together with Gerber files.
- Check whether pads, holes, and outline align correctly in the Gerber Viewer.
📍Fusion 360 Gerber Export
Operation path: Open PCB Design → Manufacture / Manufacturing Output → CAM Processor.
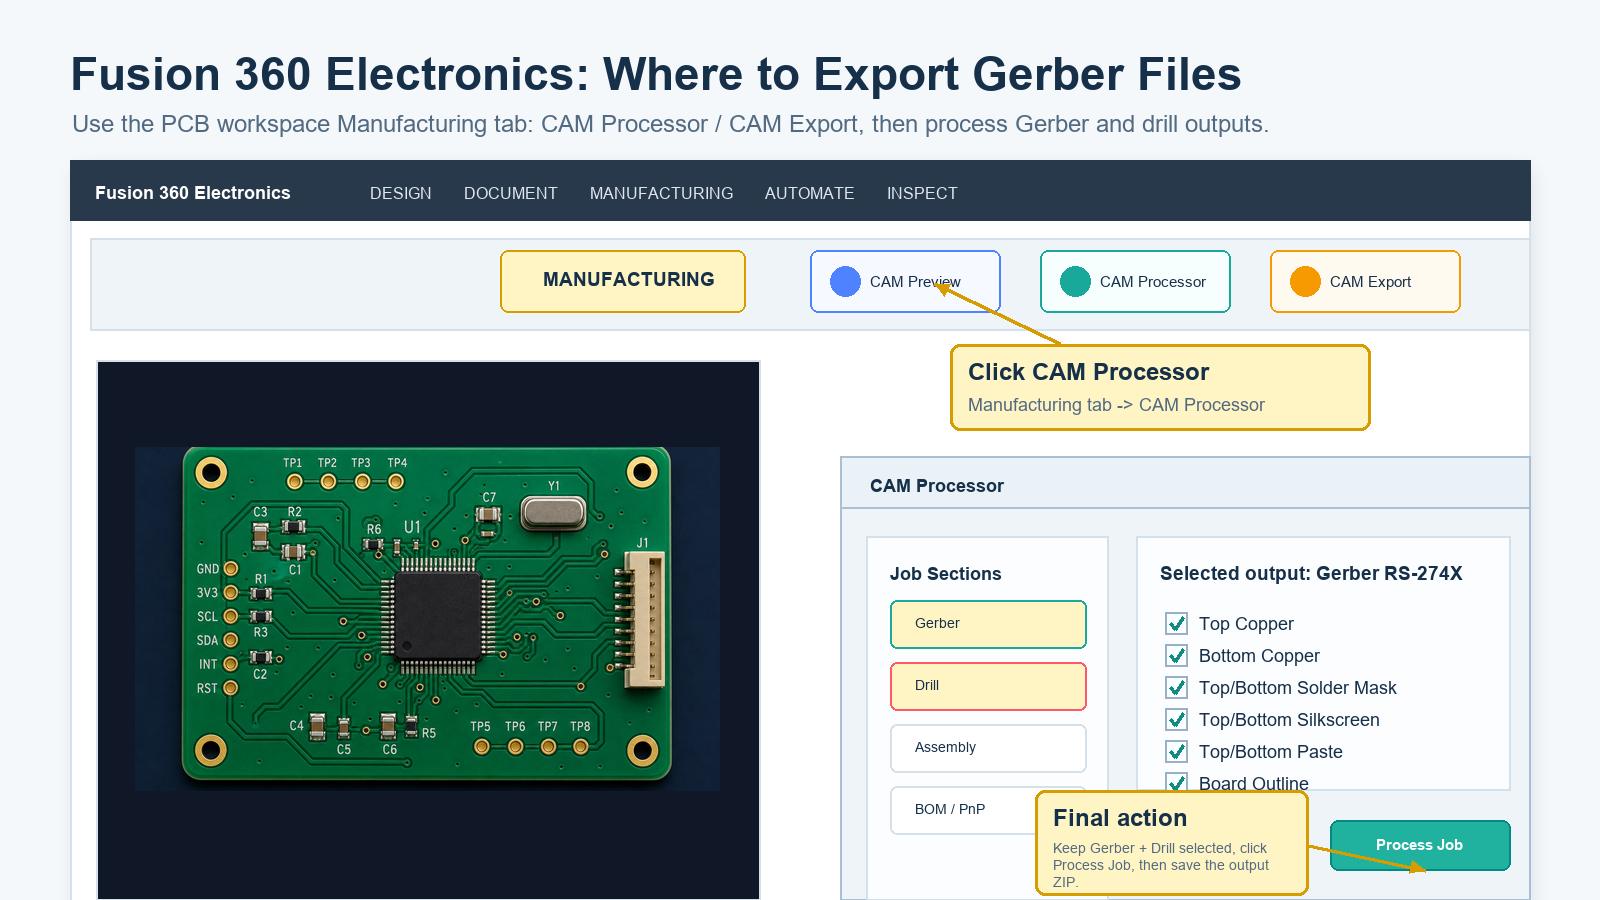
Concise steps:
1. Open the PCB file for production and confirm that schematic, PCB, BOM/CPL are synchronized to the same revision.
2. Go to Manufacturing Output or CAM Processor, and select the Gerber output job/template.
3. Export copper layers, solder mask, silkscreen, paste layers, board outline, and Excellon drill files.
4. Preview the exported layers, confirm drill holes and outline are correct, then compress Gerber + Drill files for upload.
Key Checkpoints
- Confirm that the PCB design is the final production version before export.
- Make sure the Gerber output job includes all required manufacturing layers.
- Preview the exported files before submission.
📍Altium Designer Gerber Export
Operation path: Open the PCB file → File → Fabrication Outputs → Gerber Files; then export NC Drill Files.
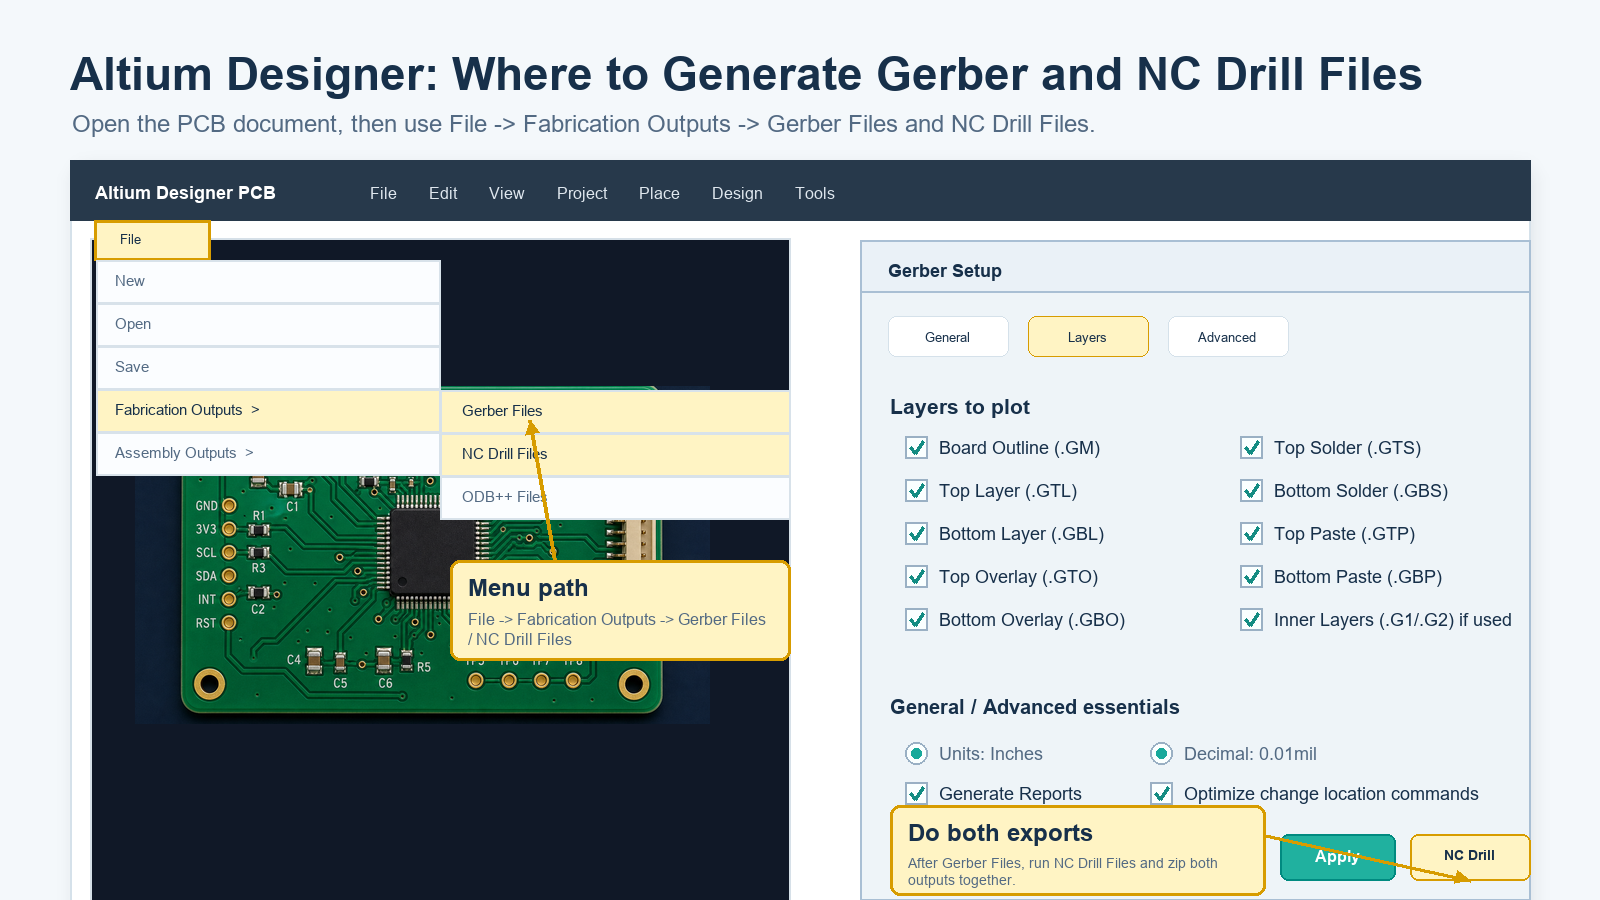
Concise steps:
1. In the PCB document, confirm that design rule check has been completed and the PCB file is ready for production.
2. Go to File → Fabrication Outputs → Gerber Files, and select the required signal layers, solder mask, paste, silkscreen, and mechanical/outline layers.
3. Go to File → Fabrication Outputs → NC Drill Files, and export the drill files.
4. Put Gerber and NC Drill files into the same folder, preview and check them, then compress the folder into a zip for submission.
Key Checkpoints
- Export Gerber files and NC Drill files together.
- Make sure the mechanical or outline layer is included.
- Confirm that the selected layers match the actual PCB stack-up and manufacturing requirements.
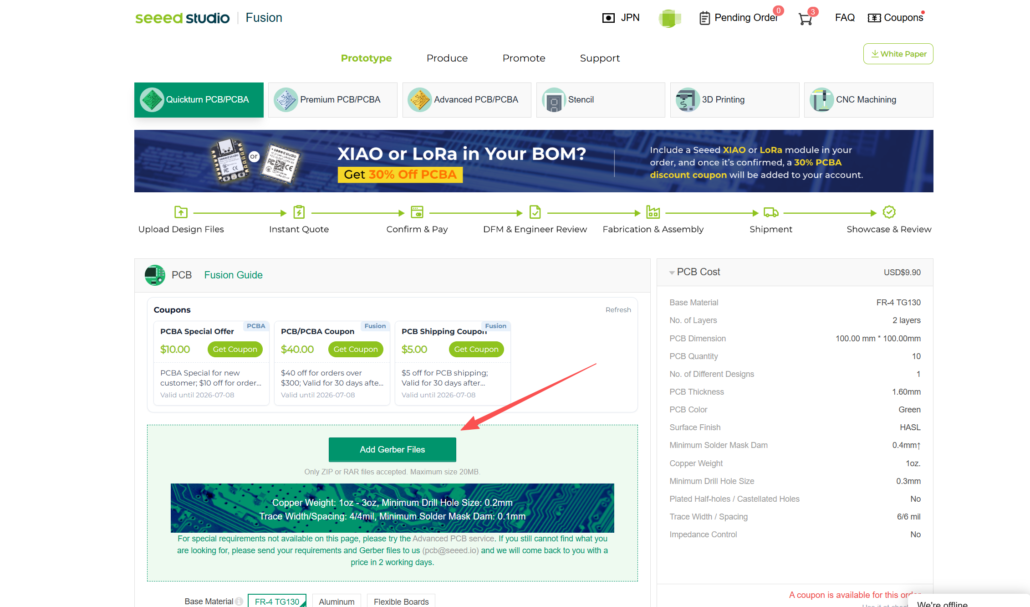
🎉Start Your PCB or PCBA Project with Seeed Fusion
Once your Gerber and drill files are ready, you can upload them to Seeed Fusion for PCB fabrication or PCBA production. A complete and well-checked Gerber package helps reduce back-and-forth communication and supports smoother DFM review, quotation, and production.
Upload your Gerber Files Now →
If you have any other questions, feel free to contact us at [email protected]