RetroMeshDevice: A Phone-Free Meshtastic Handheld Built in Public
How My Embedded Stuff transformed a T9 idea into tested hardware, custom firmware and a reusable community contribution in the competition Meshtastic Build-Off 2026.
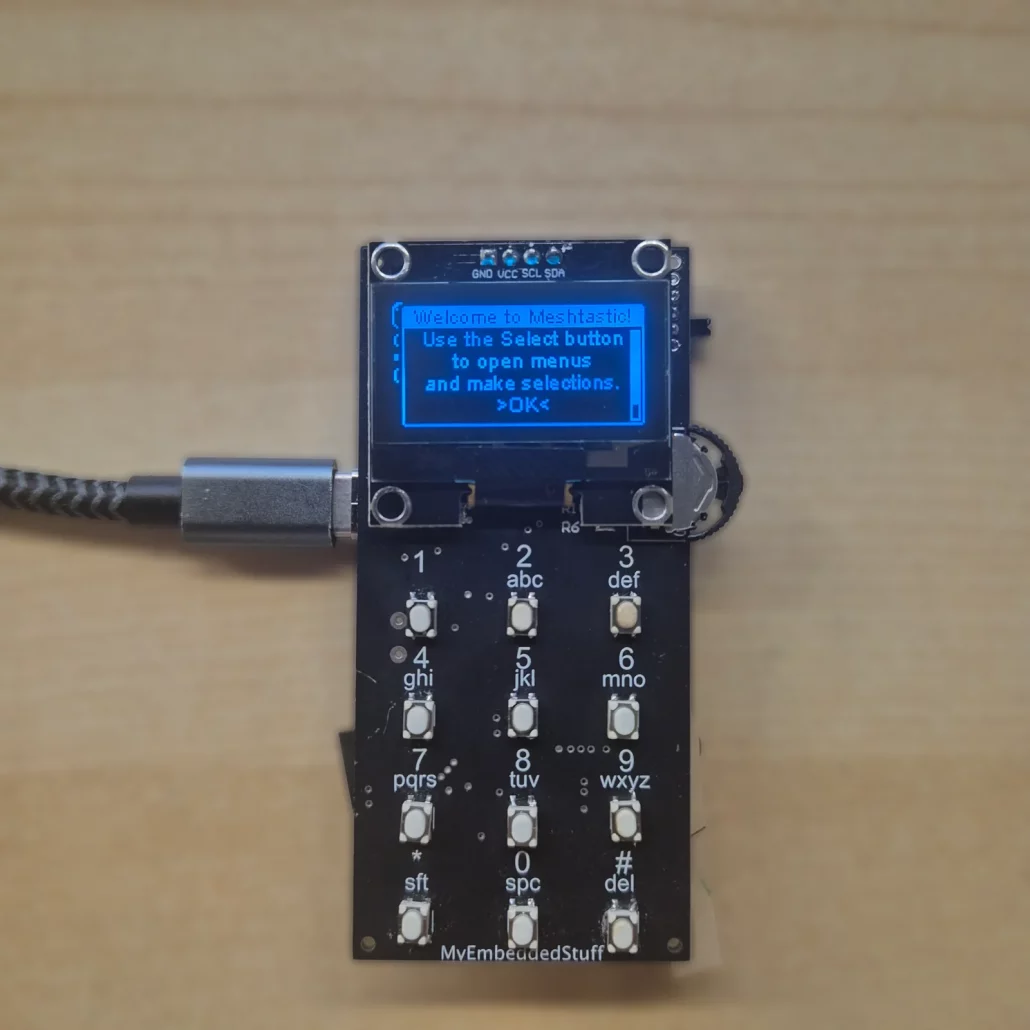
RetroMeshDevice running Meshtastic as a self-contained handheld with its own display and physical keypad. Youtube: @MyEmbeddedStuffBlog
Meshtastic is often introduced as a radio node paired with a phone. RetroMeshDevice asks the harder product question: what happens when the node itself becomes the interface? The answer is a compact communicator that can navigate, compose and read messages through a small OLED, a rotary control and a twelve-key telephone layout. Bluetooth can remain available, but a phone is no longer the only practical door into the mesh.
The Build-Off asked for hardware that could be examined
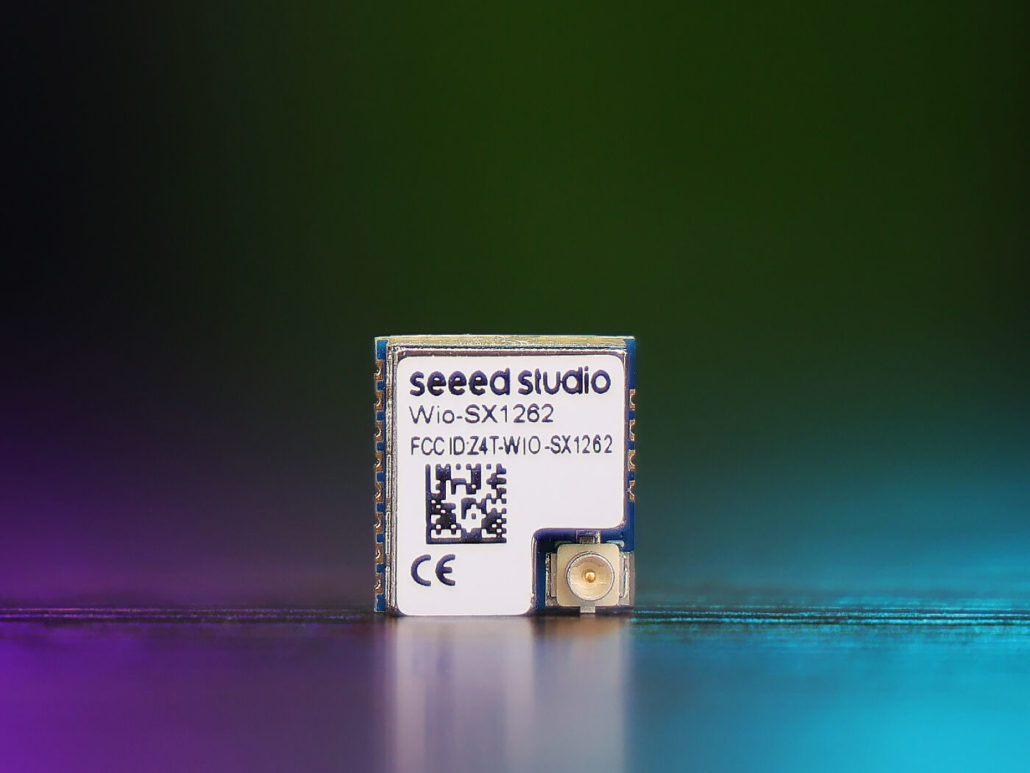
The Meshtastic Build-Off 2026 required entrants to build a real Meshtastic device around one of three Seeed Studio radio modules, Wio-WM1110, Wio-SX1262 or Wio-LR1121. Projects had to run Meshtastic firmware, carry the official competition silkscreen on the PCB, publish a public repository, and provide at least three high-resolution photos plus a demonstration video of at least 30 seconds.
Evaluation extended beyond novelty. Seeed Studio and official Meshtastic reviewers, including Ben and Jonathan Bennett, examined integration quality, functional completeness, PCB and enclosure execution, practical value and documentation. Community response also contributed. RetroMeshDevice was particularly easy to trust because its author did not wait until the end to present a polished object. The project was documented in four substantial stages, and each stage exposed decisions, measurements and corrections that another builder could inspect.
THE CENTRAL IDEA A dedicated mesh communicator does not need to imitate a smartphone. It needs controls that remain direct, tactile and understandable when a phone is inconvenient, unavailable or deliberately left out of the workflow.
Why a T9 communicator still makes sense
A smartphone is a powerful general-purpose interface, but it adds pairing, charging, app permissions and another object that must be held and unlocked. In gloves, rain, a crowded event, a workshop or a field exercise, a dedicated control can be faster and easier to understand. RetroMeshDevice treats phone-free use as the product requirement rather than as an emergency afterthought.
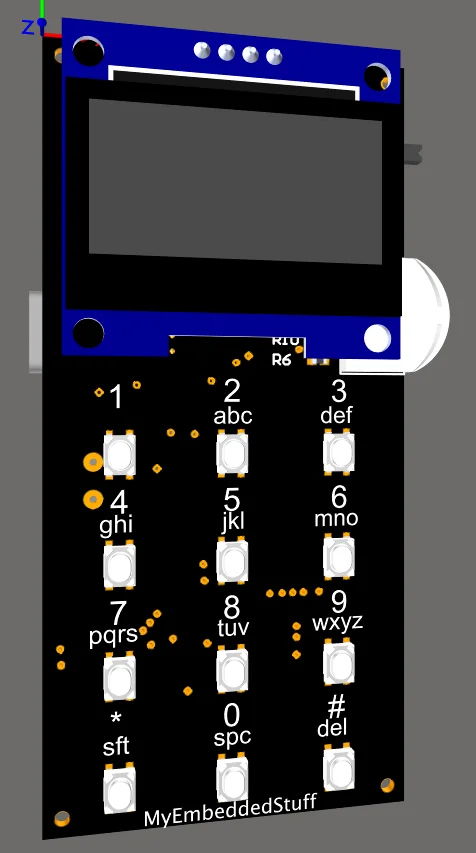
The T9-style keypad is a compact engineering compromise, not nostalgia for its own sake. A full QWERTY keyboard consumes front-panel area and many inputs. A touchscreen changes the power, software and mechanical problem. Twelve physical keys provide letters, numbers and commands in a narrow enclosure with tactile feedback. The complexity moves into key timing and interface firmware, but the object stays pocketable and predictable.
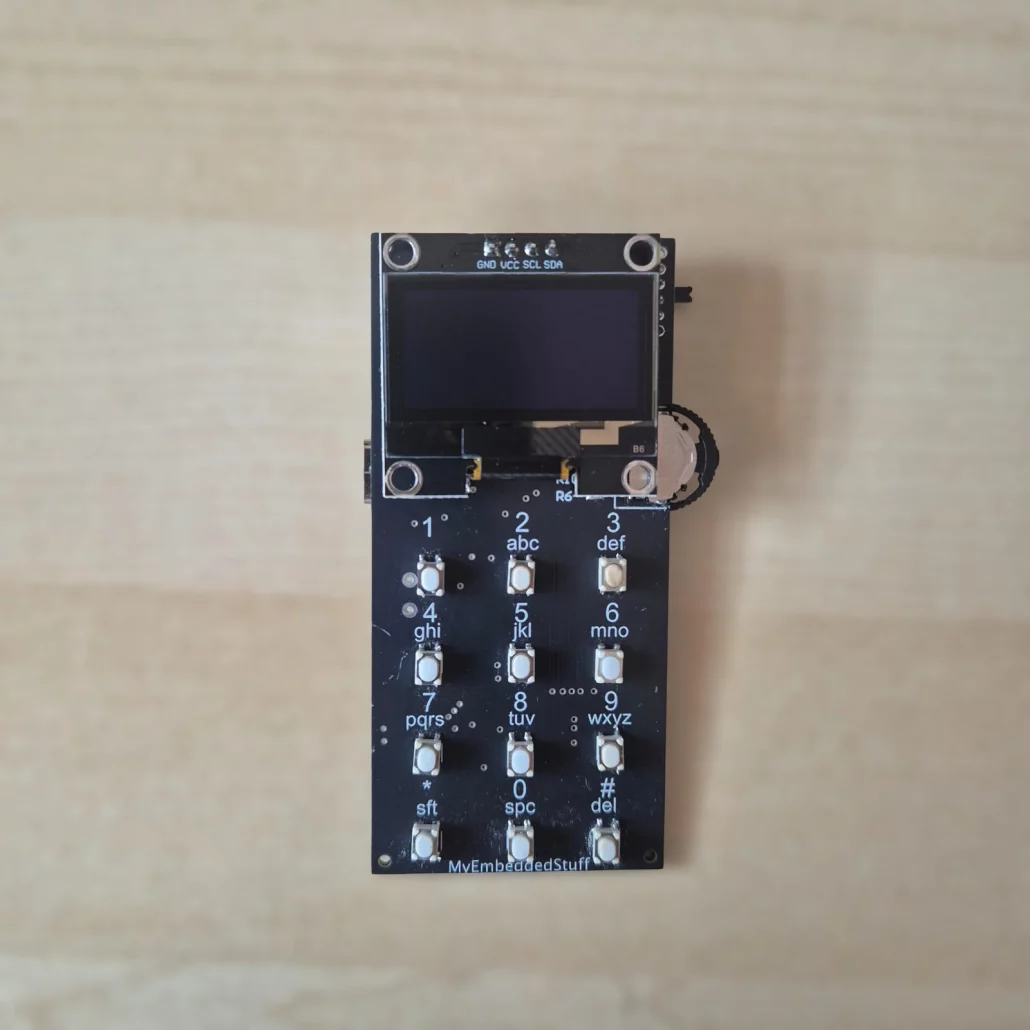
The custom PCB turns the front panel into the interface itself. The official Build-Off silkscreen is visible on the rear board. Project image: My Embedded Stuff.
Two modules divide the work cleanly
A Seeed Studio XIAO ESP32-S3 Plus acts as the application host. Its USB-C connection, battery-charging support, ESP32-S3 compute and additional accessible pins give the device room for the display, keypad expander, rotary input, battery measurement and interface logic. The Wio-SX1262 supplies the LoRa radio subsystem.
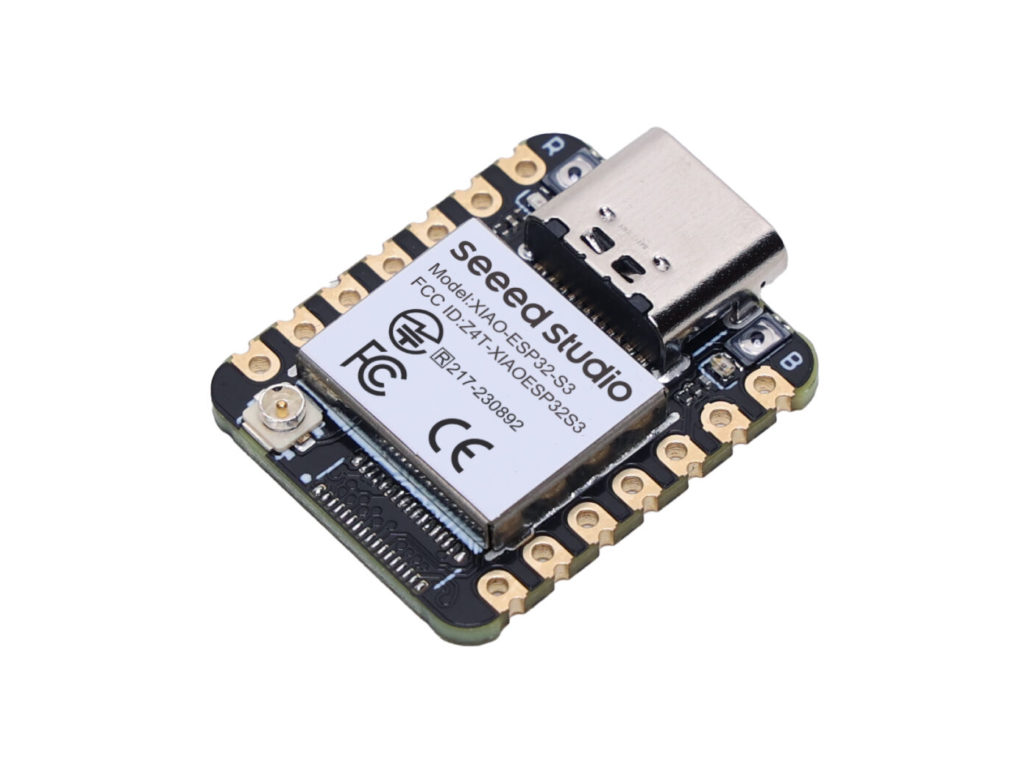
The radio connection illustrates why a module-level build is more than joining MOSI and MISO. SPI also needs clock and chip select, while BUSY tells the host when the transceiver is still processing a command. Reset and DIO1 need correct handling, DIO2 can control the RF switch, and DIO3 supplies the active TCXO. Seeed’s Wio-SX1262 documentation provides the module pinout and reference design. RetroMeshDevice then captures those details in a board variant so Meshtastic knows which radio, display, ADC and control pins exist.
This split leaves the host free to solve the human-interface problem while the module provides a familiar SX1262 radio path. It also gives the community a concrete example of how to take a supported radio family beyond a generic node-plus-app configuration.
Four stages turned the idea into credible hardware
Stage 1: The schematic made every tradeoff explicit
In the first article, Designing the RetroMeshDevice PCB, the author begins with system choices rather than a glamour shot. XIAO ESP32-S3 Plus was selected partly because USB and charging were already solved in a compact module, but also because the standard XIAO pin count was too restrictive once SPI, BUSY, DIO1, reset, RF switching, I2C and user controls were counted.
The 4-by-3 keypad is routed through an MCP23017 I2C expander rather than consuming 12 ESP32-S3 Plus GPIOs. The expander needs SDA and SCL from the host, with its INTA and INTB outputs returned to the microcontroller so a key press can raise an interrupt instead of being polled continuously. Its configurable internal pull-ups also avoid separate pull-up resistors on each keypad line.
The same practical reasoning appears in the power circuits. A MOSFET enables the battery-divider only for the few milliseconds needed for an ADC reading, rather than leaving it to drain the cell continuously. A TPS79533DCQR LDO supplies the clean 3.3 V rail for the ESP32-S3, SX1262, display and keypad expander. The author specifies a 500 mA regulator, while listing the SX1262 at about 120 mA peak during +22 dBm transmit. The stage makes the component choices and the assumptions behind them visible before the first board is tested.
Stage 2: Assembly revealed the difference between a footprint and a board
The second article, PCB Assembly, follows the first board through stencil alignment, solder-paste application, component placement, preheating, hot-air reflow and final hand soldering. The underside pads of the XIAO ESP32-S3 Plus made the module the most difficult part to assemble. By contrast, the castellated Wio-SX1262 edges remained accessible to a conventional iron.
Two issues are recorded for the next revision. The connector outline covers most of the battery-polarity silkscreen, making positive and negative difficult to distinguish. The slide-switch footprint also left too little clearance for its anchoring pins. For this prototype, the pins were cut because they serve only a mechanical purpose, and the switch was still secured with solder. The board could be validated, but the author clearly marks both corrections rather than presenting the first spin as finished.
Stage 3: A small test program isolated the hardware before Meshtastic
In Hardware Bring-up and Initial Validation, the author validates the assembled hardware before integrating Meshtastic. A small ESP-IDF test firmware cycles through the buzzer, battery ADC, I2C devices including the MCP23017 and OLED, T9 keypad, rotary encoder, SX1262 SPI link and interrupt line. Each test returns PASS, FAIL or SKIP, with results shown on both the UART console and OLED. Interactive checks have explicit timeouts so the validation sequence cannot wait indefinitely.
For the radio, the test sends the SX1262 GetStatus command and treats 0x00 or 0xFF as evidence of a dead or floating bus. This is an electrical and command-path check, not a range or sensitivity claim. Isolating each subsystem first means an OLED, key line or reset-path fault can be found before it is buried inside the full Meshtastic stack.
Whole-board current profiling with a Nordic Power Profiler Kit II. Measuring the assembled device made power behavior part of the evidence, not an estimate copied from datasheets. Project image: My Embedded Stuff.
Power profiling then moves from functional checks to product behavior. With Meshtastic, the OLED and Bluetooth active, the documented average was 75.56 mA, with short transmit peaks reaching about 191.76 mA in the captured trace. With the slide switch off, the board still drew roughly 290.78 microamps. Instead of blaming the custom PCB, the author isolated a bare XIAO and measured nearly 200 microamps there as well. The investigation led to the module’s EN pull-up and its boot-timing role. Using ideal battery-capacity arithmetic, the project estimated about 26.4 hours of active use and roughly 287 days in the off state from a 2000 mAh cell. Real runtime will vary, but the assumptions and measurements are visible.
Stage 4: The firmware integration became an upstream contribution
The final article, Meshtastic Firmware Implementation, explains how Meshtastic separates a platform build environment, a hardware variant and optional modules. RetroMeshDevice defines its battery enable and ADC scaling, SSD1306 display, Wio-SX1262 pins and other board capabilities in that structure. This is what turns the PCB from an electrical assembly into a target the firmware can identify and build.
The keypad demanded more than configuration. Starting from Meshtastic’s existing keyboard abstraction, the author implemented an MCP23017 driver with device detection, interrupt-aware reads, configurable physical-to-logical key maps, single taps, multi-taps and long presses. Short presses cycle through character groups, while long presses can emit numbers or navigation actions. The custom mapping is especially important because PCB routing rarely assigns expander bits in the same order users see on the front panel.
That work was submitted to the official Meshtastic firmware project as pull request #11015. At the time this article was prepared, the pull request remained open, so RetroMeshDevice still relied on its own Meshtastic 2.8.0 build. Even so, the submission is a meaningful contribution. It takes a driver created for one competition device and proposes it as reusable support for other MCP23017-based keyboards inside the wider firmware ecosystem.
The enclosure completes the product argument
The enclosure was modeled around the PCB STEP export so the display, switch, key travel, antenna and 2000 mAh cell could be checked as one package. Project render: My Embedded Stuff.
The case was designed in Fusion 360 around the PCB’s STEP model rather than drawn as a generic box. That allowed the author to inspect section views, cutouts, key clearances, switch access and battery volume against the real assembly. The final photographs show an unmistakably handmade prototype, but also a coherent one: the antenna, screen, rotary input and keypad occupy intentional positions, and the enclosure is sized around a usable 2000 mAh cell.
The repository strengthens that physical proof with Gerbers, drill files, pick-and-place data, a bill of materials, precompiled firmware, test firmware and printable case files. A reader does not have to reverse-engineer the device from photographs. The path from source to object is available.
Why RetroMeshDevice earned its place at the top
RetroMeshDevice has a self-consistent product idea: short off-grid messages should remain possible on the object itself. Its keypad, display, rotary control and buzzer are not a list of optional features. Together they solve the usability problem created when a Meshtastic node no longer assumes a phone.
Its strongest achievement, however, is the quality of the record. The creator behind My Embedded Stuff describes an embedded-systems background spanning PCB design, microcontroller firmware, firmware reversing and low-level MPSoC work. The project reflects that breadth. The design is explained at circuit level, the assembly is photographed step by step, bring-up is separated from application firmware, current is measured on the whole board, mechanical errors are admitted, and the custom keypad work is offered upstream.
The video demonstration closes the loop by showing the physical communicator operating rather than relying on renders. The GitHub profile and project repository make the source and production evidence easy to continue exploring.
This is why the documentation is itself a community contribution. It teaches where a first PCB can fail, how to isolate an RF module from higher-level firmware, how to make power claims with visible assumptions, and how to shape a one-off driver into a candidate for shared infrastructure. RetroMeshDevice did not simply win by becoming a functioning handheld. It won by making the journey legible enough for other builders to learn from it.
EXPLORE THE PROJECT Watch the device in operation, then inspect the source, production files, test firmware, Meshtastic variant and enclosure files in the public repository.
RetroMeshDevice GitHub repository – Hardware, firmware, production files and photos
Designing the RetroMeshDevice PCB – Architecture and schematic decisions
PCB Assembly – Stencil, reflow and first-spin corrections
Hardware Bring-up and Initial Validation – Test runner and power measurements
Meshtastic Firmware Implementation – Variant structure and keypad driver
Meshtastic pull request #11015 – Proposed MCP23017 keyboard support
RetroMeshDevice video demonstration – Physical device overview
About My Embedded Stuff – Creator background and publishing purpose
About Author

This looks interesting. Do you have a list of components or even a kit that might be built?