DIY Drone: From Electronics Bench to Flying ESP32 Quadcopter
The first flight of a DIY drone is often the easiest part to imagine and the hardest to achieve. A minuscale quadcopter may look simple, but behind those spinning propellers is a very tightly integrated system of motors, sensors, firmware, and control algorithms that are working together every millisecond. Mechanical balance, battery weight, radio communication, and motor response must all align. Otherwise, one weak solder joint, reversed propeller, or poorly tuned control loop can make a promising weekend build a twitchy plastic mosquito.
For makers, engineers, and electronics students, the actual value goes beyond “getting it into the air.” It is understanding why it flies at all. A good DIY drone kit will provide you with enough structure to avoid irrational assumptions, while still leaving room to inspect the hardware, change the code, test the control modes, and even redesign small parts.
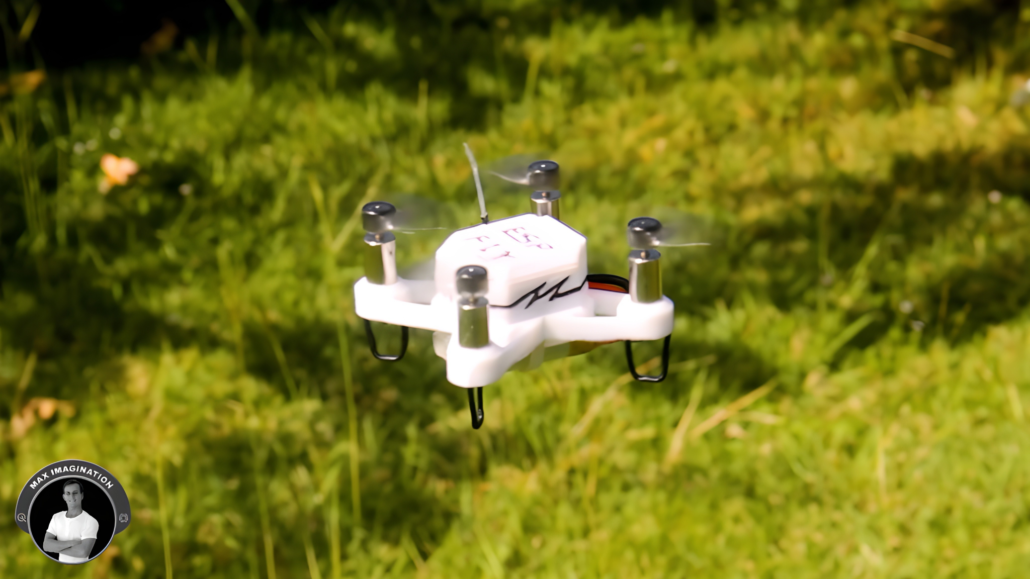
What Is Inside a DIY Drone?
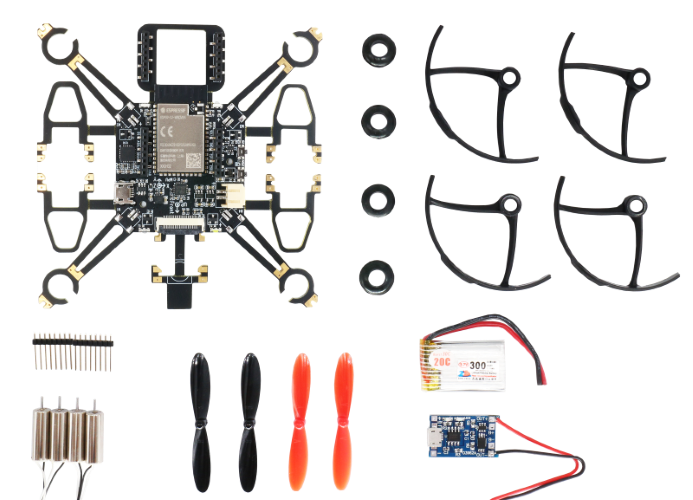
Every quadcopter, whether it is a palm-sized indoor flyer or a larger camera platform, solves the same major problem. That is, four motors must change speed hundreds of times per second so that the frame can remain level, rotate, climb, and descend. The main blocks are:
- Frame: Holds the motors, battery, flight controller, and propellers in fixed geometry.
- Flight controller: Reads sensors, runs control logic, and sends motor commands.
- IMU: A gyroscope plus accelerometer, which is used to estimate motion and tilt.
- Motor system: Brushed motors with MOSFET drivers for smaller drones, or brushless motors fitted with electronic speed controllers for bigger projects.
- Battery: LiPo, as energy density is more important than almost anything in flight.
- Firmware: Software layer that converts stick input and sensor data into motor output.
- Control link: Wi-Fi, ESP-NOW, radio receiver, Bluetooth, or another wireless method.
In a micro DIY drone, weight is brutal. Add a larger battery and flight time might not improve since the motors now work harder. Add a camera and the center of gravity changes. Print a more powerful frame and you may lose agility. Nice theory; physics still sends the bill.
DIY Drone Arduino, ESP32, or Ready Kit?
There are three ways to start.
| Build route | Best for | Main advantage | Main challenge |
| Scratch build | Experienced makers | Full hardware freedom | Debugging takes time |
| DIY drone Arduino project | Sensor and control learning | Beginner-friendly coding ecosystem | Stable flight needs careful timing |
| DIY drone ESP32 platform | Wireless control and embedded experiments | Wi-Fi, BLE, ESP-NOW, MCU options | Firmware setup can be less forgiving |
| DIY drone kit | Beginners and classrooms | Matched parts, shorter build path | Less freedom than full custom design |
Arduino-style development makes more sense for learning IMU readings, PWM concepts, battery monitoring, and basic control logic. Espressif’s Arduino core also supports ESP32-family boards to give makers access to familiar Arduino workflows on ESP32 hardware.
An ESP32 route becomes more interesting when wireless control, compact size, and firmware experimentation are important. Espressif’s ESP-Drone documentation describes ESP32/ESP32-S2/ESP32-S3 drone platforms that can be controlled through a mobile application or gamepad over Wi-Fi, as well as support for STEAM education and functional extension.
However, the kit path is the dominant option for the majority of first builds. Not because it is “easier” in a lazy way, but because matched hardware removes boring uncertainty. You can concentrate on flight behavior instead of hunting for parts that are incompatible.
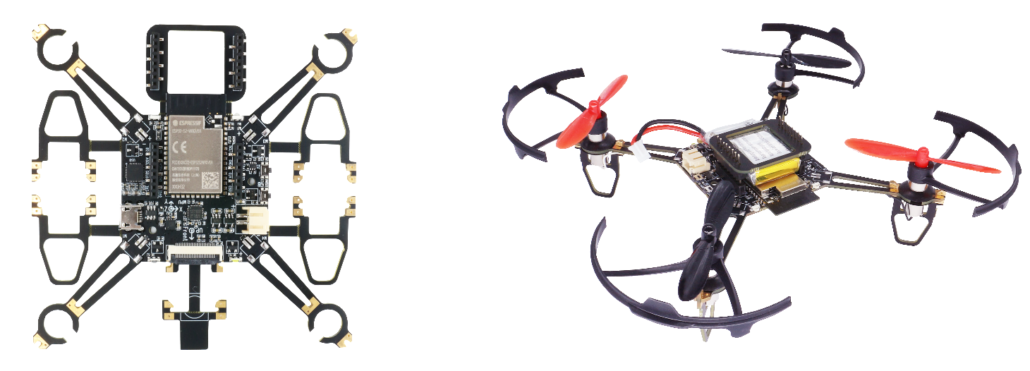
Featured DIY Drone Kit: Seeed Studio ESP-FLY
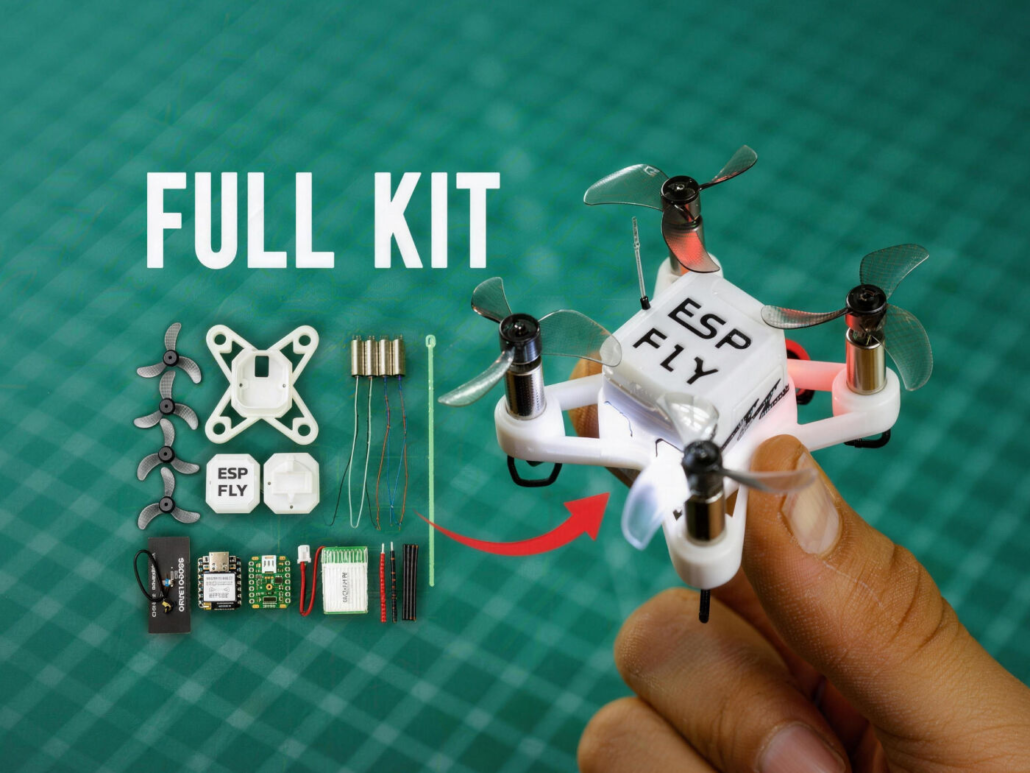
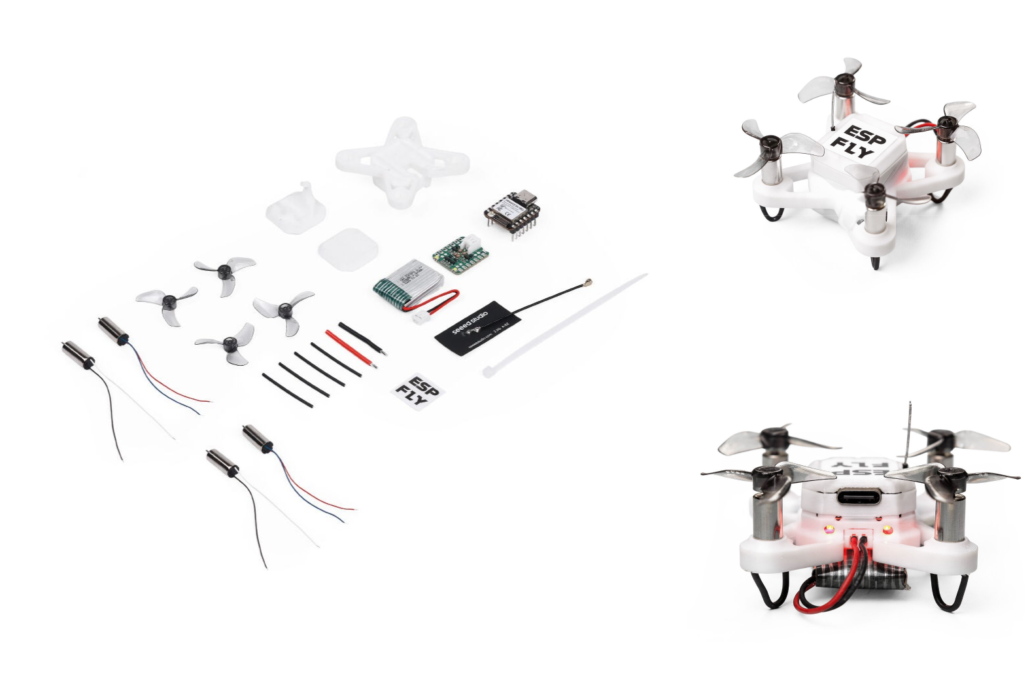
The ESP-FLY DIY Kit is a micro quadcopter based on the Seeed Studio XIAO ESP32-S3. It is a lightweight DIY micro drone kit co-created with Max Imagination for STEM education and hobbyists. Wi-Fi mobile-app control and ESP-NOW radio-controller options are included.
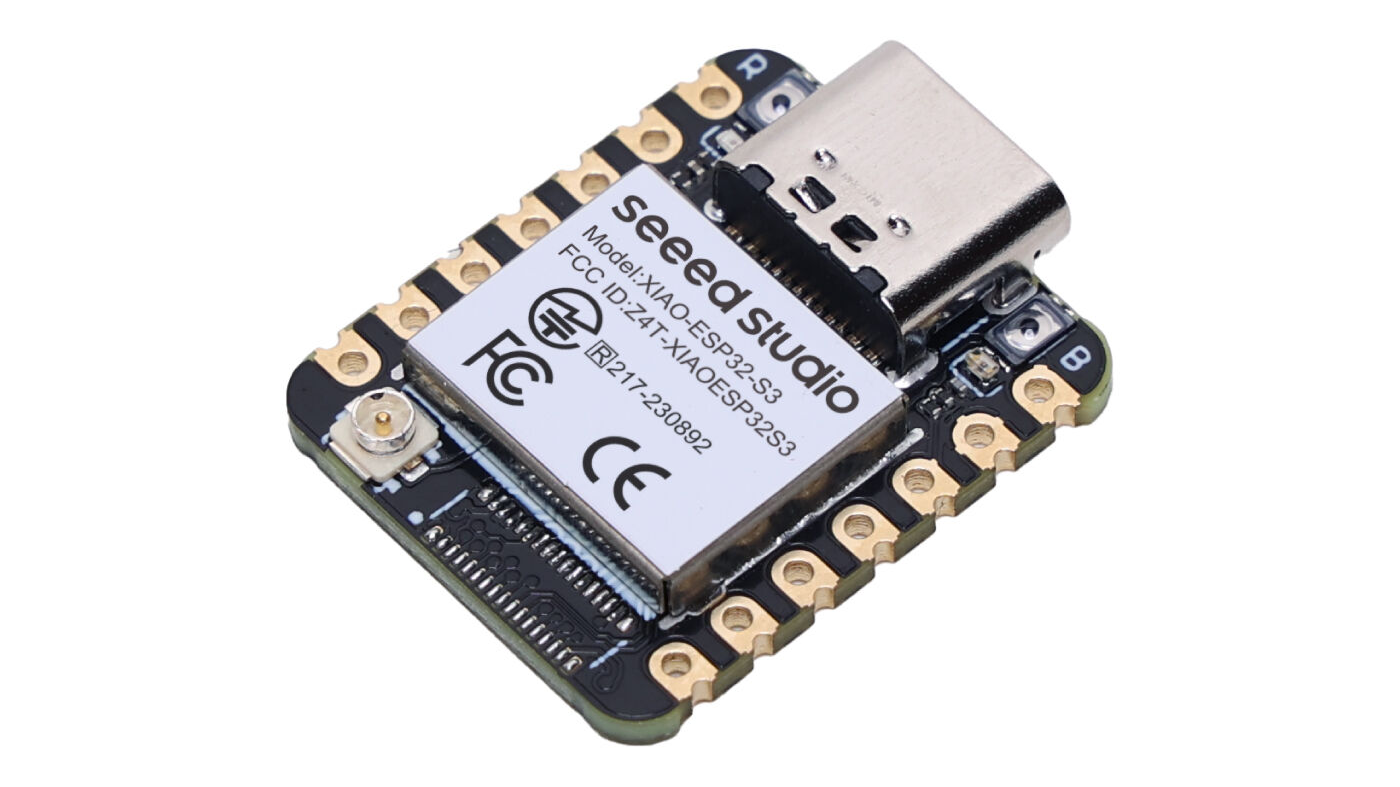
Technically speaking, ESP-FLY is more useful than a toy drone, as the hardware is visible, programmable, and hackable. The XIAO ESP32 S3 is the main flight controller, and meanwhile, a custom IMU/motor-driver board controls four high-speed coreless motors. Not only that, but it is a 50 mm class micro drone for experimentation, education, and hobby use.
Key ESP-FLY Specifications
- A dual-core 240 MHz Xtensa LX7 processor.
- 8 MB Flash.
- 8 MB PSRAM.
- Wi-Fi.
- Bluetooth 5.0.
- MPU-6050 6-axis IMU.
- Four SI2300 MOSFET motor drivers.
- 615 coreless DC motors.
- A 1S 3.7 V 250 mAh LiPo battery.
- USB-C programming.
- Development workflows (ESP-IDF, VS Code/PlatformIO, or Betaflight Configurator).
The size is also important. ESP-FLY is listed at 67 x 67 x 31 mm along with propellers, 25 g with its LiPo battery, and 28 g with an FPV camera. Flight time is 5 minutes – up to 5.5 minutes tested under suitable conditions. Control range is 50 m over Wi-Fi and up to 200 m with ESP-NOW.
What ESP-FLY Can and Cannot Do
That said, it should be framed honestly. ESP-FLY is a manually controlled micro drone. It supports Angle and Acro modes, but keep in mind that it does not include altitude hold, GPS, or autonomous navigation. That is not a flaw. In a simple way, it tells readers what kind of project they are buying, meaning a learning platform, not a self-flying camera drone.
How to Build a DIY Drone: High-Level Steps
A ESP32 micro drone build moves like this:
Inspect the Kit Parts.
Before touching the soldering iron, make sure that the frame, the motor direction labels, the propeller pairs, the battery connection, the antenna, and the motor wires are in good condition.
Assemble the Power and Motor Path
This is the moment when neat soldering is necessary to be implemented. Remember, a weak joint may seem to be fine on the bench and fail when subjected to vibration.
Mount the Controller Stack
A flawless mechanical alignment is required for the XIAO ESP32-S3 and the IMU/motor-driver board in order to ensure that the sensor readings are interpreted correctly.
Flash or Modify Firmware
Beginners can begin with the recommended firmware path. On the other hand, advanced users have the option of exploring ESP-Drone or ESP-FC workflows.
Connect the Controller
Your initial option should be to use the phone-based Wi-Fi control, and if you want a more precise stick response, you may switch to the ESP-NOW or radio control.
Run Preflight Checks
For the sake of preflight checks, verify the direction of the propeller, the order of the motors, the voltage of the battery, the frame rigidity, and the failsafe behavior.
Test Low. Very Low
When doing first hover testing, it is recommended to do it on a soft or cushioned surface, indoors, and away from people (or at least faces), pets, wires, and coffee cups.
Links to instructional materials are provided on the official ESP-FLY repository including the ESP-FLY drone tutorial video and a tutorial on radio-controller/Betaflight firmware.
Watch the official ESP-FLY tutorial video offered by Max Imagination to learn the precise assembly sequence, how to configure the firmware, and how to do the first hover test.
Where 3D Printing Fits
A DIY drone 3D print project is pretty easy. Print a frame, attach motors, fly. The frame must remain light, rigid, symmetric, and repairable. Flexible arms create oscillation. Heavy ducts protect propellers but reduce thrust margin. Brittle parts crack during rough landings.
For ESP-FLY-style builds, 3D printing is most beneficial for frame iteration, top covers, FPV camera mounts, battery holders, and landing gear. Keep walls thin, avoid unnecessary decorative mass, and print a few sacrificial frames. Crashes are not a maybe. They are part of tuning.
Use Cases Beyond “It Flies”
A small DIY drone for beginners can still teach serious engineering ideas.
STEM and Classroom Learning
In the context of a classroom, it might connect embedded systems, soldering, wireless communication, battery safety, and mechanical design all in one object.
Firmware and Control-Loop Experiments
Firmware learners get immediate feedback (adjust parameter, flash, test, observe).
Indoor FPV Practice
For FPV practice, micro quads are safer and cost-effective than bulkier outdoor drones.
Research and Prototyping
When it comes to researchers or advanced makers, it can be a small testbed for control loops, human-input mapping, telemetry displays, and lightweight payload experiments.
To put it in a nutshell, applications such as STEM education, DIY maker projects, indoor FPV flying and training, research and prototyping, and hobby experimentation can be considered.
Safety, Legal Checks, and Sensible Limits
Small does not mean harmless. Propellers can cut skin, LiPo cells can be damaged by abuse, and indoor flight near people is still risky. Use eye protection during early tests, remove propellers while flashing or debugging motor output, and never charge a damaged LiPo battery unattended.
Rules differ by country. In the USA, the FAA says recreational flyers must register drones that weigh 250 g or more, take the free TRUST test, and keep the aircraft within visual line of sight. ESP-FLY’s weight is far below 250 g with its battery, but payloads, cameras, or different batteries can change takeoff weight. Builders should still check local rules before flying outside.
Final Buying Checklist
Before choosing a DIY drone platform, check these points:
- Does the kit include matched motors, props, battery, and frame?
- Is the firmware open enough to inspect or modify?
- Are control options clear, such as phone, radio, gamepad, or PC?
- Are spare propellers and motors easy to source?
- Is the documentation strong enough for your skill level?
- Is the drone light enough for safe indoor testing?
- Can the frame support your future experiments, such as FPV or 3D-printed parts?
ESP-FLY fits when the goal goes beyond just buying a mini quadcopter to learning how a micro drone works from the inside. It provides beginners with a path into flight electronics as well as leave room for firmware work, hardware inspection, FPV experiments, and small mechanical changes. That is the sweet spot. Structured enough to start, open enough to keep going.
FAQ
How much does it cost to build a DIY drone?
A basic DIY drone can cost $50-$200, depending on its size, controller, motors, and included tools. The ESP-FLY kit is at $59.99 before shipping and optional accessories.
Can I 3D print a drone?
You can 3D print the frame, propeller guards, battery holder, and camera mount. Nevertheless, the motors, batteries, sensors, and control electronics are all components that need to be installed independently. The ESP-FLY makes use of a lightweight 3D-printed 50 mm frame.
Is a DIY drone suitable for beginners?
Yes, when beginners choose a documented DIY drone kit with matched parts, prepared firmware, and tutorial support. Some soldering, calibration, and careful preflight testing are still required.
Can I build a DIY drone with Arduino or ESP32?
Both platforms can work. ESP32 boards suit compact drones as they combine processing power with Wi-Fi and Bluetooth. ESP-FLY uses the XIAO ESP32-S3 as its main flight controller.
Do I need to program the flight controller myself?
No. You can begin with compatible open-source firmware and modify the code later to explore sensor filtering, control loops, wireless communication, or failsafe behavior.
How long can a DIY micro drone fly?
Most small DIY drones fly for only a few minutes since battery capacity is limited by weight. ESP-FLY provides five minutes of standard flight time with its 250 mAh LiPo battery.
Can I control a DIY drone with my phone?
Yes, provided the hardware and firmware support Wi-Fi control. ESP-FLY can connect directly to a smartphone through its own Wi-Fi access point and also supports ESP-NOW radio control.
Can I add an FPV camera to a DIY drone?
Yes, but the camera must be lightweight, enough for the motors and frame. If the weight is additional, it may shorten flight time, change the center of gravity, and reduce stability.
Do I need to register a DIY drone?
It depends on location and takeoff weight. In the United States, recreational drones weighing 250 g or more need FAA registration. Pilots must still follow applicable operating and airspace rules.
>> Read more
About Author

can I buy it locally in Indonesia?
Hi, the ESP-FLY DIY Kit is available on Seeed Studio and can be shipped to Indonesia. However, the kit is currently on backorder, with an estimated warehouse arrival date of September 29, 2026.