Inspired by Microduck? Explore Open-Source Physical AI Robots
MicroDuck has recently attracted a lot of attention from the robotics community. Its small form factor makes it approachable, but the technology behind it points to a much bigger shift: robots are increasingly moving from systems that simply execute programmed motions toward systems that can learn from data, perceive their surroundings, and adapt their behavior.
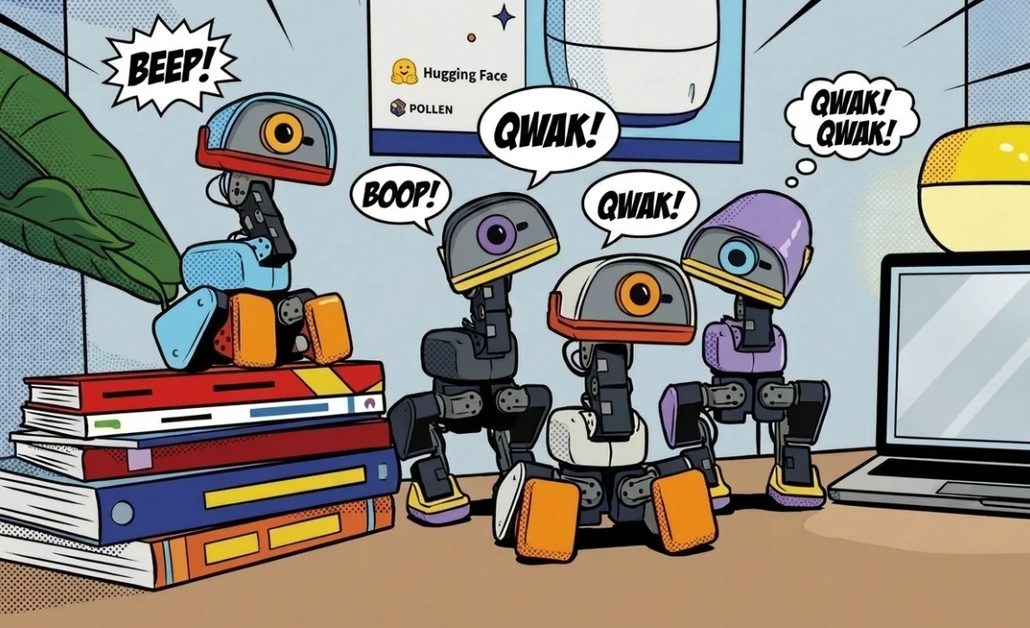
This shift brings together technologies that developers may have encountered separately: Robot Learning, Reinforcement Learning, Simulation, Computer Vision, LeRobot, Sim2Real, Edge AI, and Physical AI.
The difficult part for someone just getting started is understanding how these pieces actually fit together.
What does Jetson do in a robot-learning workflow? What does a robot-learning dataset contain? How does teleoperation become training data? Why train a robot in simulation if the final goal is to control a physical robot? And after a model has been trained, how does it actually produce movement?
MicroDuck provides a good starting point because its reinforcement-learning workflow connects many of these pieces into one practical system.
But you don’t have to wait for a MicroDuck to start experimenting.
With platforms such as SO-ARM101, reBot Arm B601-RS, and LeKiwi, you can explore different parts of the same Physical AI stack today.
This article follows that journey from teaching a robot a simple behavior to building systems that can perceive, learn, manipulate objects, move through an environment, and respond to natural-language commands.
Table of Contents
- MicroDuck: Where Robot Learning Starts
- Your MicroDuck Hasn’t Arrived Yet? Start with a Robotic Arm
- From Robot Learning to Real-World Manipulation: Meet reBot Arm
- Why Simulation Matters: From MuJoCo and Isaac to Sim2Real
- From a Robotics Tutorial to a Real Workflow: Seeed Workshop
- Once You Understand One Robot, the Ecosystem Opens Up
- From MicroDuck to Physical AI
- Where Should You Start?
- Explore the Seeed Studio Robotics Ecosystem
1. MicroDuck: Where Robot Learning Starts
A traditional robotics program usually tells a robot exactly what to do. If you want a robot to walk, for example, you can manually define the position, timing, and trajectory of its joints.
Reinforcement learning takes a different approach. Instead of specifying every movement, you define a task and a way to evaluate the robot’s behavior. The robot then performs the task repeatedly, receives feedback, and gradually improves a policy that determines which actions it should take.
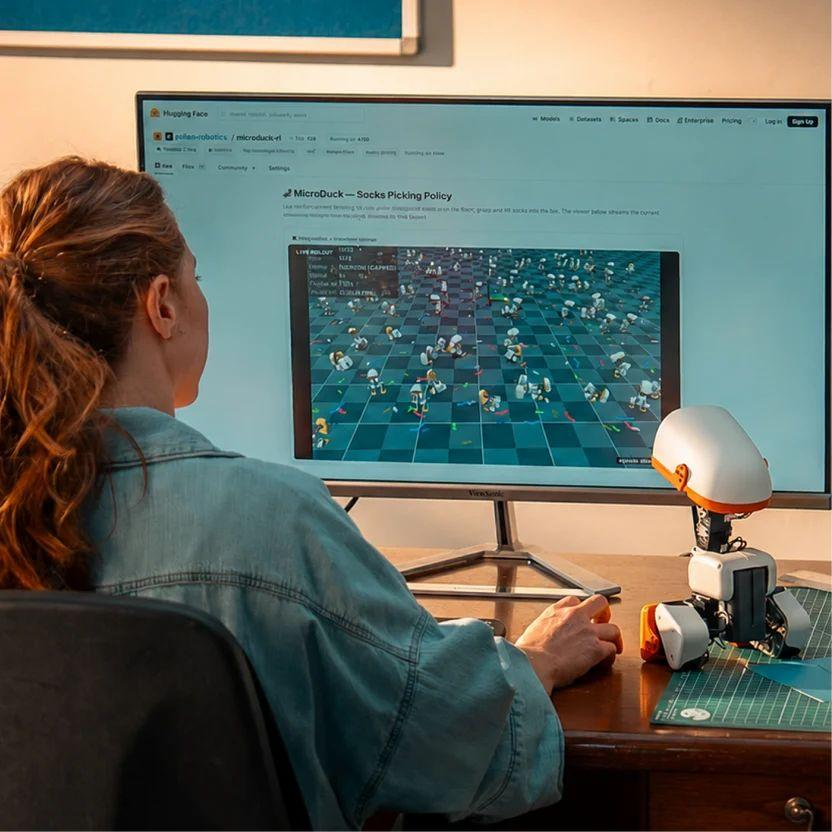
The MicroDuck workflow from Seeed Studio is a practical example of this approach.
What does Jetson actually do?
The first piece is the NVIDIA Jetson Orin NX 16GB.
Jetson is not the algorithm that teaches MicroDuck to walk. It is the edge AI computing platform that provides the GPU resources needed to run the simulation, training, and later inference.
The workflow combines Jetson Orin NX, JetPack, CUDA, MuJoCo, PPO, and ONNX, but each technology has a different job.
Jetson provides the computing hardware.
CUDA provides GPU acceleration for workloads that benefit from parallel computation.
MuJoCo provides the physics simulation in which the robot can practice.
PPO (Proximal Policy Optimization) updates the robot’s policy during reinforcement learning.
ONNX provides a portable representation of the trained policy for inference and deployment.
Together, they form a development pipeline rather than simply a collection of AI keywords.
Where does MicroDuck practice?
This is where MuJoCo becomes important.
Instead of placing a physical MicroDuck on the floor and asking it to learn by repeatedly falling, the workflow creates a simulated version of the robot.
The simulator handles the physics of the virtual environment, including gravity, contact, movement, and interactions between the robot and its surroundings.
The robot can then try a behavior, fail, reset, and try again.
For example, when training a walking policy, the simulated MicroDuck can repeatedly attempt to move forward while the system evaluates whether it maintains balance and follows the desired movement.
Because the environment is simulated, thousands of trials can be performed without physically moving or potentially damaging the robot.
How does PPO teach the robot?
The training algorithm used in the workflow is PPO, or Proximal Policy Optimization.
You do not need to start with the mathematics behind PPO to understand what is happening.
At a practical level, the learning loop looks like this:
Take an action → observe the result → calculate a reward → update the policy → try again.
If the robot performs behavior that matches the objective, the reward encourages the policy in that direction. If the robot falls or performs poorly, the reward provides a different signal.
After many iterations, the policy gradually becomes better at selecting actions that produce the desired behavior.
This is why the policy is the central output of reinforcement learning. It represents the behavior the robot has learned from its interaction with the simulated environment.
From training checkpoint to robot inference
There is an important difference between training and deployment.
During training, the system produces checkpoints containing the information needed to continue or evaluate the training process. After training, the policy can be exported to ONNX for inference.
The workflow therefore looks roughly like:
Jetson → MuJoCo simulation → PPO training → trained policy → ONNX export → robot inference
Once exported, the policy can be used to run behaviors on the robot, including examples such as walking, standing, sit/stand transitions, ground picking, forward rolling, and ball kicking.
This is what makes the workflow interesting from a developer perspective. You are not simply downloading a robot demo. You can follow the path from building the training environment to creating a policy and eventually deploying that policy to hardware.
Explore the MicroDuck Reinforcement Learning on Jetson tutorial →
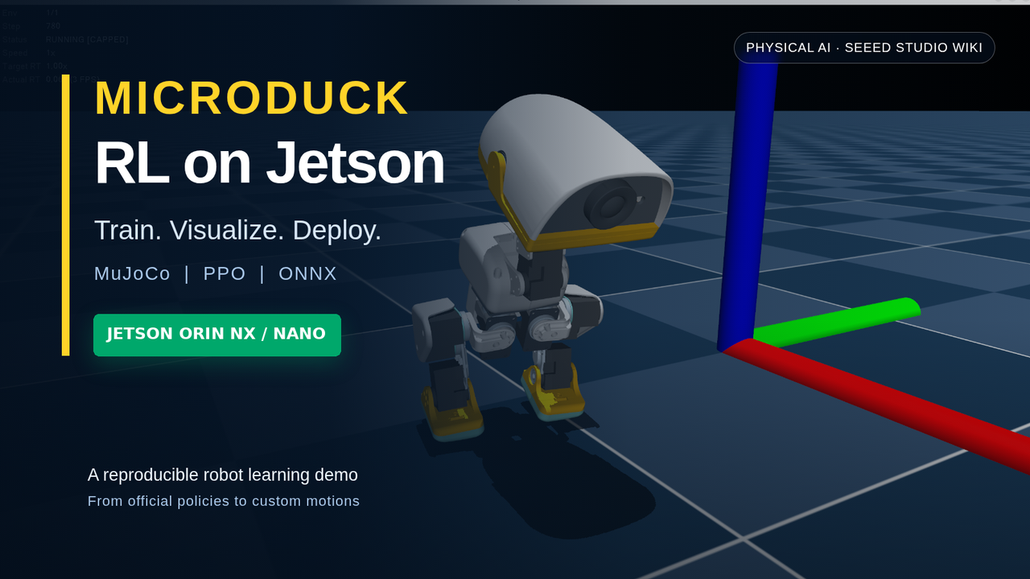
What if you want to teach MicroDuck something new?
The official workflow also provides a path beyond predefined behaviors.
A new behavior can be divided into motion phases, with reward functions defining what the training process should consider successful.
For example, imagine that you want MicroDuck to perform a bowing motion. You could define the different phases of the movement, determine what posture should receive a positive reward, and specify when the behavior should be considered complete.
The workflow then becomes:
Define the task → configure the environment → train in simulation → visualize and evaluate the checkpoint → export the policy → deploy it → refine the behavior
This is a useful way to think about reinforcement learning in robotics. The goal is not simply to understand an algorithm such as PPO. The goal is to build a repeatable process for turning a desired physical behavior into a trainable and deployable policy.
2. Your MicroDuck Hasn’t Arrived Yet? Start with a Robotic Arm
If you are waiting for your MicroDuck, a robotic arm can be one of the easiest ways to start understanding Robot Learning.
A quadruped robot makes the learning problem exciting, but it also introduces balance, locomotion, and many degrees of freedom at the same time. A robotic arm gives you a more controlled environment in which the relationship between human demonstration, robot movement, data, and learning is easier to observe.
This is where SO-ARM101 becomes a useful starting point.
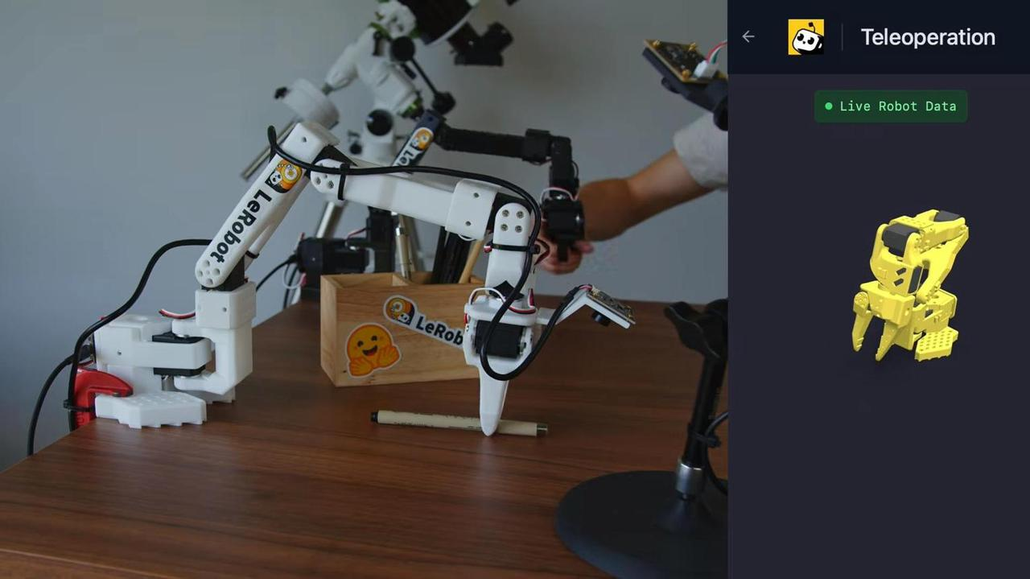
SO-ARM101 is an open-source robotic arm designed to work with the Hugging Face LeRobot ecosystem. It provides an accessible platform for experimenting with teleoperation, data collection, imitation learning, and simulation.
Seeed also provides resources connecting SO-ARM101 with LeRobot, Isaac Lab, and NVIDIA Isaac GR00T.
Explore SO-ARM101 + LeRobot + Isaac Lab + GR00T →
Start by making the robot follow you
The first step does not need to involve an AI model.
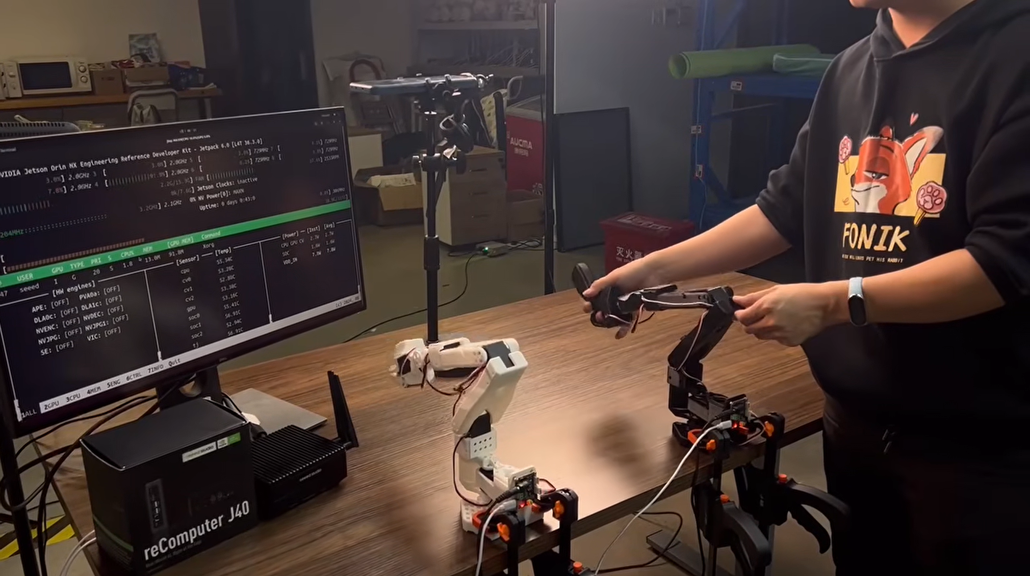
After assembling and calibrating the system, you can use a Leader-Follower configuration for teleoperation.
You move the Leader Arm, and the Follower Arm reproduces the movement.
This simple interaction introduces an important concept in modern Robot Learning:
A human demonstration can become training data.
Imagine that your task is to pick up a block and place it at another location.
Instead of writing a complete sequence of joint commands by hand, you can perform the task yourself while the system records what happened.
Repeat the task several times, and you now have multiple demonstrations of the same behavior.
What is actually inside a robot-learning dataset?
A robot-learning dataset is more than a video of someone controlling a robot.
Depending on the setup, an episode can contain synchronized information such as:
- Camera observations
- Robot joint positions
- Robot states
- Actions generated during teleoperation
- The sequence of states and actions throughout the task
For a pick-and-place task, a simplified episode might look like:
Camera observation → robot state → operator action → next state → next observation → next action
Repeat this process over many demonstrations and you create a dataset describing how the task was performed.
This is the bridge between teleoperation and Robot Learning.
The robot first learns from examples of what you demonstrated rather than from a manually written trajectory.
Why does data quality matter?
Once you start working with real robots, the dataset becomes just as important as the model.
Suppose one demonstration approaches an object from the left, another approaches from the right, and another starts with the object in a completely different location.
A learning algorithm now has to deal with much more variation.
On the other hand, if the demonstrations consistently use the same camera setup, task space, object placement, and successful grasping behavior, the dataset provides a much clearer learning signal.
This is why practical Robot Learning often follows a cycle of:
Calibrate → demonstrate → record → inspect → improve the data → train
From dataset to policy
Once demonstrations have been collected, the dataset becomes the input to policy training.
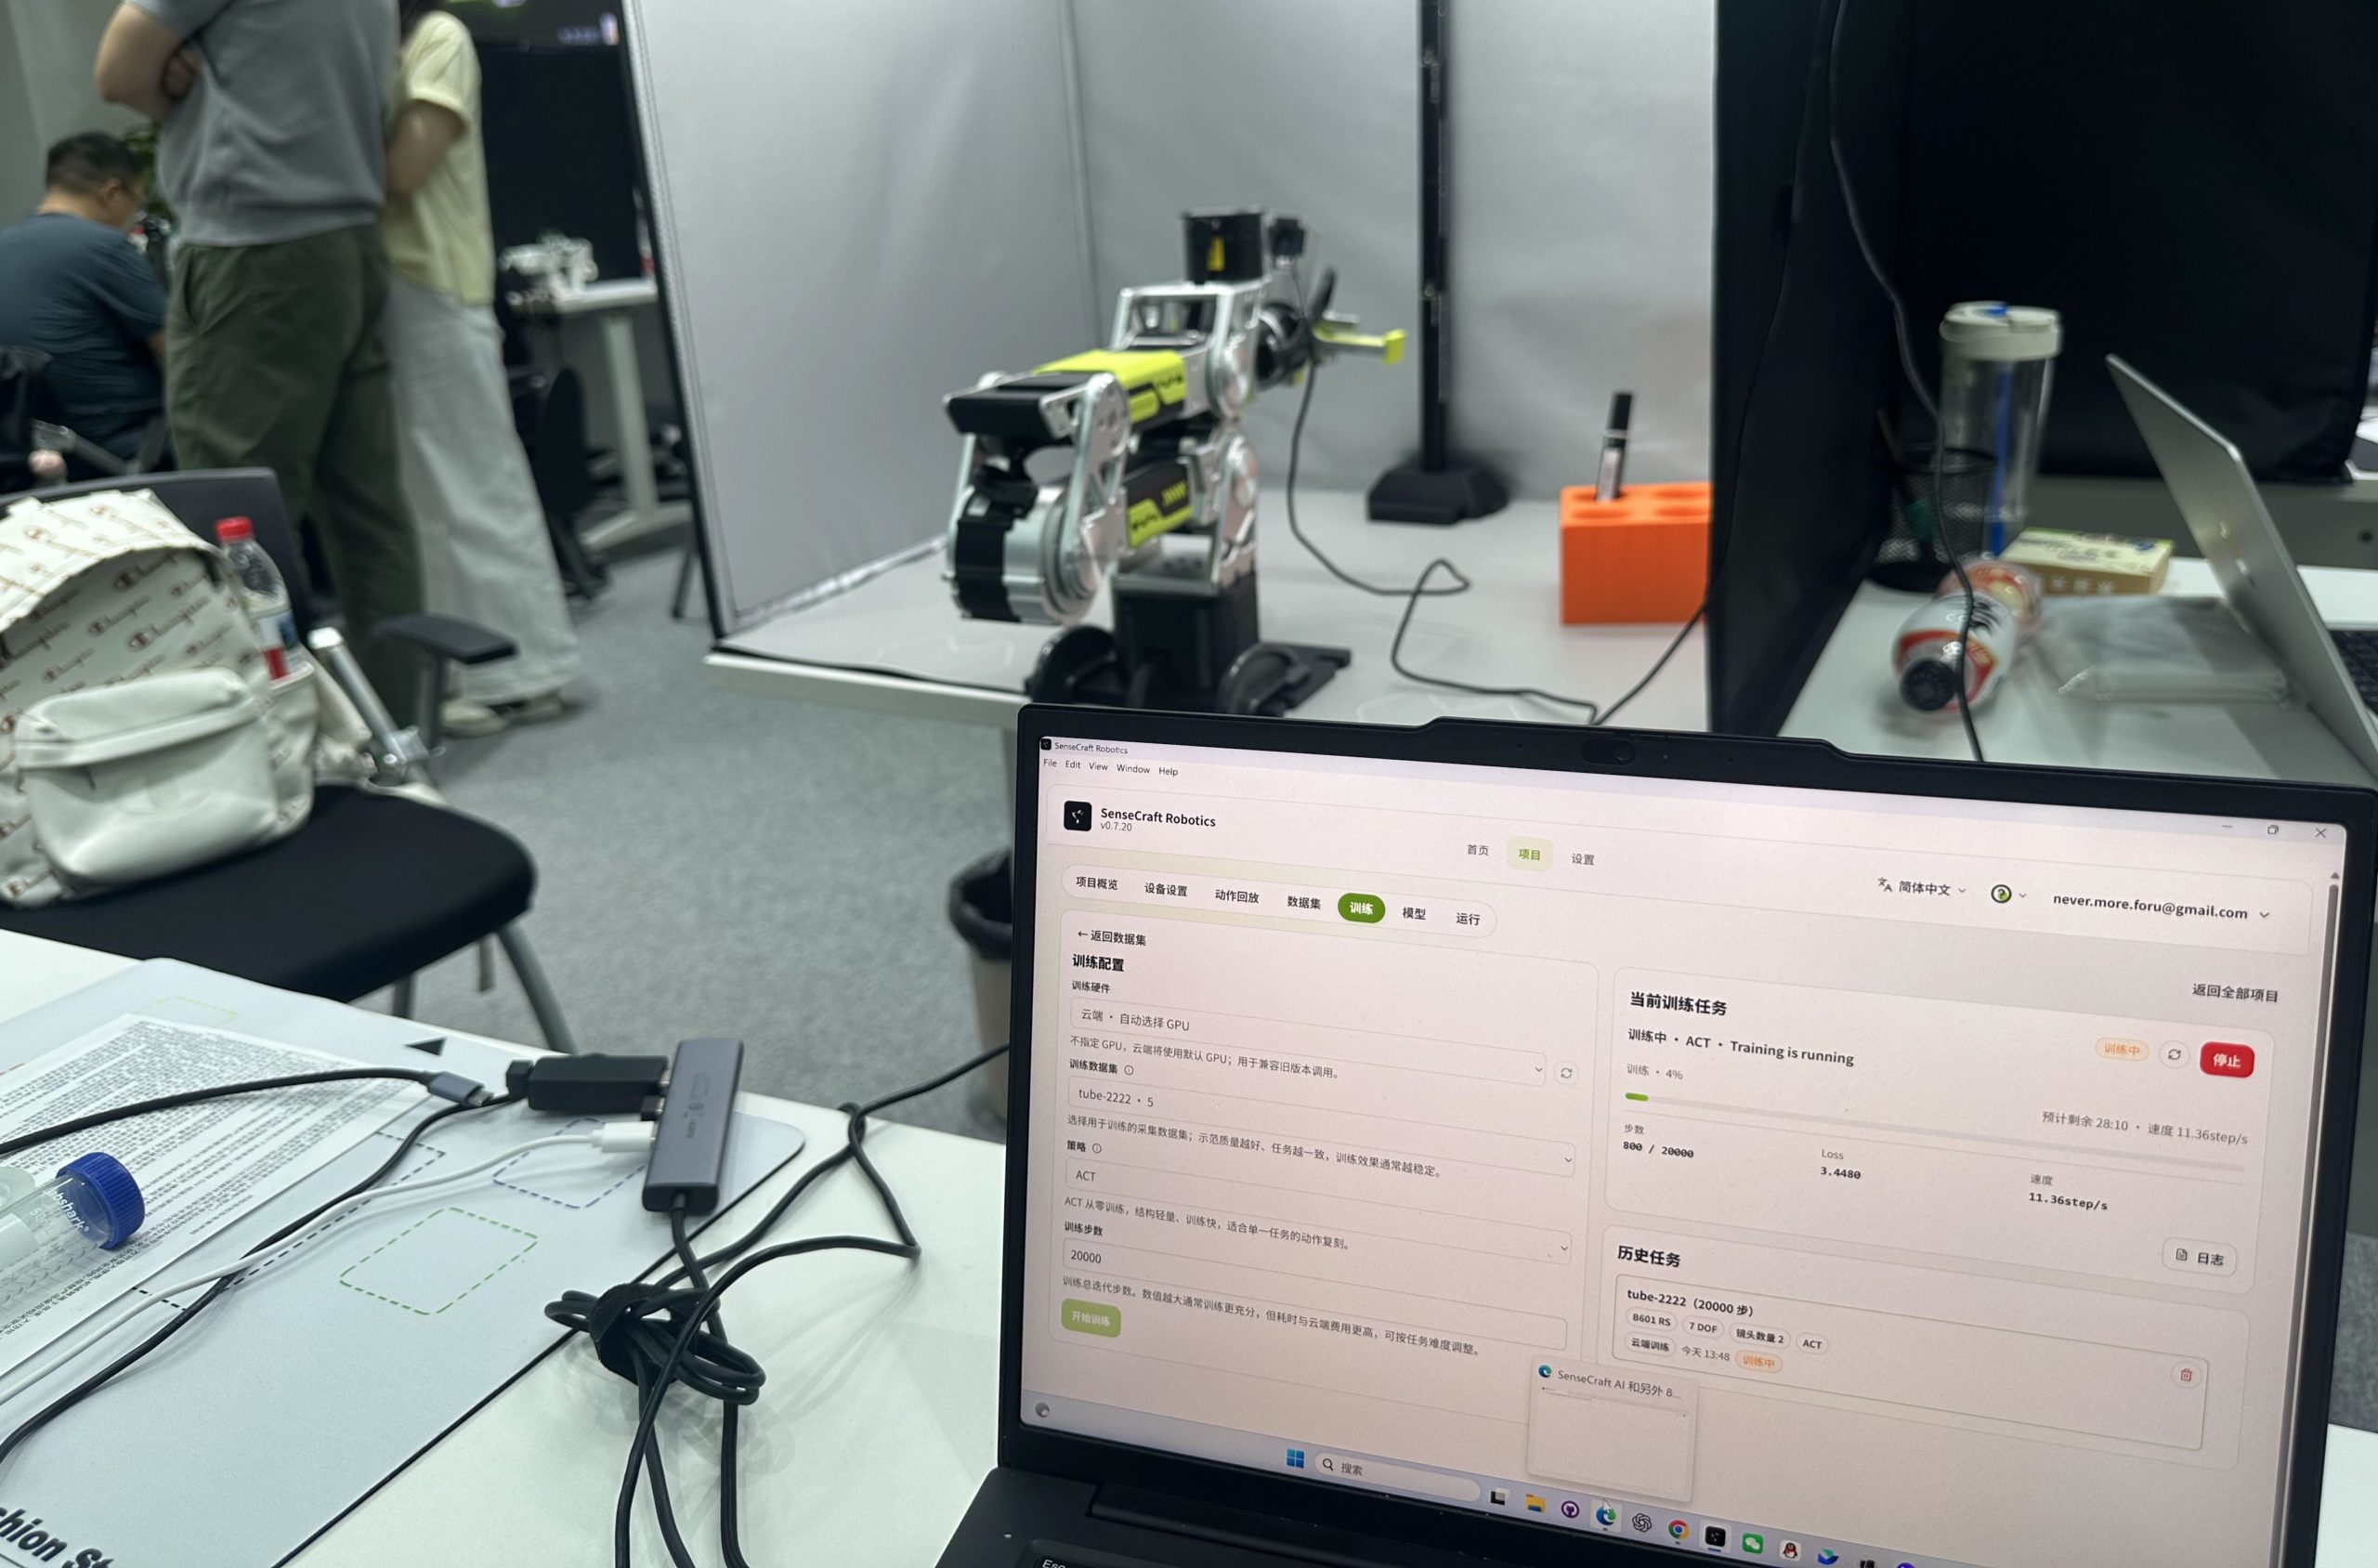
For example, the current reBot/LeRobot workflow provides an ACT policy training path using collected demonstrations. The trained policy can then be evaluated on the physical robot without continuous human teleoperation.
The conceptual flow is:
Human demonstration → dataset → policy training → trained policy → autonomous execution
This is one of the most important ideas to understand before moving into more advanced Physical AI.
A model is not magically learning because a camera is attached to a robot. The learning system needs examples that connect what the robot observes with the actions that successfully solve the task.
The next step: Sim2Real
Once you can collect demonstrations and train a policy, the same idea can be extended into simulation.
NVIDIA’s official SO-101 Sim-to-Real tutorial provides a practical path connecting calibration, teleoperation, data collection, training, simulation, evaluation, and deployment on a real robot.
NVIDIA SO-101 Sim-to-Real Tutorial →
For developers working with SO-ARM101, Seeed’s resources also connect LeRobot with Isaac Lab and NVIDIA Isaac GR00T, providing a path toward more advanced robot-learning and simulation workflows.
3. From Robot Learning to Real-World Manipulation: Meet reBot Arm
SO-ARM101 is a useful way to understand how robots can learn from demonstrations.
The next question is more ambitious:
What happens when the robot also needs to perceive objects, calculate where they are, and manipulate them autonomously?
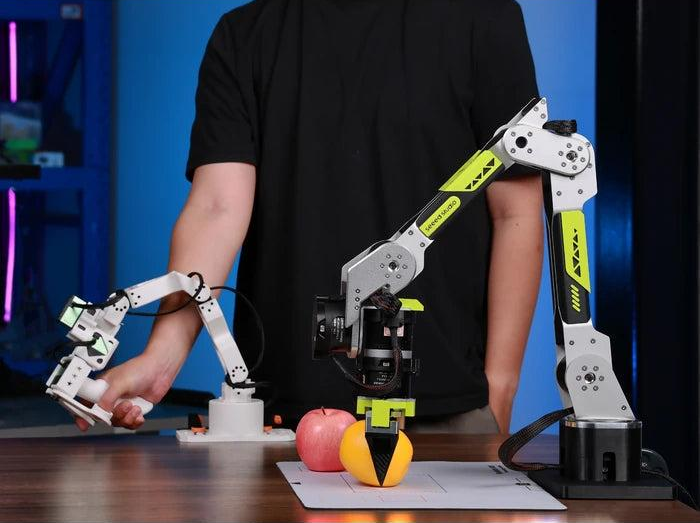
This is where reBot Arm B601-RS becomes particularly interesting.
reBot Arm is an open-source robotic arm platform from Seeed Studio designed for experimentation with robot control, Robot Learning, perception, and Physical AI.
It supports an open development stack that includes Python, ROS 1/2, LeRobot, MuJoCo, Isaac Sim, and Pinocchio, allowing developers to move between direct control, learning, kinematics, and simulation.
Rather than looking at these technologies as a feature list, let’s follow one actual task.
Suppose the goal is:
Recognize an object, pick it up, and place it at a predefined location.
That seemingly simple task contains several layers.
Step 1: Calibrate the robot
Before collecting data or running a learned policy, the robot needs to have a consistent relationship between its physical joints and the software representation of those joints.
Calibration is particularly important for a Leader-Follower setup because the follower needs to reproduce the intended movements accurately.
It also becomes important when transferring policies between robots or configurations. If the physical robot and the software disagree about joint positions, even a correctly trained policy can produce unexpected movements.
So the first stage is not AI.
It is:
Make sure the robot and the software agree about where the robot actually is.
Step 2: Teleoperate the robot
After calibration, the operator can control the robot through a Leader-Follower setup.
The human performs the task, while the follower reproduces the motion.
At this point, you can also connect cameras and begin collecting demonstrations.
The system is now capturing two types of information at the same time:
What the robot sees
and
What the human tells it to do.
That produces the foundation for Robot Learning.
The workflow becomes:
Human demonstration → robot motion → recorded observation/action data
Explore the reBot Arm + LeRobot workflow →
Step 3: Train a policy from the demonstrations
After enough demonstrations have been collected, the dataset can be used to train a policy.
The current reBot + LeRobot workflow provides an ACT training path using collected demonstrations and also documents more advanced policy options such as Pi0/Pi0.5.
The important distinction is between data collection and training.
During data collection, the human is showing the robot what successful behavior looks like.
During training, the model is learning a relationship between observations and actions from those examples.
The resulting policy can then be evaluated on the robot.
The complete learning loop is therefore:
Demonstrate → collect dataset → train policy → evaluate → improve dataset or training → deploy
This is a much more realistic picture of Robot Learning than simply saying “train an AI model.”
Step 4: Give the robot eyes
Now we can remove the human from part of the loop.
An RGB-D camera can provide both color information and depth information about the scene.
The robot can then use a vision model to identify the object it needs to manipulate.
For example, the reBot visual grasping workflow supports approaches such as YOLO + OBB for object detection and orientation estimation, with GraspNet available for 6D grasp pose estimation. (wiki.seeedstudio.com)
But detecting an object is not enough.
The system also needs to convert the camera’s understanding of the object into coordinates that the robot can use.
This is where hand-eye calibration becomes important.
Step 5: Convert vision into robot movement
The camera and robot use different coordinate systems.
The camera might determine that:
“The object is here.”
But the robot needs to know:
“Where is that position relative to my base and end effector?”
Hand-eye calibration establishes the transformation between those coordinate systems.
Once that transformation is available, the system can convert the object’s position from the camera frame into the robot’s coordinate frame.
The workflow becomes:
Camera → object detection → depth/pose estimation → coordinate transformation → target pose → robot motion
This is the step that turns:
“The AI found the object.”
into:
“The robot knows where to move.”
Step 6: Plan and execute the grasp
Once the target pose is known, the robot still needs to determine whether its arm can actually reach that position.
The system can use kinematics and motion planning to calculate a suitable configuration for the arm.
The complete manipulation process can therefore look like:
Detect object → estimate position → transform coordinates → calculate reachable pose → move arm → close gripper → lift → move to target → release
This is what makes the reBot workflow useful for understanding Physical AI.
The AI model is only one component.
A working physical system requires perception, calibration, kinematics, planning, control, and hardware to work together.
Explore the reBot Arm Visual Grasping Workflow →
4. Why Simulation Matters: From MuJoCo and Isaac to Sim2Real
At this point, you might ask:
Why not simply train everything on the real robot?
The answer is that physical trial and error is expensive.
A simulation can reset a failed experiment immediately. A physical robot cannot always do that without human intervention, and repeated collisions or failed grasps can damage hardware.
Simulation also makes it possible to run large numbers of experiments and systematically change the environment.
This is why tools such as MuJoCo, NVIDIA Isaac Sim, and Isaac Lab have become important in modern robotics workflows.
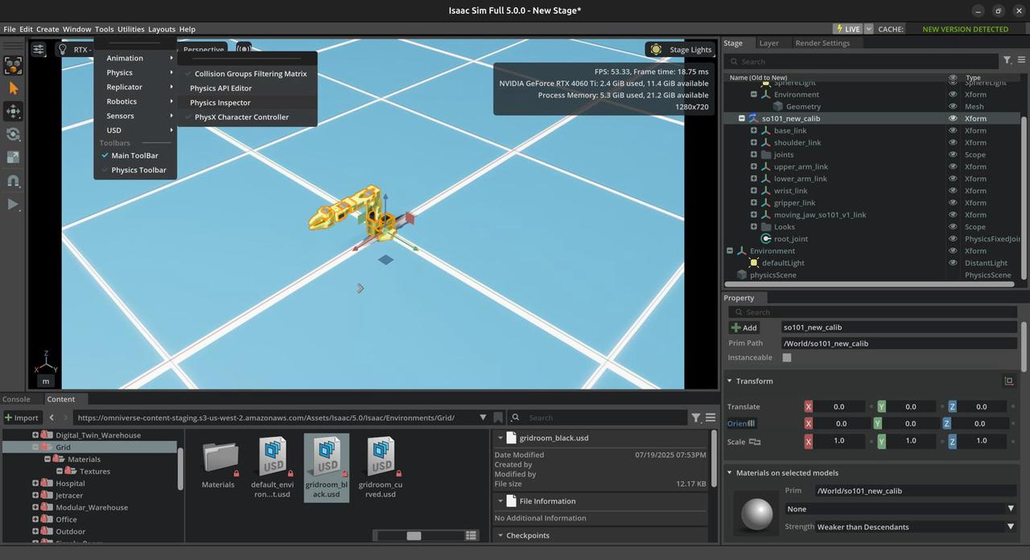
Simulation gives the robot a safe place to practice
Imagine training a robot to pick up a cup.
In simulation, the robot can repeatedly:
See the cup → calculate a grasp → move toward it → close the gripper → check the result
If it fails, the environment can reset and the robot can try again.
For reinforcement learning, this can happen across many simulated environments in parallel.
For imitation learning, simulation can be used to evaluate a learned policy before sending it to the physical robot.
For manipulation, simulation can also help developers test trajectories, inverse kinematics, collision behavior, and different grasping strategies.
But there is a fundamental problem.
Simulation is not reality
The simulated cup may have a different friction coefficient from the real one.
The simulated camera may produce cleaner images.
The real robot has motor tolerances and mechanical backlash.
The physical object may be a few centimeters away from where the simulation expected it to be.
A policy that succeeds perfectly in simulation can therefore fail as soon as it encounters the physical world.
This is the problem that Sim2Real addresses.
Sim2Real is an iterative process
A practical Sim2Real workflow is not:
Simulation → Real Robot → Done
It is closer to:
Train in simulation → test on the real robot → identify the failure → adjust the model, data, calibration, or environment → train again
For example, if a simulated grasp works but the real robot consistently approaches the object too far to one side, the problem might not be the grasping model itself. It could be a camera calibration issue, a coordinate transformation error, or a difference between the simulated and real robot.
That is why real-world testing is part of the learning process.
NVIDIA’s SO-101 Sim-to-Real workflow is a useful practical example because it connects calibration, teleoperation, data collection, training, simulation, evaluation, and real-robot deployment into one workflow.
Read the NVIDIA SO-101 Sim-to-Real Tutorial →
For developers using SO-ARM101, Seeed’s LeIsaac workflow provides another path into simulation by connecting LeRobot, Isaac Lab, and NVIDIA Isaac GR00T.
Explore SO-ARM101 + LeRobot + Isaac Lab + GR00T →
5. From a Robotics Tutorial to a Real Workflow: Seeed Workshop
A tutorial is useful because it gives you a known workflow that you can reproduce.
The real challenge begins when you have to connect several components and make them work together on your own.
That was the focus of a recent Seeed Studio robotics workshop built around reBot Arm.
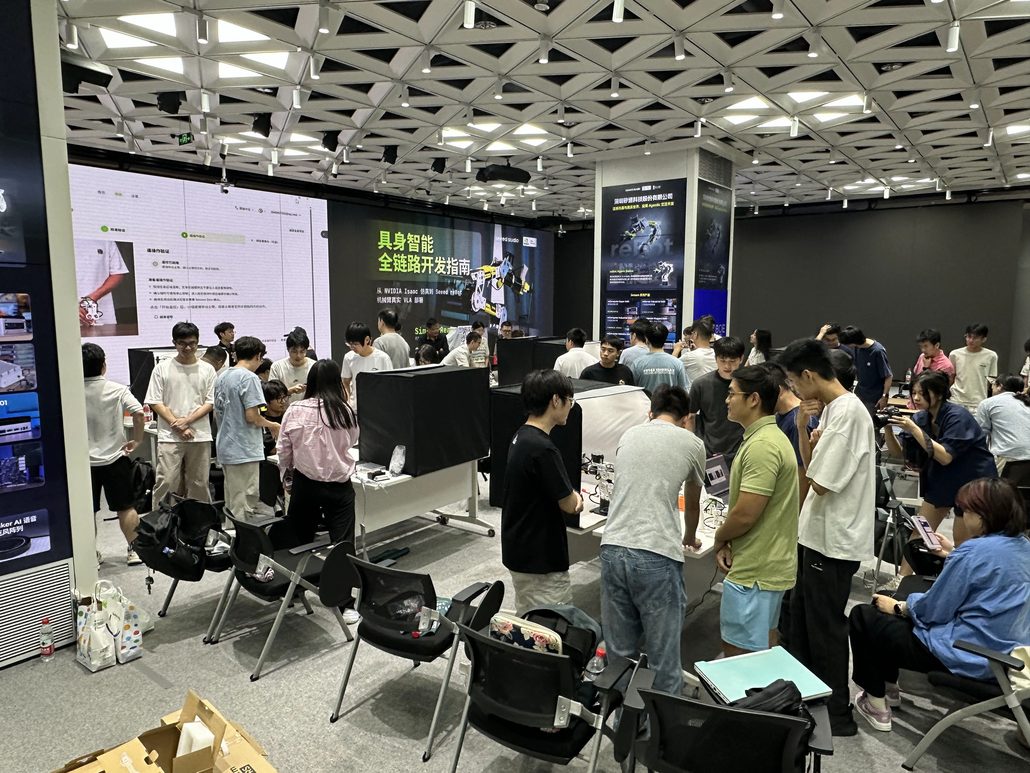
Six teams worked through different stages of a complete Physical AI workflow, starting with the development environment and robot configuration and moving toward perception, training, simulation, and physical manipulation.
The final goal was straightforward:
Recognize an object, grasp it, and place it at a fixed location.
But the robot cannot perform that task simply because an object-detection model is running.
The teams needed to connect several layers:
Robot setup → calibration → AI perception → data/training → decision → motion planning → robot control → physical manipulation
Some teams were able to complete the full object-recognition, grasping, and placement task within a single day.
That result is interesting not because robotics can always be built in a day, but because it shows what happens when the development stack is connected properly.
Where does SenseCraft fit?
The workshop also incorporated SenseCraft into the workflow.
SenseCraft provides tools for developing and deploying AI applications, helping connect AI perception and edge computing with real-world devices.
In a robotics application, that creates another useful layer:
AI model → perception → decision → robot control → physical action
The important lesson from the workshop is that a Physical AI system is rarely one model or one piece of hardware.
It is an integration problem.
The camera needs to communicate with the perception system. The perception system needs to produce information that the robot understands. The robot needs to calculate a reachable motion. The controller needs to execute it reliably.
When those pieces work together, an AI model stops being something that only recognizes an object on a screen.
It becomes part of a system that can physically act on that object.
If you want to follow future hands-on robotics and Physical AI workshops, join the Seeed Studio global community. Upcoming events, experiments, and developer activities will be shared there.
6. Once You Understand One Robot, the Ecosystem Opens Up
Once you understand the basic workflow of perception → decision → action, you can start changing the robot itself without changing the underlying development logic.
What if the robot could move around?
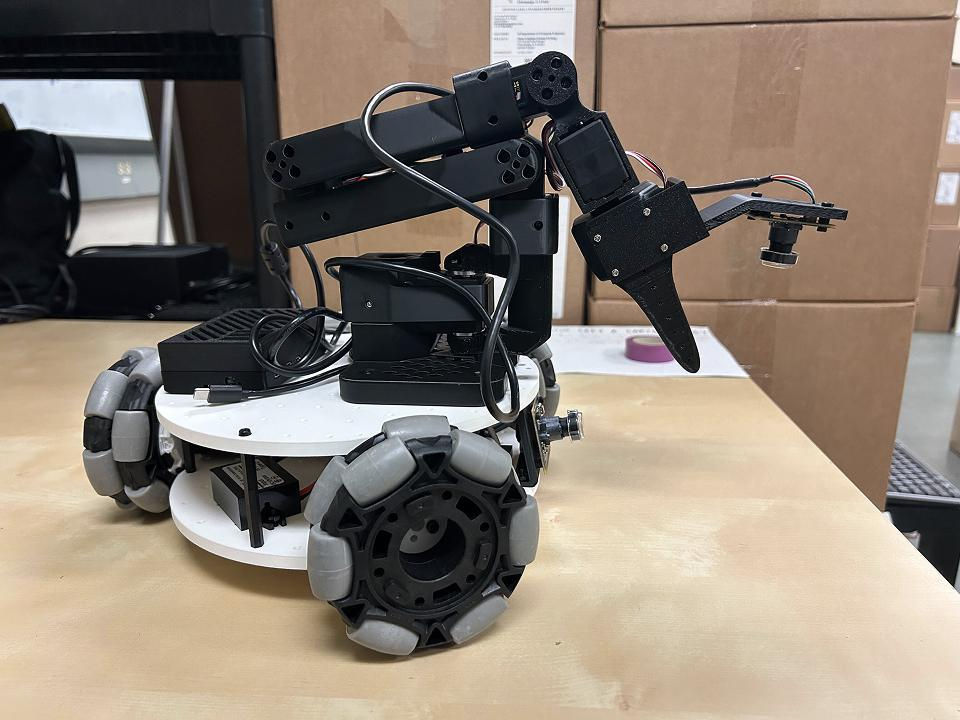
LeKiwi extends the robotic-arm workflow into mobile manipulation.
It combines a mobile platform with an SO-ARM101, allowing the robot to move through an environment while retaining manipulation capabilities.
The task therefore changes from: “Pick up this object.”
to: “Find the object, move toward it, pick it up, and bring it somewhere else.”
The development workflow also extends naturally.
The current LeKiwi + LeRobot workflow includes calibration, teleoperation, dataset recording, and training.
After calibration, the developer can operate the mobile base and arm through teleoperation, record episodes, upload datasets, and use them for Robot Learning experiments.
The resulting workflow becomes:
Calibrate → teleoperate → record episodes → prepare dataset → train → deploy
LeKiwi therefore demonstrates how the same Robot Learning concepts can be extended from fixed-base manipulation to mobile manipulation.
What if the robot could understand language?
Another direction is to connect robotics with language models.
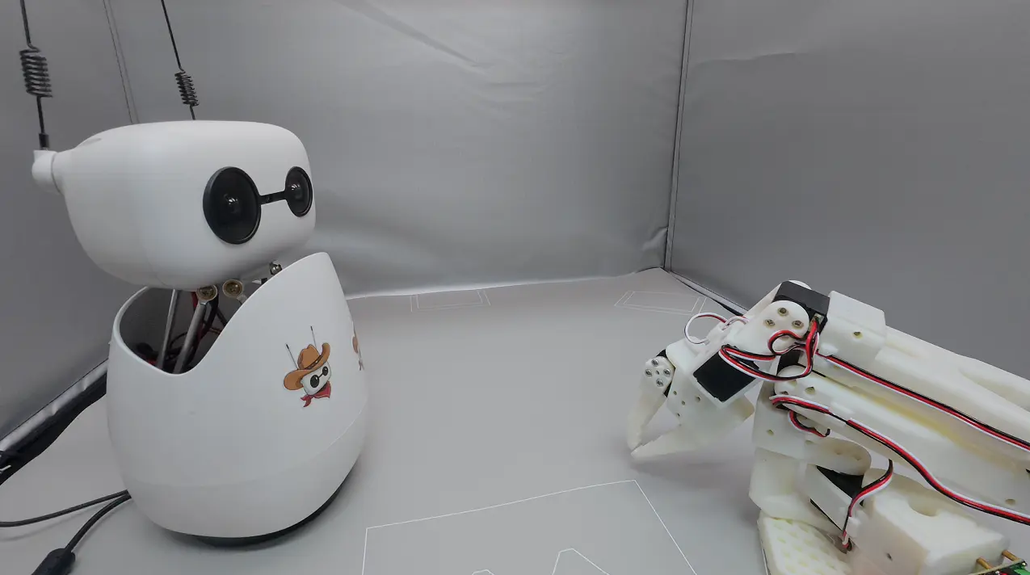
Seeed x Hugging Face’s Reachy Mini + SO-ARM example demonstrates how a voice command can be connected to an LLM function-calling workflow and ultimately control a physical gripper.
Suppose the user says:
“Open the gripper.”
The voice command is processed by the conversation application. The LLM determines which available tool should be called, and that tool invokes a Python driver that communicates with the robot through the LeRobot interface.
The actual chain is:
Voice → LLM → Function Call → Python Tool → LeRobot → Robot
The LLM does not directly drive the motor.
Instead, it selects from predefined functions that translate a high-level instruction into a concrete robot action.
This is an important pattern for Agentic Robotics because it creates a controlled interface between a general-purpose AI model and physical hardware.
Developers can also extend the available actions by adding new commands to the robot driver and exposing them through the tool schema.
Explore the Reachy Mini + SO-ARM Voice-Control Workflow →
7. From MicroDuck to Physical AI
Looking at these projects together makes the bigger picture easier to understand.
MicroDuck demonstrates how reinforcement learning can produce physical behaviors.
SO-ARM101 shows how human demonstrations can become robot-learning data.
reBot Arm brings together perception, manipulation, robot control, and learning.
Simulation gives robots a safer and more scalable environment in which to practice.
Sim2Real provides the process for bringing those learned behaviors back into the physical world.
LeKiwi adds mobility, while Reachy Mini demonstrates how language models can become part of a physical interaction loop.
The technologies are therefore connected by a common development cycle:
Perception → Data → Learning → Simulation → Policy → Edge Inference → Physical Action → Real-World Feedback
The exact implementation changes from project to project, but the underlying idea remains similar.
A camera produces observations.
A model interprets those observations.
A policy or decision system determines what should happen next.
The robot controller converts that decision into physical movement.
The result becomes new feedback from the real world.
This is the foundation of Physical AI.
The important shift is that AI is no longer limited to generating information on a screen. AI models are increasingly becoming part of systems that can see, decide, and act in the physical world.
That is also why open-source robotics is becoming so interesting for developers.
You can inspect the hardware, modify the software, collect your own data, train your own policies, test different simulation environments, and connect different models to the same physical platform.
The robot becomes part of a development ecosystem rather than an isolated product.
8. Where Should You Start?
If you are new to robotics, you do not need to learn the entire Physical AI stack at once.
Choose one problem and complete one workflow from beginning to end.
| If you want to explore | A practical starting point | Your first goal |
|---|---|---|
| Your first robotics project | SO-ARM101 | Calibrate and teleoperate the arm |
| Robot Learning | SO-ARM101 + LeRobot | Record demonstrations and train a policy |
| Reinforcement Learning | MicroDuck + MuJoCo | Train and deploy a simulated behavior |
| Vision & Grasping | reBot Arm B601-RS | Detect and pick up an object |
| Simulation / Sim2Real | SO-101 + Isaac | Train and test the same task in simulation and reality |
| Mobile Manipulation | LeKiwi | Combine movement with manipulation |
| LLM + Robotics | Reachy Mini + SO-ARM | Turn a language command into a physical action |
| Edge AI | NVIDIA Jetson | Run AI inference directly on the robot |
If you are completely new, start with SO-ARM101.
Your first project does not need to involve a large foundation model. Assemble and calibrate the arm, make the follower respond to the leader, record a simple pick-and-place demonstration, inspect the dataset, train a basic policy, and run that policy on the robot.
Once you complete that loop, you have experienced the essential structure of Robot Learning:
Demonstration → Dataset → Training → Policy → Robot
If reinforcement learning is what interests you most, start with MicroDuck.
Set up the Jetson environment, run the simulation, verify the training pipeline, visualize a checkpoint, run an official policy, and then modify a task or reward function to create your own behavior.
Your goal is to understand the difference between:
Training a behavior in simulation
and
Deploying that behavior to hardware.
If you want to build a more complete Physical AI application, start with reBot Arm.
Calibrate the robot, run teleoperation, connect an RGB-D camera, verify object detection, complete hand-eye calibration, estimate a grasp pose, test the motion, and finally execute the grasp on the real robot.
Once that works, you can start adding Robot Learning and policy training.
The key is to complete one loop before moving to the next.
When you have actually built the system, terms such as dataset, policy, inference, simulation, calibration, and Sim2Real stop being abstract vocabulary. Each one has a concrete role in something you have seen and tested yourself.
9. Explore the Seeed Studio Robotics Ecosystem
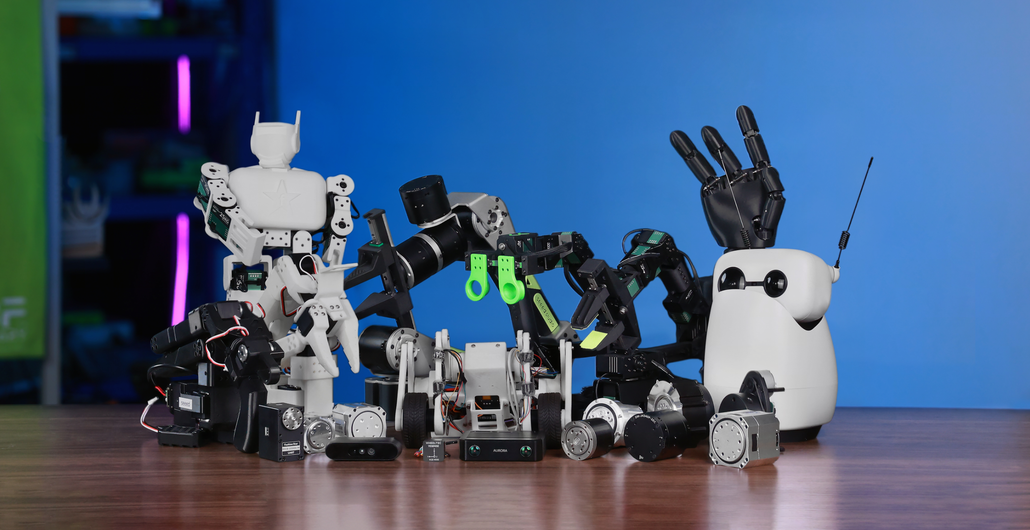
If MicroDuck was what first brought you into robotics, there are several directions you can explore next.
MicroDuck + Jetson
Build a reinforcement-learning environment on Jetson, train policies with MuJoCo, evaluate the results, export ONNX policies, and experiment with custom motions.
MicroDuck Reinforcement Learning on Jetson →
SO-ARM101 + LeRobot
Start with calibration, teleoperation, demonstration data, policy training, and simulation.
SO-ARM101 + LeRobot + Isaac Lab + GR00T →
reBot Arm B601-RS
Explore robot control, LeRobot, teleoperation, visual grasping, ROS 2, MuJoCo, and Isaac Sim.
reBot Arm Visual Grasping Workflow →
SO-101 Sim2Real
Follow a practical path from calibration and teleoperation to training, simulation, evaluation, and real-robot deployment.
NVIDIA SO-101 Sim-to-Real Tutorial →
LeKiwi
Combine a mobile base, SO-ARM101, and LeRobot to explore mobile manipulation.
Reachy Mini + SO-ARM
Experiment with voice commands, LLM function calling, and physical robot control.
Reachy Mini Voice Control for SO-ARM →
SenseCraft
Connect AI perception and deployment with real-world applications and edge devices.
Start Building Physical AI with the Community
The most exciting part of open-source robotics is that you don’t have to figure everything out alone.
You can reproduce a tutorial, share what you have built, ask questions when something does not work, and learn from developers who are experimenting with the same hardware and software.
If you are exploring MicroDuck, LeRobot, reBot Arm, SO-ARM101, NVIDIA Jetson, Physical AI, Robot Learning, or Sim2Real, join the Seeed Studio global community and connect with makers, developers, and robotics enthusiasts around the world.
🌎 Join the Seeed Studio Global Community
Facebook Community
Share projects, discover what other makers are building, follow community activities, and stay connected with the broader Seeed community.
Discord — Robotics Channel
For hands-on technical discussion, troubleshooting, project sharing, and deeper conversations around robotics and Physical AI, join the Robotics channel on Seeed Studio Discord.
[Join Seeed Studio on Facebook → https://www.facebook.com/groups/rebotarm]
[Join Seeed Studio Discord — Robotics → https://discord.gg/zaFzs5rPrz]
Whether you are still waiting for your MicroDuck, just starting with your first robotic arm, or already building your own Physical AI system, come build with us.
Start with one robot. Build one workflow. Complete one loop.
Data → AI → Robot → Real World.
That’s where Physical AI starts becoming real.
See you in the community.
About Author
