ESP32 Camera: Specs, Projects, and Getting Started Guide (2026)
The ESP32 Camera is an affordable module for IoT and embedded vision projects. It lets anyone build smart camera systems without purchasing expensive hardware. It can be as simple as a live video streaming or as advanced as an AI-powered object detection system.
This guide walks through the specs of the ESP32 Camera, popular cameras, how to set it up, and some project ideas worth trying in 2026.
What Is the ESP32 Camera and Why Choose It for Projects?
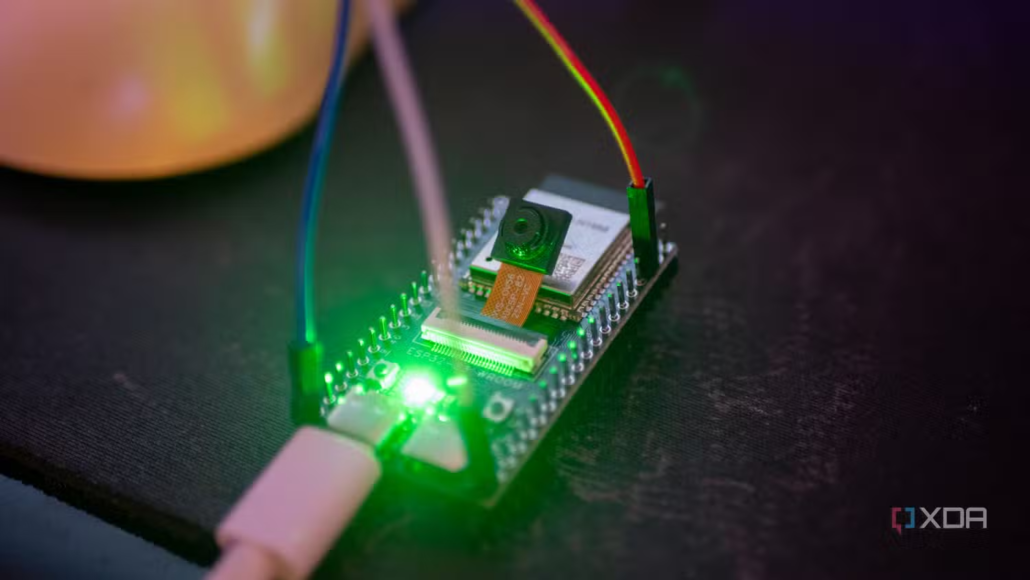
The ESP32 Camera is a compact development board that combines the ESP32 microcontroller with an onboard camera. It is powered by a dual-core 32-bit processor with built-in Wi-Fi and Bluetooth. The OV2649 camera sensor can capture up to 1600×1200 images, while the SD card slot can save those photos/videos. This makes it more than enough to handle live video streaming, motion detection, and basic AI tasks.
ESP32 Camera is a popular pick because of its affordability. For under $10-$20, you get a reliable processor and camera that would have cost much more just a few years ago.
Besides that, these boards let you build projects involving image capture, video streaming, face recognition, and other AI applications. All these are possible without needing a Raspberry Pi or any expensive computing hardware.
Key Features of ESP32 Camera Modules
A small footprint of the ESP32 Camera board packs a lot. Its key features and technical specifications are as follows:
- Dual-Core Processor: A dual-core 32-bit microprocessor running at up to 240 MHz clock frequency.
- Built-in Camera: OV2640 2MP camera that captures up to 1600×1200 images with JPEG compression for efficient Wi-Fi streaming.
- Onboard Memory: 520 KB SRAM + 4 MB PSRAM (externally added) + 4MB of flash memory for smooth image buffering and firmware storage.
- Wireless Connectivity: Built-in Wi-Fi (2.4 GHz) and Bluetooth (v4.2) connectivity.
- MicroSD Card Slot: Accepts cards for local image and video storage.
- 9 GPIO Pins: Connects sensors or control devices.
- Antenna Options: Built-in or external IPEX for better range.
- Size: 27 x 40.5 mm, highly compact.
- Operating Voltage: 3.3V.
- Image Output: JPEG (default), BMP, Grayscale.
Put all of that together, and you have a board that can assist in simple to real-time video streaming tasks.
Note: These specs may vary by ESP32 camera board and manufacturer, so always check the datasheet of your chosen board before starting a project.
ESP32 Camera Hardware Specifications Explained
It’s important to know what’s actually running under the hood before you start building. So, let’s take a quick glimpse of the core hardware that makes the ESP32 camera tick:
Processor and Performance
The ESP32 Camera features a dual-core 32-bit LX6 processor capable of clock speeds from 80 MHz to 240 MHz. This gives you enough processing power to handle live video streaming, image processing, Wi-Fi communication, and more without the board falling over. It also comes with a flash RAM and PSRAM (externally added) for smooth buffering of camera images during streaming.
Camera Sensor Capabilities
The standard onboard sensor is the OV2640. It is a 2MP CMOS sensor with built-in image signal processing and JPEG compression. It is capable of capturing images up to 1600×1200 resolution and supporting output formats including JPEG, RGB565, and YUV422.
The built-in JPEG compression reduces bandwidth during wireless transmission, so you can have smooth streaming over Wi-Fi.
Connectivity Options
The board supports Wi-Fi 802.11 b/g/n/e/i and Bluetooth 4.2 BR/EDR and BLE. It also exposes a range of interfaces based on the ESP32 camera pinout, including UART, SPI, I2C, PWM, ADC, and DAC. All this gives you the flexibility to hook up sensors/displays or other peripherals.
Overview of Popular ESP32 Cameras
Every ESP32 camera board is built differently, with slight variations to the specs. Below are the two popular ESP32 Cameras worth considering in 2026:
The All-in-One ESP32 Camera: XIAO ESP32-S3 Sense
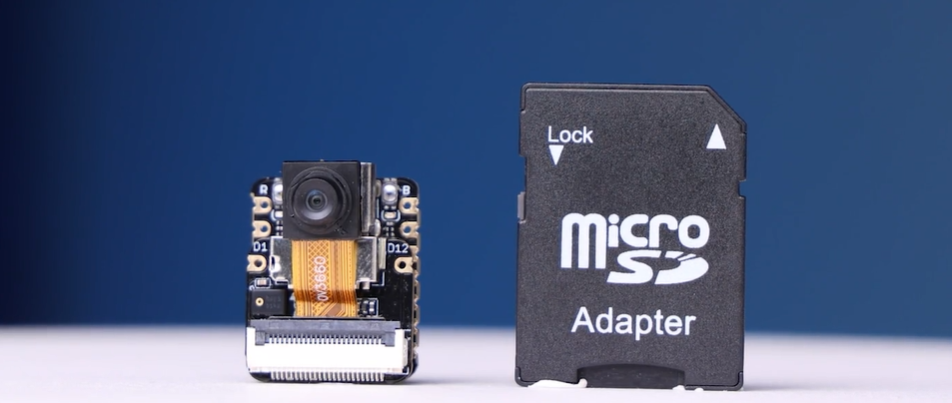
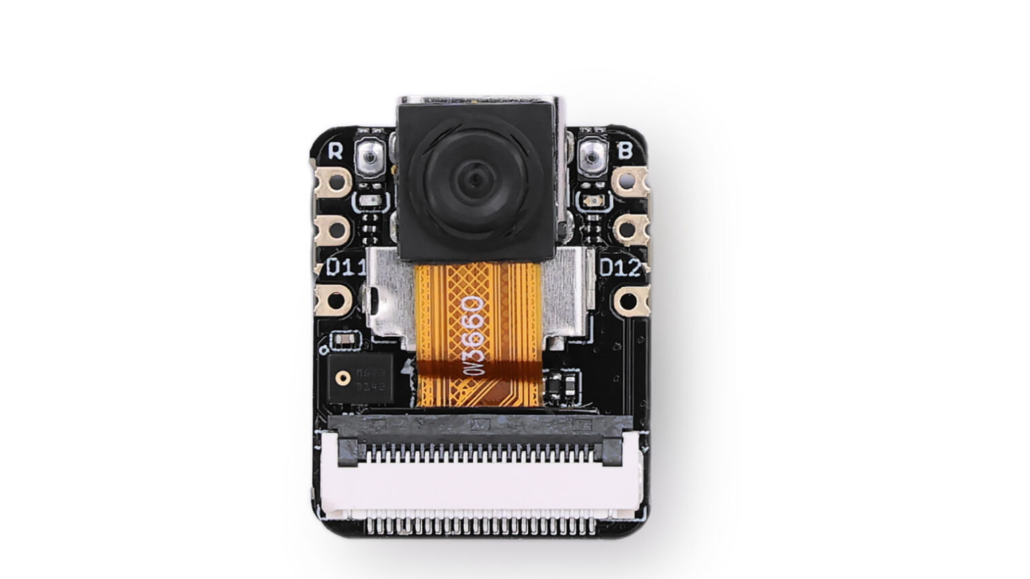
The XIAO ESP32-S3 Sense is a complete ESP32 camera board that packs a camera, microphone, and storage into a thumb-sized package.
Specs:
- Processor: ESP32-S3R8, Xtensa LX7 dual-core @ up to 240 MHz
- Camera: OV3660 (upgraded from OV2640), compatible with OV5640
- Memory: 8MB PSRAM + 8MB Flash
- Storage: MicroSD slot, up to 32GB FAT
- Wireless: 2.4GHz Wi-Fi + BLE 5.0 / Bluetooth Mesh
- Dimensions: 21 × 17.8 × 15mm (with expansion board)
- Power Input: 5V (Type-C) / 3.7V (BAT)
- Deep Sleep: 3μA
- Webcam Average Power Consumption: 5V/~140mA (Type-C)
- Webcam Peak Power Consumption: 5V/~347mA (Type-C)
- Working Temperature: -20°C to 65°C
- Interface: UART, I2C, I2S, SPI, 11x GPIO, 9x ADC, B2B connector
Key Features:
- Detachable camera sensor, which is swappable with OV5640 for higher resolution
- Onboard digital microphone for voice and audio projects
- Compatible with Arduino, MicroPython, and SenseCraft AI
- No-code AI model deployment via SenseCraft AI
- Production-ready SMD design with stamp holes for PCBA integration
Applications:
- Image processing and video monitoring
- Wearable and space-limited IoT devices
- Speech recognition projects
- Smart home automation
- TinyML and embedded machine learning
The XIAO ESP32-S3 Sense is a solid all-rounder for anyone who wants camera + audio and AI capability in one tiny board. It is available in both unsoldered and pre-soldered versions.
ESP32 Camera Module: Grove Vision AI V2 Kit
The Grove Vision AI V2 Kit is not a general-purpose camera board. It’s a dedicated edge AI module built for projects where inference speed and accuracy actually matter.
Specs:
- Processor: Himax WiseEye2 HX6538, dual-core Arm Cortex-M55
- Big Core: Up to 400 MHz | Little Core: Up to 150 MHz
- AI Accelerator: Integrated Arm Ethos-U55 microNPU @ up to 400 MHz
- Internal Memory: Up to 2432KB SRAM + 64KB ROM
- Interface: CSI, I2C, UART, SPI, Type-C, Grove
- Power: 5V input
- Communication Rate: 115200
Key Features:
- Dedicated Ethos-U55 neural network unit for fast on-device inference
- Supports TensorFlow, PyTorch, MobileNet V1/V2, EfficientNet-lite, YOLOv5 & v8
- No-code model deployment via the SenseCraft AI platform
- Onboard PDM microphone and SD card slot
- Fully open source. All code, schematics, and design files are available
- Compatible with XIAO series, Arduino, Raspberry Pi, and ESP32 dev boards
Applications:
- Industrial quality inspection and predictive maintenance
- Smart city equipment monitoring
- Intelligent agriculture and environmental sensing
- Wearable and handheld IoT devices
- Real-time object detection and face recognition at the edge
The Grove Vision AI V2 Kit starts at $15.99 for the module alone. For anyone serious about on-device computer vision, it’s the most capable option in this price range.
| Feature | XIAO ESP32-S3 Sense | Grove Vision AI V2 Kit |
| Processor | ESP32-S3R8, dual-core Xtensa LX7 | Himax WiseEye2 HX6538, dual-core Arm Cortex-M55 |
| Clock Speed | ~ 240 MHz | ~ 400 MHz (big core) |
| AI Accelerator | None (software-based) | Dedicated Arm Ethos-U55 microNPU |
| Camera Sensor | OV3660 (2048×1536), compatible with OV5640 | CSI interface (camera sold separately) |
| Memory | 8MB PSRAM + 8MB Flash | Up to 2432KB SRAM + 64KB ROM |
| Wireless | 2.4GHz Wi-Fi + BLE 5.0 | None (pairs with XIAO or ESP32) |
| Microphone | Yes — digital microphone onboard | Yes — PDM microphone onboard |
| Storage | MicroSD up to 32GB | MicroSD supported |
| Battery Support | Yes — LiPo charge management | No |
| Deep Sleep | As low as 3μA | — |
| Framework Support | Arduino, MicroPython, SenseCraft AI | TensorFlow, PyTorch, SenseCraft AI |
| Compatibility | Standalone board | XIAO, Arduino, Raspberry Pi, ESP32 |
| Open Source | Yes | Yes |
| Dimensions | 21 × 17.8mm x 15mm (with expansion board) | Compact module |
| Price | ~$15 | From $15.99 |
| Best For | All-in-one compact camera + AI projects | High-performance edge AI vision workloads |
How to Set Up an ESP32 Camera
It is simple and quick to set up the ESP32 Camera. The setup process follows a similar pattern, no matter if you pick XIAO ESP-32-S3 Sense or the Grove Vision AI V2. All you have to do is grab your components, configure your IDE, and flash your first sketch.
Required Components
You will need the following components to get started:
- XIAO ESP32-S3 Sense or Grove Vision AI V2 board
- USB-C cable for power and flashing
- A computer with Arduino IDE installed
- Stable Wi-Fi network (for streaming projects)
- MicroSD card (optional for local storage)
Software and IDE Setup
Both boards work with the Arduino IDE, which is the easiest starting point for beginners. You will need to add the ESP32 board package to your IDE, install the relevant libraries, and select the correct board and port before uploading any code.
Let’s take XIAO ESP-32-S3 Sense as an example and look at the software and IDE setup:
- Download, install, and launch Arduino IDE.
- Add ESP32 board package:
- Go to File > Preferences, and fill “Additional Boards Manager URLs” with the URL: https://raw.githubusercontent.com/espressif/arduino-esp32/gh-pages/package_esp32_index.json
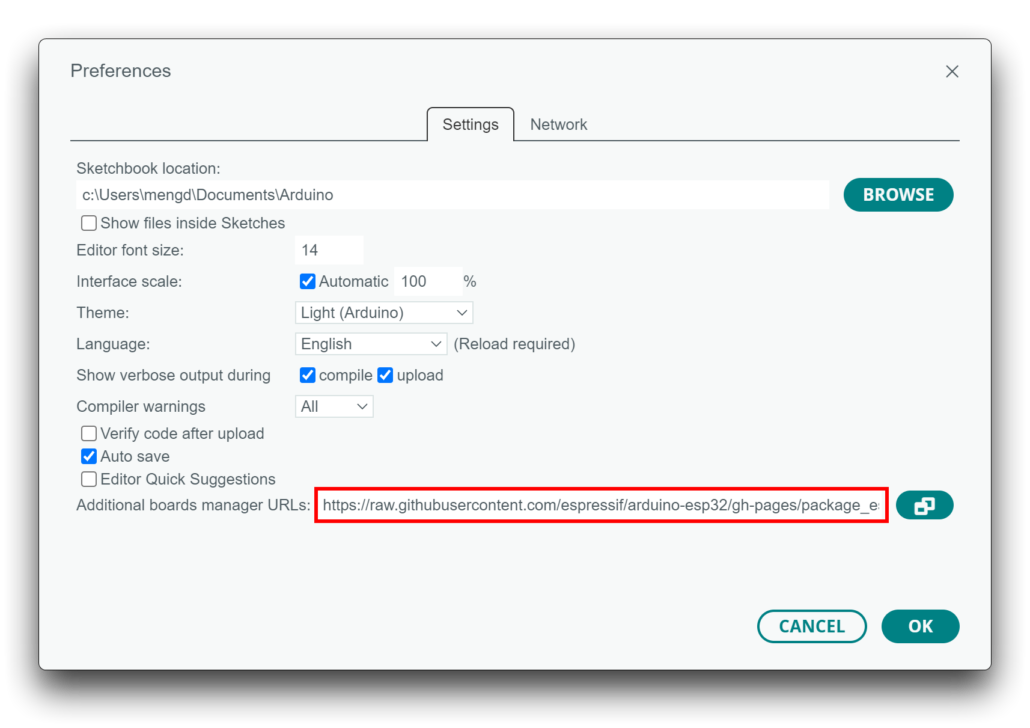
- Go to Tools > Board > Boards Manager… > search for “esp32” and install the latest version.

- Select the board and port. Search for “xiao” in the development board and select “XIAO_ESP32S3“.
Afterward, you are now all set to upload your first code. For the complete step-by-step software setup for the XIAO ESP32-S3 Sense, refer to the official wiki here.
For the Grove Vision AI V2, the full setup guide is available on the wiki here.
Uploading Your First Camera Code
After configuring the IDE, uploading your first sketch just requires selecting the correct example file from the ESP32 camera library, entering your Wi-Fi credentials, and clicking upload.
The XIAO ESP32-S3 Sense includes a dedicated camera usage guide covering everything related to basic image capture, live video streaming, and more. You can find it here.
For a quick example, let us share the simplest Blink program to try on XIAO ESP32-S3:
- Launch Arduino IDE and go to File > Examples > 01.Basics > Blink.

- Select the “XIAO ESP32-S3” board and the correct port number.
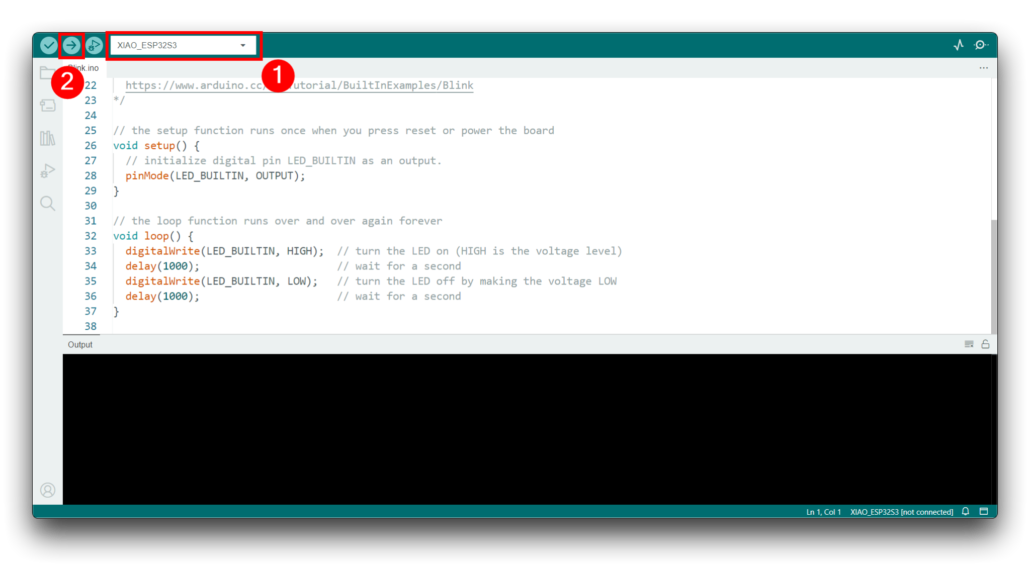
- After uploading, you can see the orange LED blinking on the board.

ESP32 Camera Video Streaming Guide
One of the popular things people do with an ESP32 Camera is set up a live video stream. So, let’s train you on how to get it done:
Setting Up a Web Server
ESP32 offers a built-in web server handling. The board hosts a lightweight HTTP server that broadcasts the ESP32 camera Wi-Fi feed over your local network. The typical steps involve:
- Installing the ESP32 board package in Arduino IDE
- Loading the built-in CameraWebServer example sketch
- Entering your Wi-Fi SSID and password
- Selecting the correct board and camera model
- Flashing the sketch and opening the Serial Monitor to grab the local IP address
For a detailed walkthrough specific to the XIAO ESP32-S3 Sense, the full guide is available here.
Accessing the Camera Feed
After you have made the board operational, open any browser on the same Wi-Fi network and enter the IP address printed in the Serial Monitor. You will then see the live feed.
Optimizing Streaming Performance
There are three things that impact the ESP32 camera quality, i.e., power, resolution, and signal. To improve the stream quality:
- Lower resolution for faster and smoother frame rates
- Drop JPEG quality a bit to reduce bandwidth without a huge visual hit
- Keep the power supply stable to avoid dropping frames
- Keep the board close to your router, or use an external IPEX antenna for better range
ESP32 Camera Use Cases and Applications
ESP32 Camera projects offer a wide range of use cases. Let’s take a look at a few popular ones:
ESP32 Camera Home Assistant Projects
The most popular use of the ESP32 Camera is in home assistant projects. For under $15-$20, you can:
- Set a motion-triggered security camera that streams live video over Wi-Fi
- Build a DIY video doorbell that captures visitors and triggers smart home automations
- Send instant photo alerts to your phone when motion or presence is detected
- Create a baby monitor or pet camera that feeds directly into your Home Assistant interface
- Record time-stamped snapshots to a MicroSD card whenever a door or window sensor fires
All it requires is pairing the board with a motion sensor, a weatherproof enclosure, and an external antenna to complete your home assistant projects.
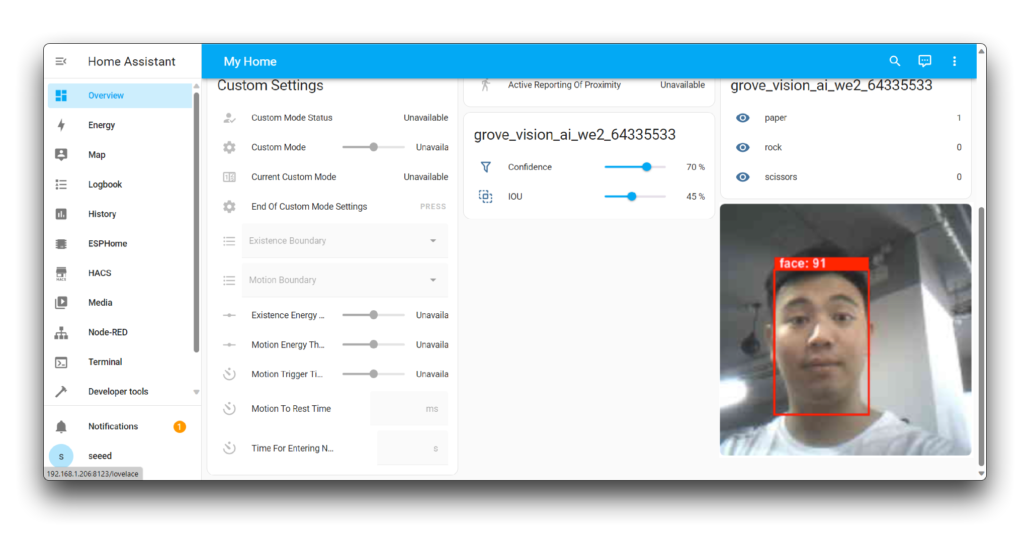
For example, you can integrate Grove Vision AI V2 into Home Assistant through the SenseCraft-HomeAssistant plugin, available via the HACS store. After connection, it enables real-time visual sensing and customized automations, such as triggering lights, sending alerts, logging activity based on what the camera actually sees, etc. You can also deploy AI models, such as object detection and face recognition, without relying on the cloud. Learn more about this project here.
IoT Smart Monitoring
ESP32 camera is being used as a low-cost visual sensing node in IoT setups. It can monitor HVAC systems, water heaters, utility areas, etc. It is useful anywhere you want to visually check something without being there in person. Add temperature or humidity sensors to the same board, and get a combined environmental and visual monitoring node in one compact package.
A standout example here is an AI-powered fault diagnostic system that uses a thermal camera and ESP32 to scan temperature distribution and analyze fan noise patterns. It would then flag heat hotspots and cooling anomalies before they become failures.
Face Recognition Projects
Face recognition on the ESP32 camera has moved well beyond the basic enroll-and-detect demos. There was a project related to a pet expression recognition system built on the XIAO ESP32-S3 Sense and trained on 1,000+ images using Edge Impulse and SenseCraft AI. This shows how capable on-device inference has become on this hardware.
Besides that, the ESP32 camera handles face detection and recognition for smart door locks, attendance systems, unauthorized-access alerts, and more. All this runs locally with no cloud dependency.
Best ESP32 Camera Projects to Try
The real appeal of ESP32 camera projects shows up when you start building with it. Other than the above ESP32 Camera home assistant projects, some of the other best projects worth trying are:
Beginner-Friendly Projects
When you don’t have much coding experience, try these beginner projects:
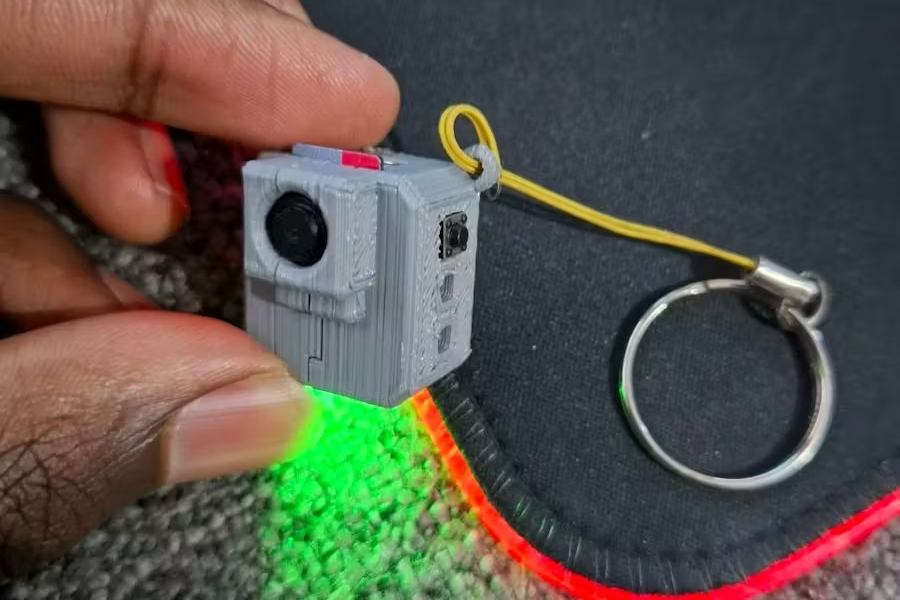
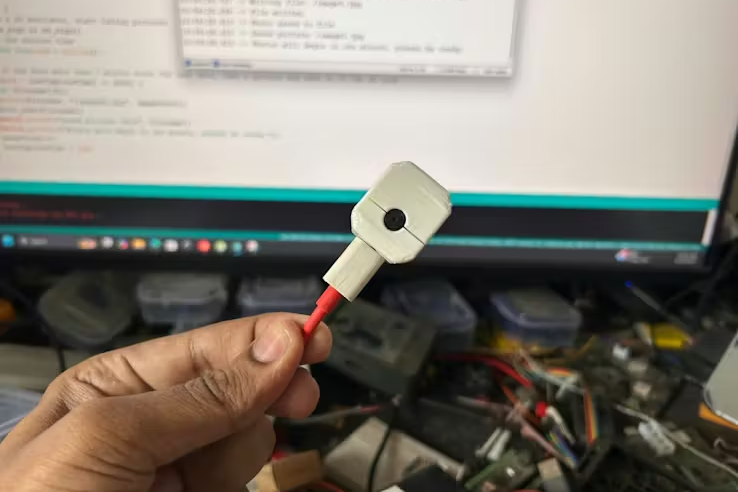
- Smallest DIY Spy Cam: Build a pocket-sized camera using the XIAO ESP32-S3 Sense that captures images with a button press and saves them directly to an SD card. A great first hardware project with a satisfying result.
- 3D Printed Mini Time-Lapse Camera: Combine the XIAO ESP32-S3 Sense with a 3D-printed enclosure to build a portable time-lapse camera for capturing sunsets, plant growth, construction progress, etc.
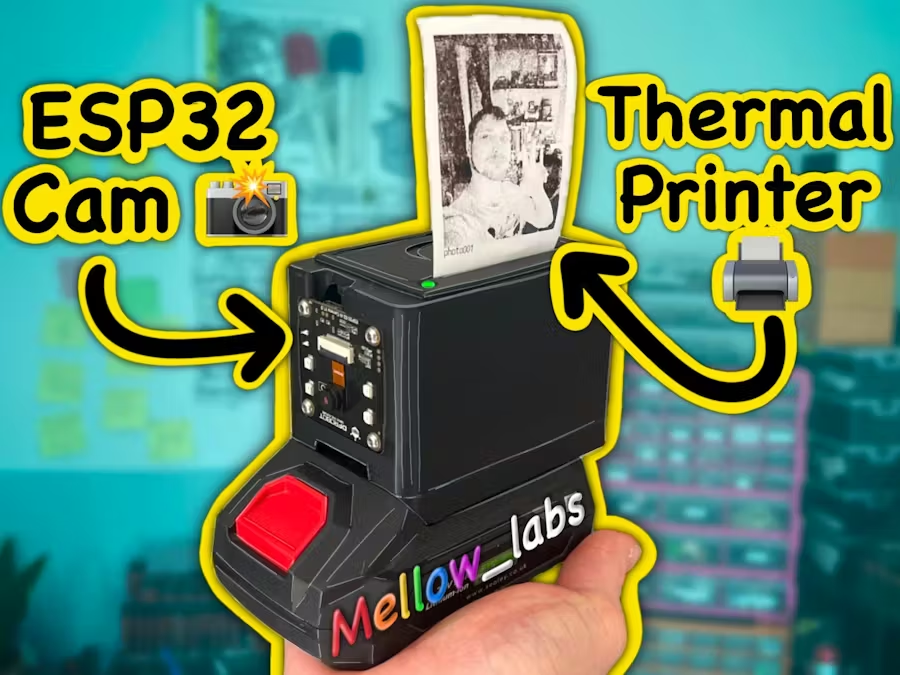
- ESP32 Instant Camera: Build a Polaroid-style instant camera that captures a photo and prints it on the spot.
- Local-First Video Doorbell: Build your own Ring doorbell alternative using an ESP32 Camera board with a button input. It can stream MJPEGs at 10 frames per second over Wi-Fi.
Intermediate AI Vision Projects
After becoming comfortable with the basics, these projects push the ESP32 camera into more interesting territory:
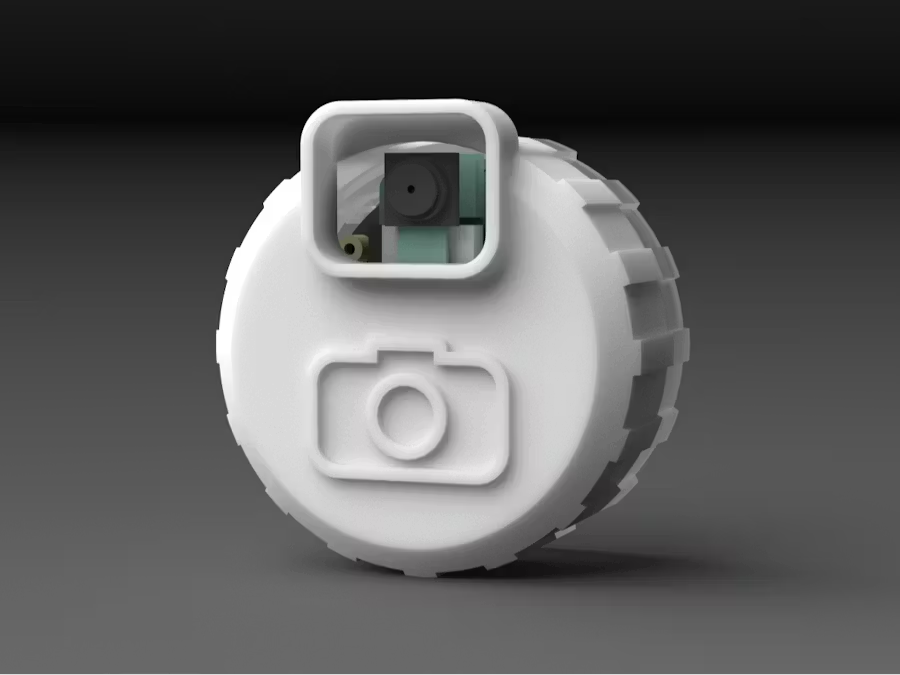
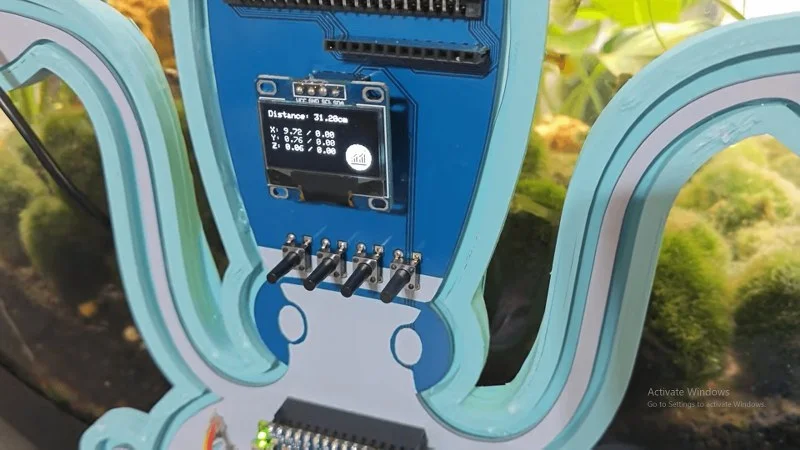
- Round Screen DIY Camera: Build a fully functioning point-and-shoot camera using the XIAO ESP32-S3 Sense paired with a round OLED display. Double-tap the screen to capture an image and save it to the SD card.
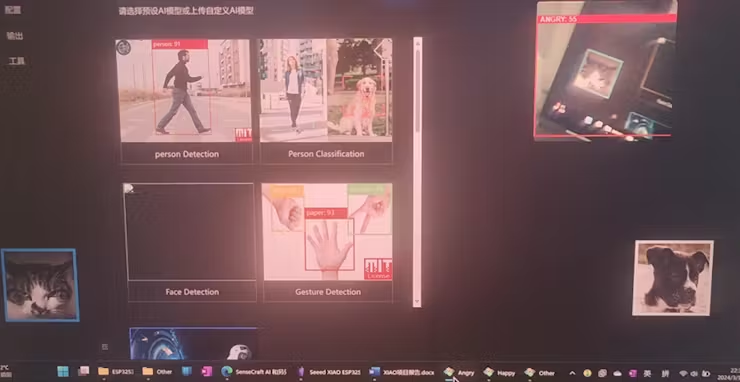
- Pet Expression Recognition: Train a TinyML model on 1,000+ pet images and deploy it on the XIAO ESP32-S3 Sense to recognize your pet’s expressions in real time using SenseCraft AI and Edge Impulse.
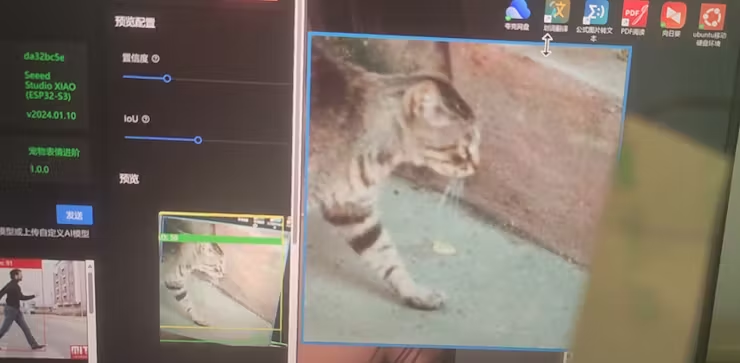
- Object Recognition with TFT Display: Use the XIAO ESP32-S3 Sense with Edge Impulse’s FOMO model to run on-device object detection and display results with bounding boxes on a round TFT screen.
Advanced Automation Systems
For those comfortable with ML frameworks and more complex builds:
- Object Detection with YOLOv3: Combine the ESP32 camera with Python, OpenCV, and YOLOv3 for real-time object detection and identification. The Grove Vision AI V2 is well-suited here due to its dedicated neural accelerator.
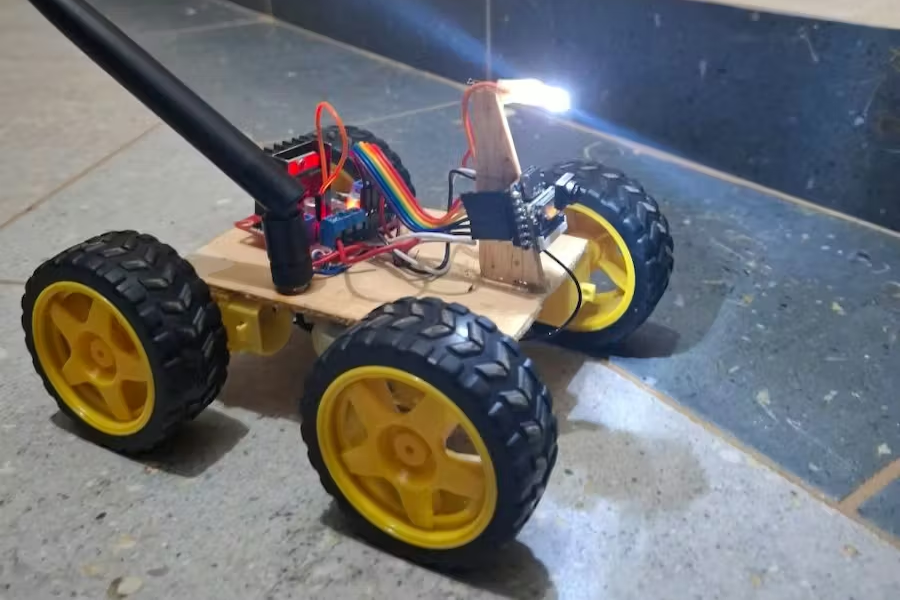
- FPV Robot Car with Live Streaming: Build a Wi-Fi-controlled robot car using the XIAO ESP32-S3 Sense. It can have a web-based control interface accessible from any device on your network, as well as real-time video streaming from the onboard camera.
- Ultra-Low-Power Event-Triggered Vision AI Camera: An ESP32 camera that only activates on specific triggers, capturing and transmitting images with minimal battery draw. It is suited for remote or off-grid deployments.
Common Issues and Troubleshooting
ESP32 Camera is a well-documented board, but things can go wrong. The common problems and their troubleshooting tips are:
Camera Not Detected
The most common reason the ESP32-CAM fails to detect the camera is a loose or misaligned ribbon cable. Always ensure it’s fully inserted and locked in place.
Other than the physical connection, your code matters too. Make sure the correct camera model is defined in your sketch. Many ESP32-CAM boards use the AI Thinker module, which must be properly selected. If not, the ESP32 camera pinout and pin assignment fails, and the camera won’t initialize.
If neither of those solves it, inspect the ribbon cable and connectors for bent pins or visible damage.
Poor Image Quality
Many users report issues with ESP32 camera quality, such as blurry or distorted images. You can fix that by adjusting the camera settings, such as resolution, frame rate, white balance, etc.
A weak Wi-Fi signal is another common culprit. If the stream is cutting off at the bottom or lagging, signal strength is the issue rather than the camera itself.
Overheating can also degrade image quality over time. Consider adding a small heatsink for better heat dissipation.
Connectivity Problems
If the ESP32-CAM is not connecting to Wi-Fi, double-check that your SSID and password are entered correctly in the sketch.
Also worth checking is your antenna configuration. The jumper resistor near the antenna connector controls whether the board uses the built-in PCB antenna or an external one. So, make sure it’s positioned correctly for your setup.
If you can see the IP address but the browser shows a blank page, note that the ESP32-CAM can only handle HTTP requests from a single client. Try accessing it in only one browser tab.
Tips to Improve ESP32 Camera Performance
Getting the board working is just the start. A few targeted adjustments can make a noticeable difference in reliability and output quality.
Power Supply Optimization
The board needs a stable 5V supply that can deliver at least 500mA. So, avoid relying on a computer USB port, as many can’t deliver consistent current.
You can also add a 470µF–1000µF capacitor across the power lines to help buffer sudden voltage drops, especially during camera initialization or when the flash LED fires. An external battery pack is a better choice than drawing from the programmer’s supply when working on battery-related projects.
Memory and Storage Management
The PSRAM is used to buffer images during streaming. It allows higher image quality without crashing the board.
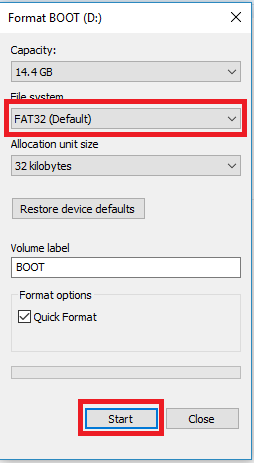
In case your project captures and stores images locally, format your MicroSD card to FAT32 before use and avoid writing large uncompressed files. JPEG output keeps file size manageable and storage lasts longer.
You must also remain aware of memory allocation when running ML models alongside streaming. It is because both tasks compete for the same resources.
Frame Rate and Resolution Tuning
There’s always a trade-off between resolution and smoothness. Lower resolutions require less bandwidth and reduce lag. VAG or SVGA is a more useful choice for live streaming than the maximum UXGA setting.
Reducing the XCLK frequency from 20MHz to 8MHz can stabilize the stream on some boards that struggle at higher clock speeds.
ESP32 Camera Accessories and Add-Ons
The right accessories are essential for different ESP32 Camera projects and the board’s safety.
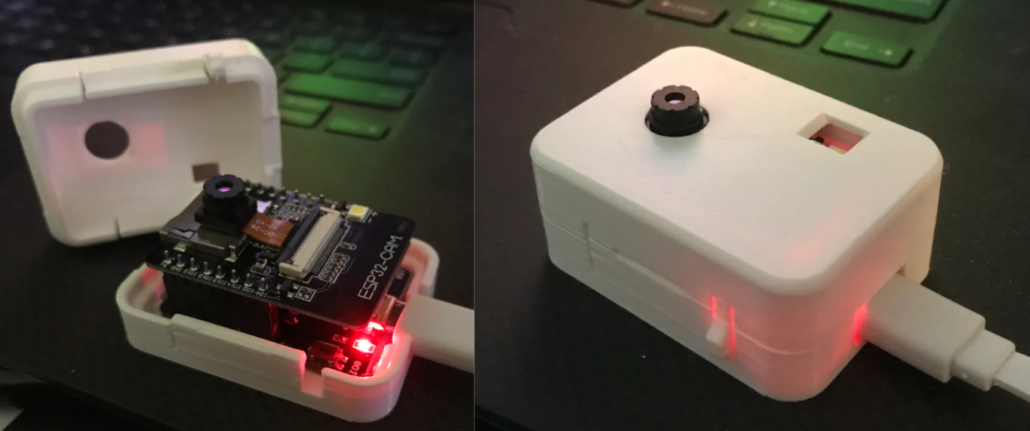
Camera Cases and Mounts
ESP 32 CAM cases are useful for protection, professional appearance, heat dissipation, and easy mounting/installation. There are plenty of casing options you can choose from. If you’re working with the XIAO ESP32-S3 Sense, Seeed’s ecosystem includes enclosures built specifically around its footprint. You can explore some of the best ESP32 camera case designs here.
External Antennas
The onboard PCB antenna works fine for short-range use, but range and reliability suffer beyond a few meters or through walls.
Switching from the built-in antenna to an external one improved signal strength. It is especially useful in a doorbell camera, surveillance setup, or industrial monitor project.
Storage Options
The MicroSD card slot accepts cards between 4GB and 32GB formatted in FAT32. This gives you plenty of room for thousands of photos or hours of video. Class 10 cards are recommended for streaming and continuous capture, as slower cards can cause write bottlenecks.
Conclusion
The whole story about the ESP32 Camera is simple. It is an affordable and well-capable board to add vision to any embedded project. Live video streaming, motion detection, edge AI, face recognition, and much more are all possible with that little board. Therefore, it’s time that you pick XIAO ESP32-S3 Sense and Grove Vision AI V2 as your starting board, follow the setup guides, and start building.
FAQs
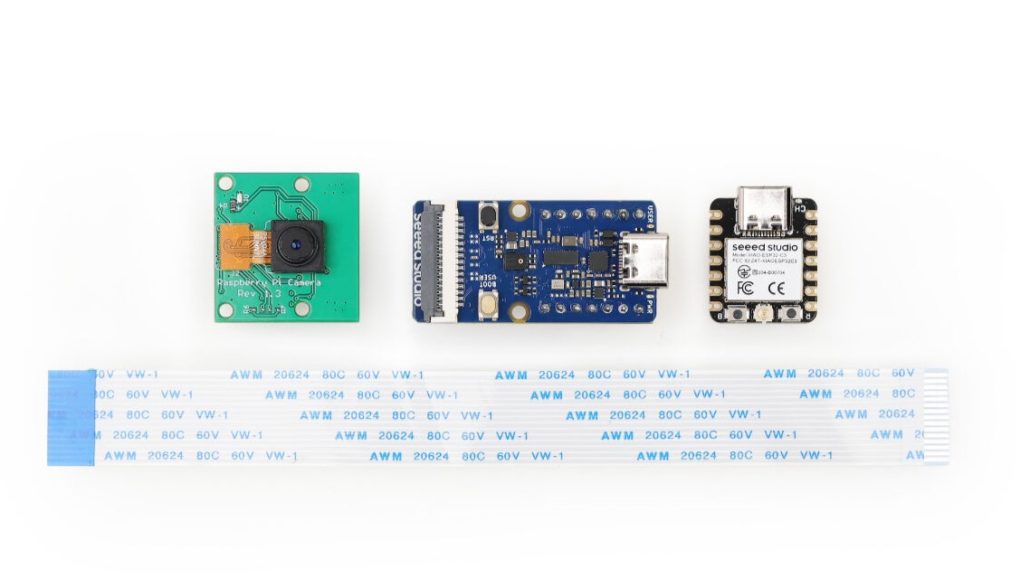
What is the difference between an ESP32 Camera and a Raspberry Pi Camera?
The ESP32 Camera is a standalone microcontroller with a built-in camera. It is compact and affordable, ideal for simple IoT and streaming projects. The Raspberry Pi Camera requires a full Raspberry Pi board. It gets far more processing power, but at a higher cost and complexity. Choose ESP32 for lightweight tasks, Raspberry Pi for demanding applications.
What is the price of ESP32 CAM?
Most ESP32 camera boards start at around $7–$10 for the basic AI-Thinker variant. More capable boards can range from $15-$25 or even higher in some variants.