Set up a Raspberry Pi VPN server using PiVPN and browse securely on public networks
Introduction
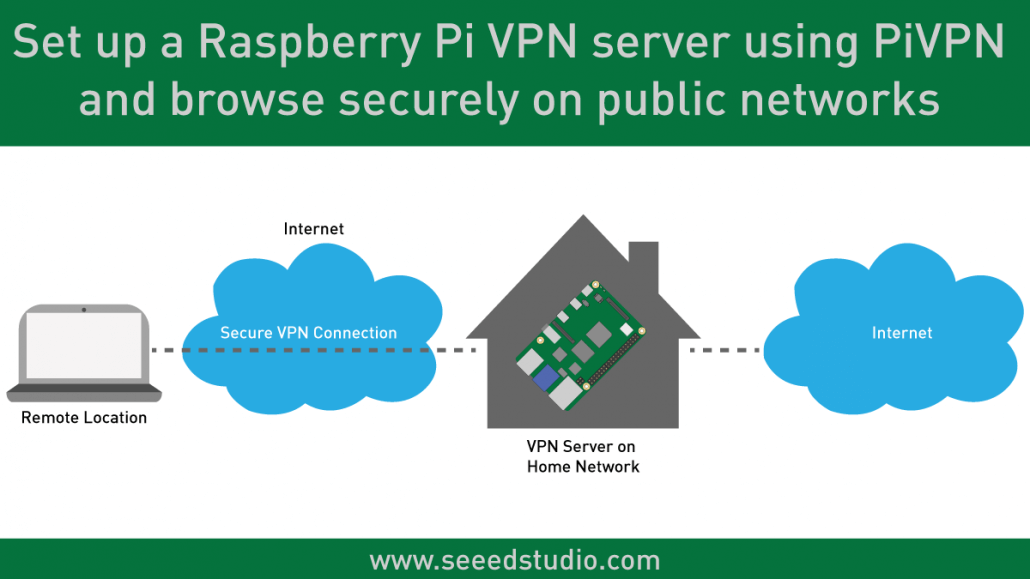
If you want a VPN to secure your internet connection when you are browsing the internet on public networks, you might be looking for a subscription service that offers this service. These VPN services are simple and work out of the box, but they are mostly expensive, have to pay on a monthly basis and you are ultimately putting your trust in their hands since they can see all your network activity if they want to. What if you could have an alternative option which is both cheaper and safer? If you have a Raspberry Pi with you, setting it up as a VPN server will only take you a couple of minutes! In this blog, we will help you set up an OpenVPN server on your Raspberry Pi with quickly and easily!
What is a VPN?
VPN stands for Virtual Private Network. Simply it allows you to connect to a LAN (Local Area Network) through the internet. This is done by creating an encrypted connection (tunnel) between you and a VPN server within the LAN. So, when the data leaves your device, it is encrypted and when it reaches the destination, it is decrypted. This keeps your data secure and private. When you connect to a VPN server, all your internet traffic is routed through this VPN tunnel. This ultimately makes it impossible for hackers to hack into your data since it’s encrypted.
Why use PiVPN?
PiVPN is a program that can be used to install and configure an OpenVPN server on your Raspberry Pi. It takes only a few minutes for setting it up. By using PiVPN you can browse the web safer when you are at unsecured public Wi-Fi networks. Also, you can communicate with devices connected to your home network by using PiVPN. Alternatively, if you set it up in your office and want to work from home, you would be able to use all the tools and serves in the office through the VPN. If you are traveling abroad where some services are geo-blocked for that region, you can potentially be able to access them via your home network using PiVPN.
How to set up PiVPN on a Raspberry Pi?
Setting up Pi-hole is not a complicated process. We will start by listing what you need for this setup:
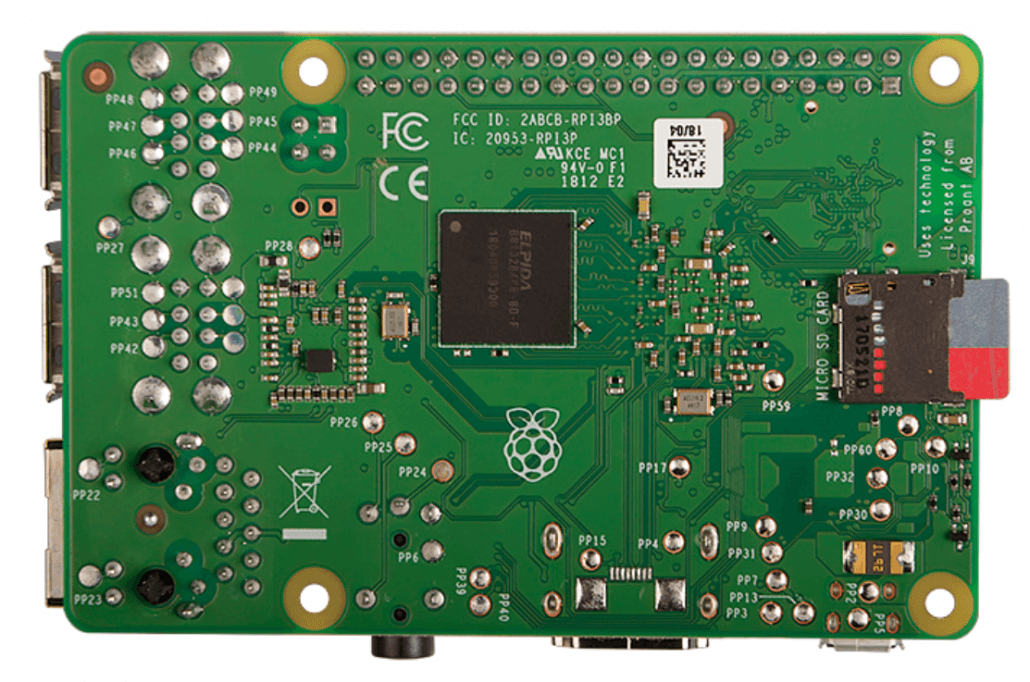
- 1 x Raspberry Pi
- 1 x USB Type-C Cable with power adapter
- 1 x Argon ONE Raspberry Pi 4 Aluminum Case (Optional)
- 1 x Micro-SD card with card reader
Note that we have used Argon ONE Raspberry Pi 4 Aluminum Case because once you set up Pi-hole on your Raspberry Pi, you would leave it running all the time. So, this case can help provide better cooling while the Raspberry Pi gets hot from continuous usage. On the other hand, it’s also a very stylish Aluminum case to use with your Raspberry Pi!

Configuring the Raspberry Pi for initial boot
When you buy a Raspberry Pi, there is no operating system installed on it out of the box. So, you need to burn an operating system into a micro-SD card and then boot the Raspberry Pi from that card.
Step 1
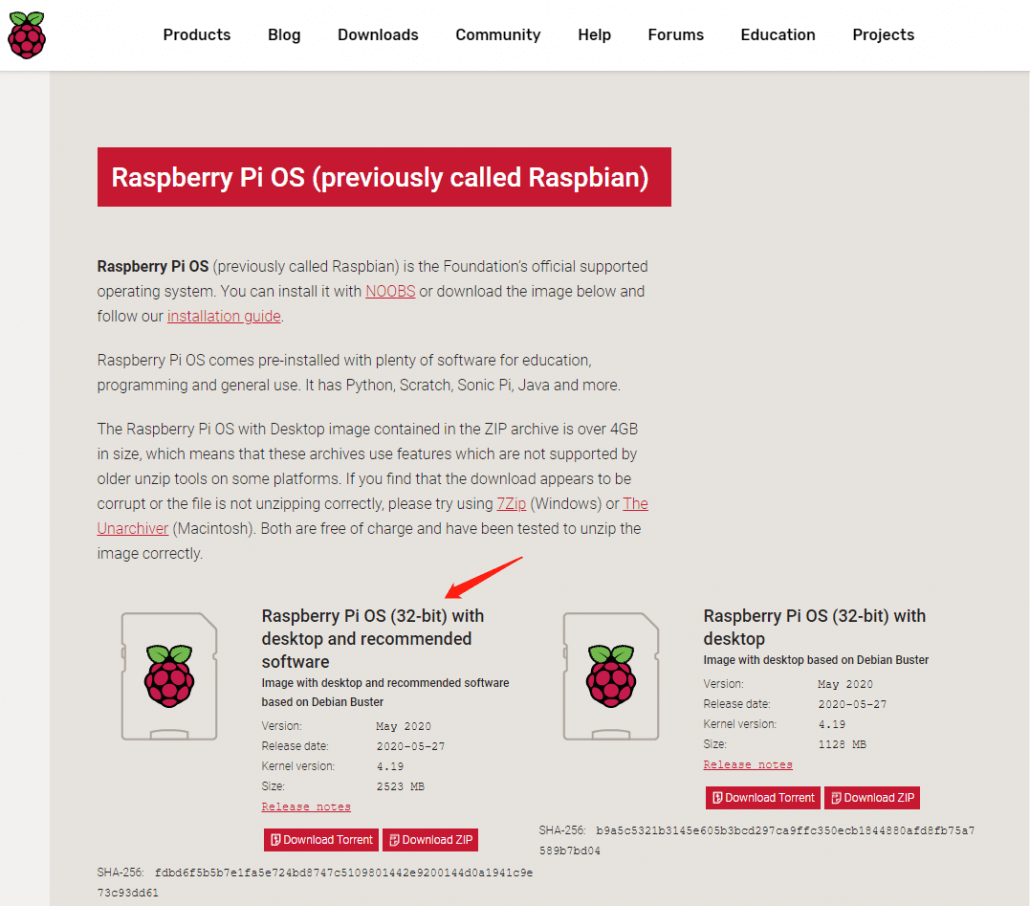
First, we must download a Linux-based operating system. Raspberry Pi supports various Linux distributions such as Ubuntu, but in this guide, we will use the official OS from the Raspberry Pi Foundation, which is the Raspberry Pi OS. Download it here by selecting “with desktop and recommended software” version.
Step 2
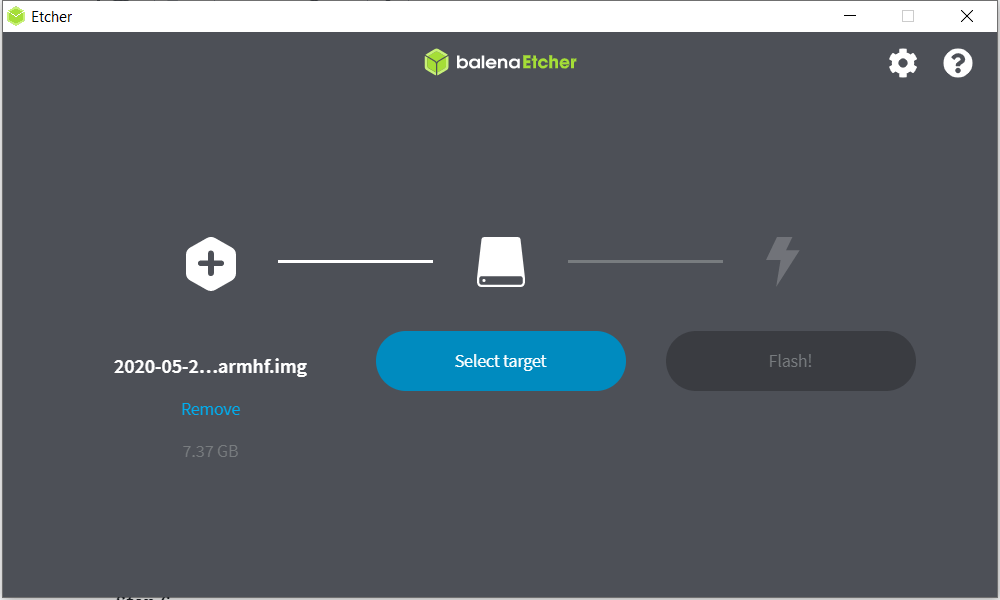
Then you need to download a software called “balenaEtcher” which is used to burn the downloaded image above and make the Raspberry Pi boot from the Micro-SD card. Click here to download the latest version of this software.

Step 3
Then connect a micro-SD card into the micro-SD card slot of a PC by using a micro-SD to SD card adapter. You can also use a USB Micro-SD card reader.
Step 4
After that open the “balenaEtcher” software. Then point to the location of the downloaded image, select the connected micro-SD card, and press “flash”. It will take a few minutes to complete this process.
Step 5
Now we will set up Raspberry Pi to automatically connect to the wireless network so that we can communicate with it.
However, if you have an HDMI display, a keyboard and a mouse, you can skip this step, connect those into the Raspberry Pi and move onto “Configuring PiVPN on Raspberry Pi”
Also if you have a Seeeduino XIAO, you can follow the guide here to setup the communication between Raspberry Pi and PC and move onto “Configuring PiVPN on Raspberry Pi”
Step 6
Navigate to Raspberry Pi root folder from your PC and create a file called “wpa_supplicant.conf”. Then copy the following codes into this file and add your home Wi-Fi username and password into the fields “WiFi-name” and “WiFi-password”
country=US
ctrl_interface=DIR=/var/run/wpa_supplicant GROUP=netdev
update_config=1

network={
ssid="WiFi-name"
psk="WiFi-password"
key_mgmt=WPA-PSK
priority=1
}
Note:
The Wi-Fi name and password should be the same as your local Wi-Fi which your PC is connected to (make sure your PC and Raspberry Pi are in the same LAN).
Step 7
Create a blank file called “ssh” in this directory
Step 8
Then eject the micro-SD card from PC and insert it into the Raspberry Pi.
Step 9
Power up the Raspberry Pi through a Type-C USB cable and a power adapter
Step 10
Now we will download Putty, which is an SSH client we will use in order to communicate with the Raspberry Pi. Click here to download.
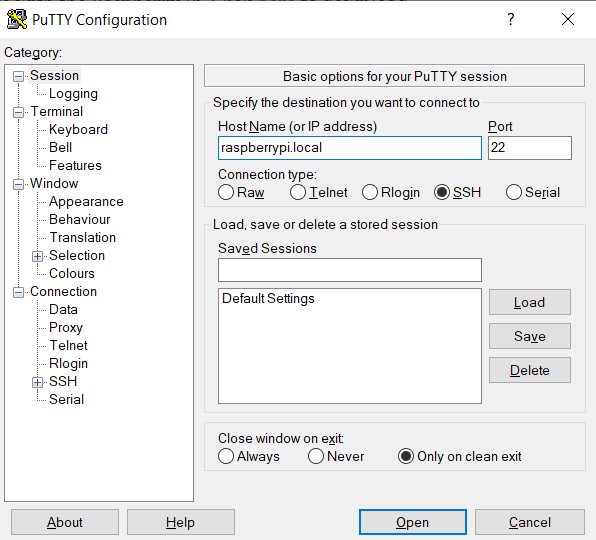
Step 11
Open Putty and set hostname as “raspberrypi.local” and port as “22”. Then press “Open”.
Configuring PiVPN on Raspberry Pi
Step 1
Open the terminal and run the following command
curl -L https://install.pivpn.io | bashThen you will be prompted with a dialog box and will be asked with a few questions on setting up the OpenVPN server. Here we will choose the default settings because it is enough to make the server up and running.
Step 2

Step 3

Step 4

Step 5

Step 6

Step 7

Step 8

Step 9

Step 10

Step 11

Step 12

Step 13

Step 14

Step 15

Step 16

Step 17

Step 18

Now you have successfully installed the OpenVPN server on your Raspberry Pi. Check whether it’s running by entering the following command.
sudo service openvpn statusIf you see the messages as below, your installation is successful.

Port Forwarding
Even though you have set up the OpenVPN server on the Raspberry Pi, it’s not possible to access this server remotely because the port we have configured before is not open to access from outside networks. In order to give access to this server, you need to open that port on your router which is called port forwarding. However, different routers have different methods to set up port forwarding. You can check your router model and search on how to port forward on that specific router.
Creating a client ovpn profile
Now that the server is running, you need to configure the clients which will be connecting to your server. In order to do this, you need to generate an ovpn profile for each and every client that will be accessing your server.
Run the following command to add a client
pivpn addThen proceed with entering a client name, number of days the certificate would last, and a password


However, if you don’t want to specify a password, you can type the following
pivpn add nopassTo list all valid and revoked certificates, type the following
pivpn listTo revoke a client ovpn profile, type the following
pivpn revokeConnecting Clients
When client profiles are added, they get stored under /home/user/ovpns directory.

Now that you have a .ovpn file for your device, you need to install the necessary software on the client in order to use this file. OpenVPN Connect is the recommended software to use on all iOS, Android, macOS, Linux and Windows devices. Click here to visit the downloads page. You can generate a profile for each device that you want to use and load the .ovpn file and connect to your own VPN server!

Conclusion
We hope you were successful in setting up your own VPN server on your Raspberry Pi by following this guide! Now you can enjoy a more secure internet when you are outside!