Running Home Assistant on Raspberry Pi (2026): From Hardware to Setup & Maintenance
You have probably heard about Home Assistant by now. Maybe a friend mentioned it, or you came across a Reddit thread where someone showed off their dashboard. What keeps people hooked once they try it is not just the automation possibilities. It is the feeling of owning your system. Your data stays local. Your lights do not stop working when the internet goes down. And in 2026, running Home Assistant on a Raspberry Pi remains one of the simplest and most affordable paths to get there.
The Pi sips power, runs quietly in the background, and gives you room to grow. You can start small with a few devices and expand as your needs evolve.
If you are weighing this against a plug-and-play option like the Home Assistant Green, we have a detailed comparison to help you decide: Home Assistant Green vs Raspberry Pi, Which One Should You Buy?
Hardware Selection: Choosing the Right Raspberry Pi in 2026
Before you buy anything, it helps to know which model actually fits your needs. Not every Raspberry Pi version is built to handle a modern Home Assistant setup.
Raspberry Pi 4 vs. Raspberry Pi 5: Budget vs. Performance
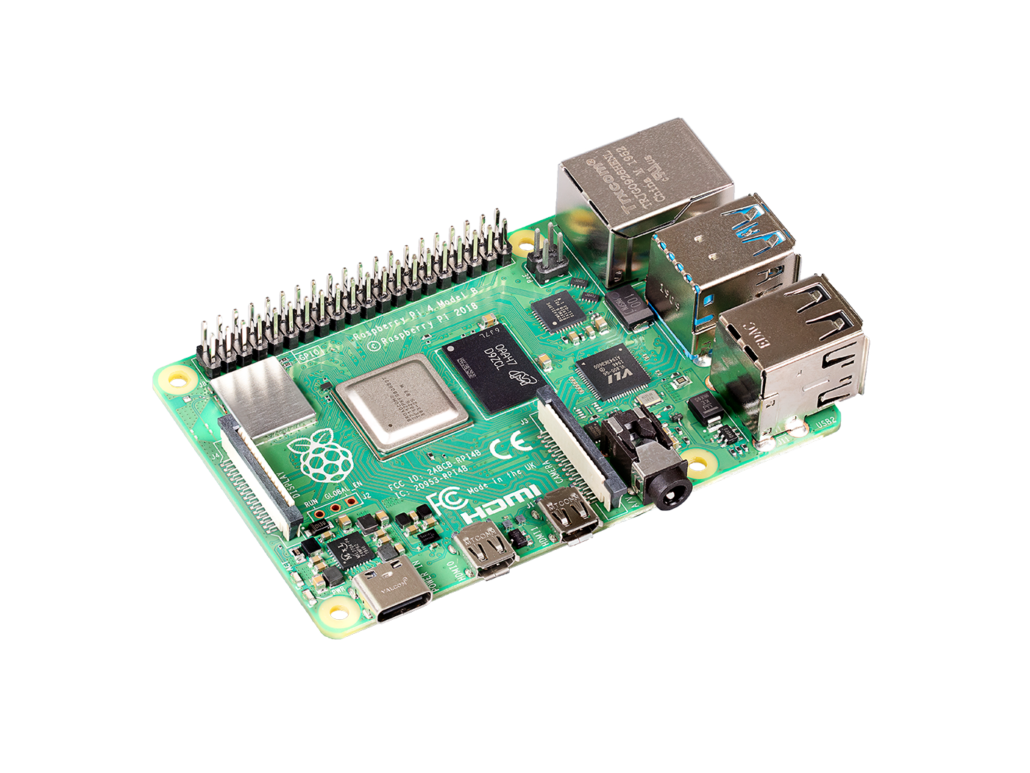
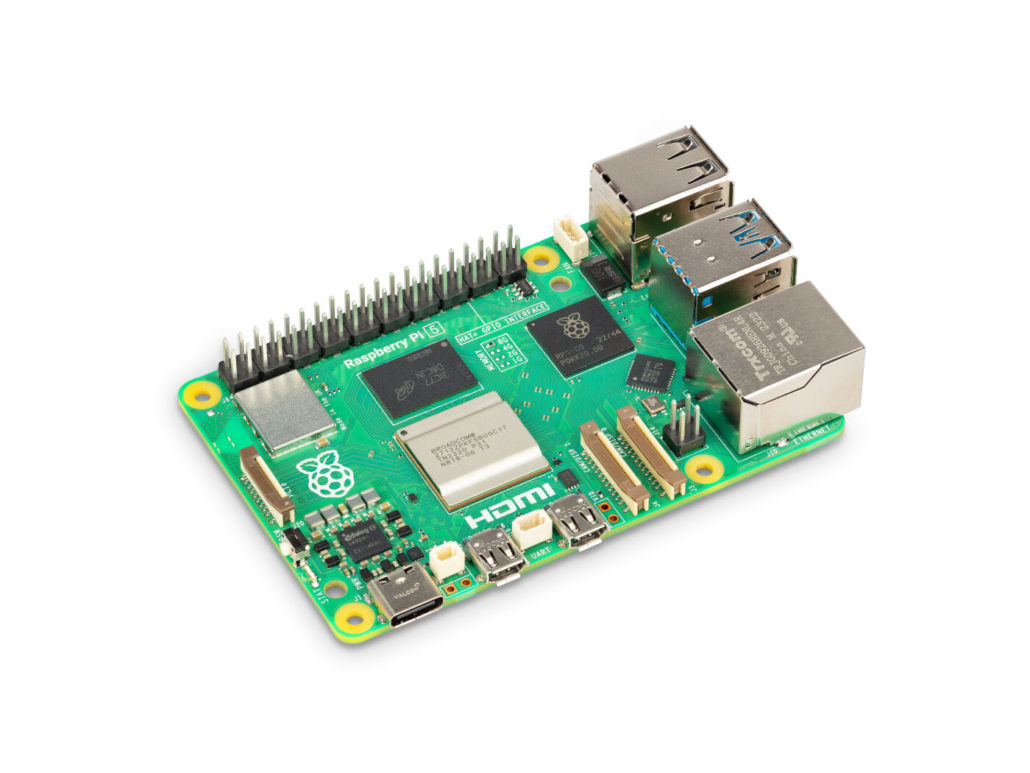
The choice comes down to what you want your smart home to do. The Raspberry Pi 4, especially the 4GB or 8GB versions, remains the value champion in 2026. It comfortably handles lighting, sensors, dashboards, and everyday automations. Many users run dozens of devices on a Pi 4 without any issues.
The Raspberry Pi 5 is better suited for more demanding use cases. Its improved processor helps with local voice control, AI features, or heavier integrations.
In all cases, 4GB of RAM is now the baseline for a smooth experience in 2026. Lower configurations tend to slow down as your system grows.
Storage Strategy: The NVMe SSD Revolution
If there is one piece of advice you will see repeated over time, it is to avoid relying on a microSD card for a long-term Home Assistant setup.
Many users start with one because it is simple and affordable. In practice, issues tend to appear after a few months. Slowdowns, corrupted data, or systems that fail to boot without warning are not uncommon. This is what people often call “sudden death”.
Home Assistant generates frequent read and write operations, which gradually wear out SD cards. That is why SSDs have become the standard in 2026.
Discussions within the Home Assistant community show that even for simple setups, many users now consider SSDs a worthwhile upgrade for reliability alone.
With a Raspberry Pi 5, NVMe SSDs offer excellent performance and stability. On a Pi 4, a USB 3.0 SSD already provides a significant improvement.
Essential Accessories: The Stability Foundation
The official power supply is critical, especially in 2026 when many of us power high-performance SSDs. A 5V/5A power supply like the official 27W USB-C PD power supply for example, ensures your Pi runs without random reboots or instability. If the voltage drops, you might see a rainbow square in the corner of your screen or, worse, file system corruption.
For a deeper dive, read our Technical Guide: Selecting the Right Raspberry Pi Power Supply.
Cooling also plays a role as your system grows. As you add integrations and automations, the Pi works more and generates heat. A small fan helps maintain stable performance and avoids slowdowns over time.
Starting with the right accessories makes everything easier to manage later.
Step-by-Step Tutorial: How to Install Home Assistant on Raspberry Pi
The easiest and most reliable way to install Home Assistant on a Raspberry Pi in 2026 is by using Home Assistant OS (HAOS). It is an all-in-one system that comes pre-configured and optimized for Home Assistant, making it suitable for both beginners and long-term stable use.
In this guide, Raspberry Pi 5 is used as the example device. The same process also applies to Raspberry Pi 4 and other supported models.
What You Need Before Starting
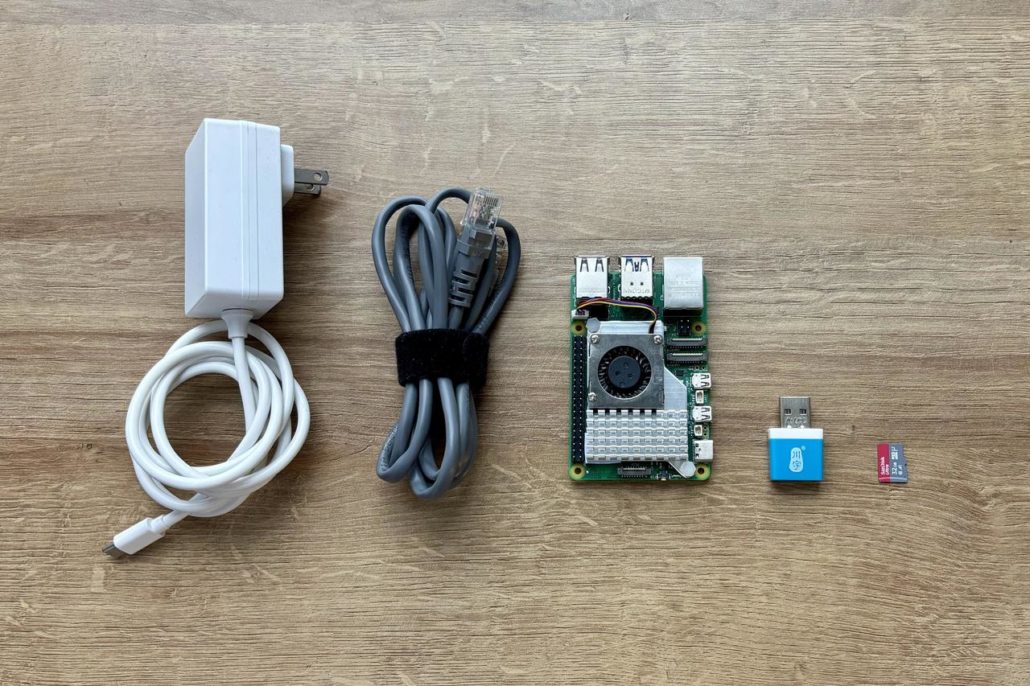
Before you begin, prepare the following:
- Raspberry Pi 4 or Raspberry Pi 5 (4GB RAM or higher recommended)
- A 32GB or larger microSD card, or an SSD (recommended)
- A card reader (if using a microSD card)
- Official Raspberry Pi power supply
- Ethernet cable for initial setup
Phase 1: Flashing Home Assistant OS (HAOS)
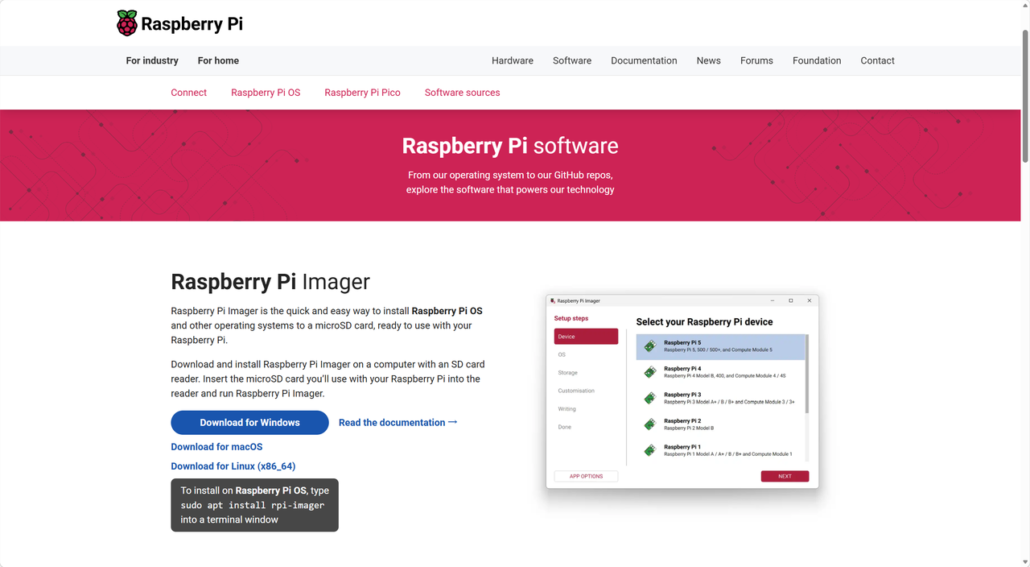
Step 1: Download and Open Raspberry Pi Imager
Download Raspberry Pi Imager from the official website: https://www.raspberrypi.com/software
Install and open the application on your computer.
Step 2: Select Your Device
In Raspberry Pi Imager, click “Device” and select Raspberry Pi 5.
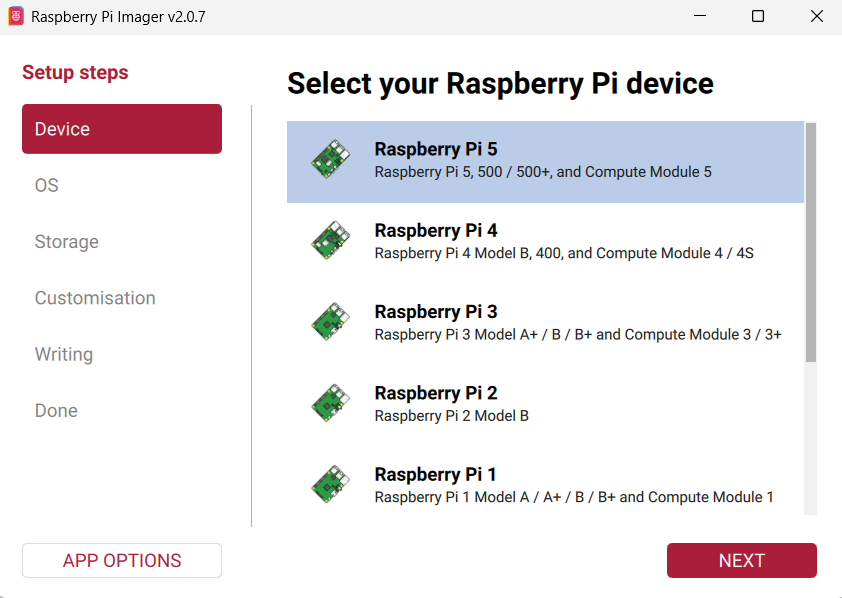
After selecting the device, click “NEXT”. The software will automatically move to the operating system selection step.
Step 3: Choose the Operating System
Next, select the operating system for Home Assistant on your Raspberry Pi.
- Click Other specific-purpose OS in Raspberry Pi Imager.
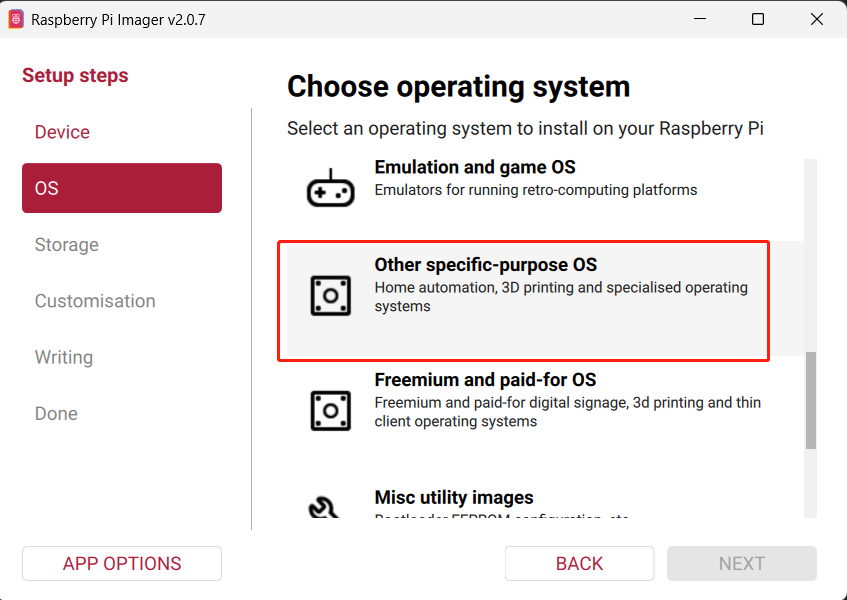
- Select Home automation.
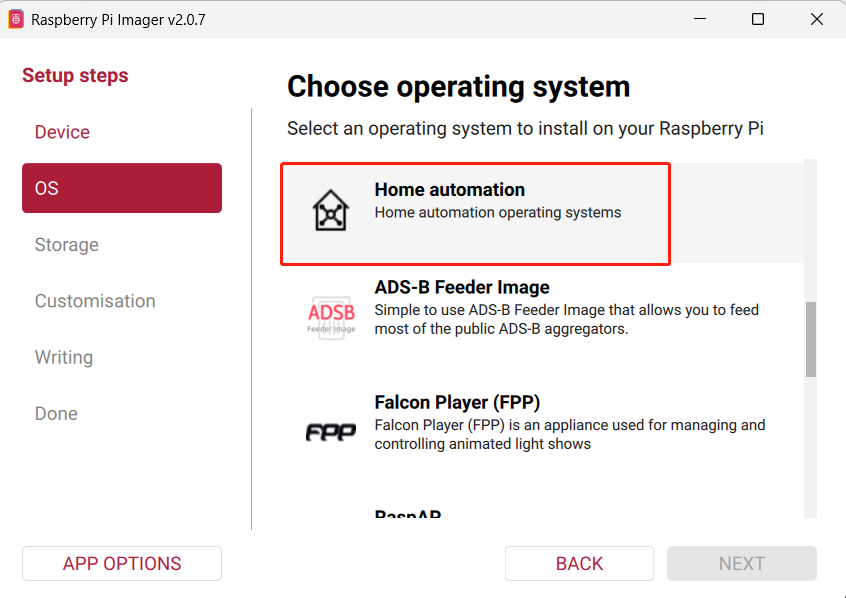
- Choose Home Assistant.
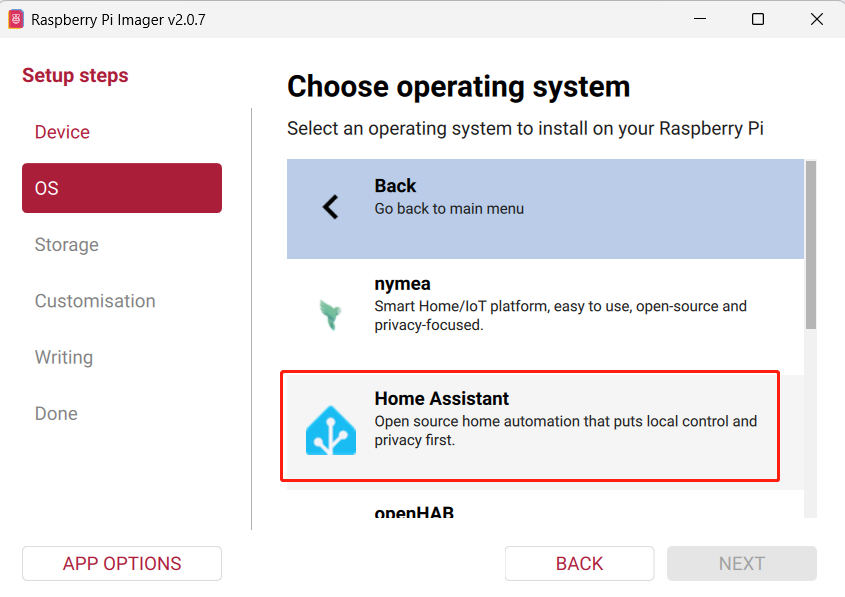
- Select Home AssistantOS 17.1 (RPi 5).
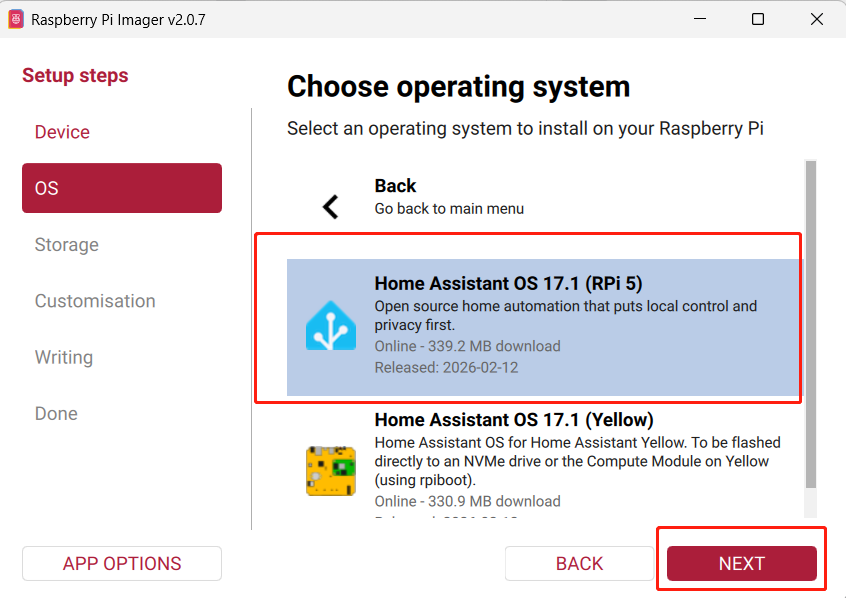
After selecting the correct image, click “NEXT” to proceed to the storage selection step.
Step 4: Select Storage
Choose your target storage device, either a microSD card or an SSD.
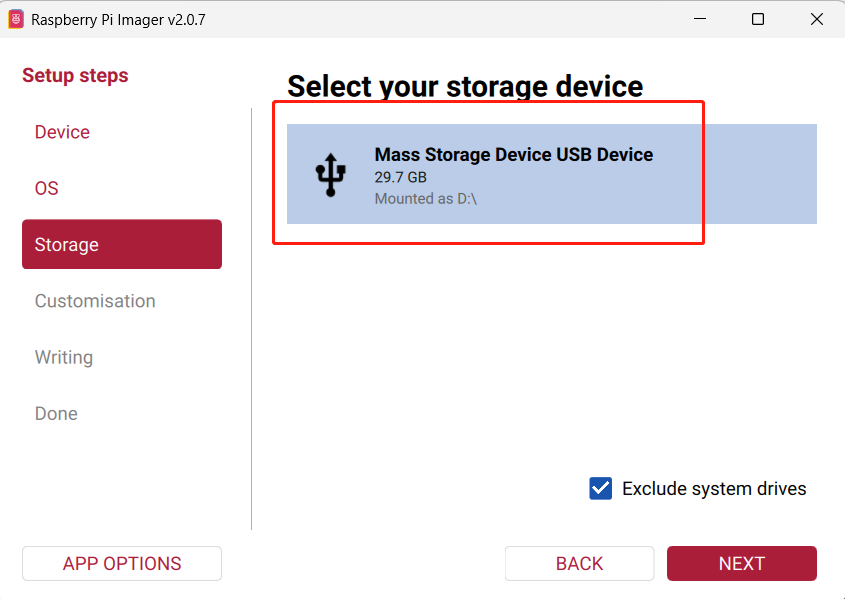
If you are planning a long-term setup, an SSD is strongly recommended due to better performance and reliability compared to microSD cards.
After selecting the storage, click “NEXT”.
Step 5: Review and Start Writing
A summary of your selections will appear. Confirm that the device, OS, and storage are correct, then click “WRITE”.

Step 6: Confirm Data Erase
A confirmation prompt will appear. Click “I UNDERSTAND, ERASE AND WRITE” to continue.
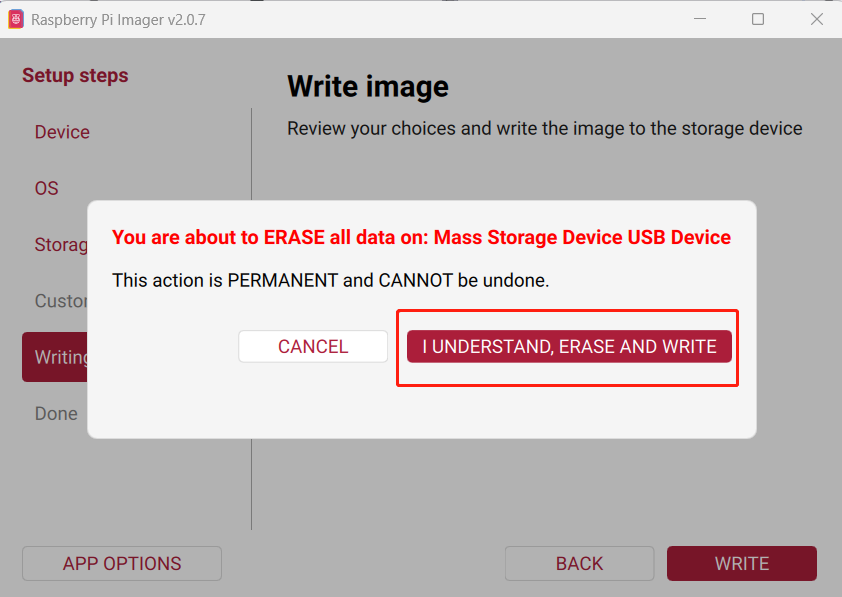
All existing data on the selected storage device will be erased.
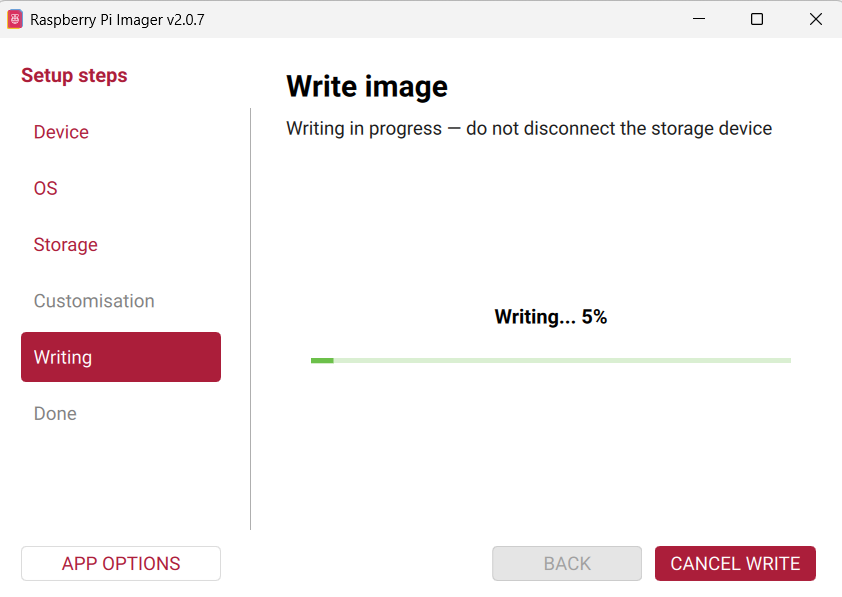
Step 7: Wait for the Writing Process
The writing process may take several minutes, depending on your storage speed.
Step 8: Complete the Process
Once the writing process is finished, click “FINISH”.
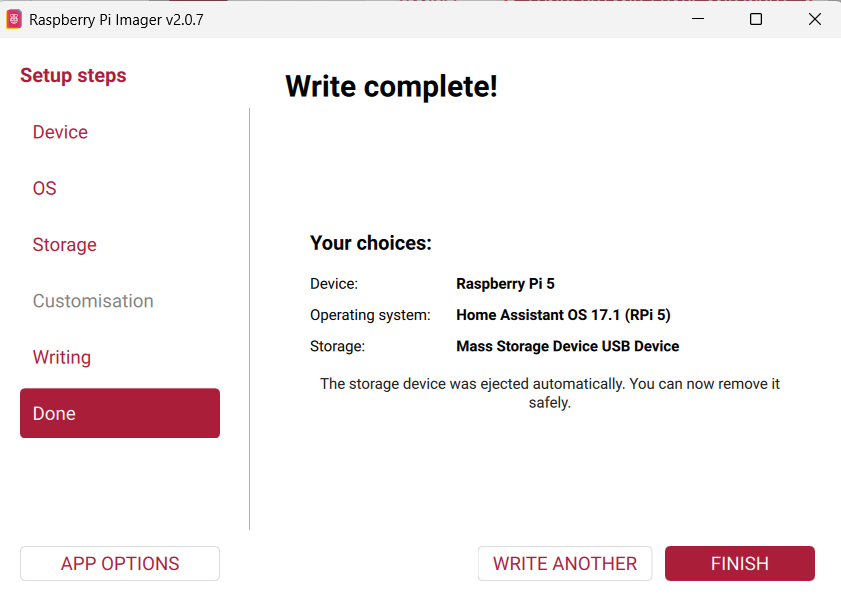
The installation media is now ready.
Phase 2: First Boot and System Initialization
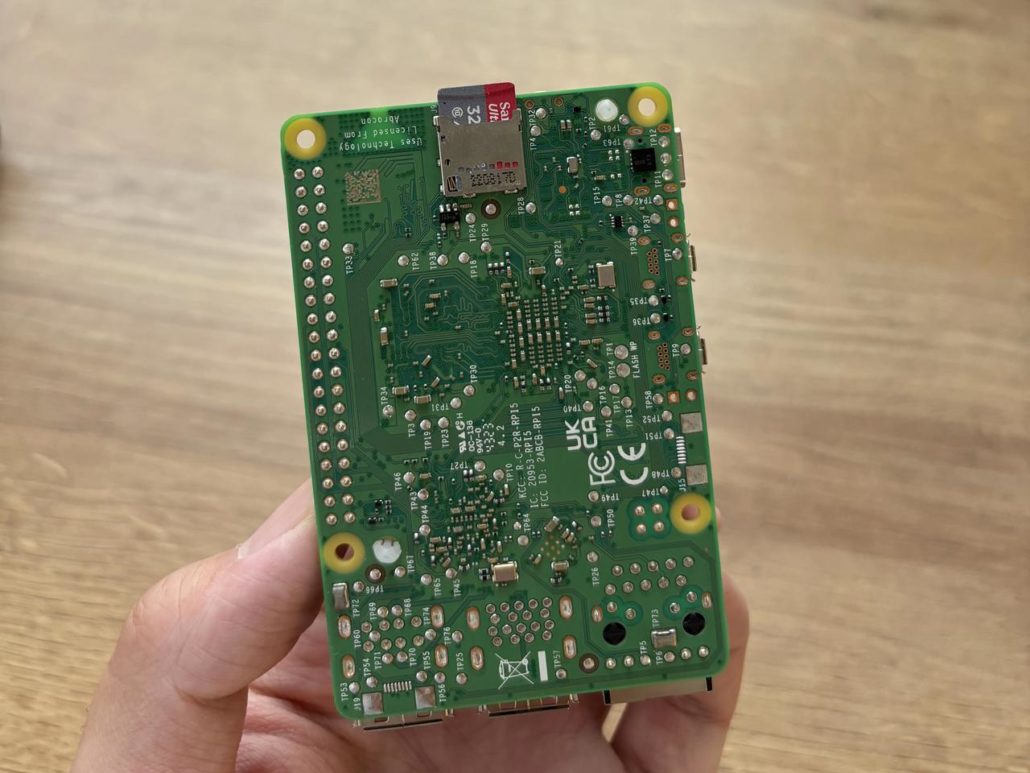
Step 9: Insert and Power On
Insert the microSD card or connect the SSD to your Raspberry Pi.
Then connect the Ethernet cable and power supply. The device will start automatically.
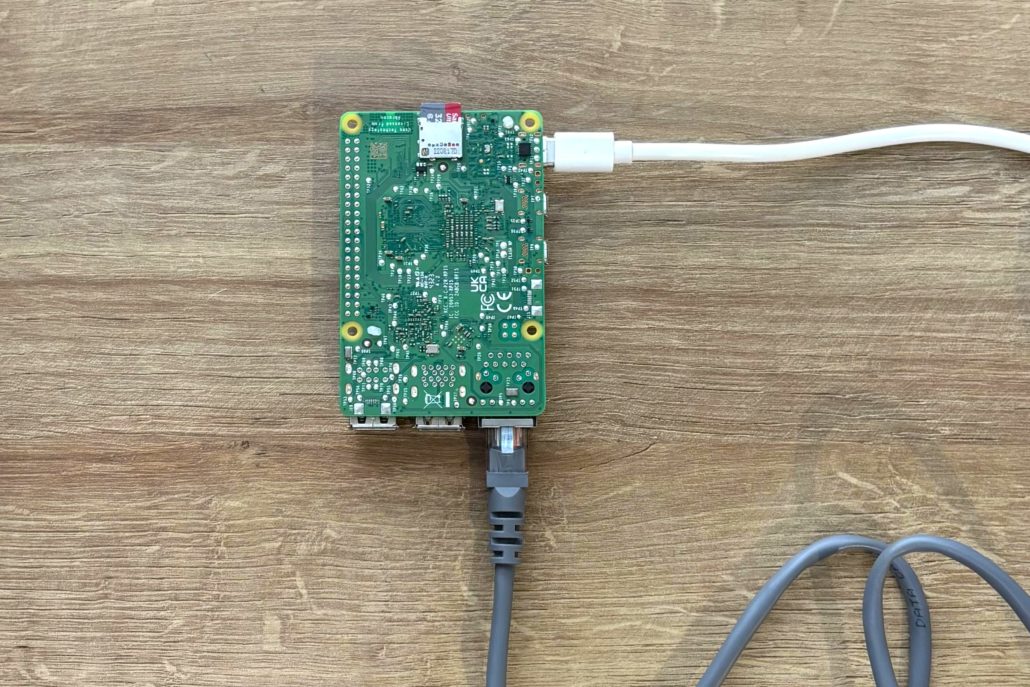
Using a wired network connection is recommended during the first setup to avoid connectivity issues.
Step 10: Wait for System Initialization
On first boot, Home Assistant needs time to install and initialize.
This process typically takes 10 to 20 minutes.
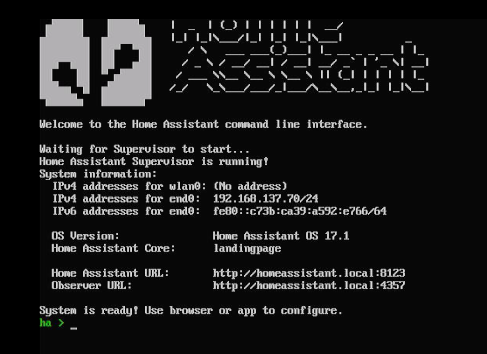
If a monitor is connected, you may see a command-line screen showing an IP address such as 192.168.x.x. This indicates that the device has successfully connected to your network.
However, a monitor is not required. Home Assistant runs headlessly, and you can complete the entire setup from your browser.
If you do not use a monitor, you can find the IP address by checking your router’s connected devices list.
Do not power off the device during this stage, even if it appears idle.
Phase 3: Accessing Home Assistant
Step 11: Open Home Assistant in a Browser
On a device connected to the same network, open a browser and enter:
http://homeassistant.local:8123
In most cases, this address works immediately and will load the Home Assistant setup page.
If it does not load, you can use the Raspberry Pi’s IP address instead:
http://192.168.x.x:8123
If neither address works right away, wait a few more minutes and refresh the page. The system may still be finishing its initialization process.
Step 12: Welcome Screen
Once the system is ready, the Home Assistant welcome screen will appear.
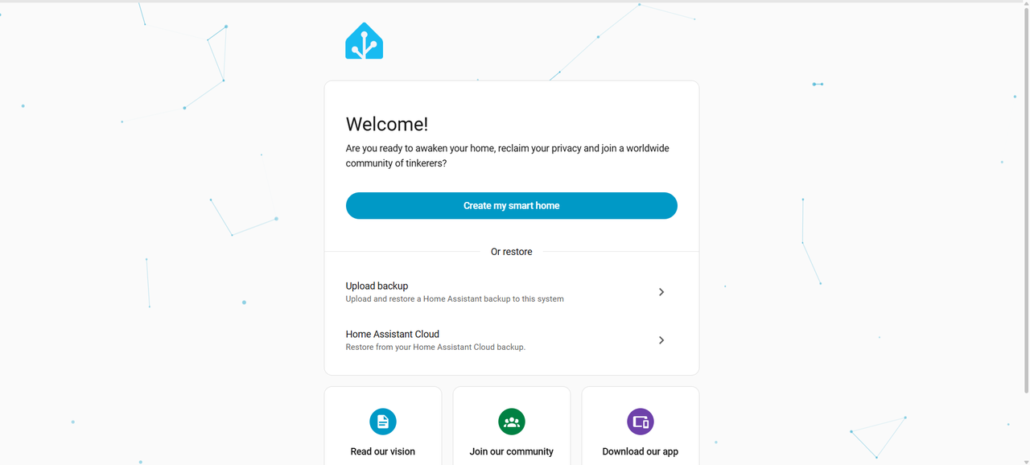
Step 13: Start Setup
Click “Create my smart home” to begin the onboarding process.
You will be asked to:
- Create a user account
- Set your location and time zone
- Confirm basic settings
This process usually takes only a few minutes.
What Happens After the First Login
After completing the initial setup, Home Assistant will open the main dashboard and begin scanning your network for available devices and services.
Depending on your setup, you may see automatically discovered integrations such as smart lights, Wi-Fi devices, media players, or even Zigbee and Matter services if a compatible coordinator is connected. These usually appear as suggestions that you can configure directly.
To add a detected device, go to Settings → Devices & Services, find the items marked as discovered, and click “Configure”. In most cases, the setup only takes a few steps.
If nothing is detected, that is completely normal for a fresh installation. This can happen if there are no compatible devices on your network yet, if devices are on a different subnet, or if a required hub or integration has not been added.
You can still add devices manually by clicking “Add Integration” and searching for the platform or brand you want to connect. Many integrations require additional details such as login credentials, a local IP address, or a bridge device.
Home Assistant is designed to grow over time, so it is perfectly fine to start with an empty dashboard and add devices gradually as your setup expands.
Common Issues and Quick Fixes
If homeassistant.local does not load, use the IP address instead. For more details, see our previous guide: Home Assistant.local:8123 Not Working.
If the system is not accessible after 20 minutes, check your router for connected devices and confirm that the Raspberry Pi has received an IP address.
If performance feels slow, consider switching from a microSD card to an SSD.
If no devices are discovered, continue setup and add integrations manually.
Your System Is Ready
At this point, Home Assistant is successfully installed and running on your Raspberry Pi.👏
You can now begin building your smart home by adding devices, creating automations, and expanding your setup over time.
Solving the Stability Puzzle: Maintenance & Backups
A stable setup is not just about hardware. A few simple habits help you avoid most issues and keep your system running without interruptions.
Automated Backups (The “Life Saver” Section)
Backups save you when things go wrong. Home Assistant lets you automate this process from day one. You can send backups to Google Drive or a local Samba share, keeping your data safe outside the Raspberry Pi.
Google Drive backups are simple and accessible from anywhere. For a deeper dive, the official documentation covers everything about the Google Drive integration.
Samba is a solid alternative for those who prefer keeping everything on their local network. Here is a step-by-step Samba backup tutorial to set it up: Access Files on Home Assistant Via Samba Share
If your storage device fails, restoring is fast. You install Home Assistant on a new device, upload your latest backup, and recover your full configuration in minutes. All your integrations, dashboards, and automations come back exactly as they were.
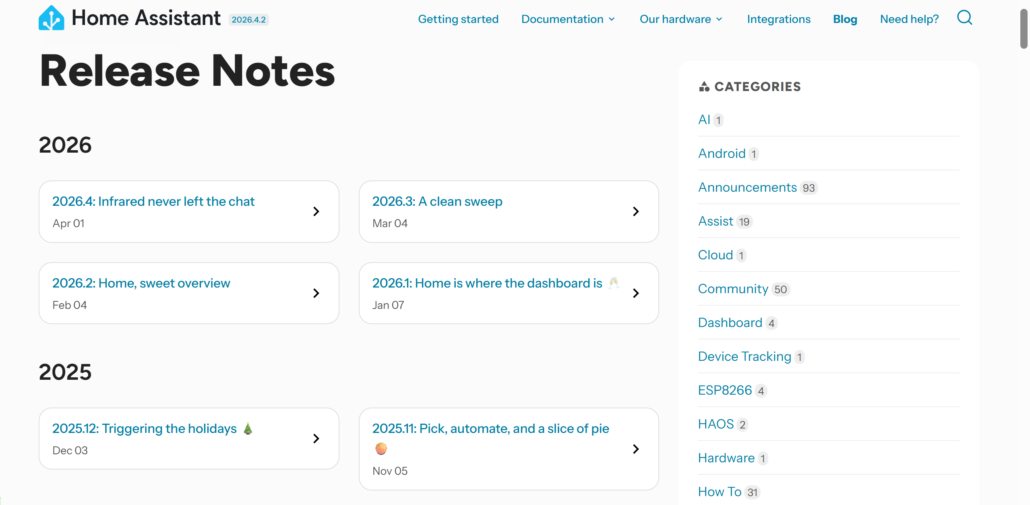
Safe Update Practices
Updates bring improvements, but they should be handled with care. Before installing one, take a look at the Release Notes to check if anything could affect your setup.
Creating a backup beforehand gives you a safe fallback if needed. It only takes a moment and can save you a lot of time later.
During the update, you can monitor progress through logs or with a connected screen. This helps you understand what is happening and avoid unnecessary troubleshooting if the system takes time to restart.
Advanced Automation: Expanding Your Smart Home
Once you have mastered the basics, you can unlock the real potential of a local smart home by integrating more advanced tools and devices.
Beyond Basic Rules: Node-RED and MQTT
Basic automations are useful, but more complex scenarios require better control over logic. Node-RED gives you a visual way to build more complex logic. You connect blocks to create actions, conditions, and sequences without writing complicated code.
Below you’ll find a full video tutorial on getting started with Node-RED in Home Assistant :Home Assistant Node-RED Install Plus Examples
MQTT adds flexibility. It is a lightweight messaging protocol where devices publish and receive messages through a central broker. This works especially well when mixing different brands or building DIY sensors. Together, Node-RED and MQTT let you create automations that feel truly customized to how you live.
Local Voice Control & Privacy
The possibility of controlling your home with your voice without a corporate server listening in is finally real. Thanks to the “Year of the Voice” initiative, you can run a local voice assistant. While a Pi 4 can handle this, a Raspberry Pi 5 offers the extra processing power needed to make it feel snappy and responsive, truly keeping your conversations private within your own walls.
To achieve this, you can pair your Pi with a USB speakerphone or a dedicated mic array HAT for reliable wake-word detection and far-field voice capture. For a proven hardware configuration, see the reSpeaker Lite voice integration guide, which provides step-by-step instructions on setting up local voice processing with the Raspberry Pi 5.
ESPHome and DIY Sensors

Do you want to monitor the temperature in your wine fridge or know if the mailbox has been opened? ESPHome is the easiest way to build your own sensors. You can buy an ESP32 chip, flash it with ESPHome firmware, and connect it to a sensor. The magic is that it integrates directly into Home Assistant automatically. It is a fun, low-cost way to fill the gaps left by commercial sensors.
FAQ: Troubleshooting Your Raspberry Pi Setup
Even with a solid setup, questions come up as your smart home grows. Here are clear answers to the most common issues you may face when running Home Assistant on a Raspberry Pi.
- Can I run Home Assistant on a Raspberry Pi Zero 2 W?
Technically yes, but not recommended for a full setup. The limited processor and memory make the interface slow. It struggles with more than a handful of devices. Best for single purpose tasks, not as your main hub.
- How do I access Home Assistant remotely without a subscription?
You can use a free VPN like Tailscale. It creates a secure tunnel to your home network and is easy to set up. WireGuard and Cloudflare Tunnels work too for those who want more control.
- My Home Assistant is slow. What should I upgrade first?
Switch from a microSD card to an SSD. Home Assistant constantly reads and writes data, and SD cards become a bottleneck. An SSD makes your system faster, more stable, and more responsive overall.
- Can Raspberry Pi handle Home Assistant?
Absolutely. The Pi 4 and Pi 5 run Home Assistant very well for most users. They handle dozens of devices and complex automations with ease, giving you a robust local smart home experience.
- Which is better, Home Assistant Green or Raspberry Pi 5?
It depends. The Green is best for zero setup. Just plug it in and go. The Pi 5 suits high performance needs like local AI, camera systems, or a fast voice assistant, plus offers more flexibility.
- What is the minimum Raspberry Pi to run Home Assistant?
A Pi 3B+ works technically, but avoid it in 2026. The real baseline is a Pi 4 with 4GB of RAM for a smooth, reliable, and future proof experience. Anything less leads to frustration.
Final Thoughts
Running Home Assistant on a Raspberry Pi in 2026 gives you a reliable, private, and affordable foundation for your smart home. You can start with a Pi 4 for everyday automation or choose a Pi 5 for local voice and AI. Pair it with a solid SSD, proper power, and regular backups, and your system stays stable for years.
The community has proven time and again that this setup works. With the right choices from the start, you build something that quietly runs in the background, stays under your control, and grows with you as your needs evolve.
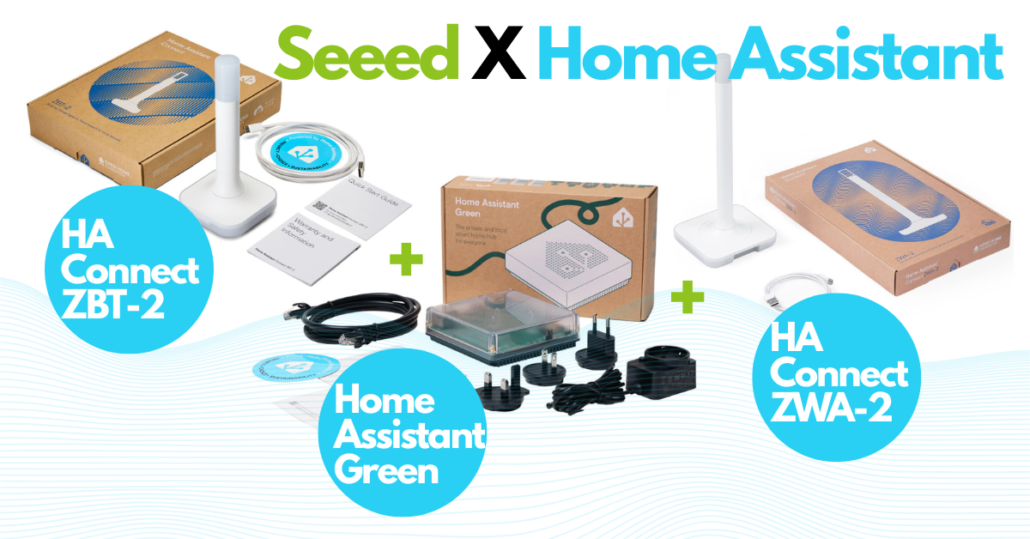
As a proud partner of Nabu Casa, Seeed Studio is an official global distributor of Home Assistant hardware (Host, Accessory, and Control), shipping to 100+ countries. Complementing the official hardware, we offer an extensive ecosystem of self-developed HA-compatible solutions—from industrial devices to DIY kits—with seamless MQTT and ESPHome integrations. From local servers to E-Ink dashboards, Seeed provides the definitive hardware foundation to bring your Home Assistant vision to life. [Explore the HA Collection]
>> Read more