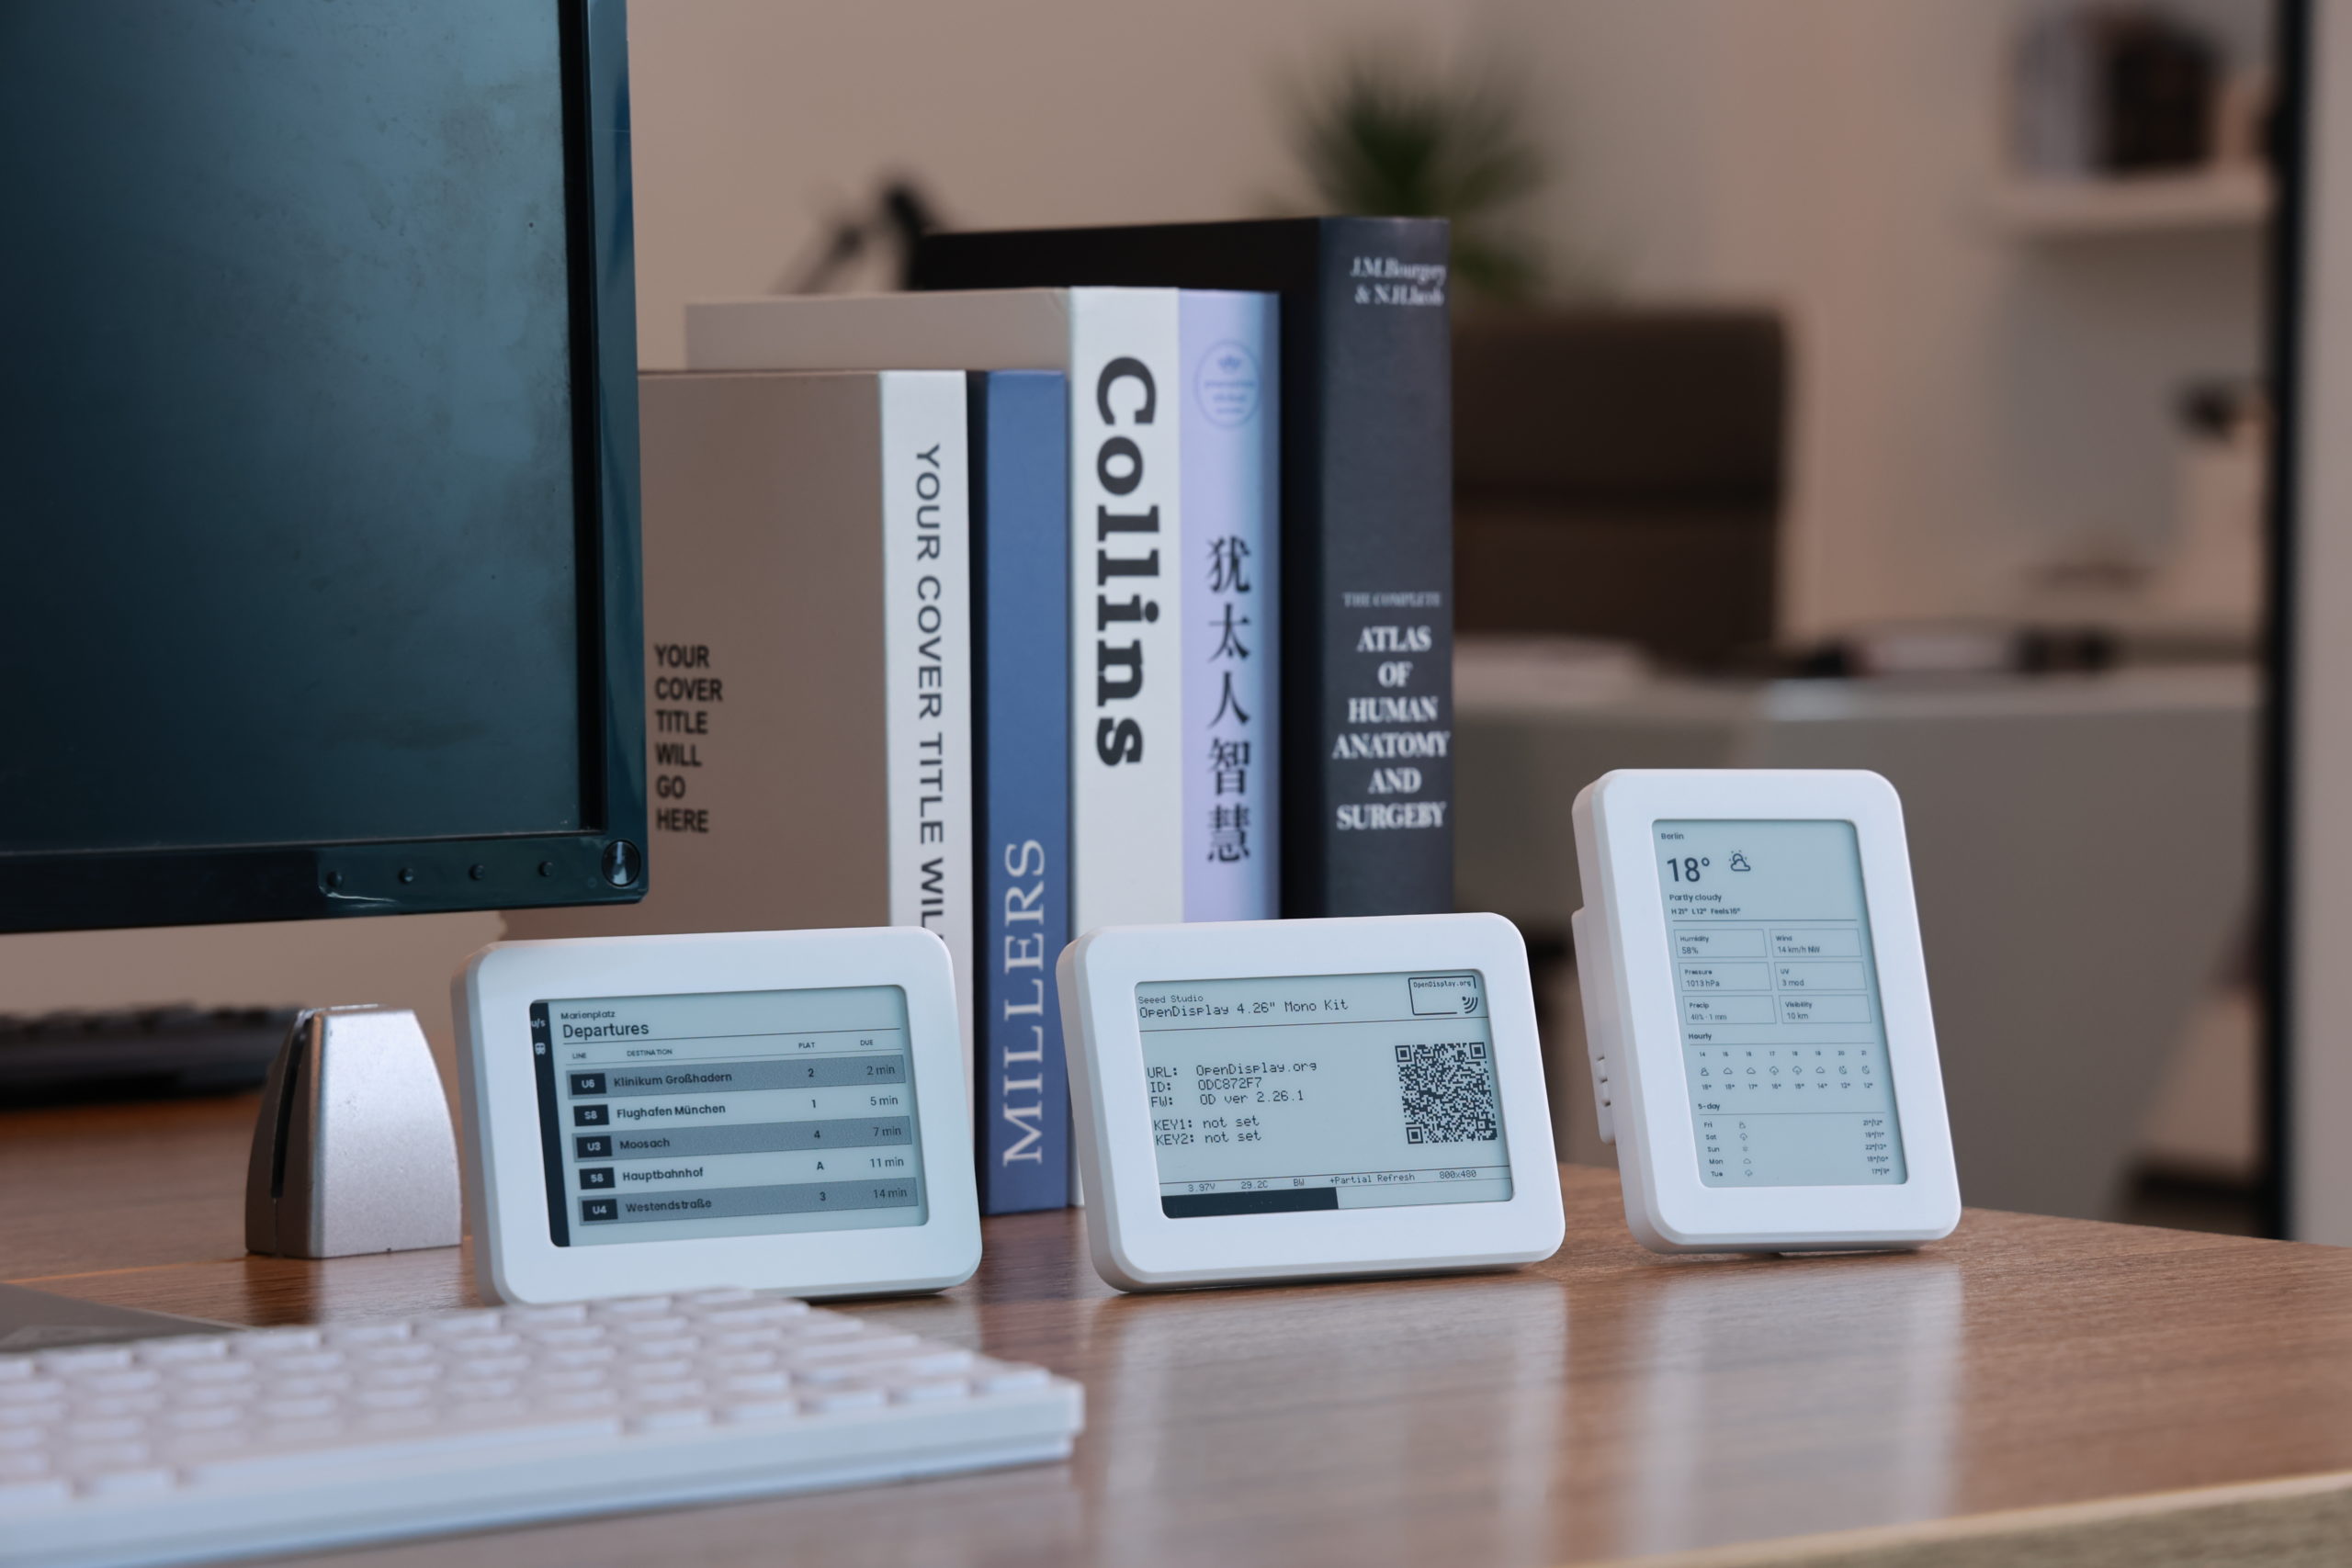
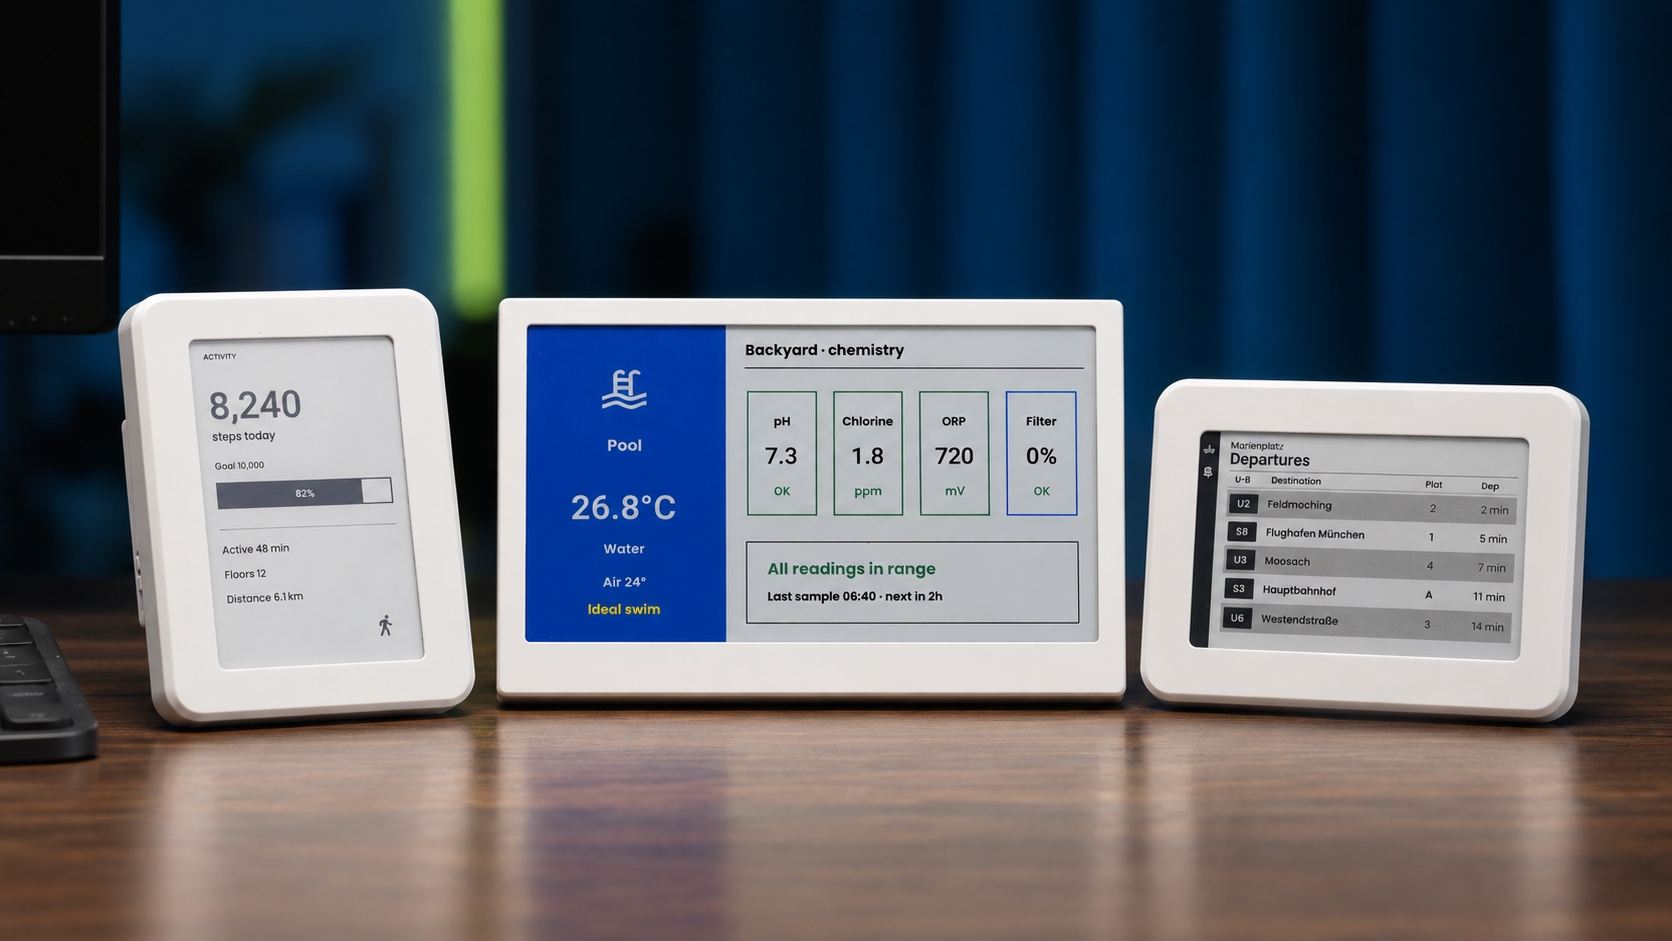
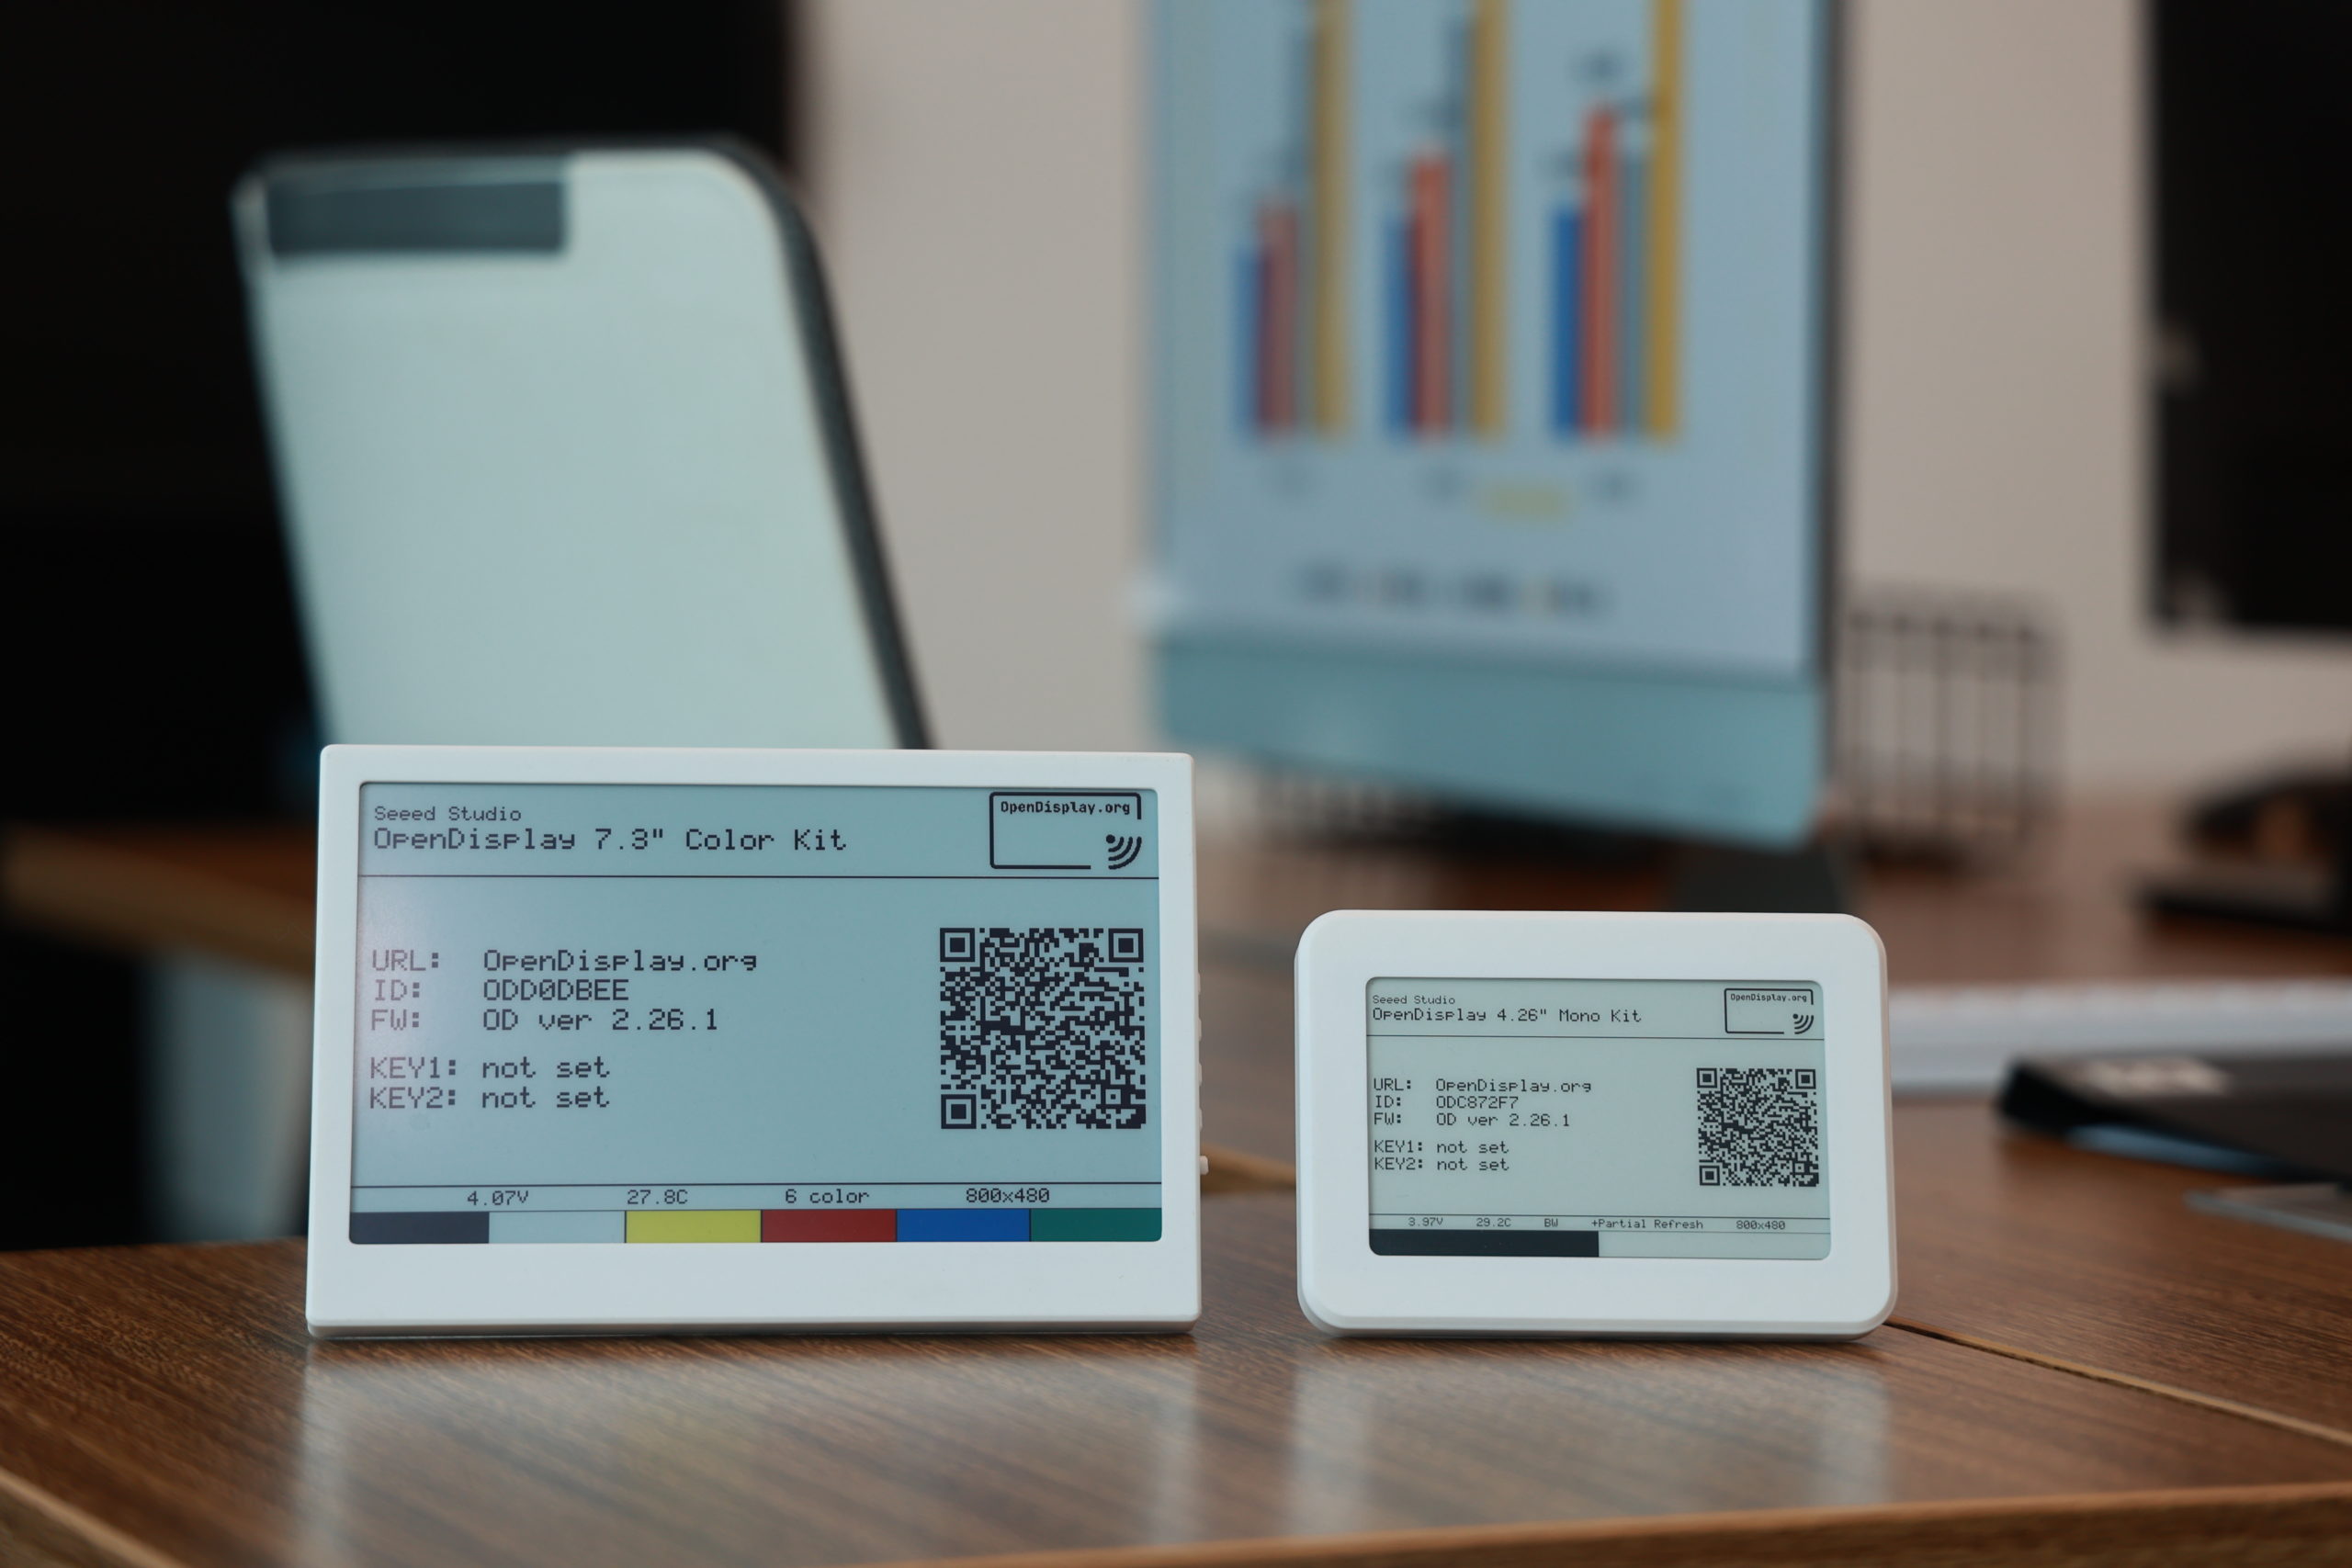
Earlier this year, we shared a guide to building DIY OpenDisplay ePaper tags and invited our community to vote for their preferred screen sizes. Among the options were a 4.26″ monochrome display and a 7.3″ color display. Now, together with the OpenDisplay team, we’re bringing both to life! Meet the OpenDisplay 4.26″ Mono Kit and 7.3″ Color Kit, co-developed by Seeed Studio and OpenDisplay.
Powered by our ultra-low-power XIAO nRF52840-based ePaper driver boards, both kits come fully assembled with a 2000 mAh rechargeable battery, 3D-printed enclosure, and pre-installed OpenDisplay firmware. Designed for local Home Assistant integration via BLE, they offer up to 2 years and 1 year of estimated battery life, respectively.
Starting at just $39.90 (available in official store and AliExpress), these ready-to-use kits make it easier to build wireless, low-power ePaper dashboards for Home Assistant and beyond.
Seeed Studio helps us turn Open Display into something people can pick up and use right away. Their hardware quality makes it easy to demonstrate the strengths of Open Display from setup to everyday use. These kits empower anyone to build ultra-efficient, custom e-paper dashboards tailored to their home routines without worrying about battery life.

What’s Special About OpenDisplay?
OpenDisplay is an open-source project originating from the OpenEPaperLink community. It provides firmware, an open communication protocol, and tools for building wireless ePaper displays, with a focus on keeping them open, local, and low-power.
With its Home Assistant integration, you can turn smart home data like weather, temperature, energy usage, and calendar events into always-visible ePaper dashboards, updated through automation. An ESPHome Bluetooth Proxy can also extend Bluetooth coverage around your home.
Home Assistant isn’t required, either. OpenDisplay also offers browser-based tools for sending images and a Python SDK for custom applications.
A Closer Look at the Two OpenDisplay Kits
What makes these kits particularly interesting is the ultra-low-power design.
These 2 kits use XIAO EN04 and EN05 boards respectively powered by the nRF52840, enabling low-power Bluetooth connectivity and on-demand screen updates without relying on scheduled wake-ups. As long as the devices are powered on and within Bluetooth range, they can receive new content whenever needed.
With built-in 2000 mAh batteries, both kits are designed for long-term wireless use with minimal maintenance.
OpenDisplay 4.26″ Mono Kit
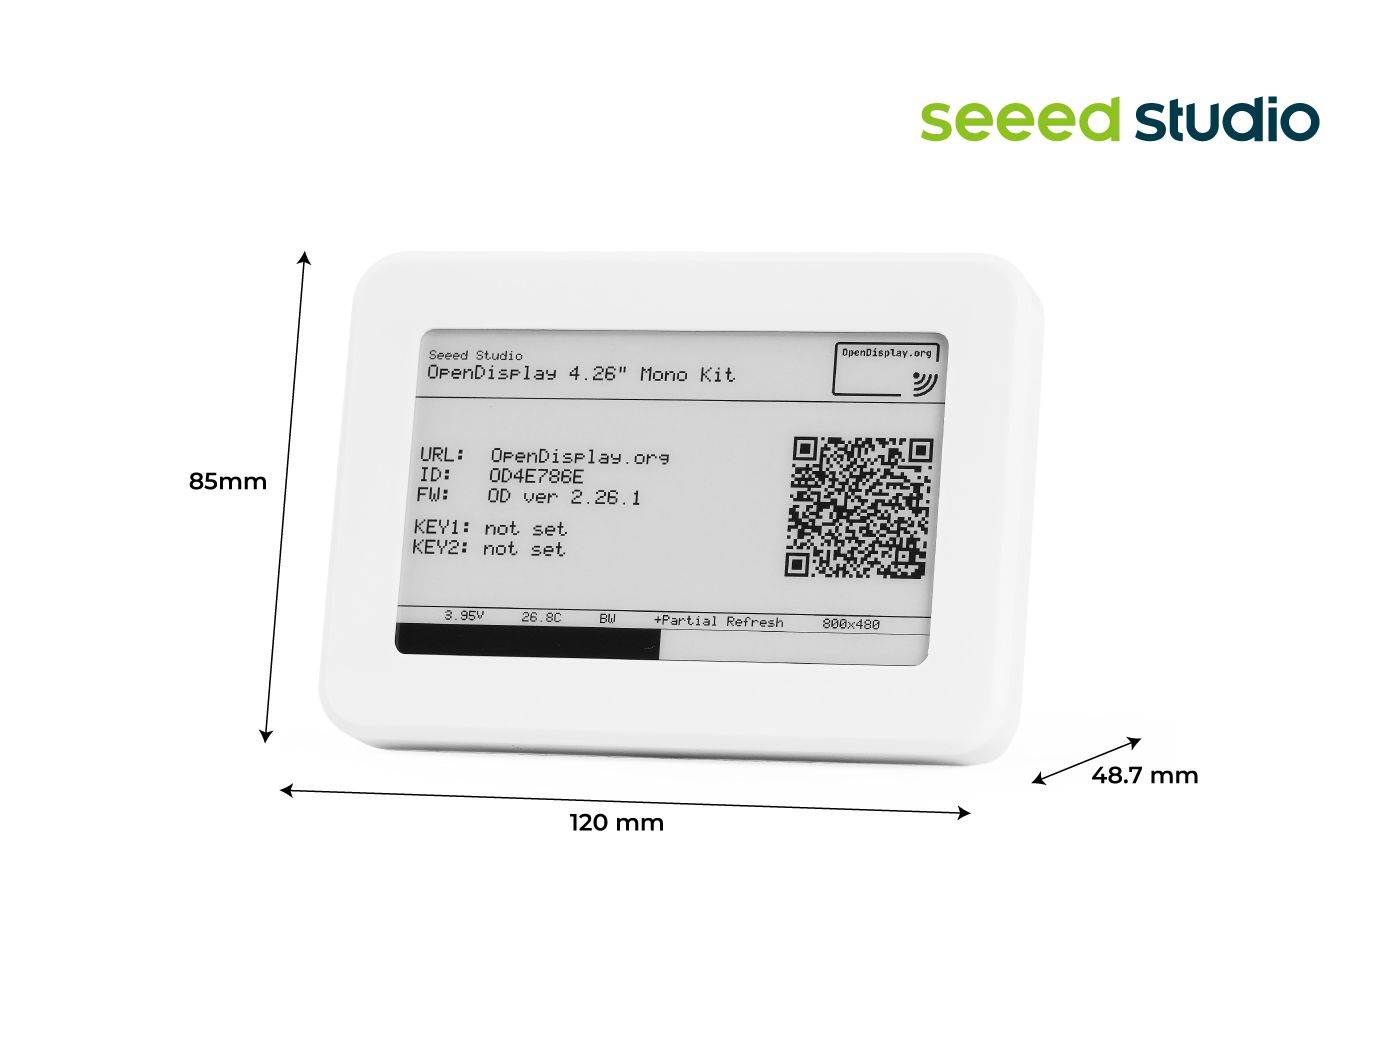
The OpenDisplay 4.26″ Mono Kit features a 4.26-inch, 800 × 480 monochrome ePaper display, powered by the Seeed XIAO EN05 driver board. It supports black-and-white and optional 4-level grayscale modes, with partial refresh support in monochrome mode for faster screen updates.
This makes it ideal for frequently changing information, such as temperature, humidity, energy consumption, and smart home status. With updates every 15 minutes, its estimated battery life reaches up to 2 years.
Price: $39.90
OpenDisplay 7.3″ Color Kit
Prefer a larger screen with some color?
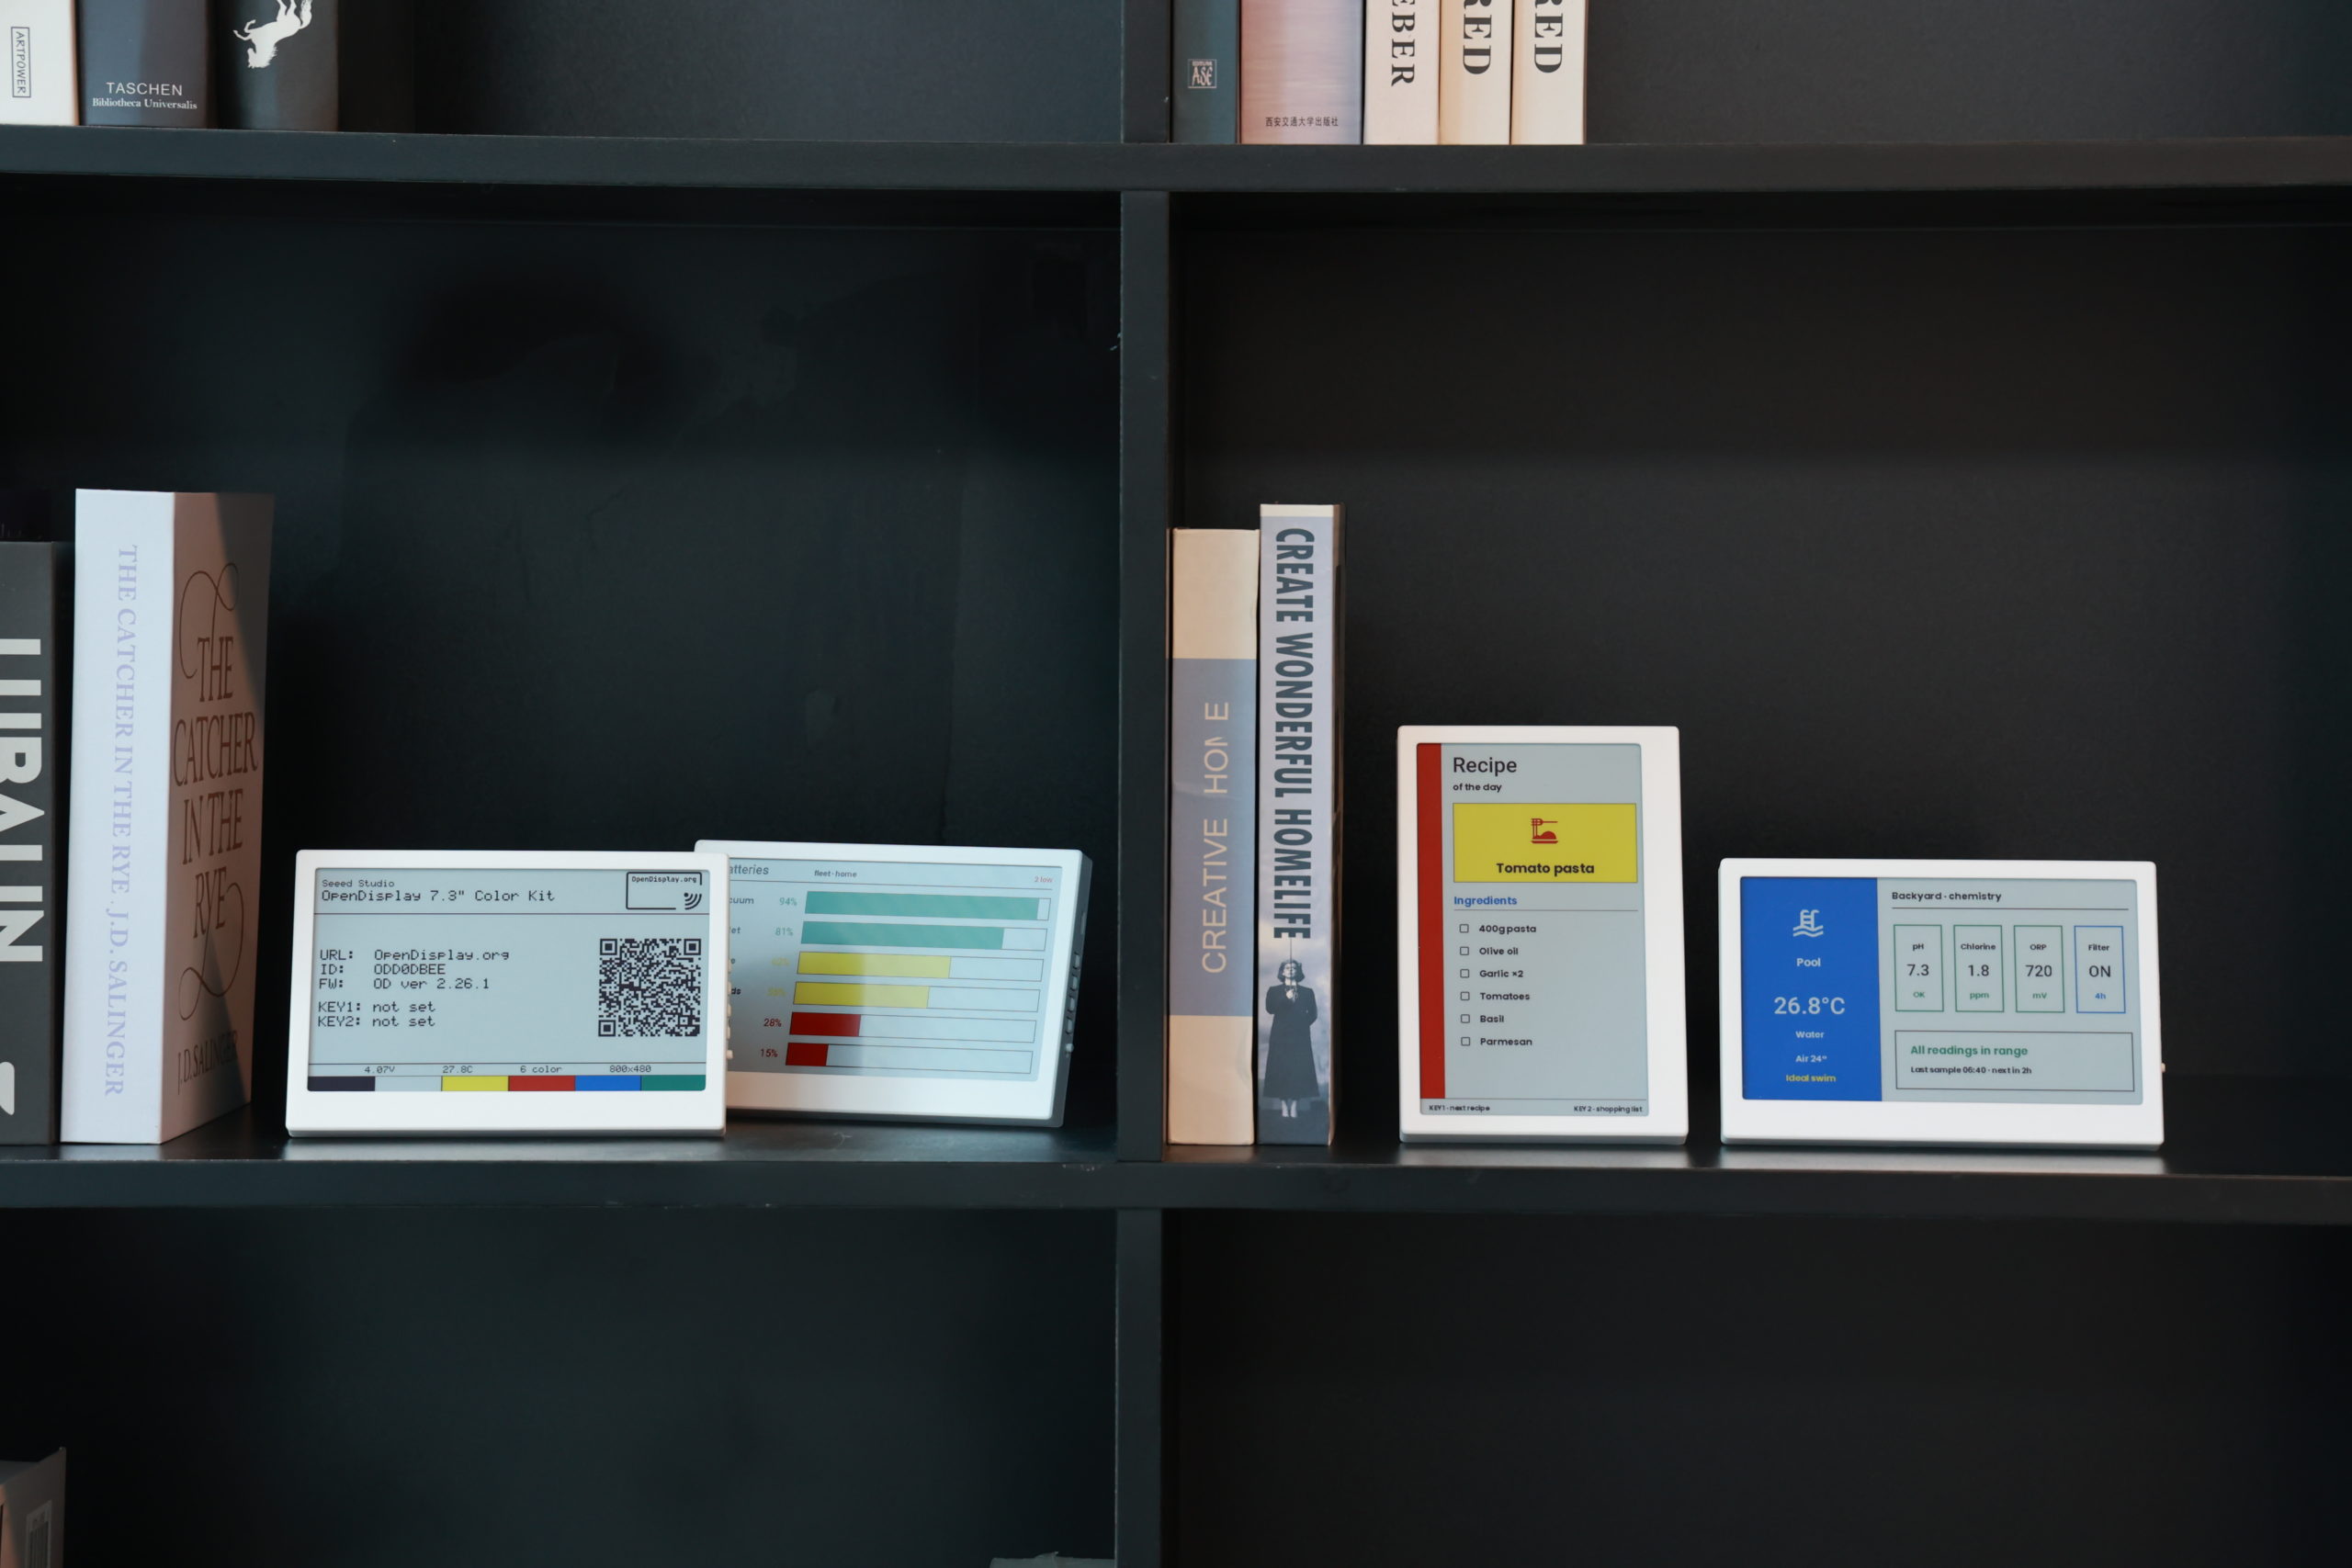
The OpenDisplay 7.3″ Color Kit features a 7.3-inch, 800 × 480 Spectra 6 full-color ePaper display, powered by the Seeed XIAO EN04 driver board. With six colors — black, white, red, yellow, blue, and green — it’s a great fit for family calendars, weather forecasts, recipes, and colorful information boards. Designed for content that updates periodically, it offers up to 1 year of estimated battery life with updates every 2 hours.
Price: $75.90
Open Display 7.3'' Color Kit
Spectra 6 color display at 800×480 pixels
Click Here
Open Display 7.3'' Color Kit
Energy-efficient BLE design
Click Here
Both kits include a white 3D-printed enclosure and a repositionable stand for portrait or landscape placement.
Here’s a quick comparison:
| 4.26″ Mono Kit | 7.3″ Color Kit | |
|---|---|---|
| Display | 4.26″ Monochrome | 7.3″ Spectra 6 |
| Resolution | 800 × 480 | 800 × 480 |
| Driver Board | XIAO EN05 | XIAO EN04 |
| Colors | B&W / 4 Grayscale | Full Colors with 6 original colors |
| Battery | 2000 mAh | 2000 mAh |
| Estimated Battery Life | Up to 2 Years (15-min intervals) | Up to 1 Year (2-hour intervals) |
| Connectivity | BLE | BLE |
| Price | $39.90 | $75.90 |
If you need frequently updated sensor readings, partial refresh, or a compact monochrome dashboard, go for the 4.26″ Mono Kit. For larger, more colorful information displays, the 7.3″ Color Kit is the better choice.
Note: Battery life estimates are based on the stated update intervals and may vary with image content, temperature, and other usage conditions. You can also try the OpenDisplay Battery Calculator to estimate runtime for your setup.
What Can You Build with OpenDisplay?
The fun part about OpenDisplay is that you’re not limited to a predefined set of apps or layouts.
Here are a few ideas to get started:
- Home Assistant Dashboard: Keep track of room temperature, humidity, energy usage, or smart home status without opening the Home Assistant app.
- Family Information Board: Display shared calendars, daily schedules, reminders, or household information in a place everyone can see.
- Weather Station: Turn sensor readings and local weather information into an always-visible display for your desk or entryway.
- Custom Projects: Use the open-source Python SDK to build your own dashboards, automate image updates, or experiment with new ways of displaying information.
For developers, the py-opendisplay Python SDK also makes it possible to build custom dashboards and automate image uploads over BLE.
Getting Started with the OpenDisplay Kits
Both kits come fully assembled with firmware pre-installed. Here’s how to get started using the 7.3″ Color Kit as an example.
Step 1: Power On
Turn on the kit and wait for the screen to refresh. The display will show its device ID (starting with OD) and a QR code.
Step 2: Send Your First Image
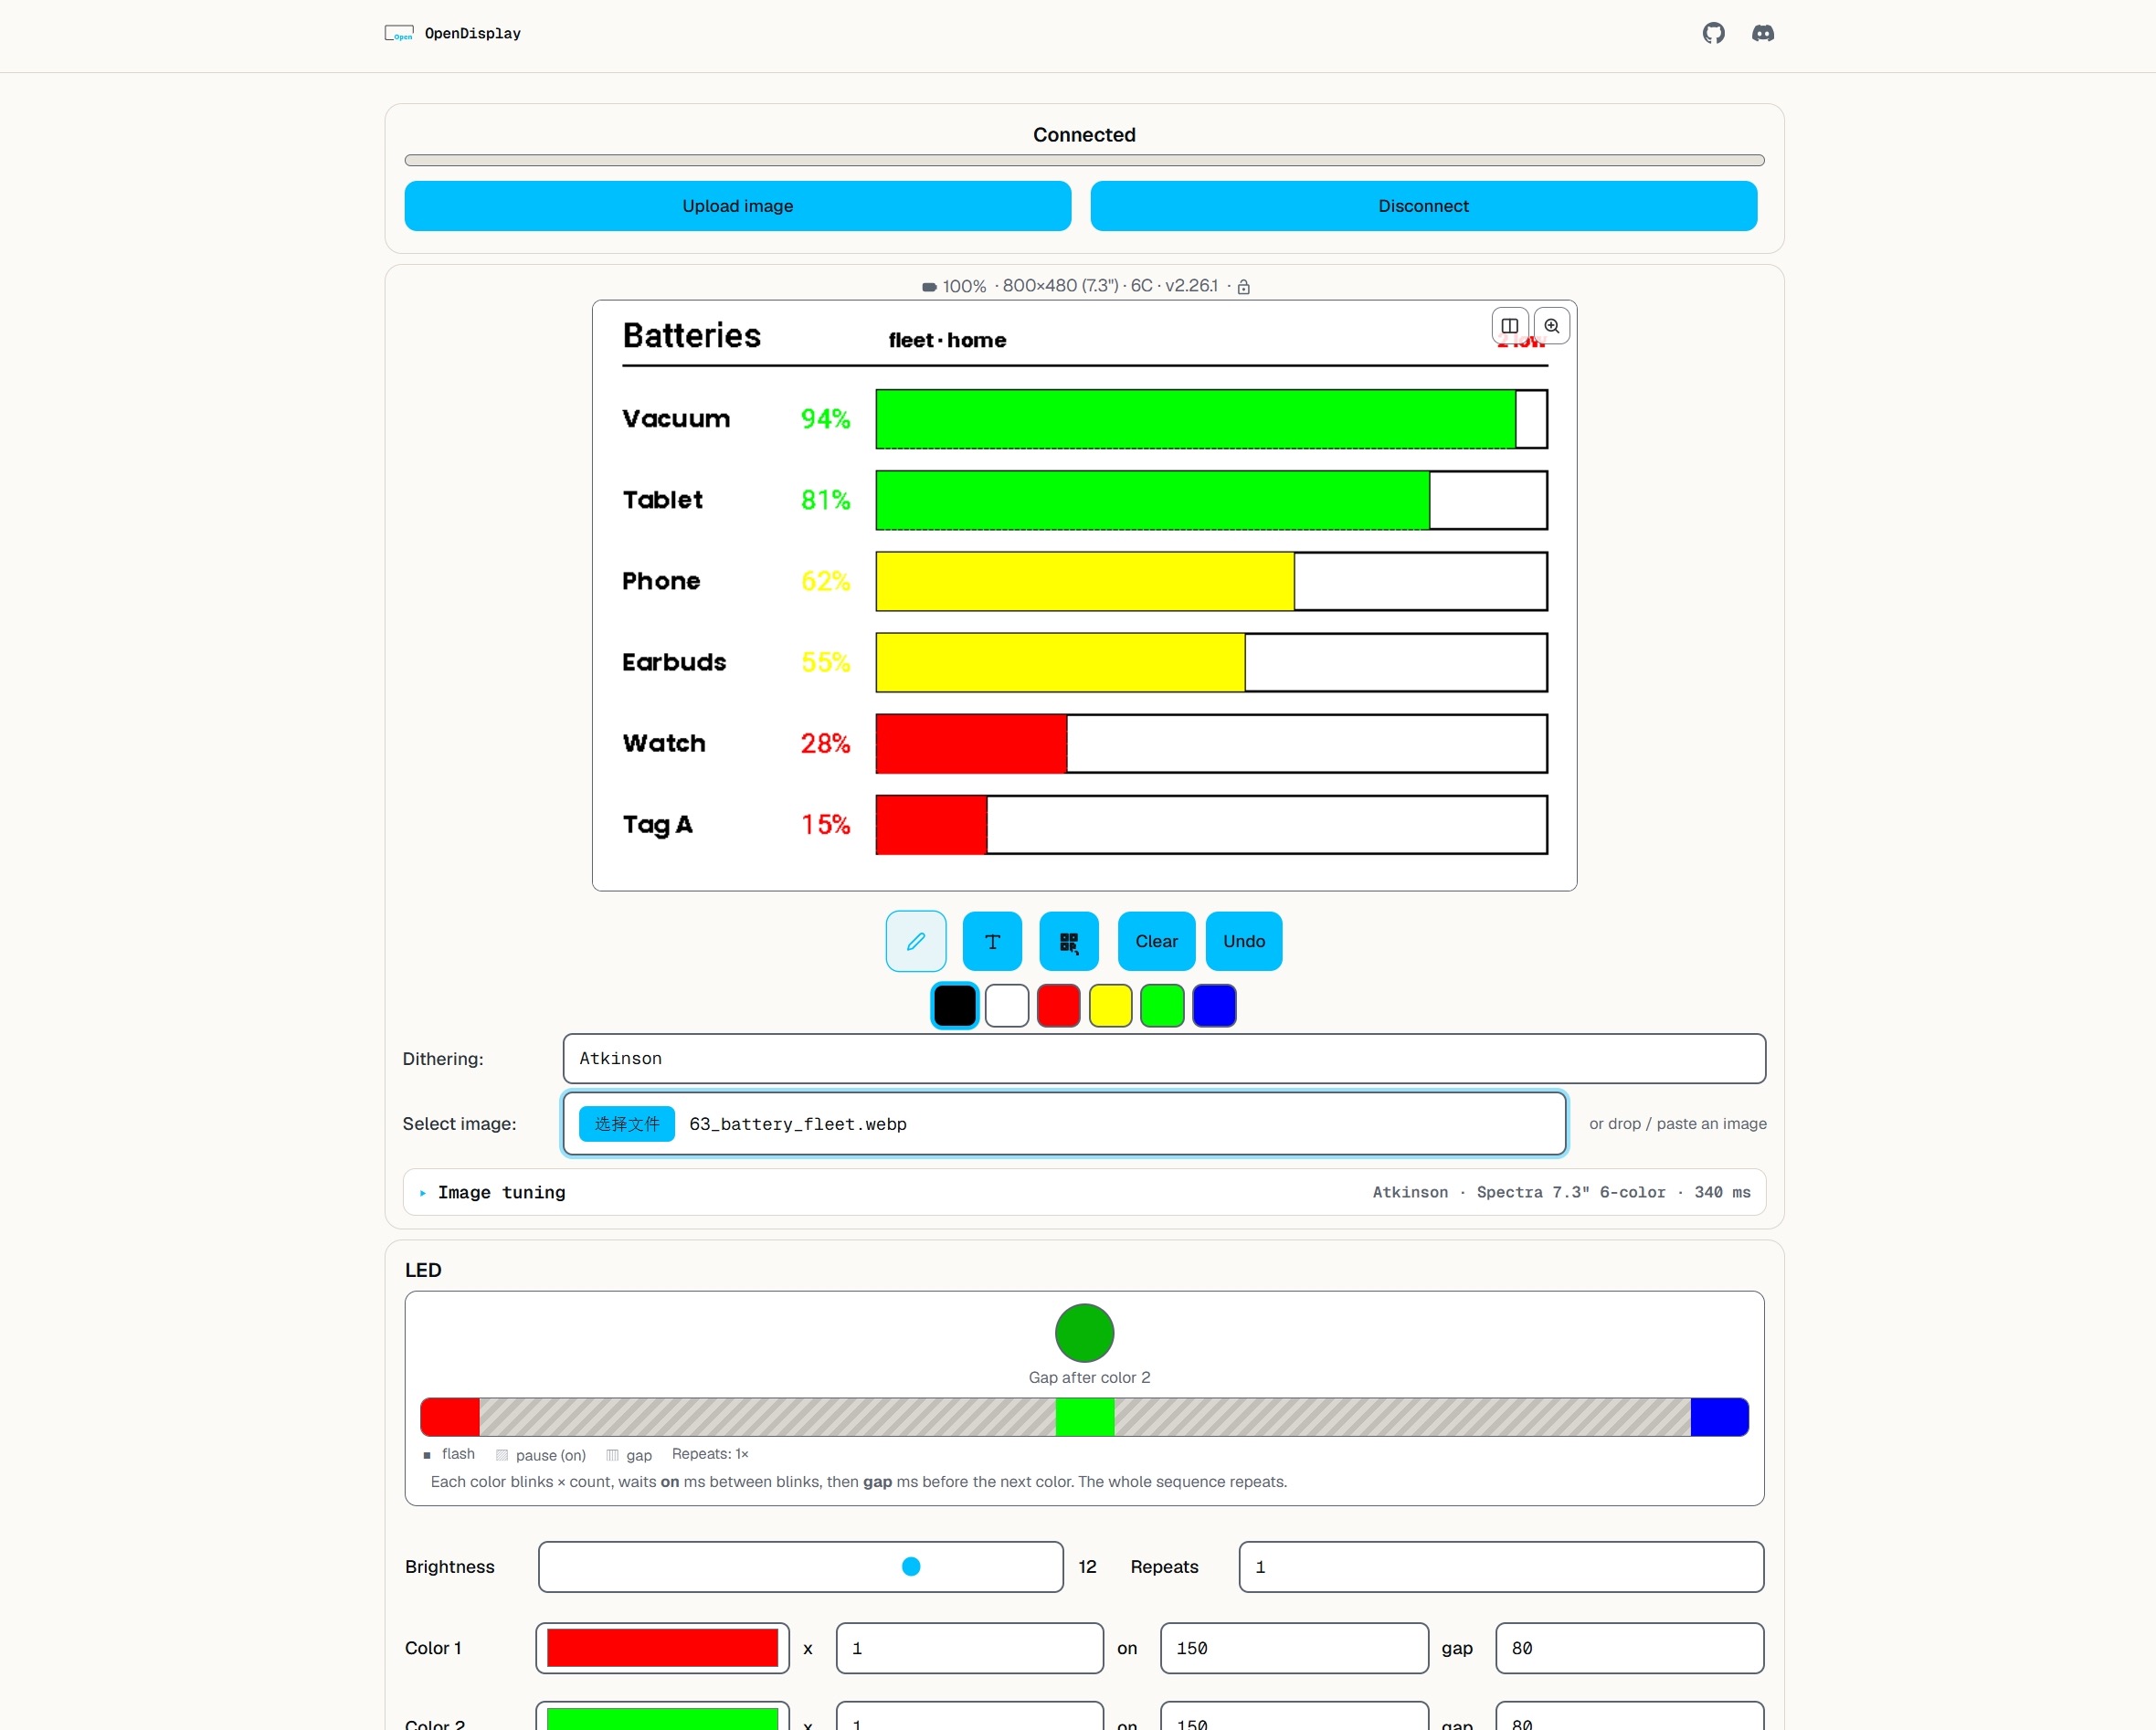
Scan the QR code and select Send an image to open the OpenDisplay BLE Tester.
Click Connect, select the matching OD device, upload an image, and send it to the display.
Note: Use Chrome or Edge on desktop/Android, or Bluefy on iOS. No encryption key is required by default.
Step 3: Connect to Home Assistant (Optional)
With the OpenDisplay integration and Bluetooth connectivity set up, Home Assistant should automatically discover your display under Settings → Devices & Services.
You can then send images and automate display updates through Home Assistant.
For detailed setup instructions, please visit the official Wiki for 4.26” Mono Kit or 7.3” Color Kit.
Ready to Give OpenDisplay a Try?
From DIY ePaper tags to two fully assembled kits, we’re happy to bring more options to the OpenDisplay community together with the OpenDisplay team.
Whether you’re building a Home Assistant dashboard or experimenting with your own dashboard ideas, we hope these new kits make it a little easier to get started.
We’d love to see what you build! Share your projects, ideas, and feedback with fellow makers in the Seeed Studio Discord and OpenDisplay Discord communities!
FAQs
Q: Do I need Home Assistant or Wi-Fi to use the kits?
No. You can send images directly from a supported browser over BLE without Home Assistant or Wi-Fi. Home Assistant is optional for automated updates and smart home integration.
Q: Can I use ESPHome with these kits?
Yes, through an ESPHome Bluetooth Proxy. It extends Home Assistant’s Bluetooth coverage so your displays can be placed farther from the host. The kits themselves ship with OpenDisplay firmware, not ESPHome firmware.
Q: Do I need a Bluetooth proxy?
Not necessarily. If your Home Assistant host already has a compatible Bluetooth adapter and the display is within range, you don’t need an additional proxy. Note that Shelly Bluetooth proxies aren’t supported for OpenDisplay image uploads because active BLE connections are required.
Q: How long will the battery last?
The estimated battery life is up to 2 years for the 4.26″ Mono Kit with 15-minute updates, and up to 1 year for the 7.3″ Color Kit with 2-hour updates. Actual runtime varies with usage.
Q: Can I customize the display content?
Absolutely! You can send your own images through the BLE Tester, use Home Assistant automations, or create custom applications with the open-source Python SDK. You’re not limited to a set of predefined dashboards.